(855-2448) Fitting/checking lamp cover for floor lighting
|
MODIFICATION INSTRUCTION
|
|
Bulletin Nbr:
|
855-2448
|
|
Date:
...........
|
Februari 2004
|
|
Market:
|
Enligt separat lista
|
|
|
Fitting/checking lamp cover for floor lighting
|
|
Product Safety Campaign 150 15
|
Cars in stock must be rectified before delivery.
A personal communication must be sent to the owners of cars already delivered requesting them to get in touch with the nearest Saab garage as soon as possible to have the fault rectified.
Saab 9-3 (9440) M04, RHD with diesel engine and Vehicle Identification Number in accordance with the following:
41034100 41034135 41034162 41034185 41034249 41034272 41034293 41034304 41034310 41034318 41034326 41034360 41034388 41034480 41034656 41034659 41034677 41034748 41034771 41034800 41034805 41034825 41034855 41034921 41034931 41034939 41034952 41034957 41034962 41034972 41035065 41035145 41035173 41035299 41035302 41035319 41035336 41035339 41035347 41035350 41035361 41035375 41035380 41035386 41035406 41035409 41035414 41035423 41035426 41035429 41035439 41035442 41035444 41035447 41035453 41035456 41035459 41035589 41035597 41035605 41035612 41035629 41035633 41035646 41035654 41035657 41035660 41035665 41035668 41035672 41035675 41035688 41035693 41035707 41035712 41035718 41035728 41035734 41035749 41035753 41035756 41035782 41035805 41035824 41035830 41035835 41035846 41035865 41035872 41035897 41035925 41036078 41036081 41036098 41036101 41036104 41036112 41036132 41036136 41036140 41036143 41036146 41036149 41036160 41036163 41036166 41036171 41036204 41036229 41036339 41036347 41036376 41036449 41036498 41036522 41036696 41036722 41036750 41036852 41036856 41036913 41037038 41037077 41037112 41037122 41037136 41037140 41037164 41037170
The lamp cover for the floor lighting on the driver's side is missing on certain cars. This can result in the bulb coming into contact with adjacently fitted sound insulation, which in some cases may cause smoke or fire.
45 19 054 Lamp cover
For fitting the modification identity plate
12 785 148 Modification identity plate
16-30 15 815 Cleaner, Teroson FL T875, sufficient for 50-100 cars
Before proceeding, check box A2 of the modification identity plate. From and including M04, and for certain markets, there is the table "Table of Modifications" in the car's Warranty and Service Book. A modification identity plate must be fitted in accordance with the section "Fitting the modification identity plate" where local directives require the marking of the car. If the box is not marked, continue as follows.
|
1.
|
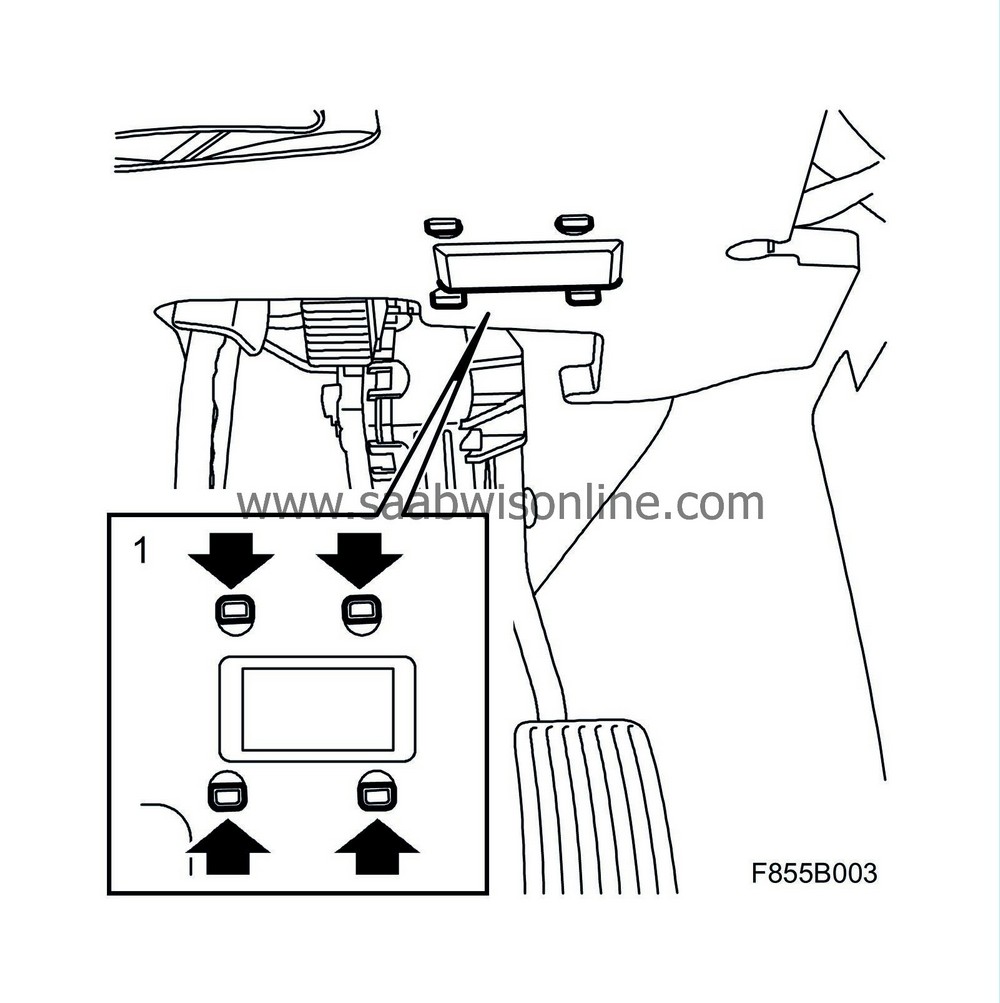
Check whether the lamp cover is fitted by feeling or visually inspecting whether the lamp cover clips can be touched or seen in the sound insulation panel hole. If the lamp cover is fitted then no further action is necessary.
If the lamp cover is not fitted, continue with step 2.

|
|
2.
|
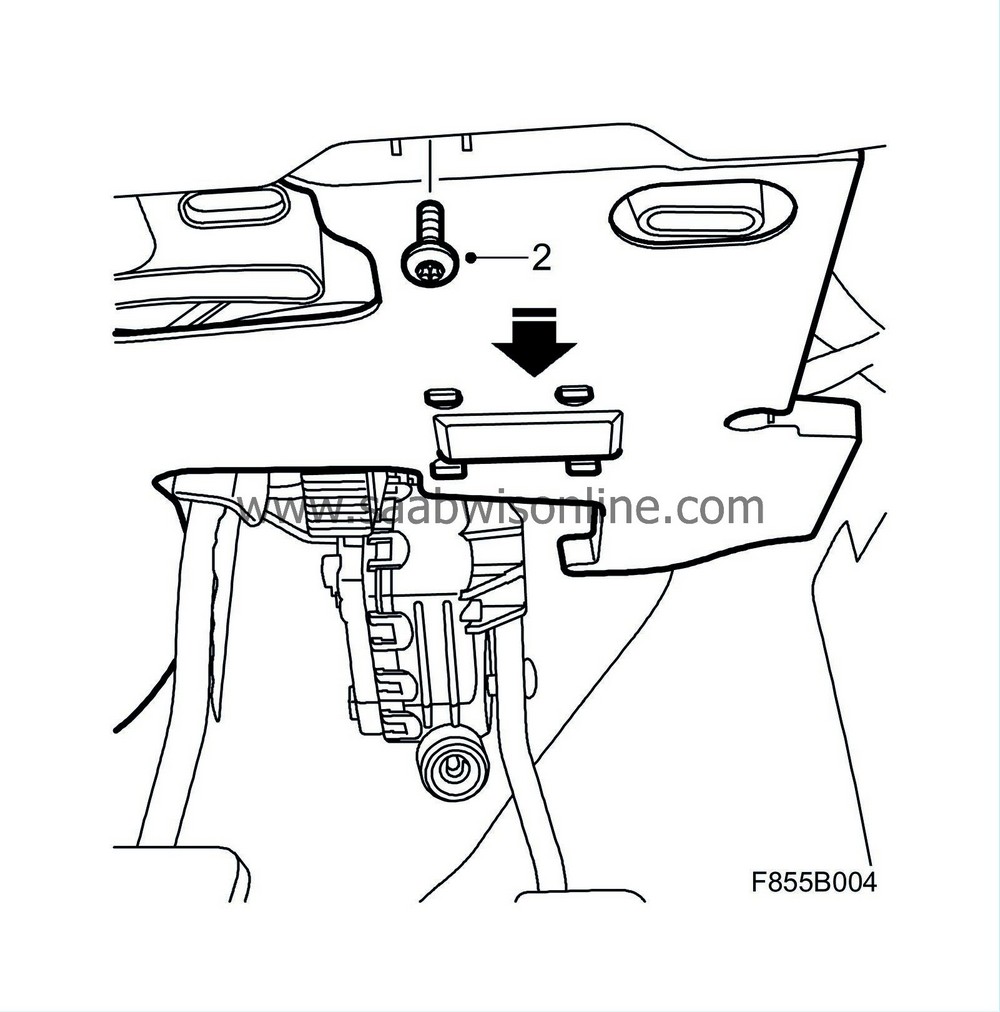
Remove the screw that secures the sound insulation panel.

|
|
3.
|
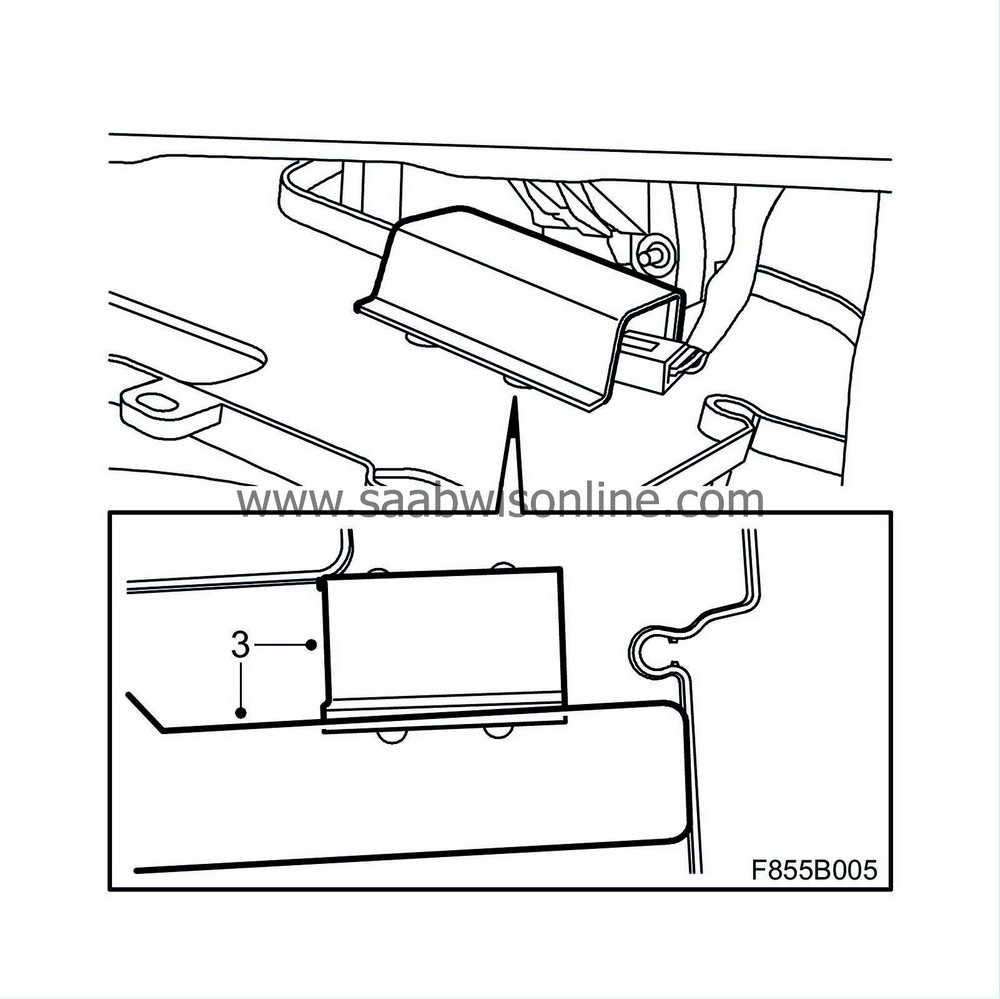
Carefully bend the sound insulation panel down and fit the lamp cover on the rear of the sound insulation panel. Make sure that all of the clips engage their correct positions and that there is no insulation between the bulb and the lamp cover.

|
|
4.
|
Press back the sound insulation panel and fit the screw.
|
|
Marking the modification identity plate
|
On completion of the necessary procedures, box A2 on the modification identity plate must be marked. From and including M04, and for certain markets, there is the table "Table of Modifications" in the car's Warranty and Service Book. Mark the box with the number "7" if the procedure was carried out by the importer or with the number "8" if carried out by the dealer.
|
Fitting the modification identity plate M04
|
|
Note
|
|
A modification identity plate must only be fitted where local directives require the marking of the car.
|
|
1.
|
Open the boot lid and lift up the floor panel.
|
|
2.
|
Clean the body surface location for the plate with Teroson FL T875. Remove the protective plastic backing from the plate.
|
|
3.
|
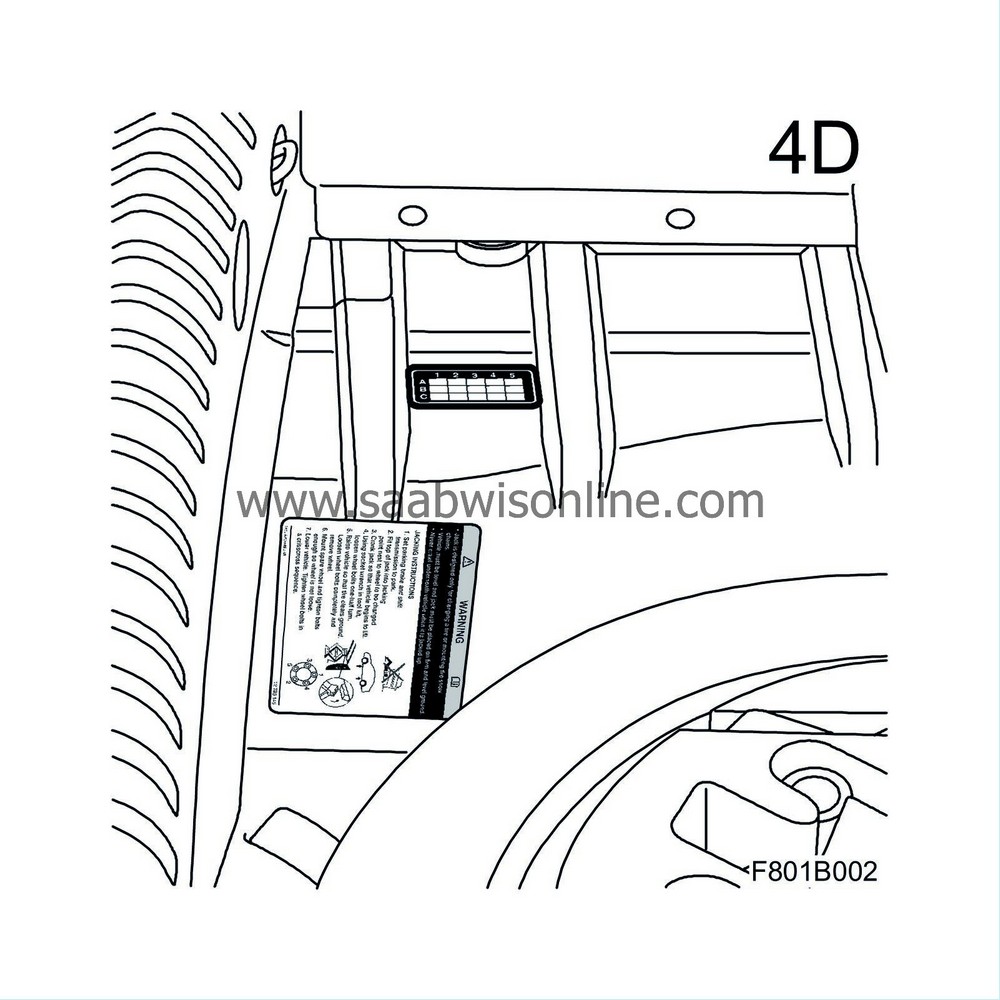
Press in the plate in accordance with the illustration.

|
|
4.
|
Mark the plate in the assigned box, lower the floor panel and close the boot lid.
|
|
Warranty/Time Information
|
See separate information.


