(853-2727) Check/Replacement of front seat belt, US/CA/MX
Symptom: Automatic belt rewinding does not work.
|
MODIFICATION INSTRUCTION
|
|
Bulletin Nbr:
|
853-2727
|
|
Date:
...........
|
Mars 2010
|
|
Market:
|
US/CA/MX
|
|
|
Check/Replacement of front seat belt, US/CA/MX
|
|
Product Safety Campaign 150 26
|
Cars in stock must be rectified before delivery.
A personal communication must be sent to the owners of cars already delivered requesting them to get in touch with the nearest Saab garage as soon as possible to have the fault rectified.
Saab 9-3 (9440), 4D M04 within VIN interval 41016380-41058122
The wire for the belt retractor may break. This may lead to the automatic belt rewinding not functioning.
Symptom description
Automatic belt rewinding does not work.
12 760 074 Front seat belt (LH)
If the bracket for the rear seat breaks when the rear seat is removed:
24 437 789 Bracket, 2 per car (estimated defective production issue 15-20%)
|
Note
|
|
Only the left side is covered by this campaign
|

Method of checking
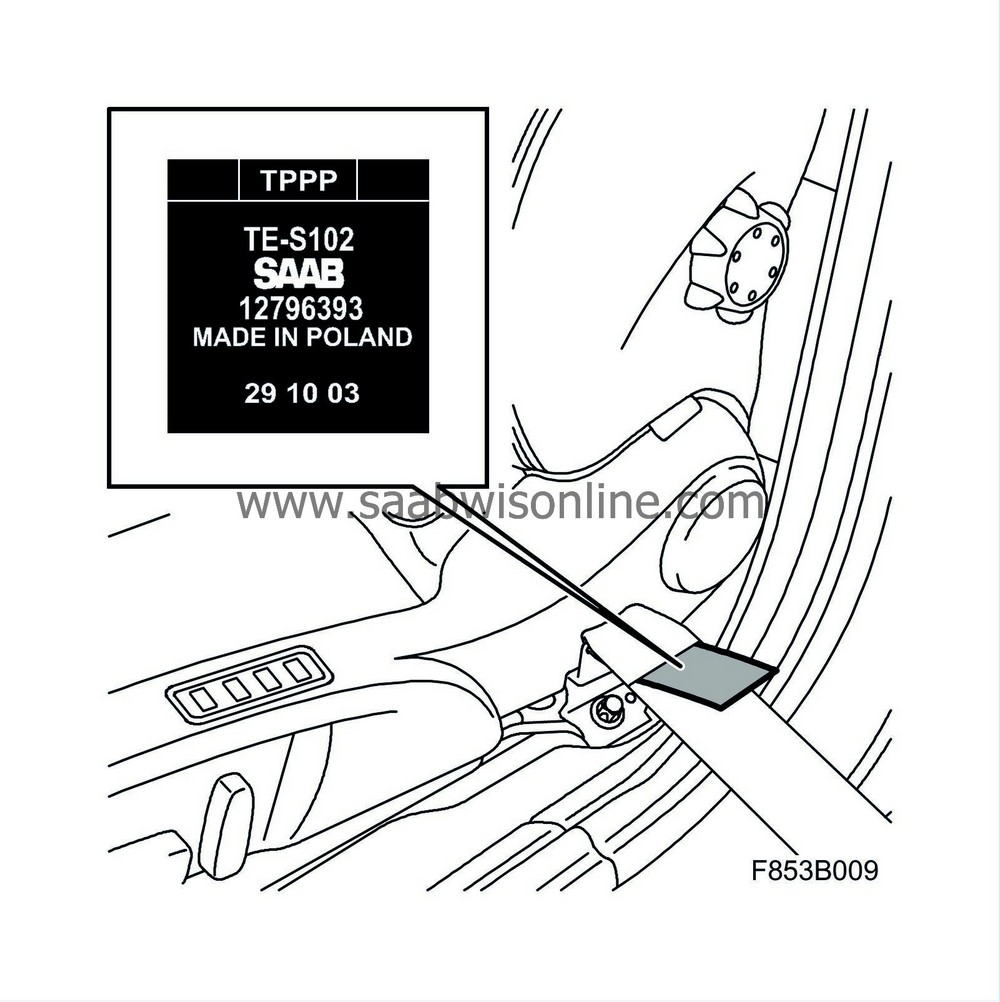
Is the seat belt on the left side marked with part number 12796393?
No:
The seat belt should not be replaced.
Yes:
Replace the seat belt on the left side.
Method for changing the seat belt
|
1.
|
Set the ignition key to the LOCK position.
|
|
2.
|
Remove the B-pillar trim as described in Tis2Web - Body - Interior - Repair instructions - B-pillar trim.
|
|
3.
|
Disconnect the battery.
|
|
4.
|
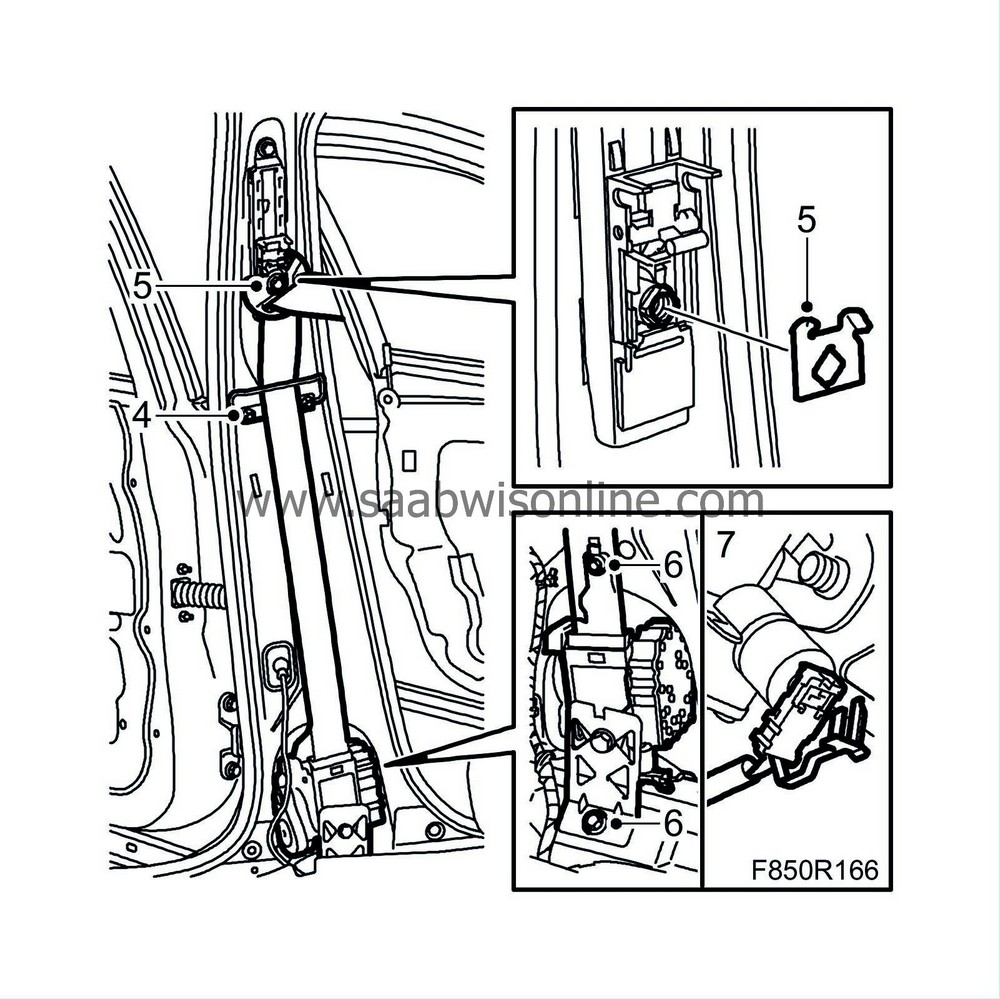
Remove the seat belt guide.

|
|
5.
|
Remove the strap guide. Make sure that the washer that lies between the strap guide and the vertical adjuster is in place.
|
|
6.
|
Remove the upper and lower bolt of the inertia reel.
|
|
7.
|
Remove the inertia reel and remove the belt tensioner connector.
|
|
8.
|
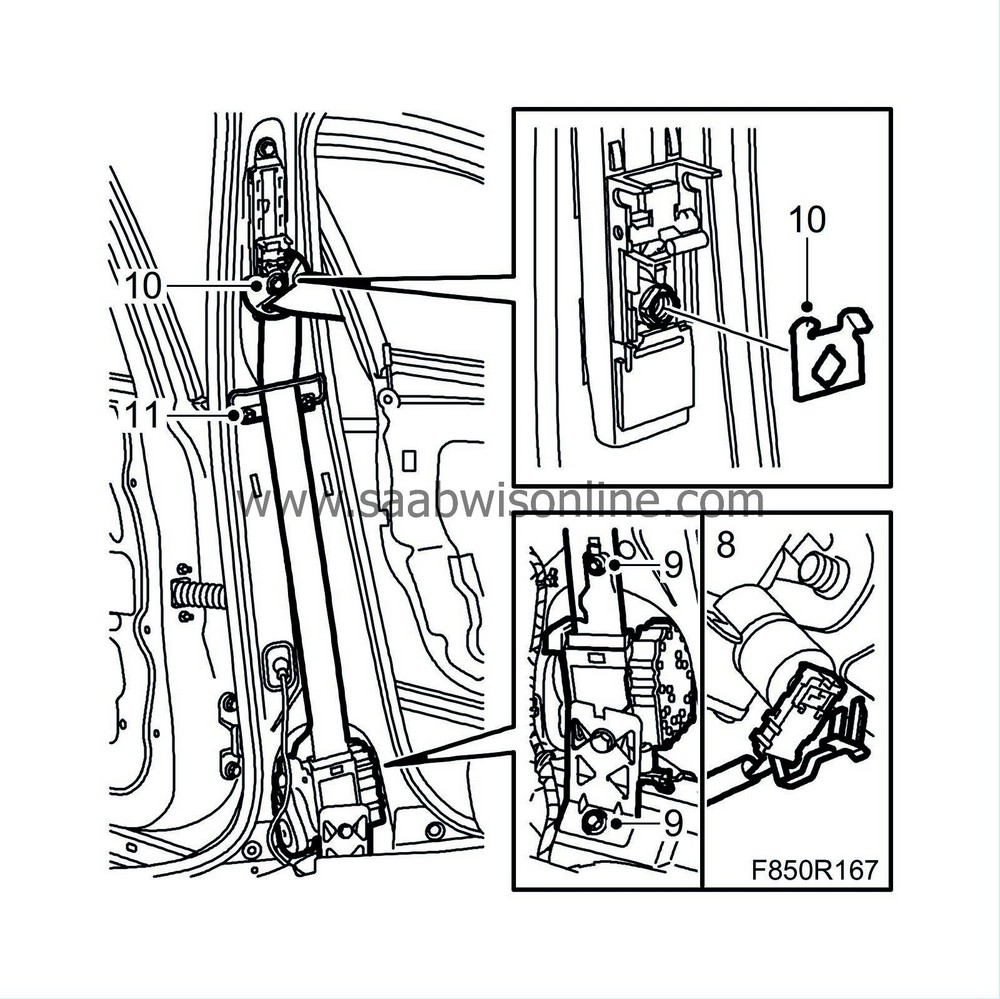
Plug in the connector of the new inertia reel. Be sure that the rear piece of the connector is pressed into place. Position the inertia reel. Insert the upper guide pin first.

|
|
9.
|
Fit the upper and lower bolt of the inertia reel.
Tightening torque, lower bolt: 37 Nm ( 27 lbf ft)
|
|
10.
|
Fit the strap guide using a new bolt.
|
Note
|
|
Note the position of the washer. The washer is marked with an R (right) or L (left) depending on which side is to be installed.
|
Tightening torque: 37 Nm (27 lbf ft)
|
|
11.
|
Fit the seat belt guide.
|
|
12.
|
Refit the B-pillar trim as described in Tis2Web - Body - Interior - Repair instructions - B-pillar trim.
|
|
13.
|
Check seat belt function.
|
|
15.
|
Then check with the diagnostic tool as follows:
|
|
|
•
|
Connect the diagnostic tool to the data link connector underneath the dashboard. Clear any diagnostic trouble codes.
|
|
|
•
|
Switch off the ignition and switch it on again. Wait at least 1 minute with the ignition key in the ON position. Check if any diagnostic trouble codes appear.
|
|
|
•
|
If a diagnostic trouble code appears: Perform the relevant fault tracing following the instructions for the trouble code.
|
|
|
•
|
If no diagnostic trouble code appears: Installation was successful. Disconnect the diagnostic tool.
|
|
16.
|
Perform the procedure after battery disconnection as described in Tis2Web - Body - Airbag system - Repair instructions - Procedure after battery disconnection
|
|
17.
|
Scrap the belts as described in the following method.
|
For reasons of safety and environmental protection, the pyrotechnic charge in the belt tensioner must be neutralised via electric priming as described below.
The belt tensioner is to be activated using 84 71 104 Cable with switch (B) and 86 12 434 Adapter cable, detonation device SRS (A).
|
Note
|
|
The detonation device used consists of a 10 metre long two-wire cable with push button and battery clips as well as a connector for connection to the wiring harness. The wiring harness is replaced depending on which of the airbag system's components are to be scrapped. The battery to which the detonation device is connected must be in good condition.
|
|
1.
|
Cut the belt to separate it from the height adjuster.
|
|
2.
|
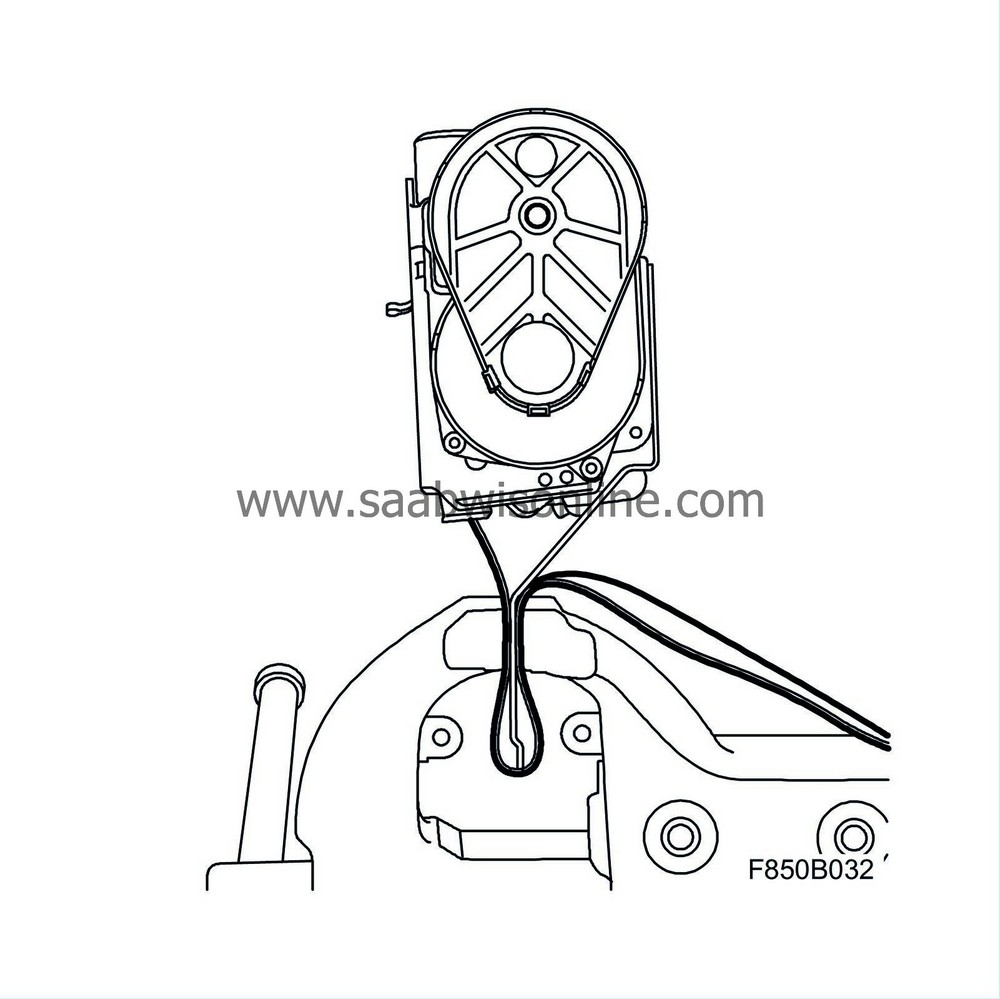
Pull out the belt enough to allow it to be clamped in place together with the inertia reel bracket in a vice as illustrated.

|
|
3.
|
Connect 86 12 434 Adapter cable, detonation device SRS to the belt tensioner. Make sure that the secondary lock of the connector is locked.

|
|
4.
|
Connect the detonation device 84 71 104 Cable with switch to the wiring harness.
|
|
5.
|
Check that the belt is properly secured in the vice and that the belt is completely retracted.
|
|
6.
|
Place a battery 10 metres from the vice. Connect the detonation device to the battery.

|
|
7.
|
Check that no one is within 10 metres of the vice.
|
|
8.
|
Stand outside of the safety zone and press the switch. A bang will be heard when the belt tensioner is deployed.
|
|
9.
|
Disconnect the detonation device wires from the battery immediately after the belt tensioner has been deployed.
|
|
10.
|
Remove the connector from the belt tensioner gas generator.
|
|
Warranty/Time Information
|
See separate information.


