(852-2430 ed. 2) Checking/Replacement of front seats
|
MODIFICATION INSTRUCTION
|
|
Bulletin Nbr:
|
852-2430 ed. 2
|
|
Date:
...........
|
December 2003
|
|
Market:
|
se separat lista
|
|
|
Checking/Replacement of front seats
|
|
Product Safety Campaign 150 14
|
Cars in stock must be rectified before delivery.
A personal communication must be sent to the owners of cars already delivered requesting them to get in touch with the nearest Saab garage as soon as possible to have the fault rectified.
9-3 (9440) CV within Vehicle Identification Number range 46000001 - 46008002
Not all cars in the range are affected.
The locking catch of the backrest release mechanism may be faulty on certain cars.
|
Note
|
|
Do not order any seats before the checking is carried out.
|
|
Order seats in accordance with PI 08-6-2003. Place the order as a VOR order. Place 1 separate order per car/Vehicle Identification Number.
|
Order as necessary:
Front seat, manual
12 804 104 LHD, Driver's seat
12 804 106 LHD, Passenger seat
12 804 107 RHD, Passenger seat
12 804 105 RHD, Driver's seat
Front seat, electrically adjustable without memory function
12 804 108 LHD, Driver's seat
12 804 110 LHD, Passenger seat
12 804 111 RHD, Passenger seat
12 804 109 RHD, Driver's seat
Front seat, electrically adjustable with memory function
12 804 112 LHD, Driver's seat
12 804 113 RHD, Driver's seat
For fitting the modification identity plate
12 785 148 Modification identity plate
16-30 15 815 Cleaner, Teroson FL T875, sufficient for 50-100 cars
Before proceeding, check box A1 of the modification identity plate. From and including M04, and for certain markets, there is the table "Table of Modifications" in the car's Warranty and Service Book. A modification identity plate must be fitted in accordance with the section "Fitting the modification identity plate" where local directives require the marking of the car. If the box is not marked, continue as follows.
|
1.
|
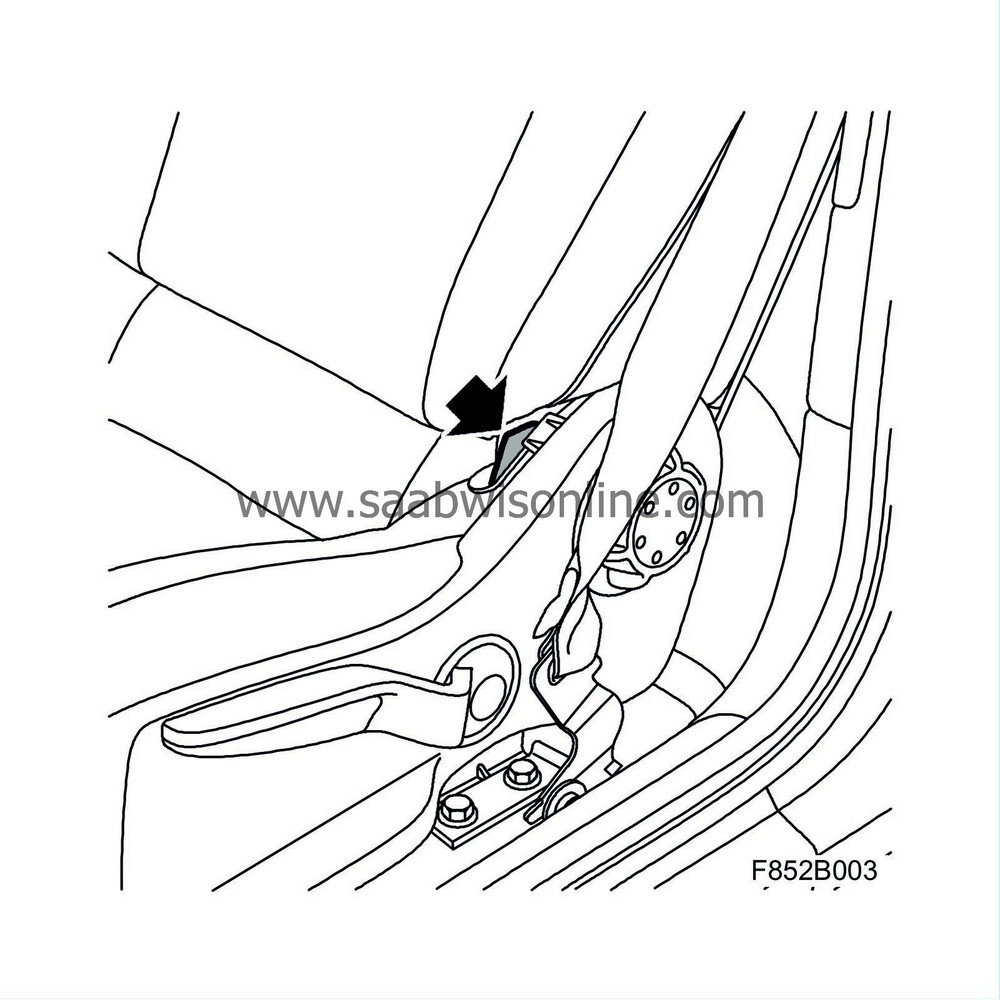
Move the seats to their rearmost positions for better access. Fold up the backrest trim at the lower edge. Check the production code on both front seats (4 numbers/letters) which is stamped on the seat chassis. The production code may be stamped at different heights depending on the side.

|
|
2.
|
Do the 2 last characters correspond to any of the combinations in the following list?
|
|
|
•
|
**3F (to be excluded, these seats are not faulty)
|
|
3.
|
Yes
: Proceed to step 4.
No
: The seat is not faulty and must not be replaced. Proceed to step 6.
|
|
4.
|
Is there white marking by the production code?
Yes
: The seat is not faulty and must not be replaced. Proceed to step 6.
No
: Proceed to step 5.
|
|
5.
|
Do the 3 first characters correspond to any of the combinations in the following list?
|
|
|
•
|
JN3*
Yes
: The seat is not faulty and must not be replaced. Proceed to step 6.
No
: The seat must be replaced. Order a new seat and replace the seat in accordance with the method in WIS, see 9-3 (9440) 2004 - Body - Seats - Adjustment/Replacement - Front seat, CV.
Use 74 96 268 Thread lock on the seat bolts.
Then proceed to step 6.
|
|
6.
|
Carry out the check on the other seat.
|
|
Marking the modification identity plate
|
After carrying out the procedure, box A1 on the modification identity plate must be marked. From and including M04, and for certain markets, there is the table "Table of Modifications" in the car's Warranty and Service Book. Mark the box with the number "7" if the procedure was carried out by the importer or with the number "8" if carried out by the dealer.
|
Warranty/Time Information
|
See separate information.
|
•
|
All work must take place in accordance with the instructions given and carried out with caution. Risk of personal injury exists in the event of incorrect handling.
|
|
•
|
Ear defenders must be worn when deploying the airbag and belt tensioner.
|
|
•
|
The airbags should be kept at room temperature. At temperatures above +115
°
C (239
°
F) there is a risk of self-deployment.
|
|
•
|
The belt tensioners should never be exposed to temperatures above +100
°
C (212
°
F).
|
|
•
|
The airbags must be kept in a special area, separate from storage areas for petroleum products or other inflammable materials.
|
|
•
|
Wear protective glasses and protective gloves when dismantling deployed airbags. Place the airbag in a fully sealing plastic bag. Wash your hands using a mild soap solution and lukewarm water after working with a deployed airbag.
|
|
•
|
The airbags and belt tensioner are classified as pyrotechnic articles and must be stored and handled in accordance with the laws and provisions in each country.
|
|
•
|
The belt tensioner must not be treated with grease, cleaning agents or similar.
|
The following tools should be used when scrapping the seat
84 71 104 Cable with switch
86 12 921 Wiring harness, side airbag
86 12 434 Adapter cable, detonation device SRS
In order to prevent injury in connection with the scrapping of seats with airbags and belt tensioners, undeployed pyrotechnical components must be made unfit for use through electric detonation as described below before the seat is scrapped. These safety measures are essential as the pyrotechnical units can cause injury with non-professional handling.
|
Note
|
|
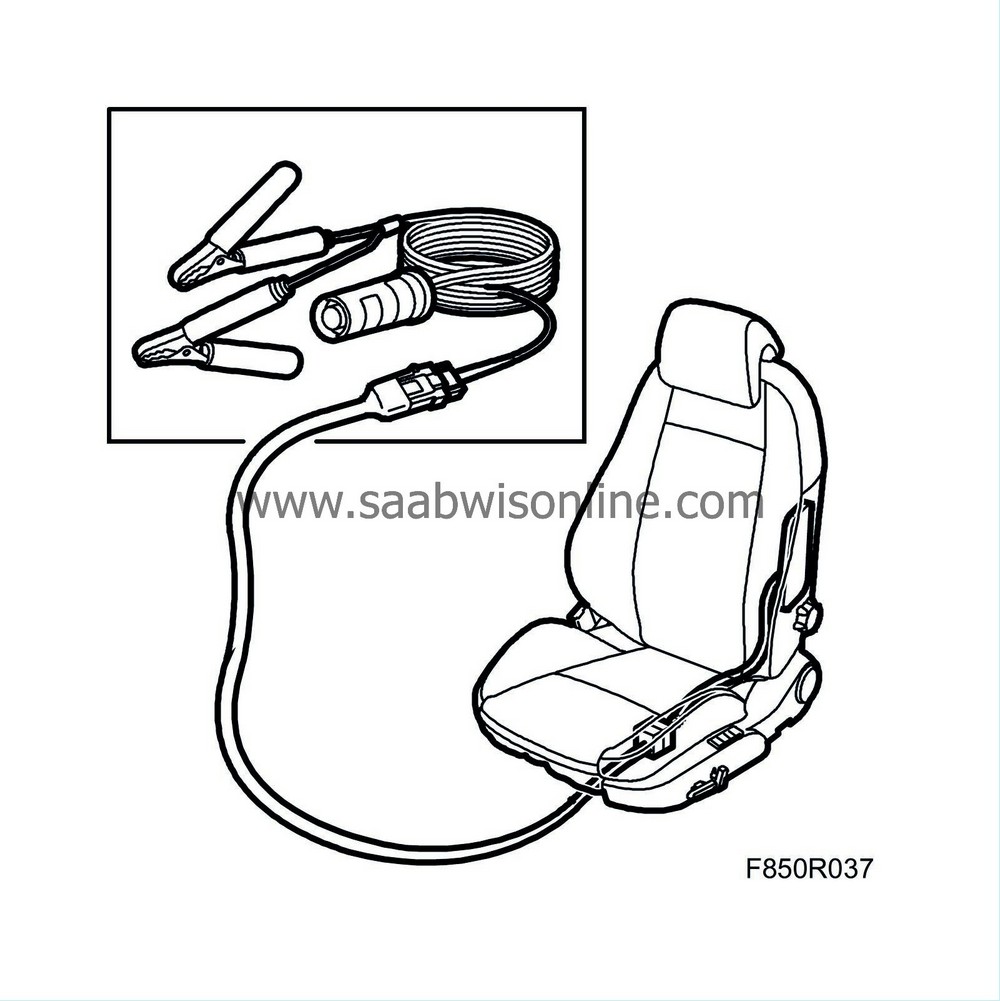
The detonation device used consists of a 10 metre long two-wire cable with push button and battery clips as well as a connector for connection to the wiring harness. The wiring harness is replaced depending on which of the airbag system's components are to be scrapped.
|
|
The battery that the detonation device is connected to must be in good condition.
|
|
1.
|
Scrapping must be performed either outdoors or in well ventilated premises. Place the seat on its side with the airbag side facing upwards (outside of the seat). The seat must be placed on a flat surface so that it is stable.
|
|
2.
|
Remove the rivets from the underside of the rear lower cover using a screwdriver.
|
|
3.
|
Lift the cover upwards and pull off.
|
|
4.
|
Check that the seat belt is not caught in anything and that the seat belt is fully retracted.
|
|
5.
|
Remove the connector from the belt tensioner.
|
|
6.
|
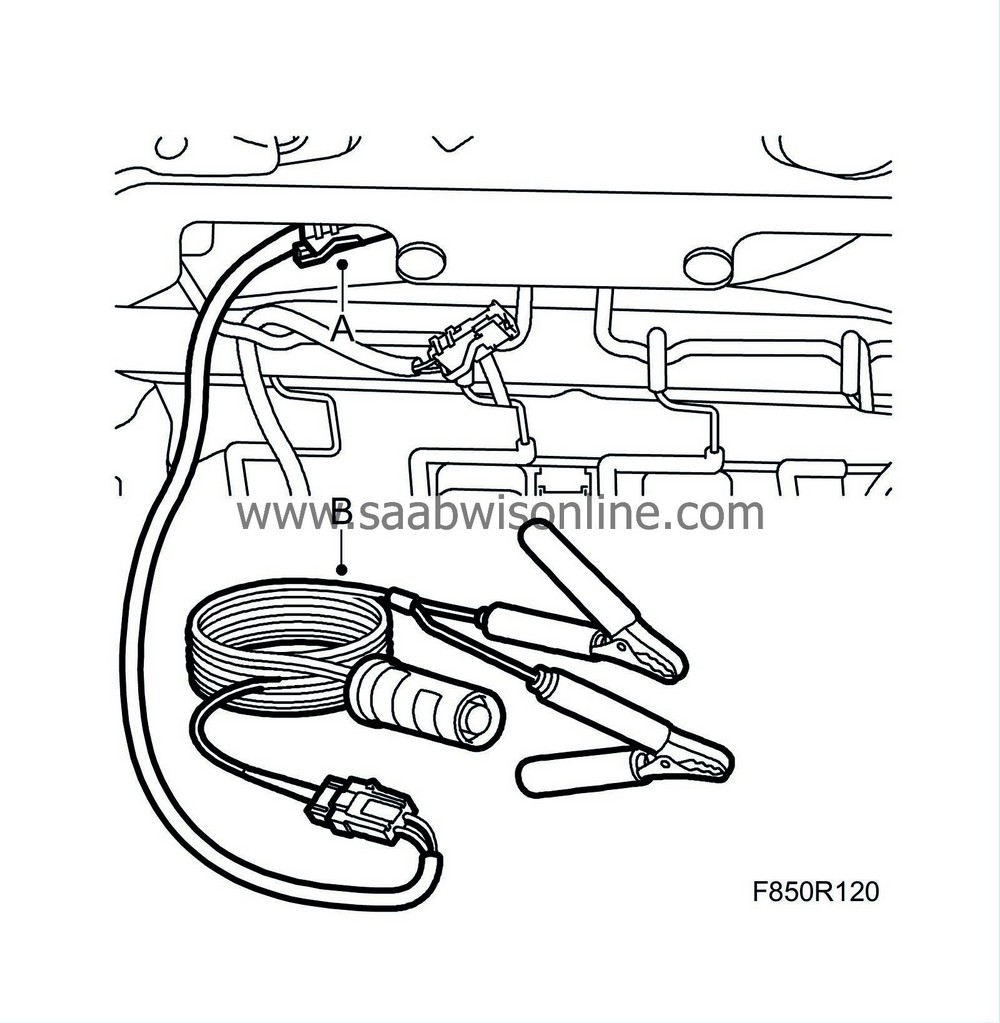
Connect 86 12 434 Adapter cable, detonation device SRS (A) to the belt tensioner.
Make sure that connector's secondary locking catch is engaged.


|
|
7.
|
Connect the detonation device 84 71 104 Cable with switch (B), to the wiring harness.
|
|
8.
|
Place a battery 10 metres behind the seat. Connect the detonation device to the battery.
|
|
9.
|
Check that no one is within the safety distance of 10 metres from the seat. Stand behind the battery and press the switch. When the belt tensioner is deployed a bang will be heard.
|
|
10.
|
Disconnect the detonation device's wires from the battery immediately the belt tensioner has been deployed.
|
|
11.
|
Exercise caution when dismantling the connector from the belt tensioner's gas generator as this may be hot. Wear protective gloves.
|
|
12.
|
Connect 86 12 921 Wiring harness, side airbag to connector the under the seat.

|
|
13.
|
Connect the detonation device 84 71 104 Cable with switch to the wiring harness.
|
|
14.
|
Connect the detonation device to the battery. The battery must be placed 10 metres from the seat.
|
|
15.
|
Check that no one is within the safety distance of 10 metres from the seat. Stand behind the battery and press the switch. When the airbag is deployed a bang will be heard.
|
|
16.
|
Disconnect the detonation device's wires from the battery immediately the airbag has been deployed.
|
|
17.
|
Disconnect the wiring harness from the seat.
|
|
Fitting the modification identity plate
|
|
Note
|
|
A modification identity plate must only be fitted where local directives require the marking of the car.
|
|
1.
|
Open the boot lid and lift up the floor panel.
|
|
2.
|
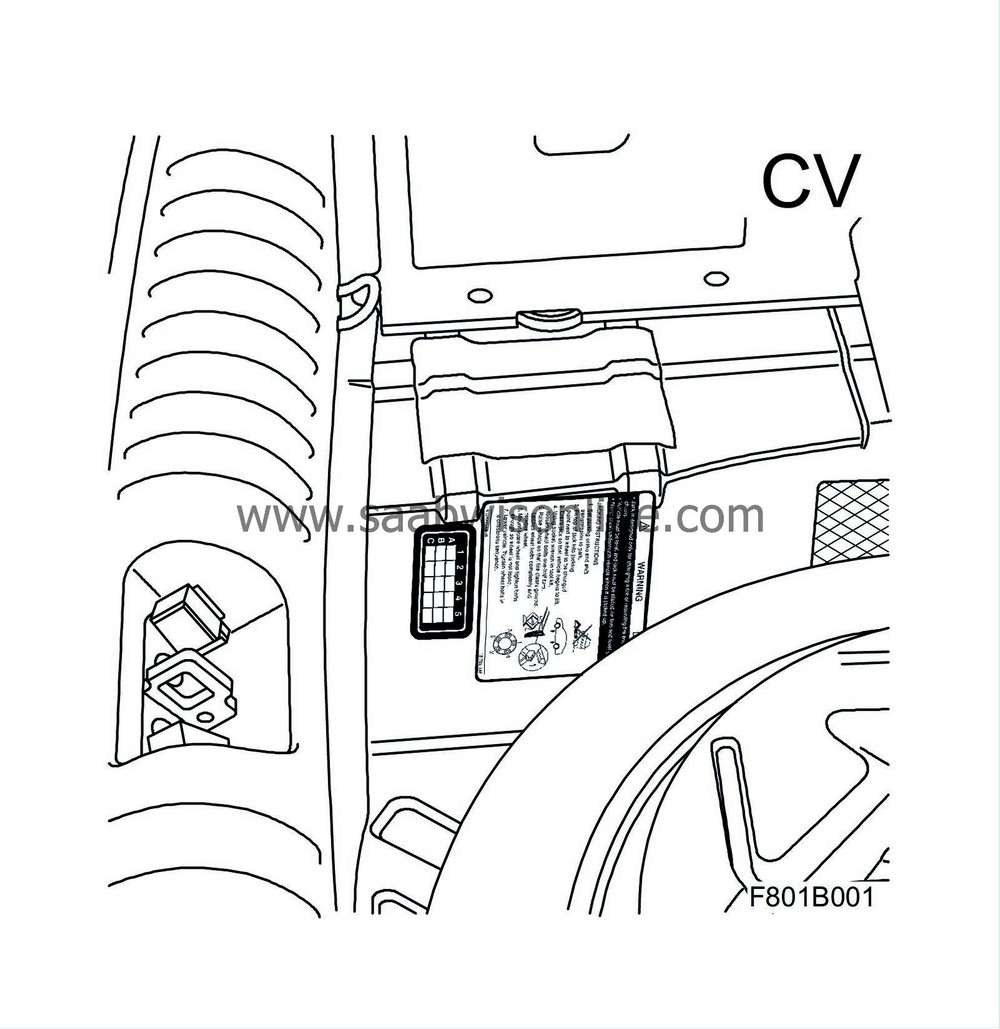
Clean the body surface for the plate with Teroson FL T875. Remove the protective plastic backing from the plate.
|
|
3.
|
Press in the modification identity plate in accordance with the illustration.

|
|
4.
|
Lower the floor panel and close the boot lid.
|


