Fuel tank
| Fuel tank |
|
||||||||||||||||||||||
| Important | ||
|
Be particulary observant regardning cleanliness when working on the fuel system. Loss of function may occur due to very small particles. Prevent dirt and grime from entering the fuel system by cleaning the connections and plugging pipes and lines during disassembly. Use 82 92 948 Plugs, A/C system assembly. Keep components free from contaminants during storage. |
||
| To remove |
| 2. |
Drain the fuel tank. See
Emptying the fuel tank
. Remove the tank cap.
|
|
| 3. |
Place the car on a lift.
|
|
| 4. |
Raise the car.
|
|
| 5. |
Remove the right rear wheel.
|
|
| 6. |
Remove the bolts and nuts to the wing liner.

|
|
| 7. |
Release the wing liner from the stud bolts.
|
|
| 8. |
Release the wing liner from the liner edge starting at the back. Then release the entire liner edge. Remove the wing liner.

|
|
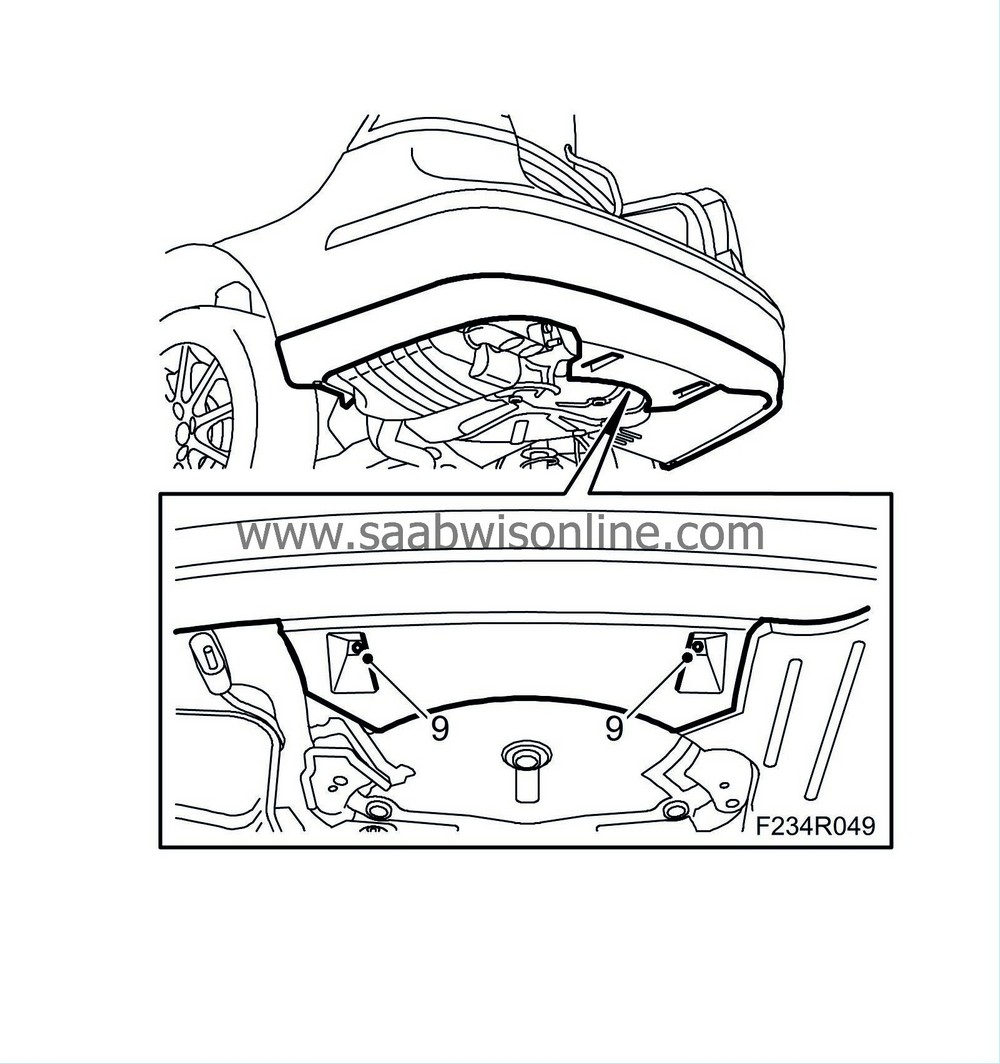
| 9. |
Undo the rear spoiler shield.
CV:
Remove
Chassis reinforcement, rear subframe, CV,
right-hand side.
|
|
| 10. |
Remove the rubber mounts and carefully lower the exhaust system, fasten with
83 95 212 Strap
.

|
|
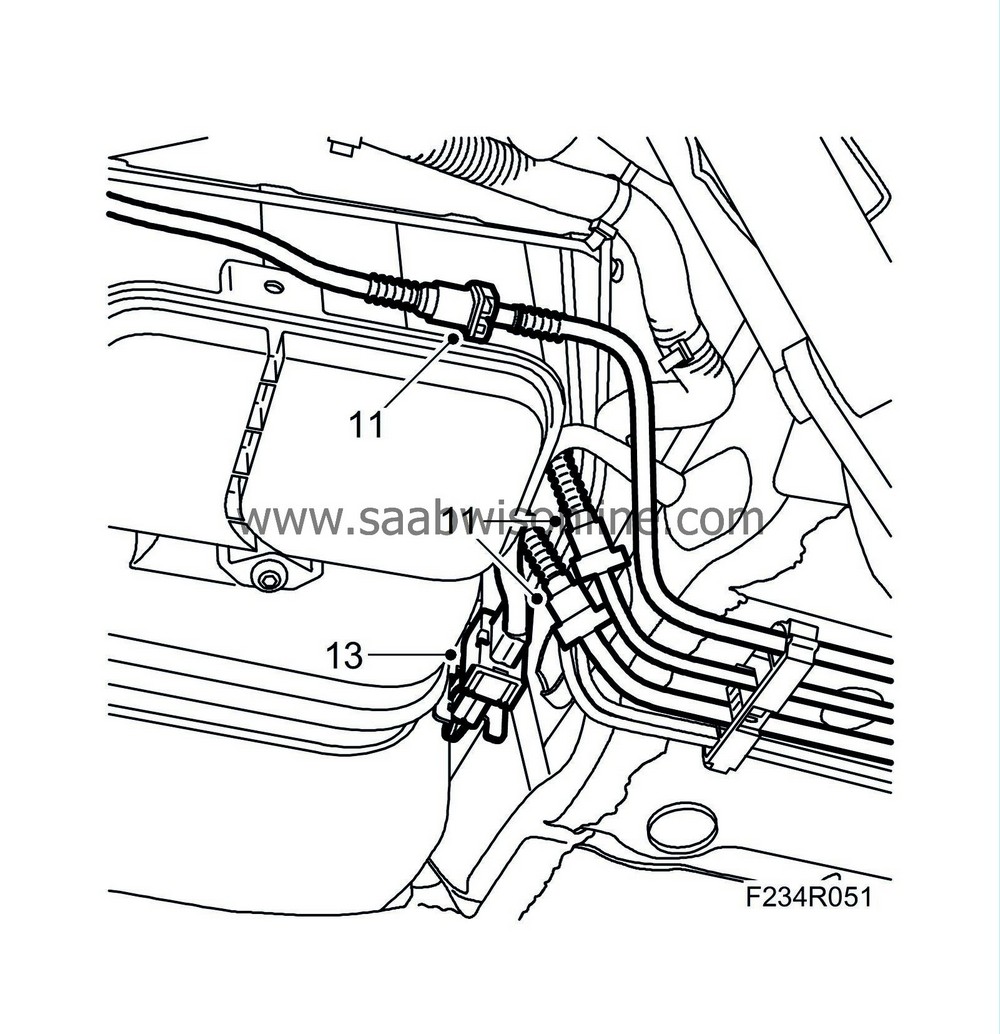
| 11. |
Separate the fuel connections and vent connections at the carbon canister. Catch any spilt fuel.
|
|
| 12. |
Seal the connections to the outlet line from the fuel pump.
|
|
| 13. |
Separate and remove the connector at the evaporative emission canister.
|
|
| 14. |
Detach the hose between the filler pipe and tank, and separate the fast coupling on the vent.

|
|
| 15. |
Place a single-support lift under the tank, remove the tank straps and fuel tank. Be careful when removing the tank, ensure that no components or connections are damaged.

|
|
| To fit |
| 1. |
Remove the filler pipe and change the connection hose between the tank and the filler pipe.
|
|
| 2. |
Use Vaseline to lubricate the filler pipe connection to the filler cap opening.
|
|
| 3. |
Fit the filler pipe and tighten the bolts. Check the rubber seal in the filler cap opening, and adjust if necessary.
|
|
| 4. |
Raise the tank and refit the tank straps.

Tightening torque 25 Nm (18 lbf ft). |
|
| 5. |
Connect the fuel filler pipe hose and tighten the clamp.

Tightening torque 4 Nm (3 lbf ft) |
|
| 6. |
Tighten the bolt on the fuel filler tube.
Tightening torque 25 Nm (18 lbf ft). |
|
| 7. |
Connect vent hose.
|
|
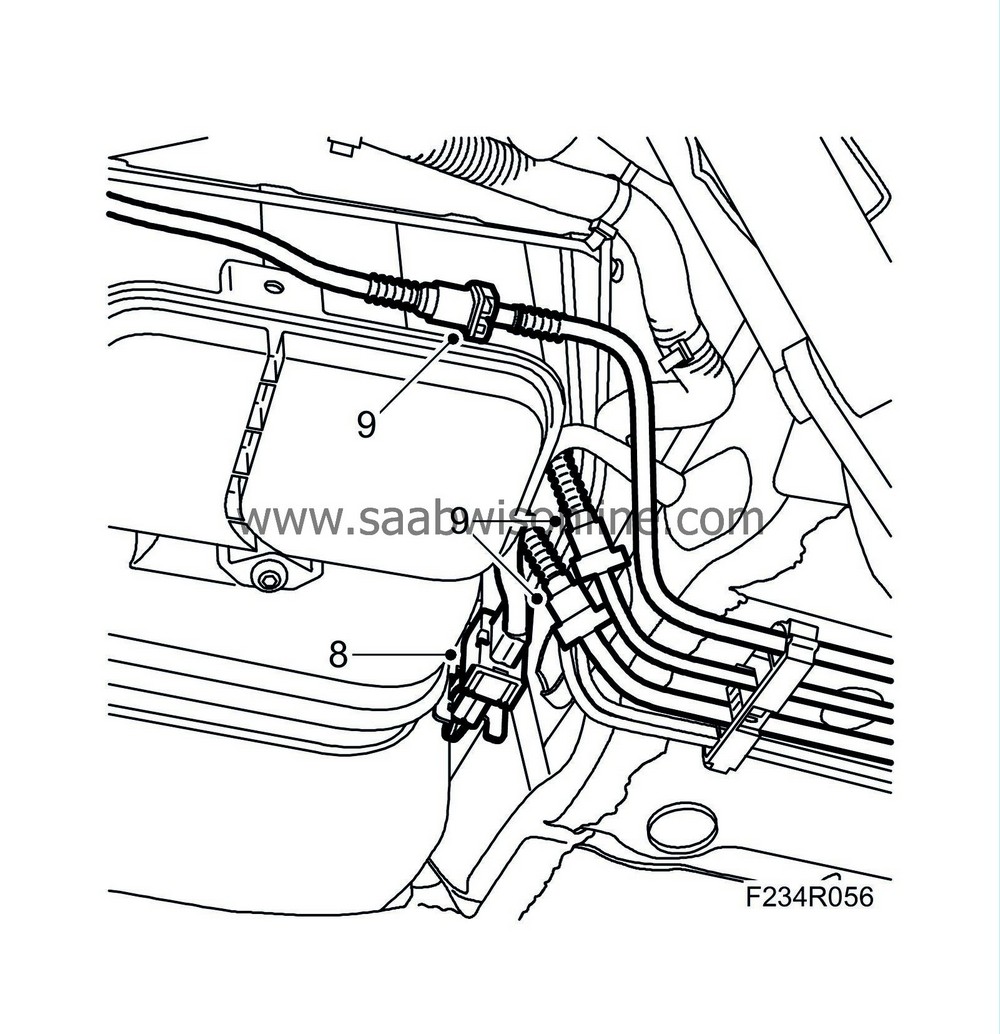
| 8. |
Attach the connector to the evaporative emission canister.
|
|
| 9. |
Connect the vent and fuel lines.
|
|
| 10. |
Fold in the wing liner. Press the lower liner edge against the wheelarch. Guide the liner onto the upper stud bolts. Then fit onto the other stud bolts.

|
|
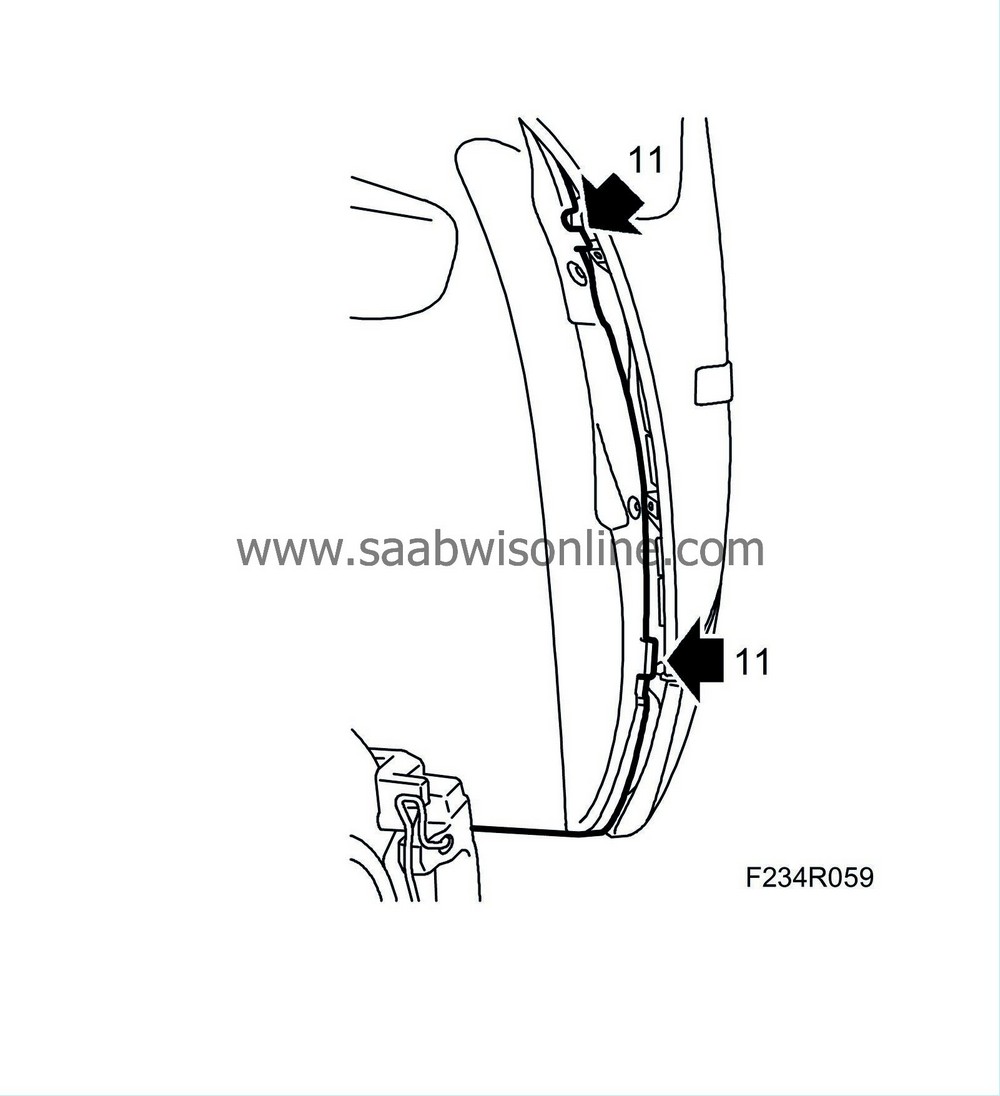
| 11. |
Fit the wing liner to the liner edge and bumper cavity. The wing liner should lie behind the bumper cavity.
|
|
| 12. |
Check the fit of the wing liner.
|
|
| 13. |
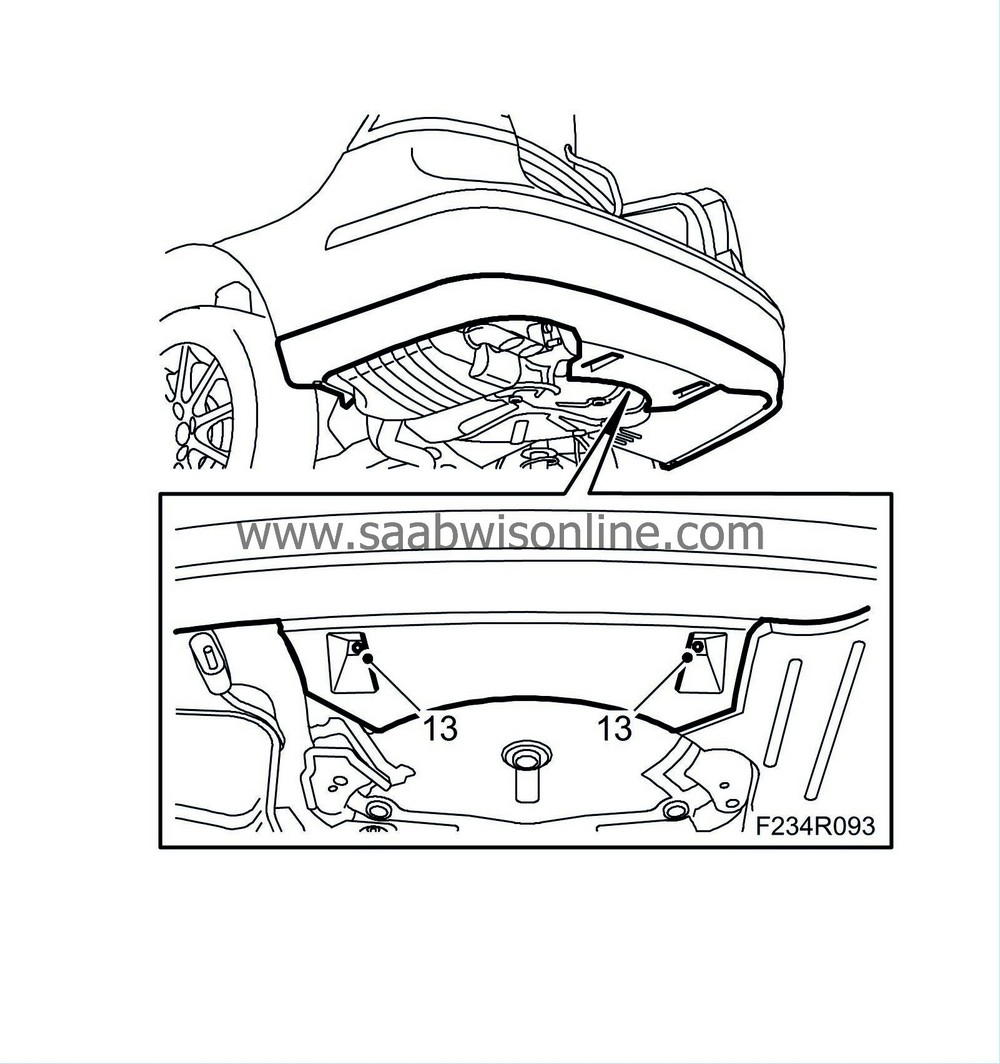
Attach the rear spoiler shield.
|
|
| 14. |
Refit all bolts and nuts.

|
|
| 15. |
Fit
Wheel
.
|
|
| 16. |
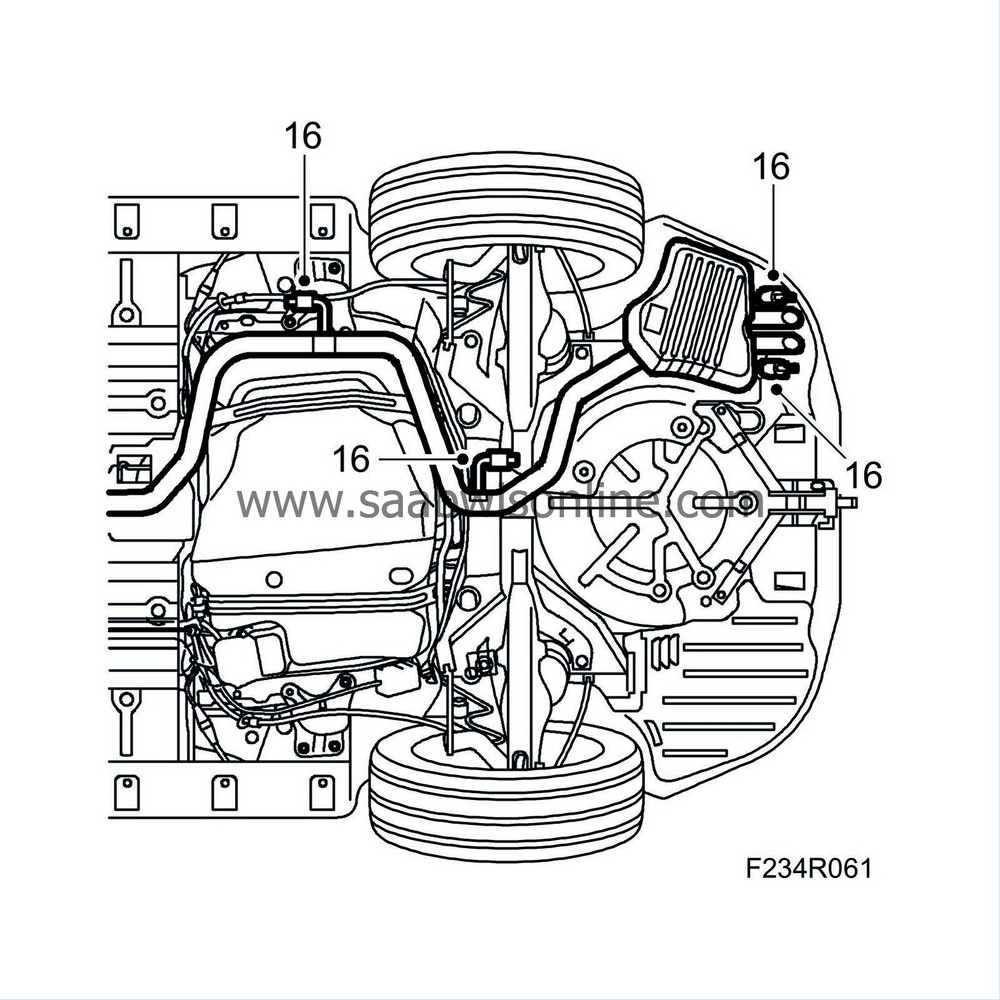
Fit the rubber mountings and the exhaust system.
CV:
Fit
Chassis reinforcement, rear subframe, CV
, right-hand side.
|
|
| 17. |
Lower the car.
|
|
| 18. |
Fill with petrol of the correct octane rating, and fit the filler cap.
|
|
| 19. |
Connect and exhaust extractor and start the engine for function test.
|
|

 Warning


