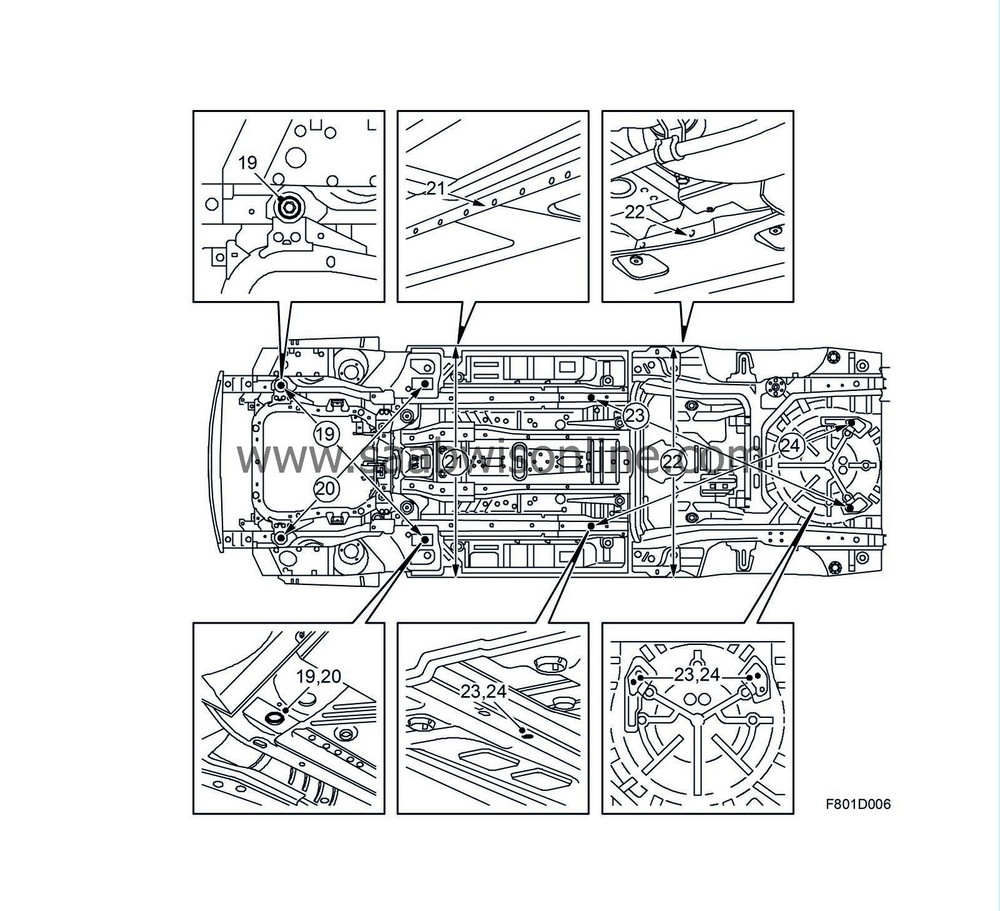
Body dimensions, 4D
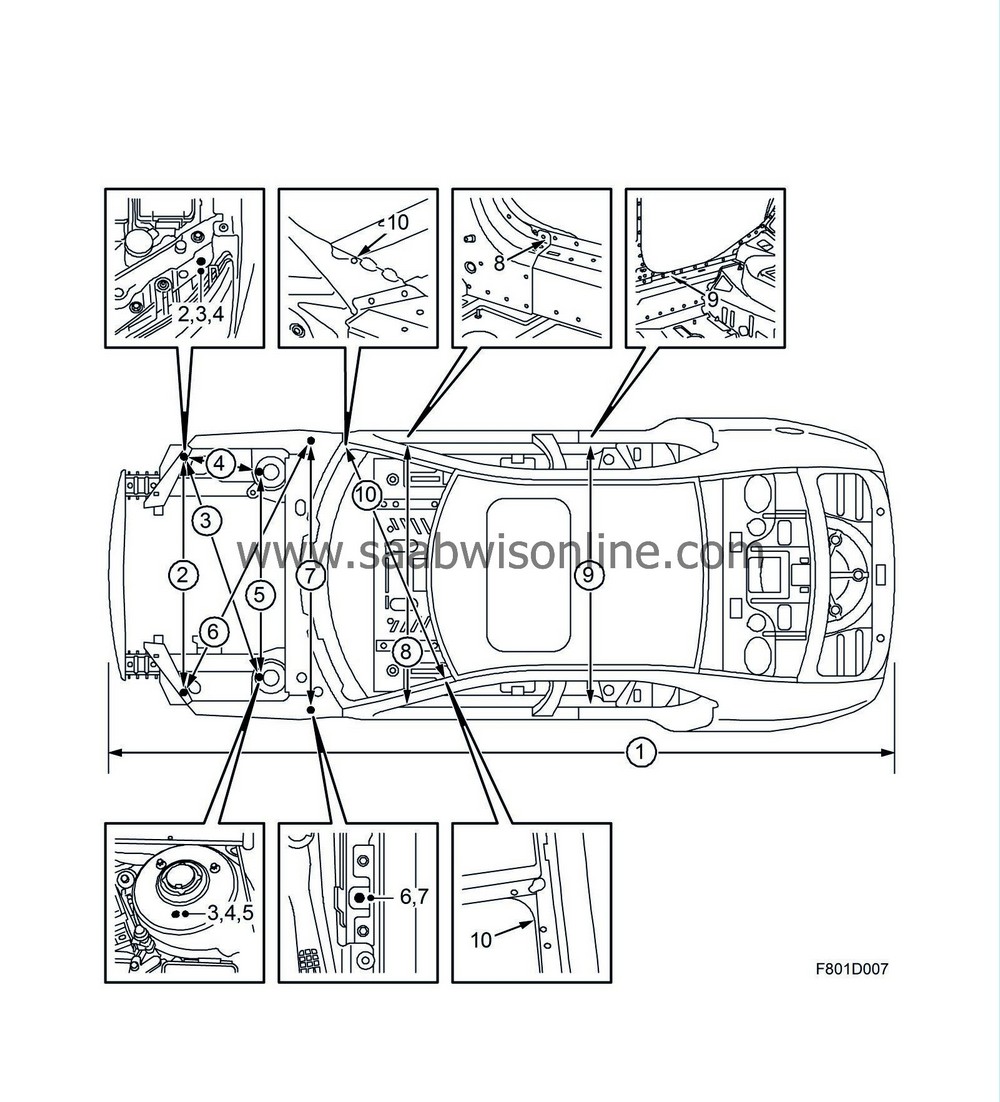
The following dimensions can be used to determine if the car must be fitted on an alignment jig. Complete dimensions are available from the respective alignment jig manufacturer.

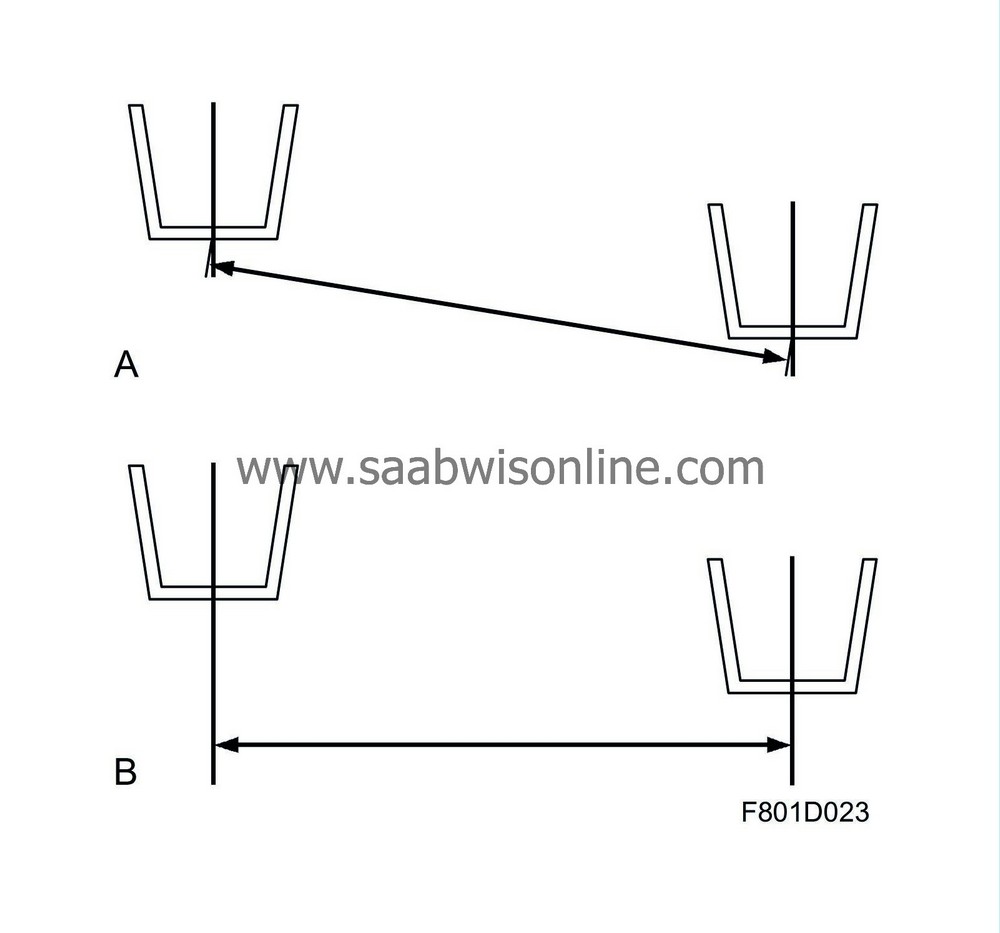
Illustration A shows the correct measurement orientation
Illustration B shows the incorrect measurement orientation

|
Pos
|
Dimension, mm
|
Measuring points
|
|
1
|
4414
|
Total length Front bumper member - Rear bumper abutment
|
|
2
|
1340
|
Hole in the outer mounting for headlight frame (*) - Hole in the outer mounting for headlight frame (*)
|
|
3
|
1315
|
Hole in the outer mounting for headlight frame (*) - Hole in the front MacPherson strut mounting (*)
|
|
4
|
457
|
Hole in the outer mounting for headlight frame (*) - Hole in the front MacPherson strut mounting (*)
|
|
5
|
1145
|
Hole in the front MacPherson strut mounting (*) - Hole in the front MacPherson strut mounting (*)
|
|
6
|
1568
|
Hole in the outer mounting for headlight frame (*) - Lower bonnet hinge mounting, centre of bolt head
|
|
7
|
1431
|
Lower bonnet hinge mounting, centre of bolt head centre of bolt head
|
|
8
|
1473
|
Distance between weatherstrip ribs on top of door sill
|
|
9
|
1475
|
Distance between weatherstrip ribs on top of door sill
|
|
10
|
1447
|
Lower A-pillar section in the corner near the windscreen member/A-pillar upper section, inner radius where the dimension is largest. diagonal
|
(*) = dimension is measured from the centre of the hole.
|
Body measurements, rear, side, 4D
|

|
Pos
|
Dimension, mm
|
Measuring points
|
|
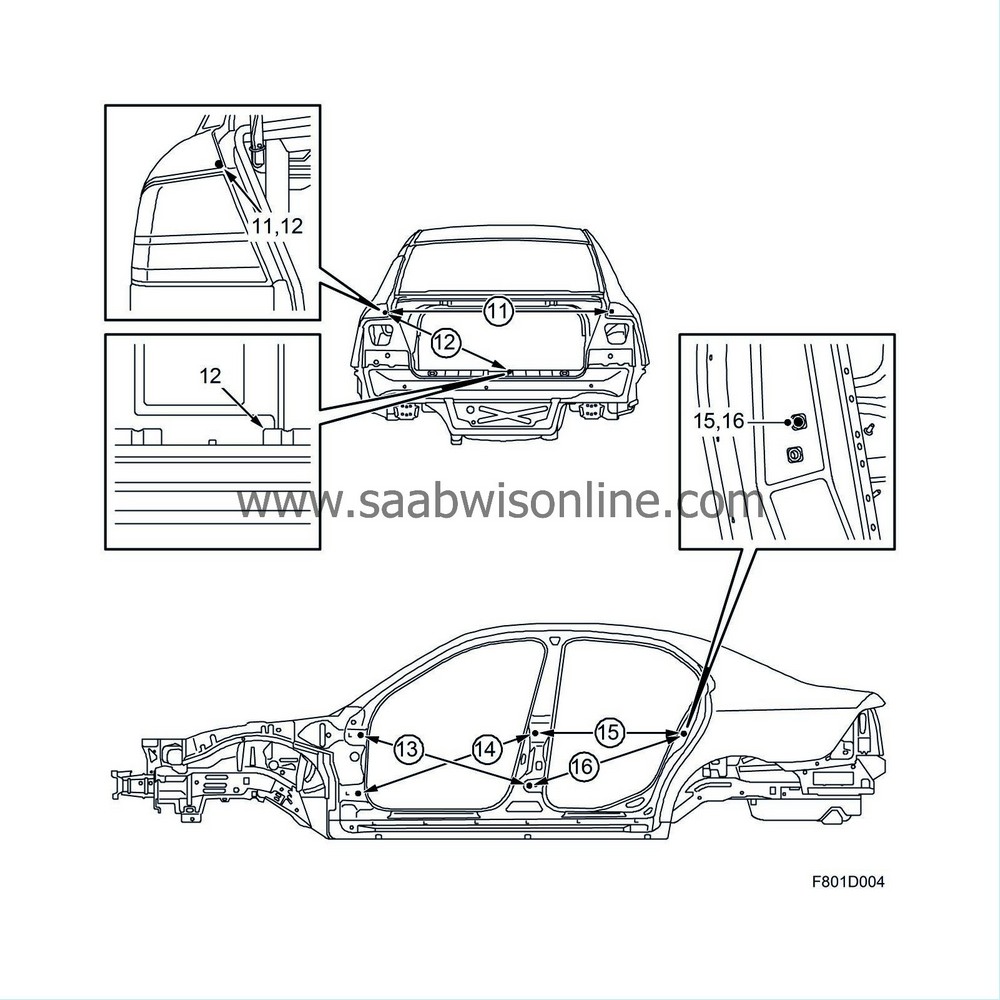
11
|
1153
|
Distance between the corners towards the tail light
|
|
12
|
699
|
Corner towards the tail light - Corner of the opening for the striking plate
|
|
13
|
989
|
Front hinge, rear, upper hole (*) - Rear hinge, front, lower hole (*)
|
|
14
|
1055
|
Front hinge, rear, lower hole (*) - rear hinge, Front, upper hole (*)
|
|
15
|
860
|
Rear hinge, front, upper hole (*) - Upper striking plate hole (*)
|
|
16
|
942
|
Rear hinge, front, lower hole, (*) - Upper striking plate hole (*)
|
(*) = dimension is measured from the centre of the hole.
|
Body measurements, B-pillar, 4D
|

|
Pos
|
Dimension, mm
|
Measuring points
|
|
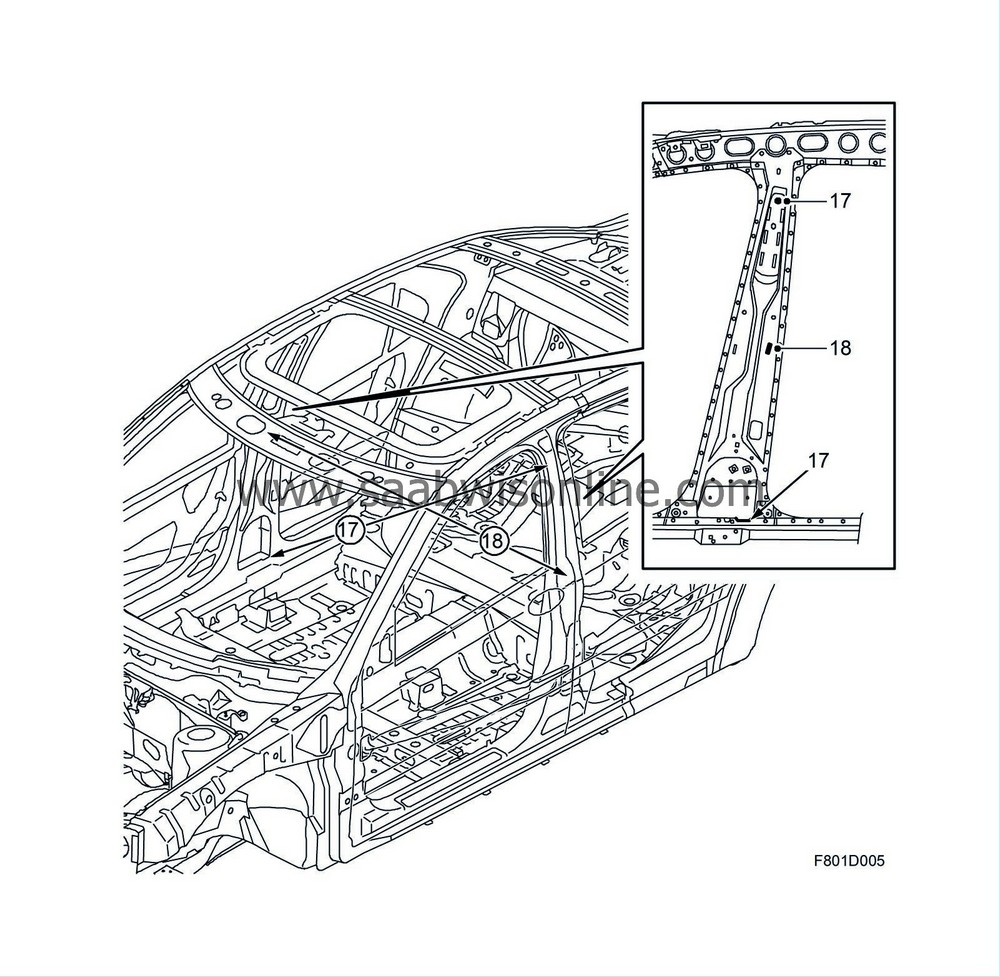
17
|
1599
|
Recess at the inner sill edge - Bolt hole to the belt anchorage point (*). Diagonal measurement
|
|
18
|
1416
|
Distance between the upper edges of the rear clip hole (*)
|
(*) = dimension is measured from the centre of the hole.

|
Pos
|
Dimension, mm
|
Measuring points
|
|
19
|
1346
|
Front subframe mounting, centre of bolt head LH side - Hole in the floor reinforcement RH side (*)
|
|
20
|
1350
|
Front subframe mounting, centre of bolt head RH side - Hole in the floor reinforcement LH side (*)
|
|
21
|
1475
|
Distance between the inside of sill edge
|
|
22
|
1475
|
Distance between the inside of sill edge
|
|
23
|
1838
|
Hole in the member LH side(*) - Hole for towbar mounting RH side (*)
|
|
24
|
1822
|
Hole in the member RH side(*) - Hole for towbar mounting LH side (*)
|
(*) = dimension is measured from the centre of the hole.
