Front door, door handle
| Front door, door handle |
| To remove |
| 1. |
The window should be closed.
|
|
| 2. |
Remove the
Front door trim, 4D
and fold down the water barrier.
|
|
| 3. |
Cars with guard
: Remove the guard's screws.

|
|
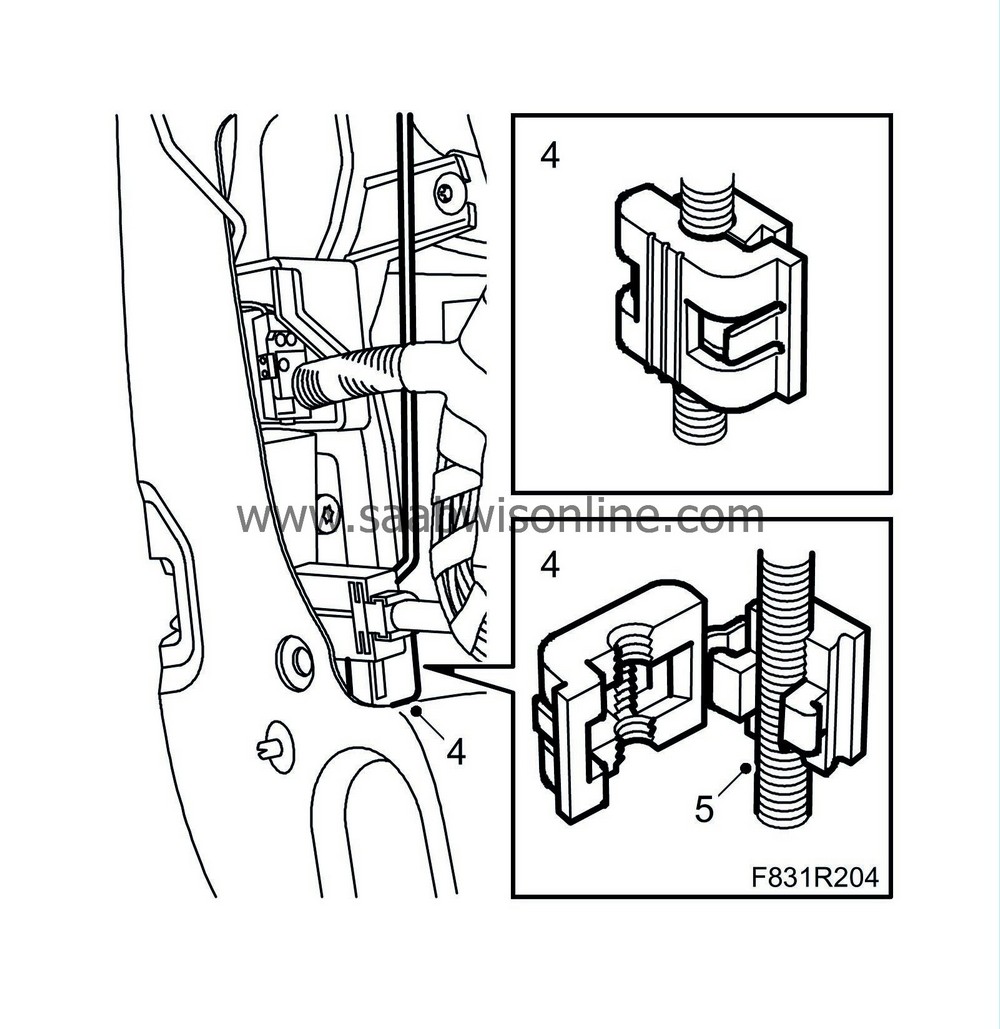
| 4. |
Detach the lock cover to the handle rod.
|
|
| 5. |
Loosen the handle's rod from the clip.
|
|
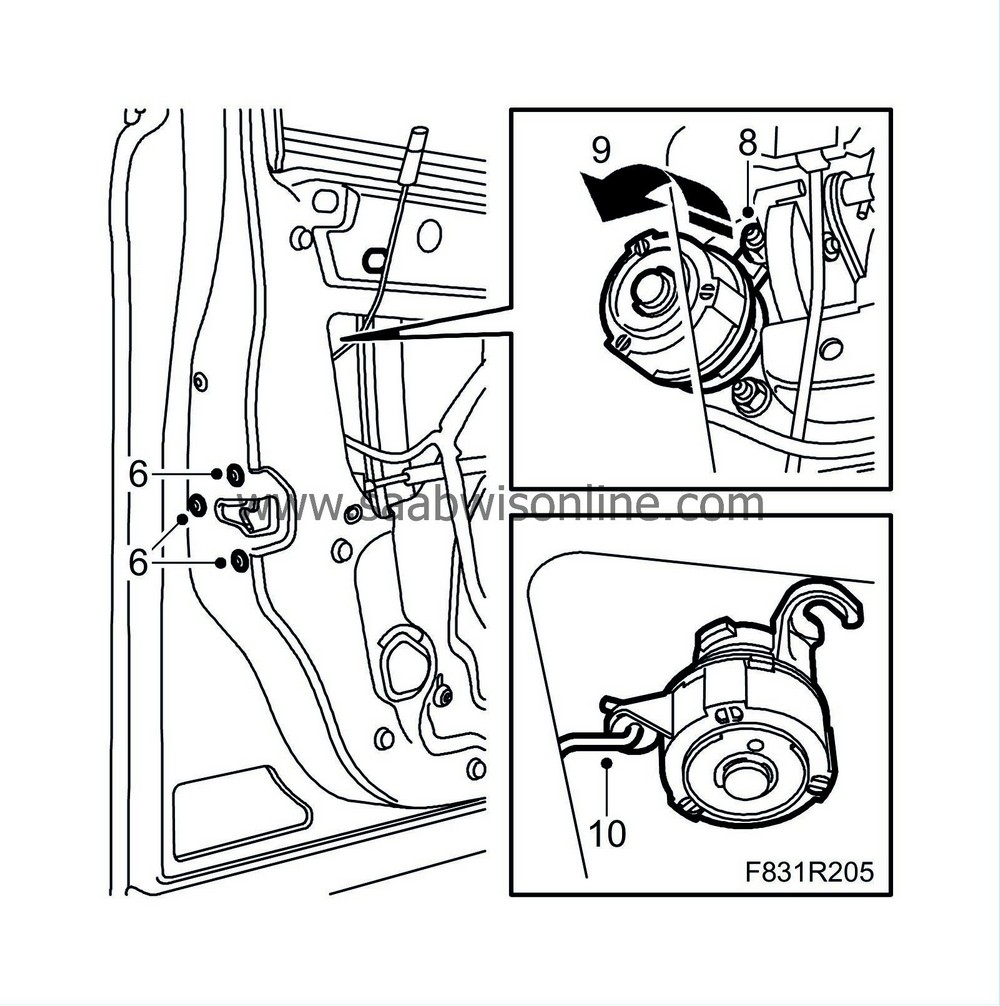
| 6. |
Cars with guard
: Remove the bolts on the lock unit.
|
|
| 7. |
Cars with guard
: Remove the guard by coaxing it out.
|
|
| 8. |
Undo the upper rear nut to the handle.
|
|
| 9. |
Turn the lock cylinder anticlockwise and pull out the cylinder from the handle.
|
|
| 10. |
Unhook the lock cylinder from the lock rod.
|
|
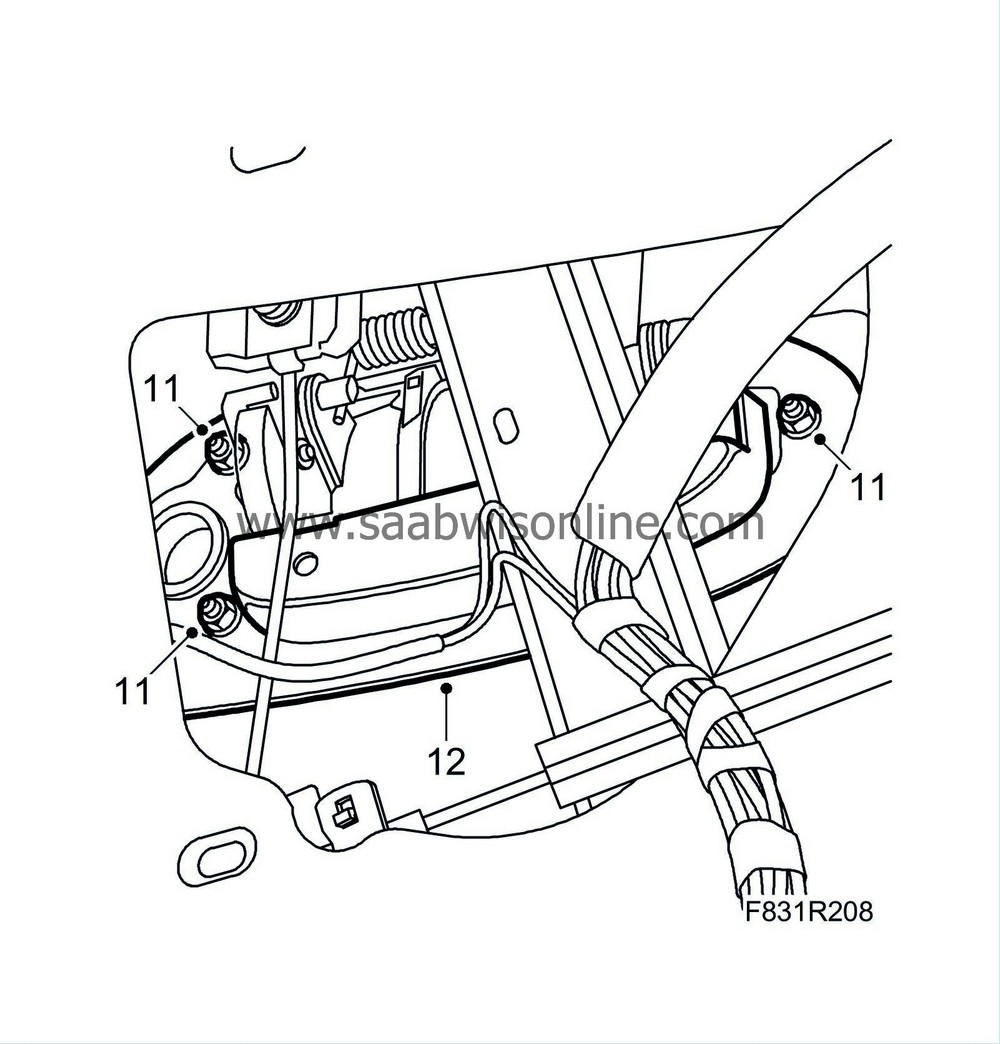
| 11. |
Remove the handle's nuts.
|
|
| 12. |
Remove the reinforcement plate.
|
|
| 13. |
Lift out the handle by:
|
|
| 13.A. |
Pull out the lower edge of the handle so that the studs release.
|
| 13.B. |
Pull downwards to get out the handle counterweight.
|
| 13.C. |
Now lift upwards to get the handle's rod out through the hole.

|
| To fit |
| 1. |
Check the handle's gasket so that it is in one piece and located correctly.
|
|
| 2. |
Fit the handle by:
|
|
| 2.A. |
Insert the handle's rod in the door.
|
| 2.B. |
Angle in the handle's counterweight.
|
| 2.C. |
Angle in the handle's lower edge and insert the studs in the holes.

|
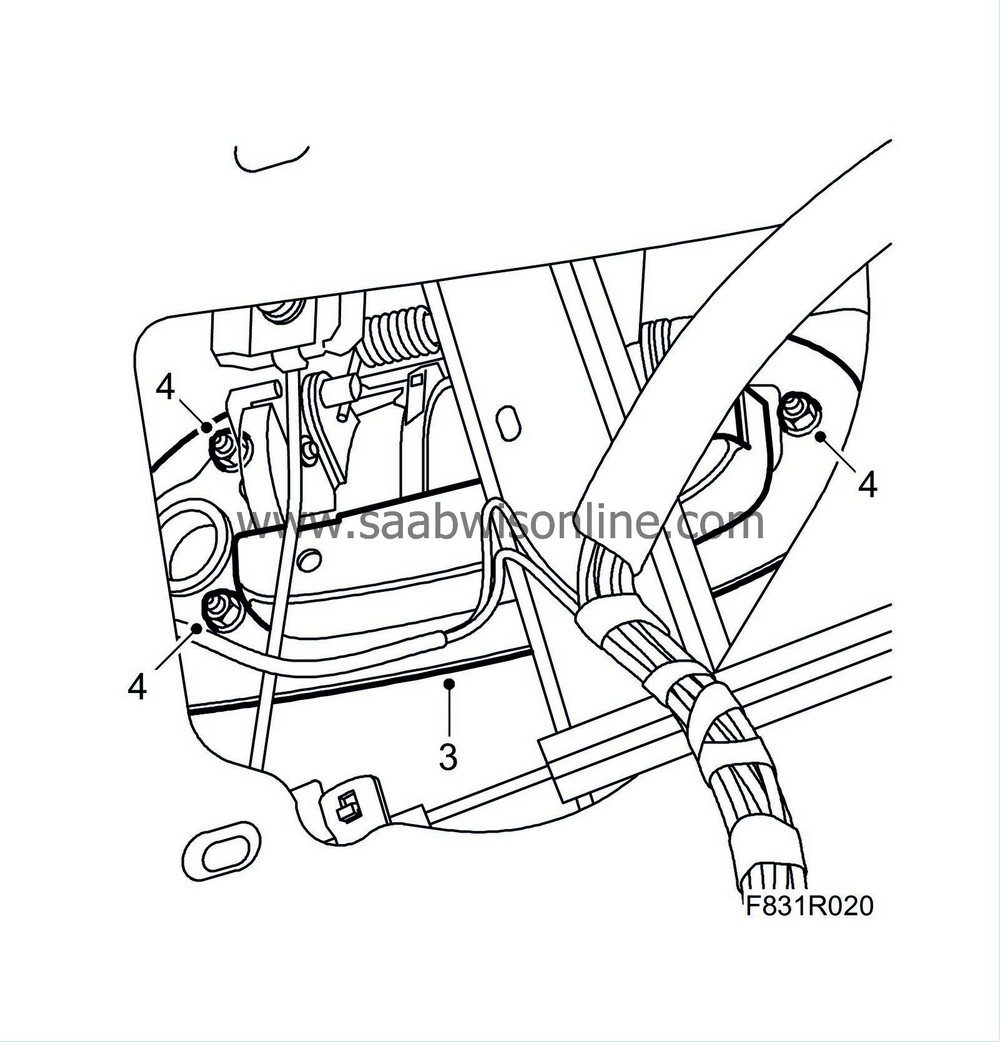
| 3. |
Fit the reinforcement plate.
|
|
| 4. |
Fit the handle nuts. Tighten the two lower nuts and screw on the upper one just a few turns.
|
|
| 5. |
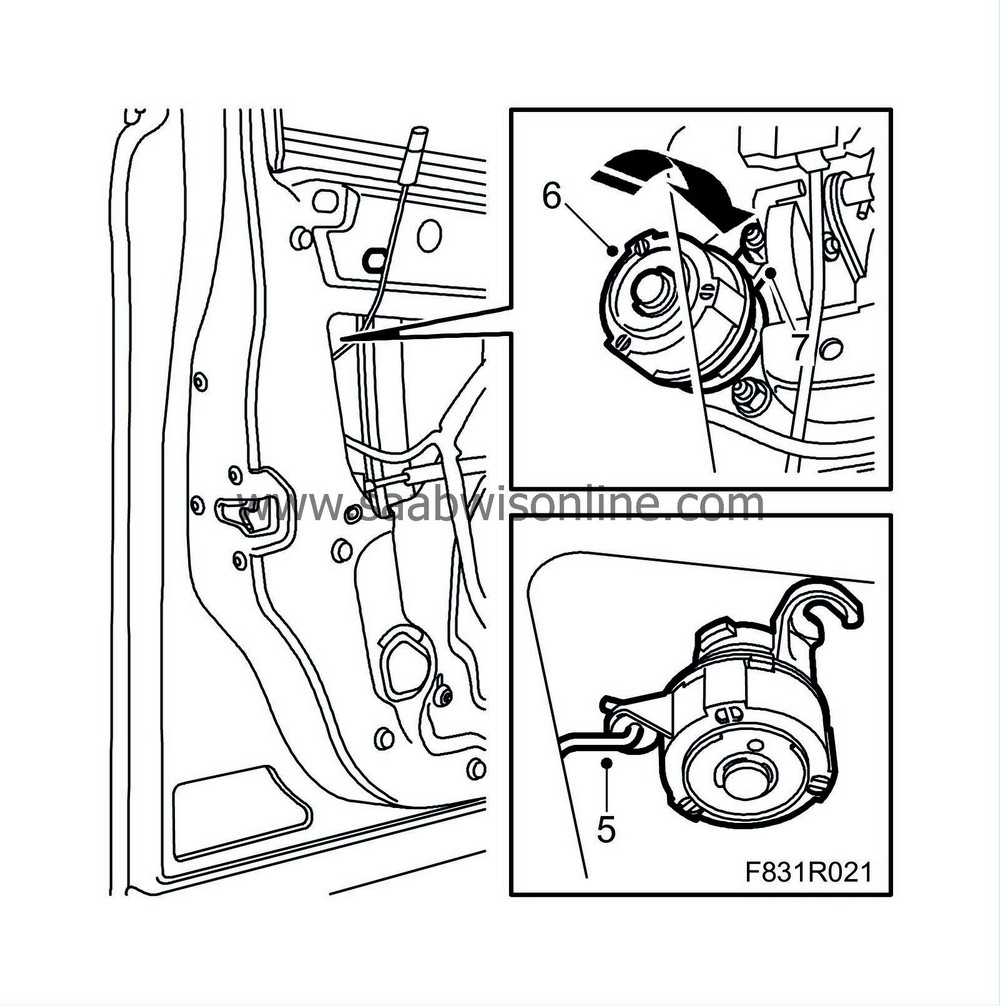
Hook the lock cylinder on the rod.
|
|
| 6. |
Fit the lock cylinder by pushing the lock cylinder and turning it clockwise.
|
|
| 7. |
Tighten the rear upper nut on the handle and lock cylinder.
|
|
| 9. |
Cars with guard
: Insert the lock unit bolts and the guard bolt.
|
|
| 10. |
Cars with guard
: Tighten the bolts.
|
|
| 11. |
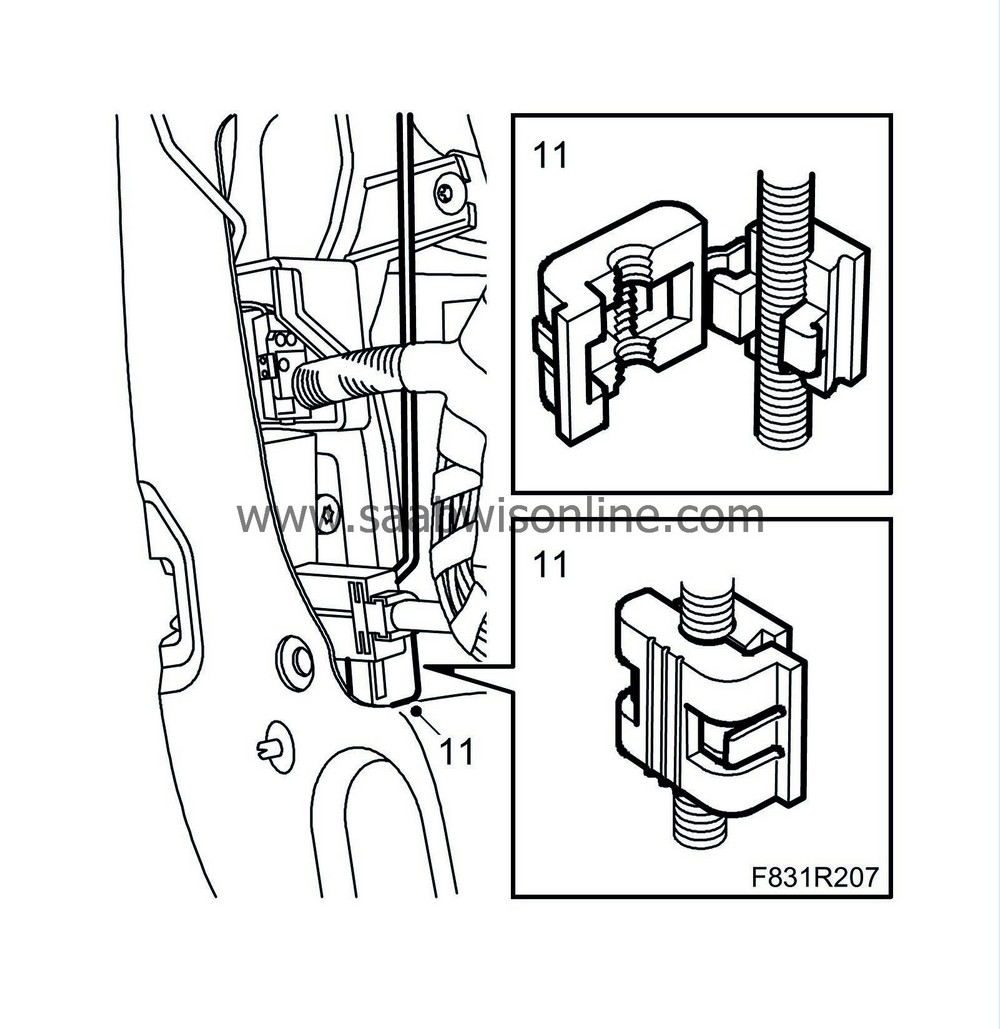
Fit the rod in the clip. Close the lock cover to the clip.
|
|
| 12. |
Check the function of the handle and lock.
|
|
| 13. |
Fit the water barrier and
Front door trim, 4D
.
Cars with pinch protection: Perform Programming of the pinch protection. |
|


