Key code
| Key code |
| General |
The key code is stored in the Column Integration Module (CIM), Engine Control Module (ECM) and in the key. Key code information consists of two separate components:
| • |
Master key code
|
|
| • |
Individual key code.
|
|
Control module in transport mode
A control module in transport mode is a new unit that has not been programmed previously.
"Added" and "removed" control module
A used control module has previously been "added" and then "removed" from the car using Tech2.
"Remove":
Before a control module is removed, Tech2 must be used to divorce the module from the car. Go in under the "All" menu and select the control module under "Add/Remove". Then select "Remove" and follow the instructions.
"Add":
After fitting or SPS programming, Tech2 is to be used to marry the control module to the car. Go in under the "All" menu and select the control module under "Add/Remove". Then select "Add" and follow the instructions.
| Key code stored in CIM |
New CIM (in transport mode)
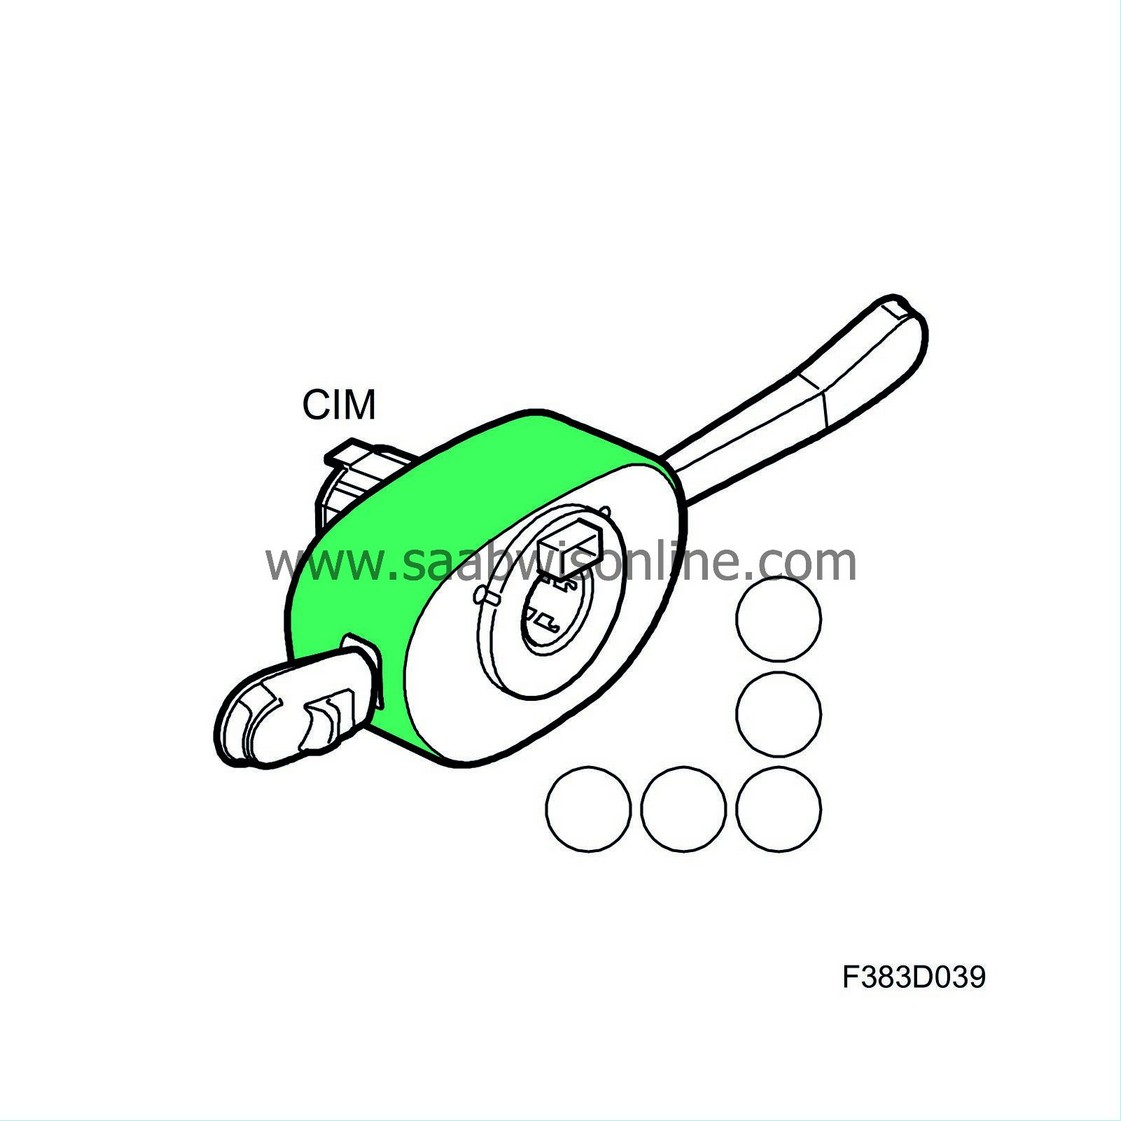
Figure 1: CIM with a master key code, illustrated here in green. The empty circles illustrate the five "empty" individual key codes.
| • |
A master key code, which can be changed
once
during the first "Add" process.
|
|
| • |
Five "empty" individual key codes.
|
|
Used CIM (previously "added" or "removed")
Figure 2: This is the same CIM as in figure 1, but it has now been "added" to a car. The circles illustrate three programmed individual key codes and two "empty" individual key codes.
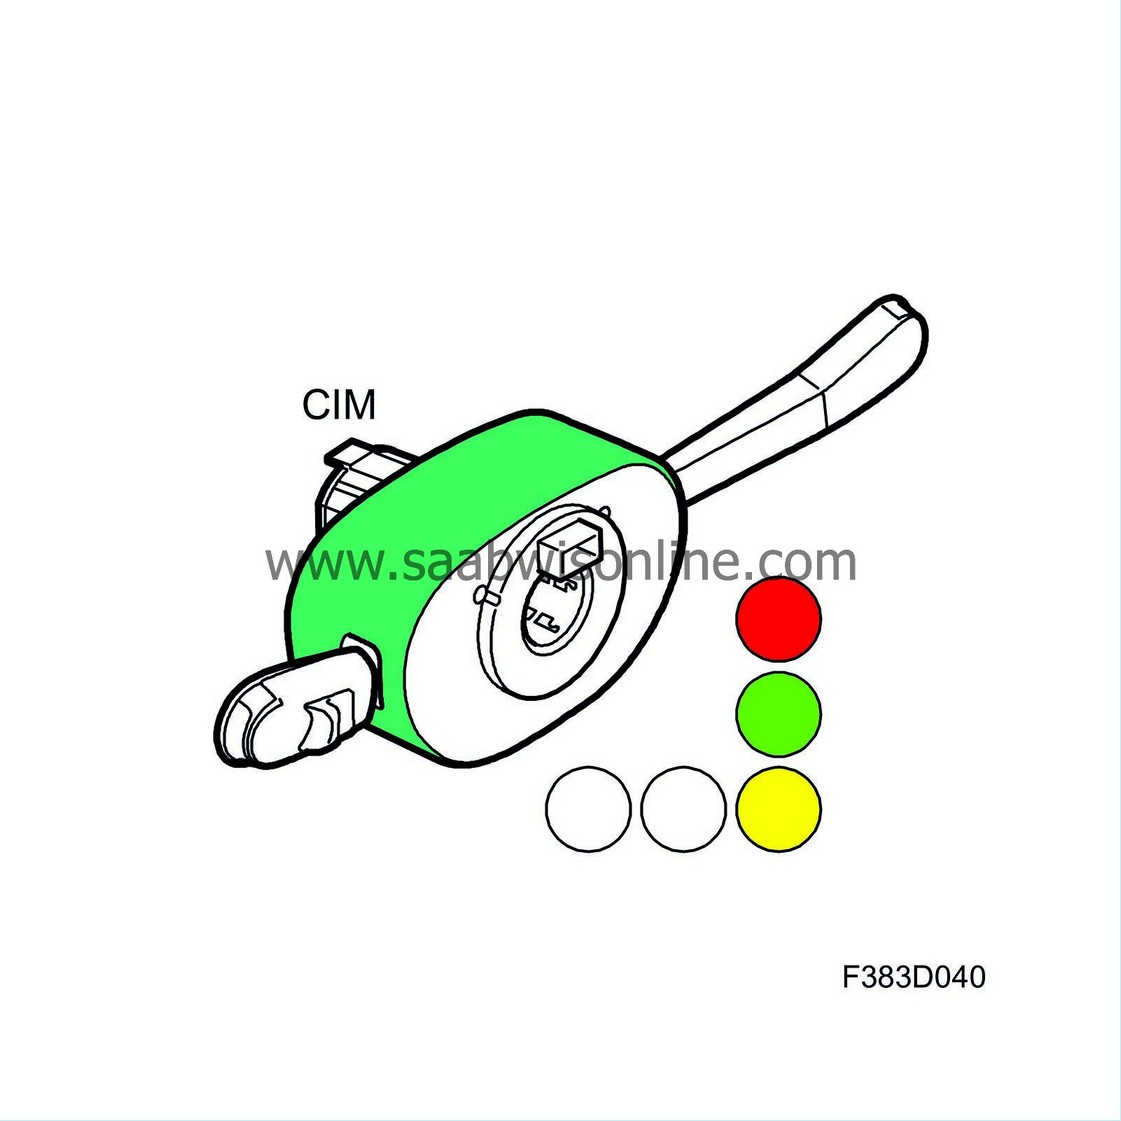
A used CIM (CIM previously "added" to or "removed" from the car) contains the following:
| • |
A master key code which
cannot
be changed
|
|
| • |
A maximum of five activated individual key codes.
|
|
| Key code stored in ECM |
New ECM (in transport mode)
Figure 3: ECM with an "empty" (unprogrammed) master key code.
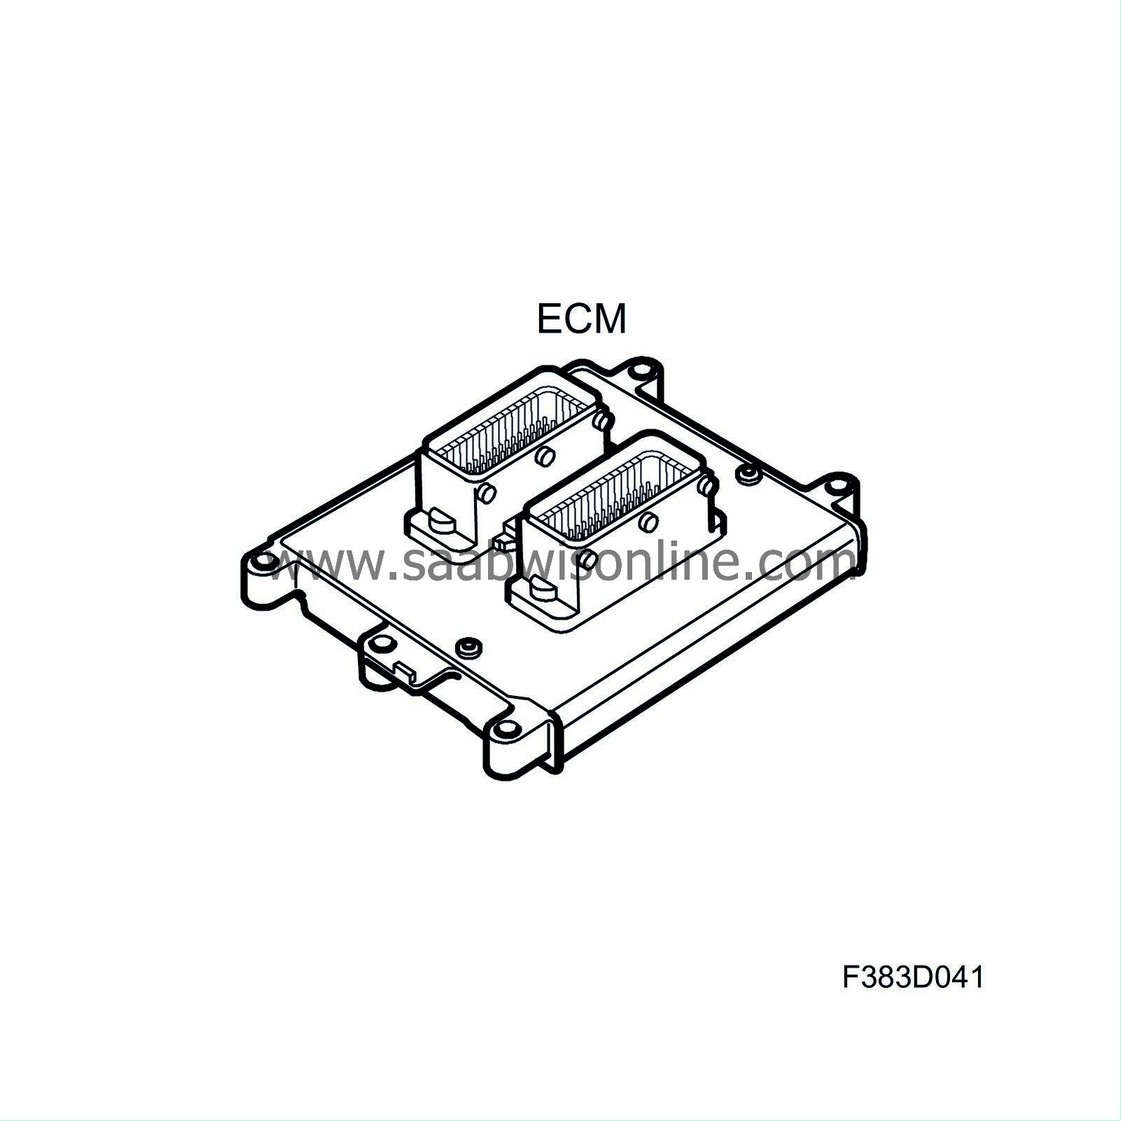
An ECM in transport mode (new ECM that has not been "added" or "removed") contains the following:
| • |
An
empty
master key code
|
|
| • |
No individual key codes.
|
|
Used ECM (previously "added" or "removed")
Figure 4: ECM with a master key code that was copied from the CIM unit in figures 1 and 2, illustrated here in green.
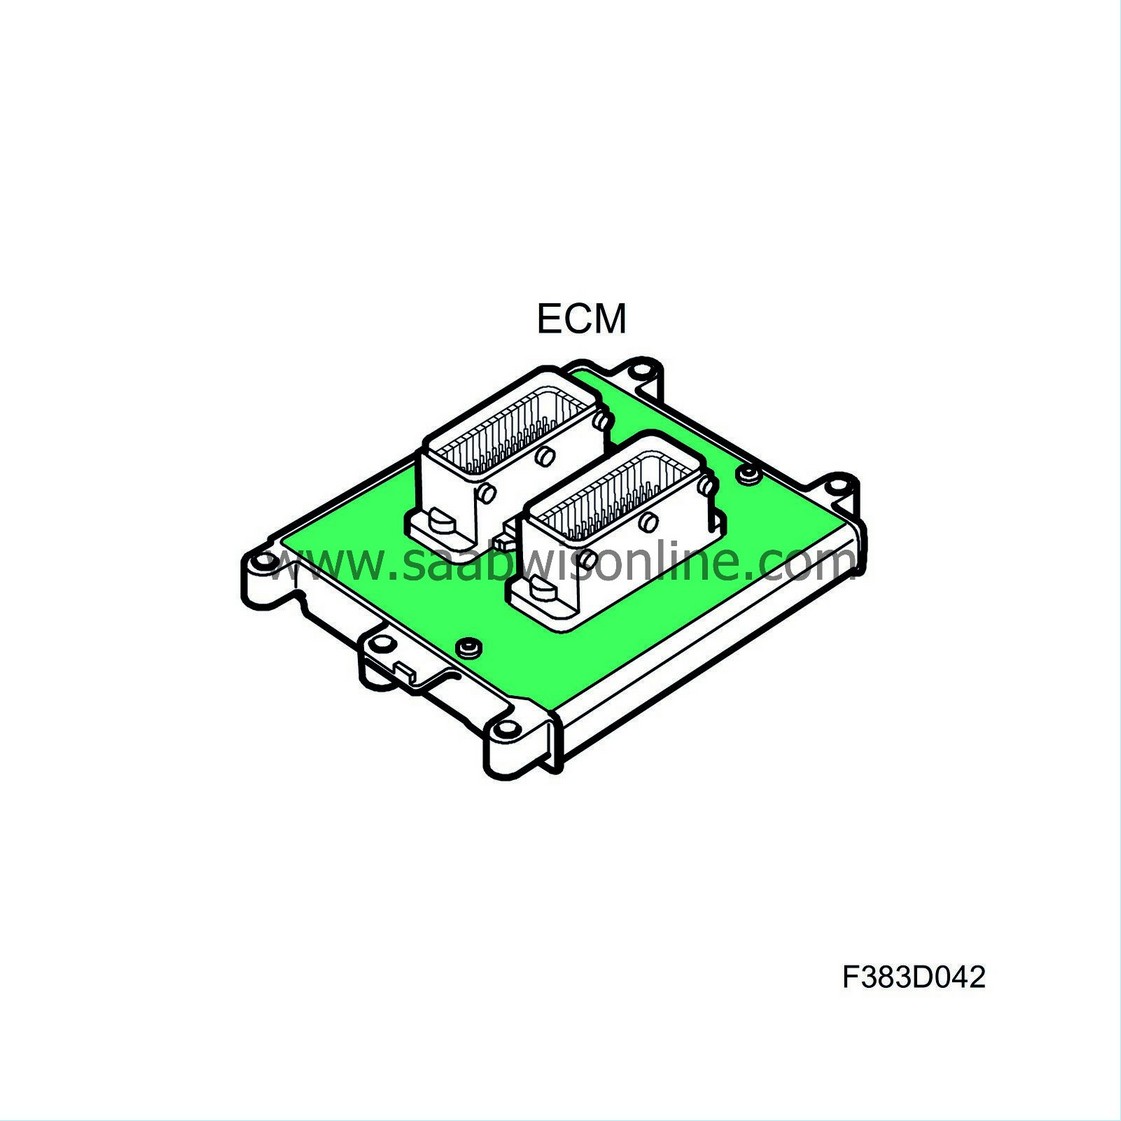
A used ECM (previously "added" or "removed") contains the following:
| • |
A "copy" of the master key code in CIM, can be overwritten by an "Add" CIM or ECM
|
|
| • |
No individual key codes.
|
|
| Key code stored in the key |
New key (in transport mode)
Figure 5: Key with an "empty" (unprogrammed) master key code. The red colour illustrates the key's individual key code.
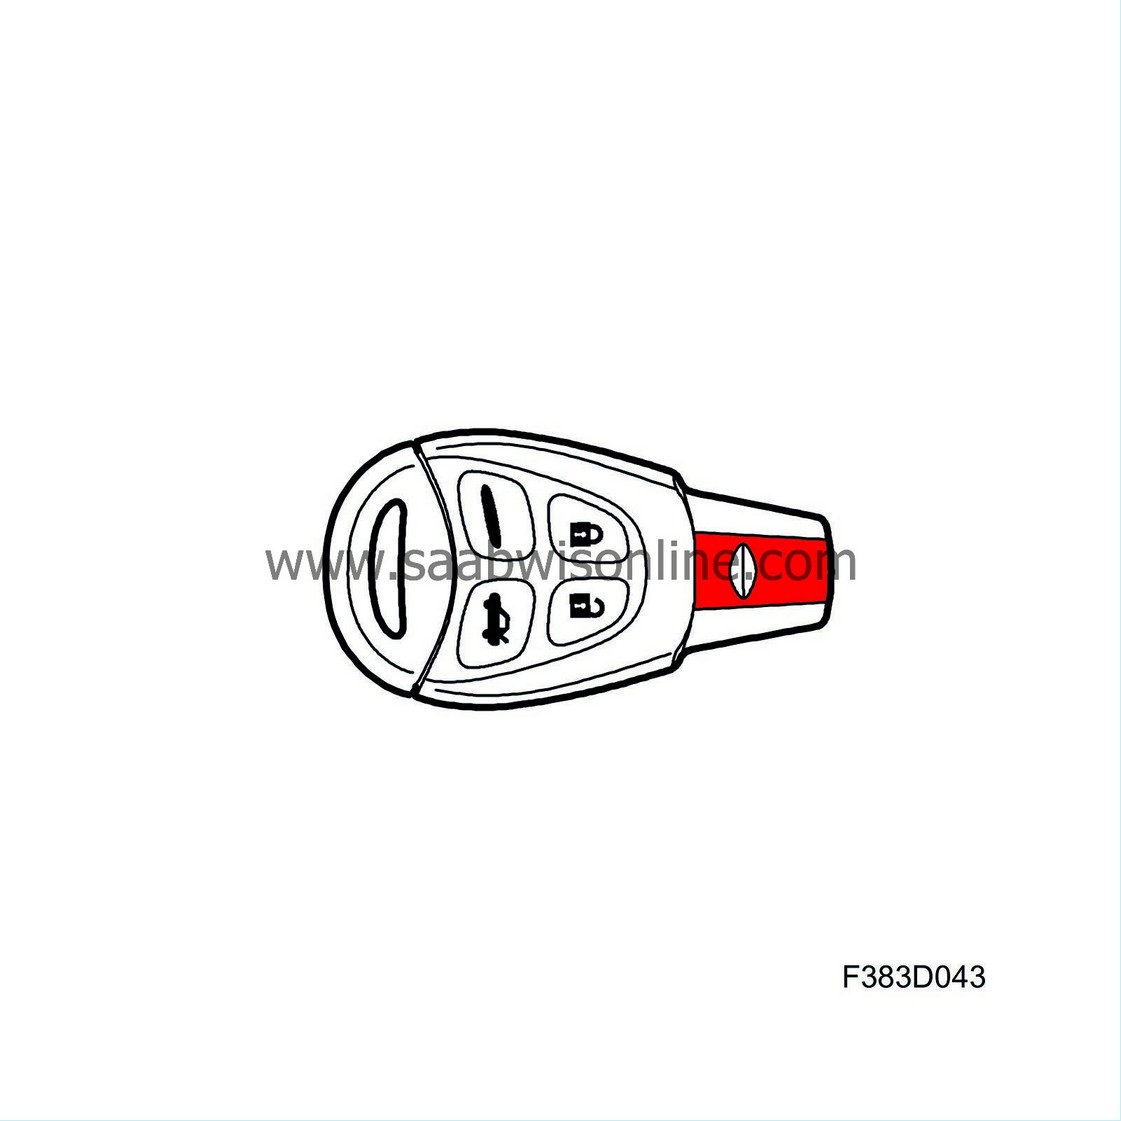
A key in transport mode (key not previously "added" or "removed") contains the following:
| • |
An
empty
master key code, which can be programmed
once
|
|
| • |
An individual key code, which
cannot
be changed
|
|
Used key (previously "added")
Figure 6: Key with a master key code that was copied from the CIM unit in figures 1 and 2, illustrated here in green. The key's individual key code is illustrated in red.
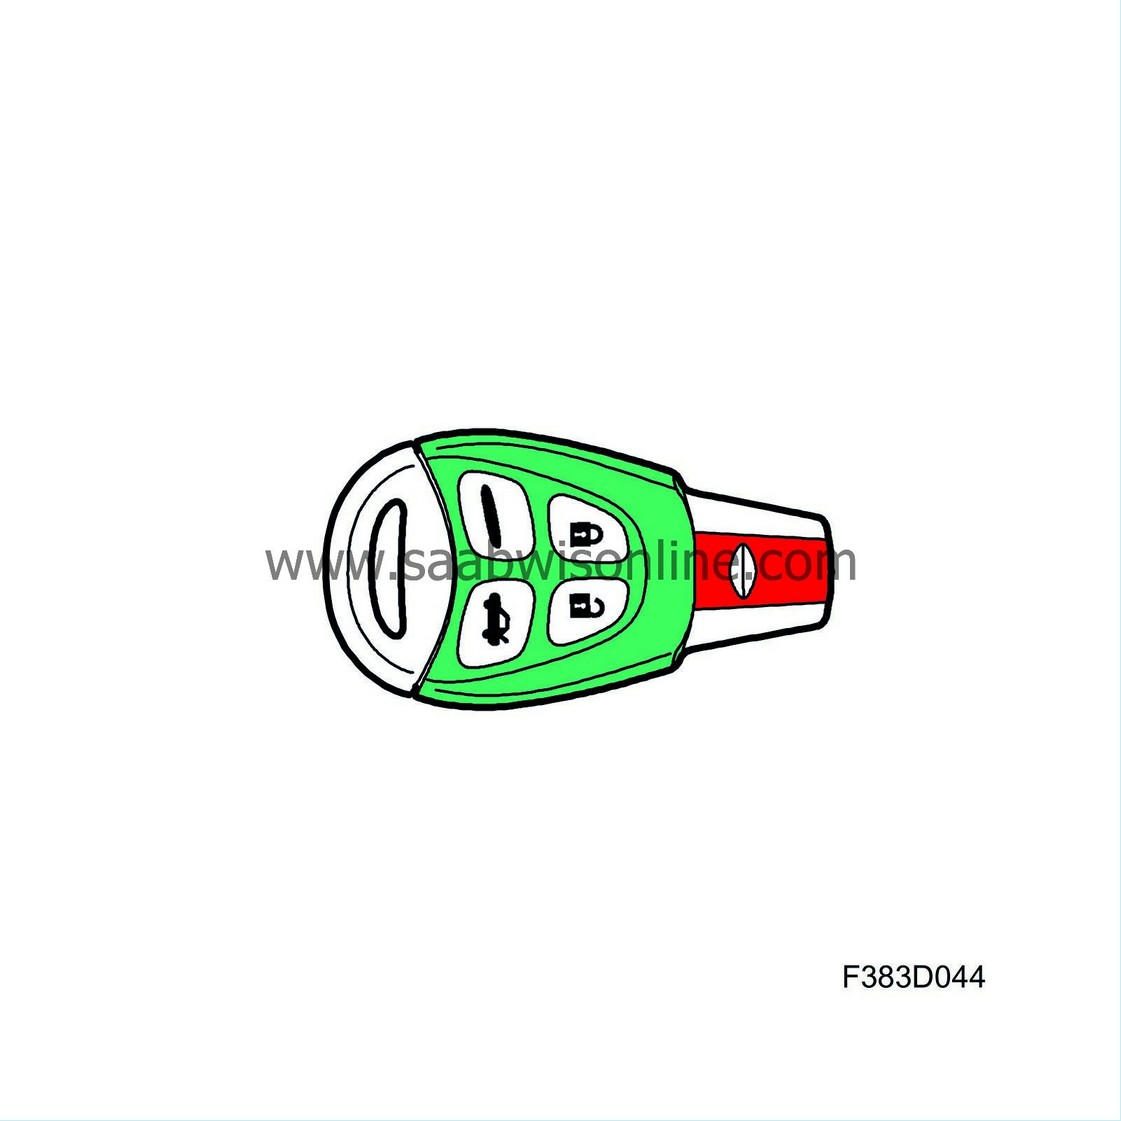
A used key contains the following:
| • |
A master key code which
cannot
be changed
|
|
| • |
An individual key code, which
cannot
be changed.
|
|
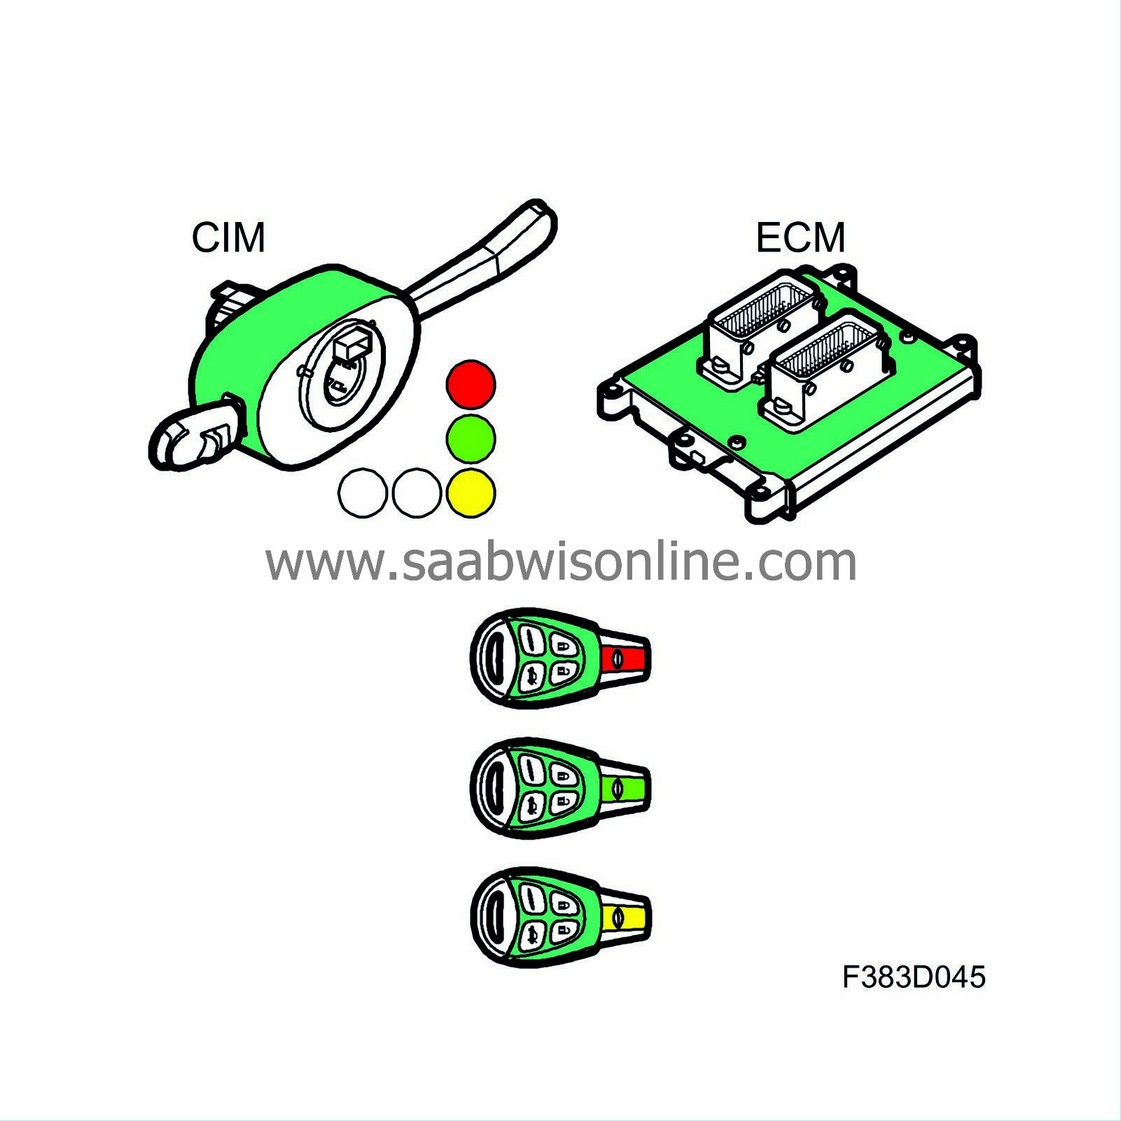
| Example on an operational car |
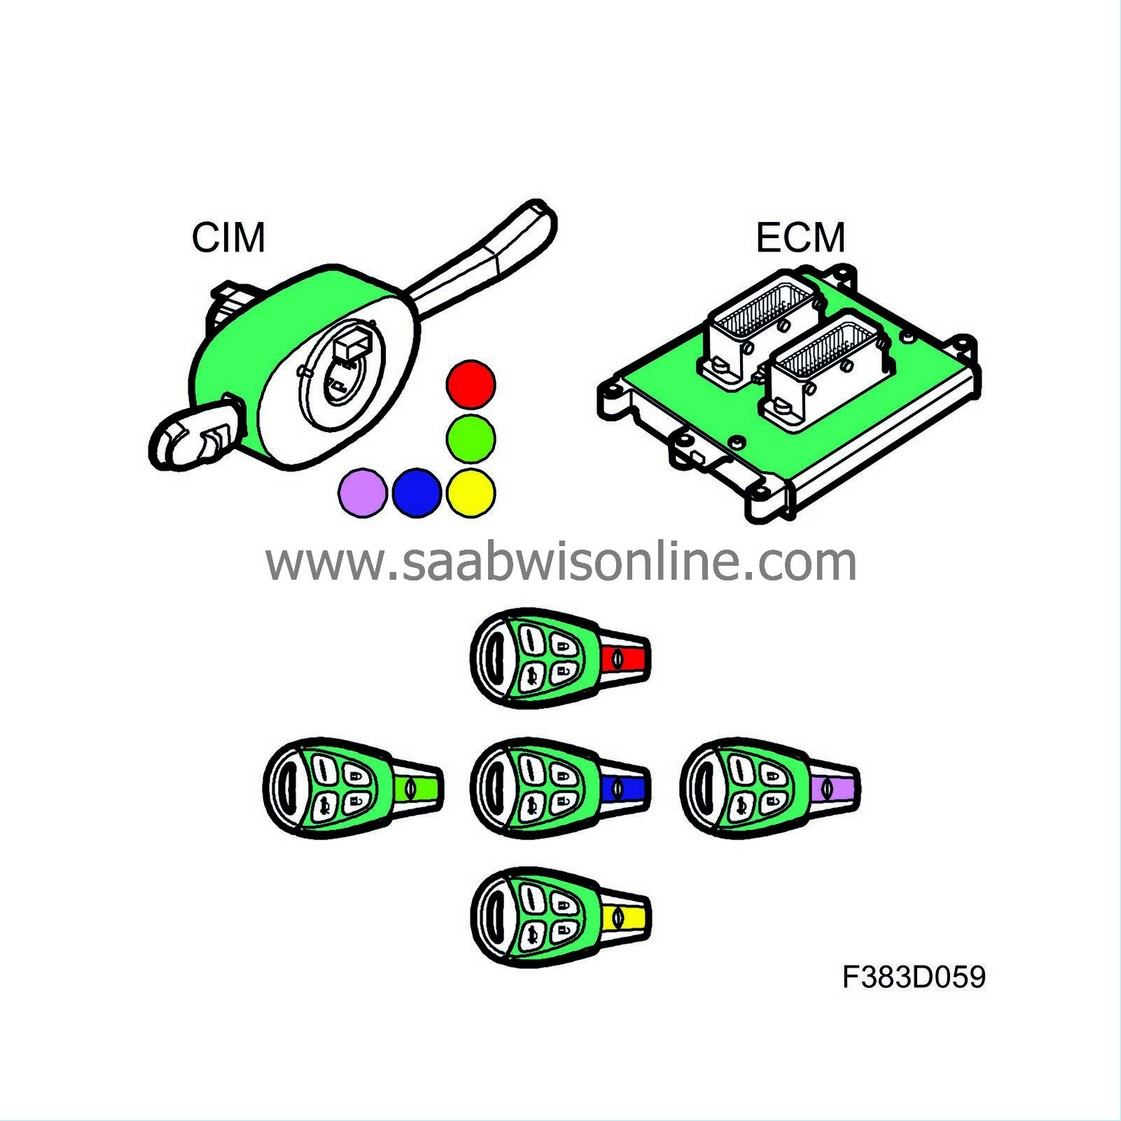
Figure 7: CIM, ECM and the keys all have the same master key code, illustrated here in green. The different individual key codes are illustrated in red, light green and yellow.
| Replacing ECM |
Before “Add” ECM:
Figure 8: ECM with a previously programmed master key code, illustrated here in orange.
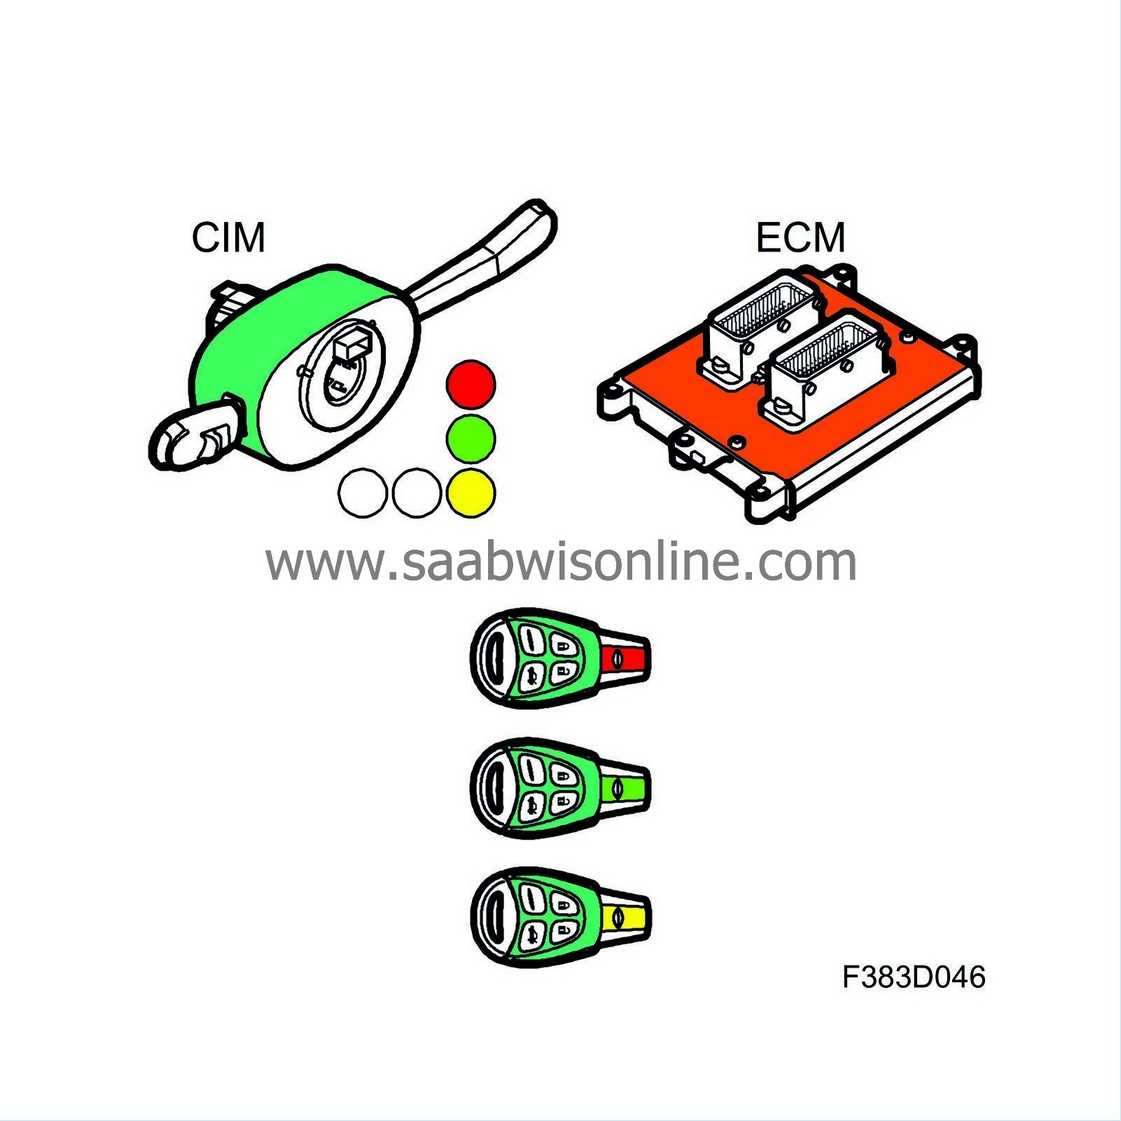
During "Add" ECM:
It does not matter if the ECM unit is new (in transport mode) or used (previously "added" or "removed").
| • |
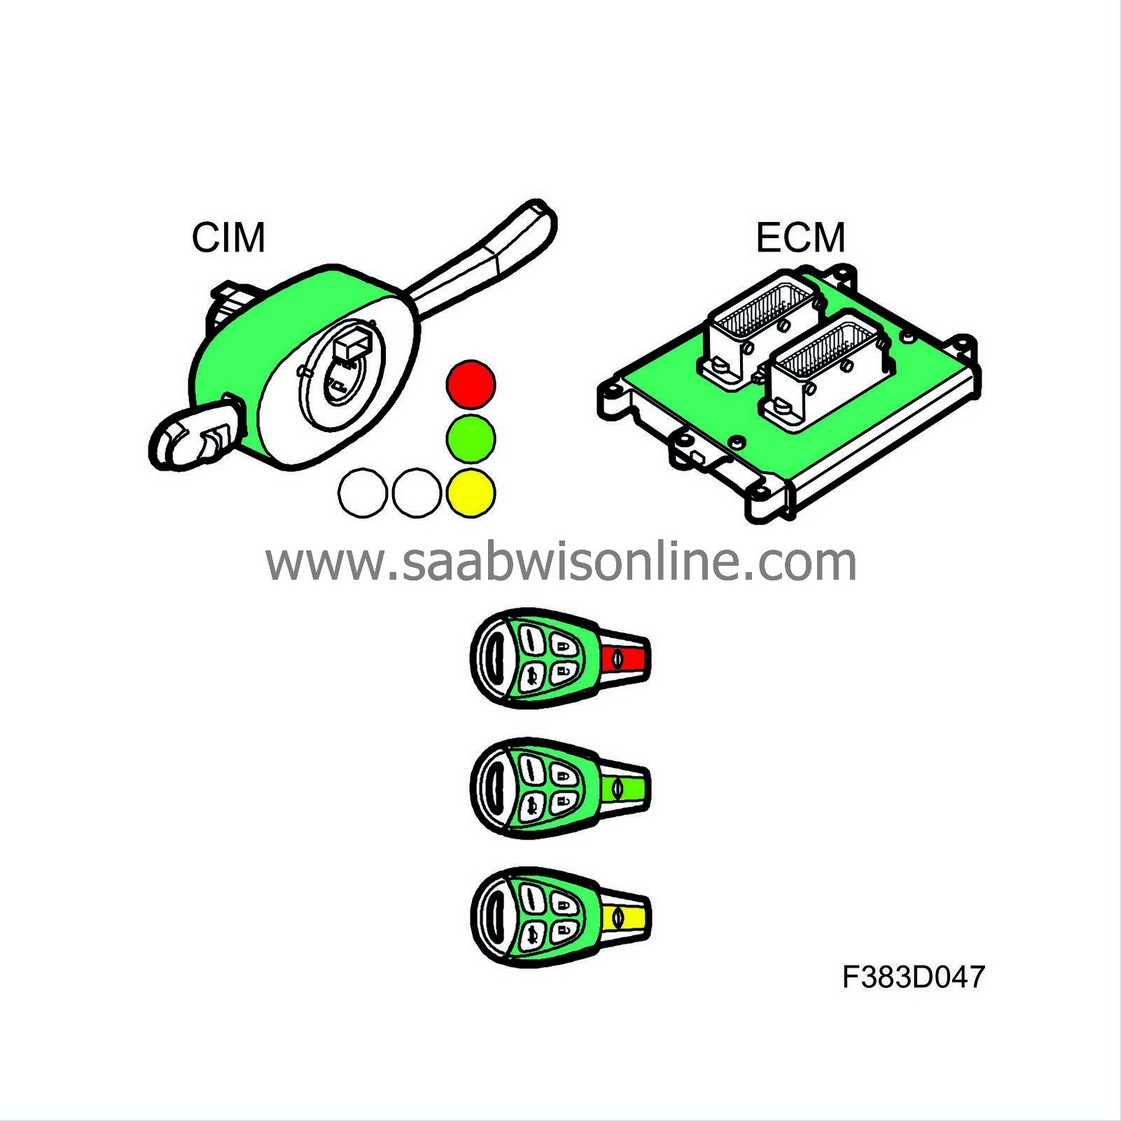
When "Add" ECM is carried out using Tech2, the master key code is copied from CIM to ECM.
|
|
| • |
The keys that worked previously will still be functional.
|
|
After “Add” ECM:
Figure 9: The illustration shows the same ECM as in figure 8, but with the master key code copied from CIM, illustrated here in green.
| Replacing CIM with a new CIM |
When using previously used keys (first choice)
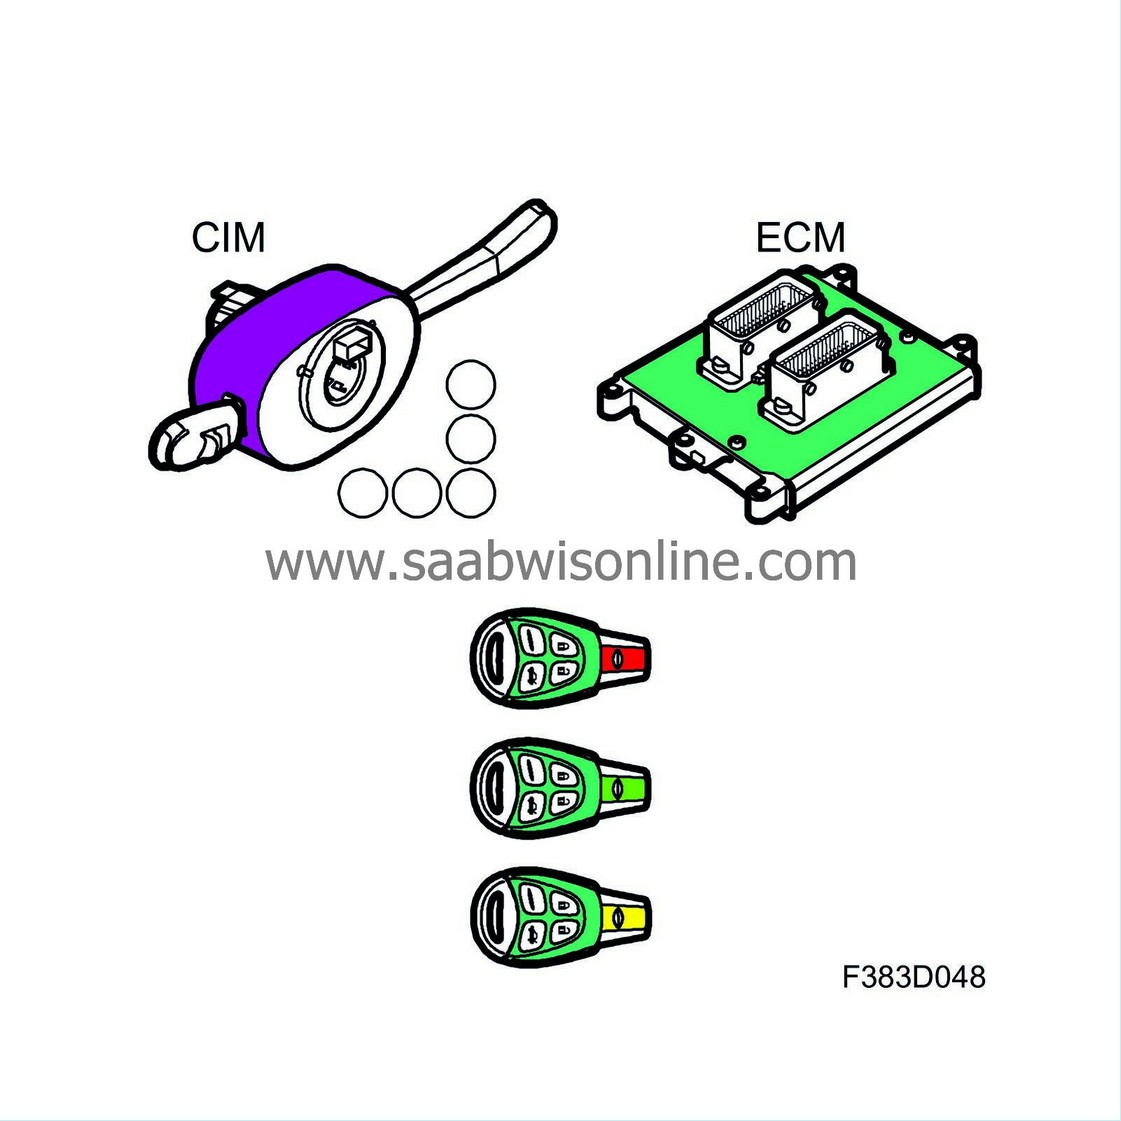
Before “Add” CIM:
Figure 10: New CIM with a master key code, illustrated here in purple.
During "Add" CIM:
| • |
Answer "Yes" to the question regarding keeping the existing old keys. The master key code is then copied from ECM to CIM.
|
|
| • |
The keys are then programmed automatically.
|
|
| • |
Key programming can be used for either the keys that were used previously or new keys.
|
|
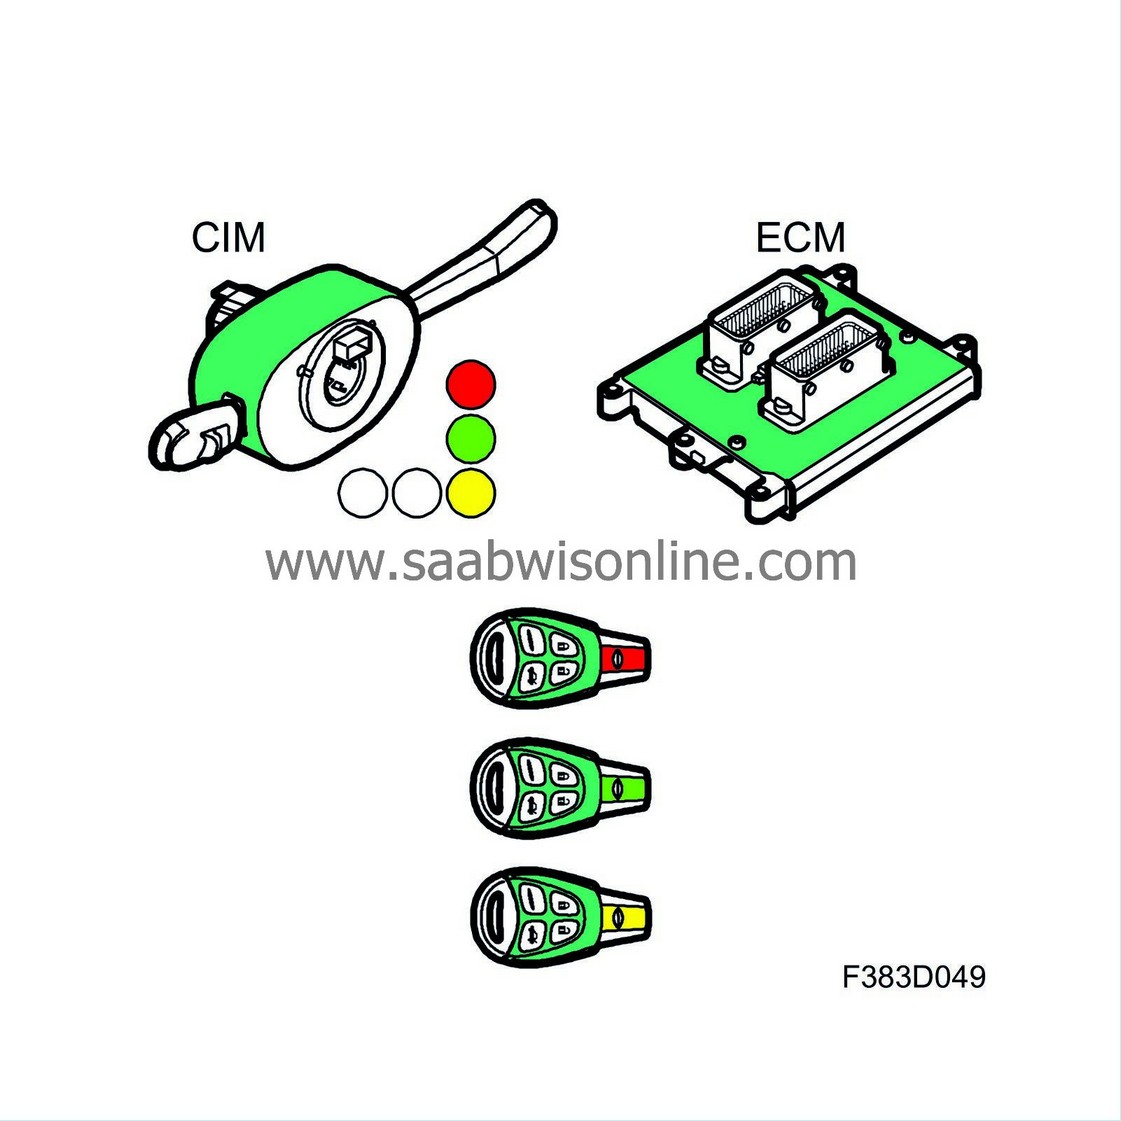
After “Add” CIM:
Figure 11: The illustration shows the same CIM as in figure 10, but with the master key code copied from ECM. The individual key codes have been copied from the keys to CIM.
When using new keys (second choice)
Before “Add” CIM:
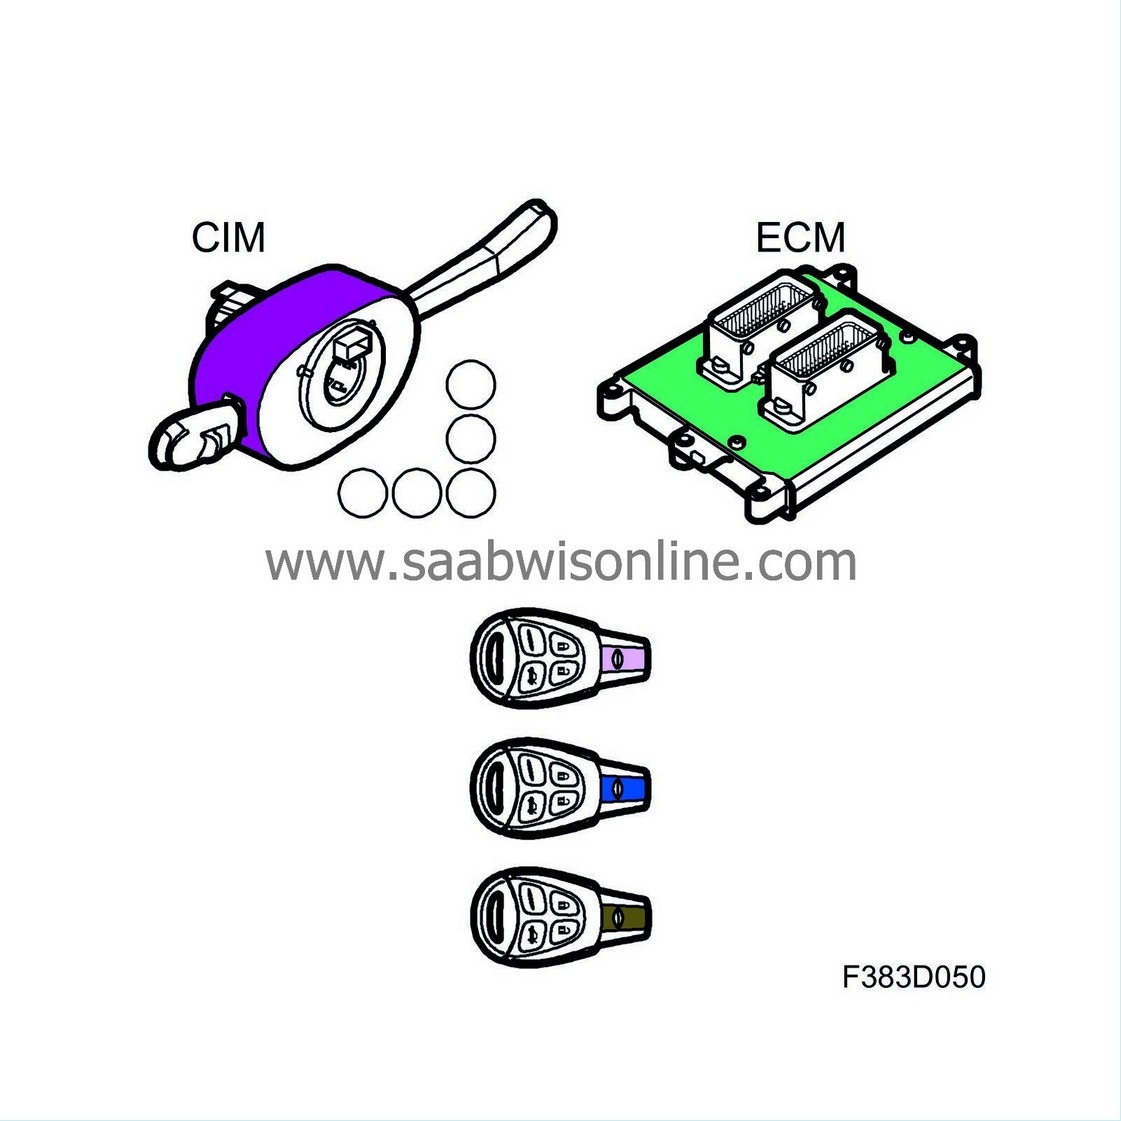
Figure 12: New CIM with a master key code, illustrated here in purple. The keys are new and do not have a master key code, but have all of the different individual key codes. ECM has a previously programmed master key code, illustrated here in green.
During "Add" CIM:
| • |
Answer "No" to the question regarding keeping the existing old keys. The master key code is then copied from CIM to ECM.
|
|
| • |
The keys are then programmed automatically.
|
|
| • |
The keys that worked previously will no longer be functional.
|
|
| • |
New keys must be used.
|
|
After “Add” CIM:
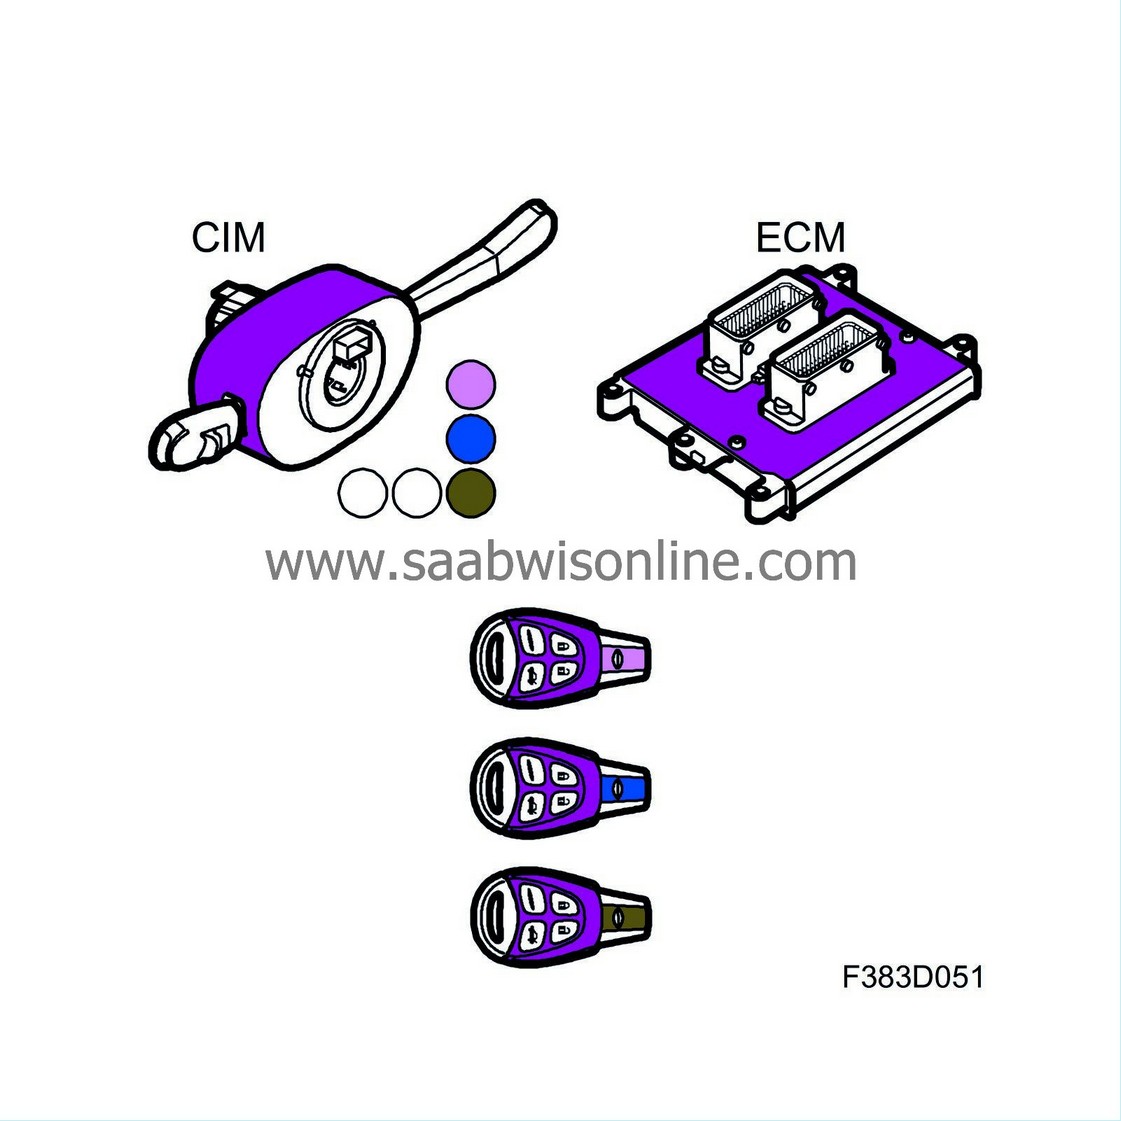
Figure 13: The illustration shows the same CIM, ECM and keys as in figure 12, but with the master key code copied from CIM to ECM and the keys, illustrated here in purple. The keys' individual key code has also been copied to CIM.
| Replacing CIM with a used CIM |
Before “Add” CIM:
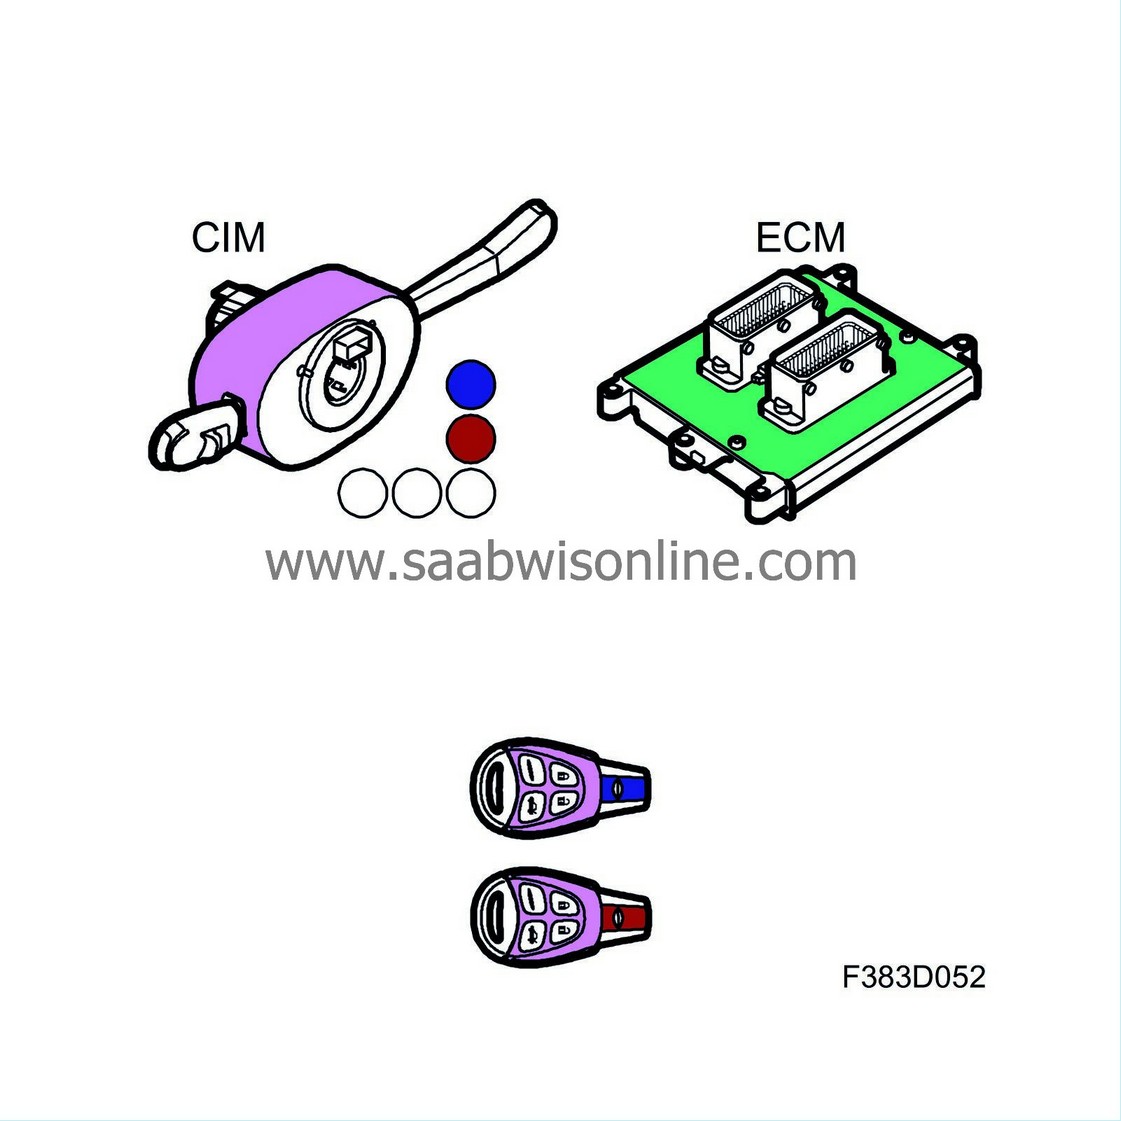
Figure 14: A used CIM with a master key code, illustrated here in pink. The keys are used and therefore also have the pink master key code. ECM has a previously programmed master key code, illustrated here in green.
During "Add" CIM:
At least one key that "belongs" to the fitted CIM must be used.
| • |
When "Add" CIM is carried out using Tech2, the master key code is copied from CIM to ECM. This means that the "old" key code copy in ECM is overwritten.
|
|
| • |
When programming the keys, Tech2 asks if you wish to skip key programming.
|
|
| - |
Answer "Yes" to skip key programming and keep the existing old keys that belong to the CIM that was fitted.
|
| - |
Answer "No" to reprogram old and new keys.
|
| • |
The keys that worked previously will no longer be functional. They were previously "added" to the CIM unit that was removed.
|
|
| • |
The keys that belong to the fitted CIM unit must be used.
|
|
After “Add” CIM:
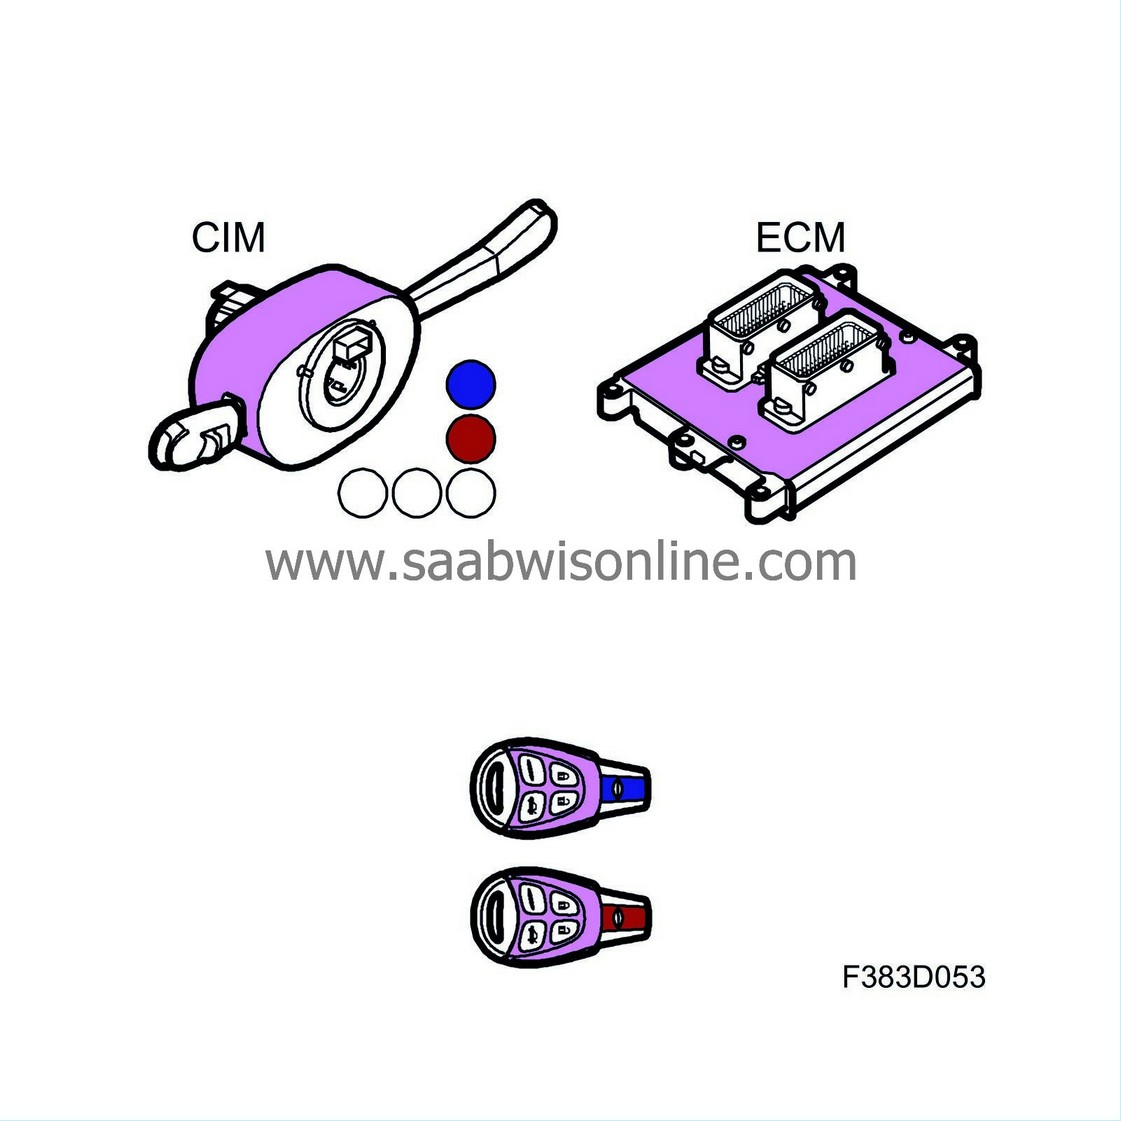
Figure 15: The illustration shows the same CIM and ECM as in figure 14, with the master key code copied from CIM to ECM.
| Replacing ECM and CIM with new units |
Before “Add” ECM and CIM:
Figure 16: New CIM with a master key code, illustrated here in purple. The keys are new and do not have a master key code, but have all of the different individual key codes. ECM has a previously programmed master key code, illustrated here in orange.
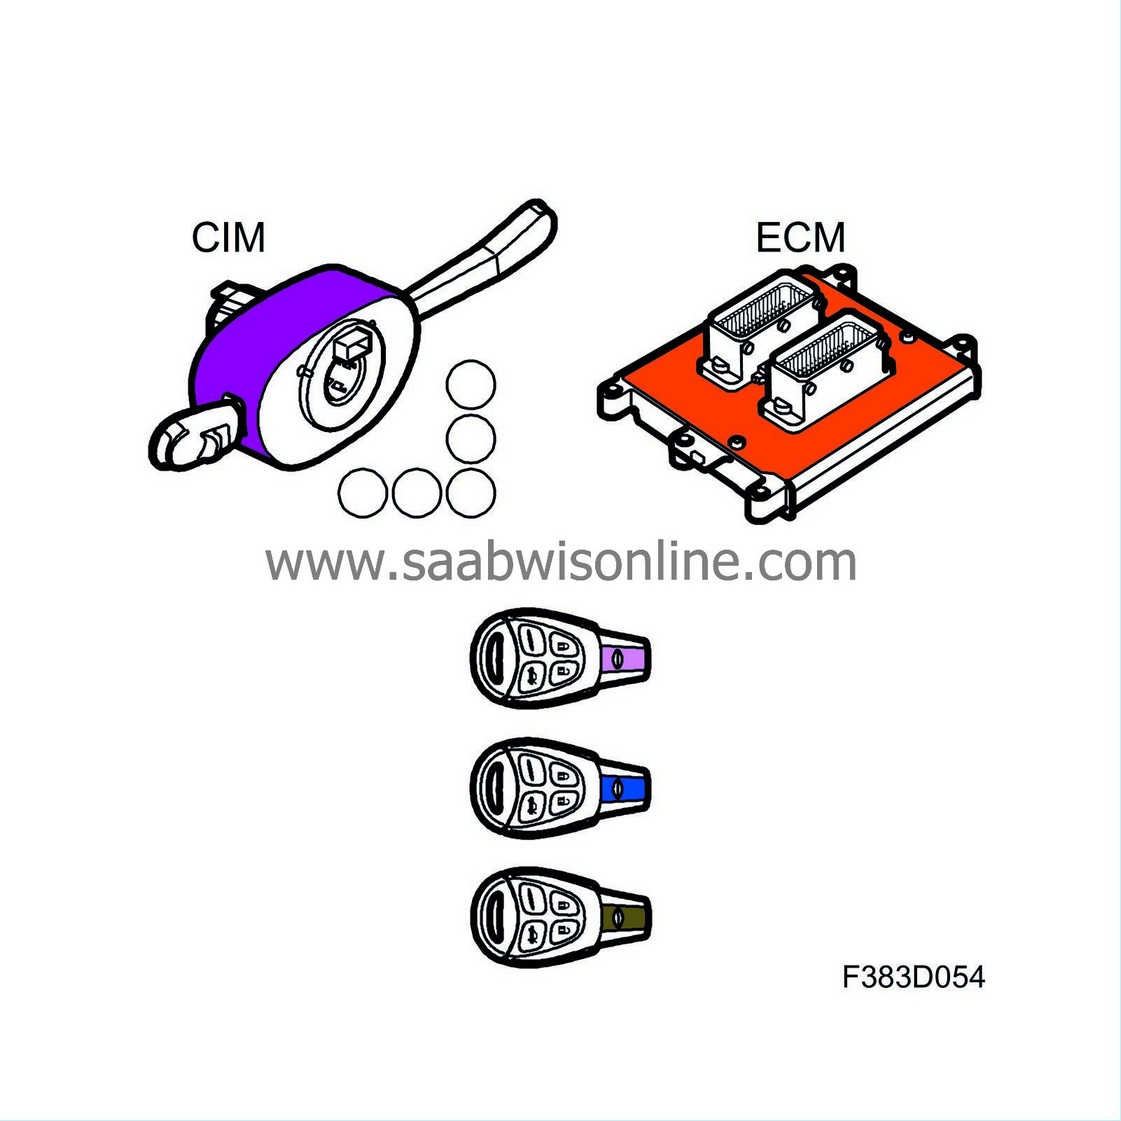
During "Add" CIM:
It does not matter if the ECM unit is new (in transport mode) or used (previously "added").
| • |
When programming the keys, Tech2 asks if you wish to keep the existing old keys.
|
|
| - |
Answer "No" to be able to program and add new keys.
|
| • |
The master key code is copied from CIM to ECM.
|
|
| • |
The keys are then programmed automatically.
|
|
| • |
The keys that worked previously will no longer be functional. They were previously "added" to the CIM unit that was removed.
|
|
| Note | ||
|
Carry out "Add" ECM after "Add" CIM has been carried out. |
After “Add” ECM and CIM:
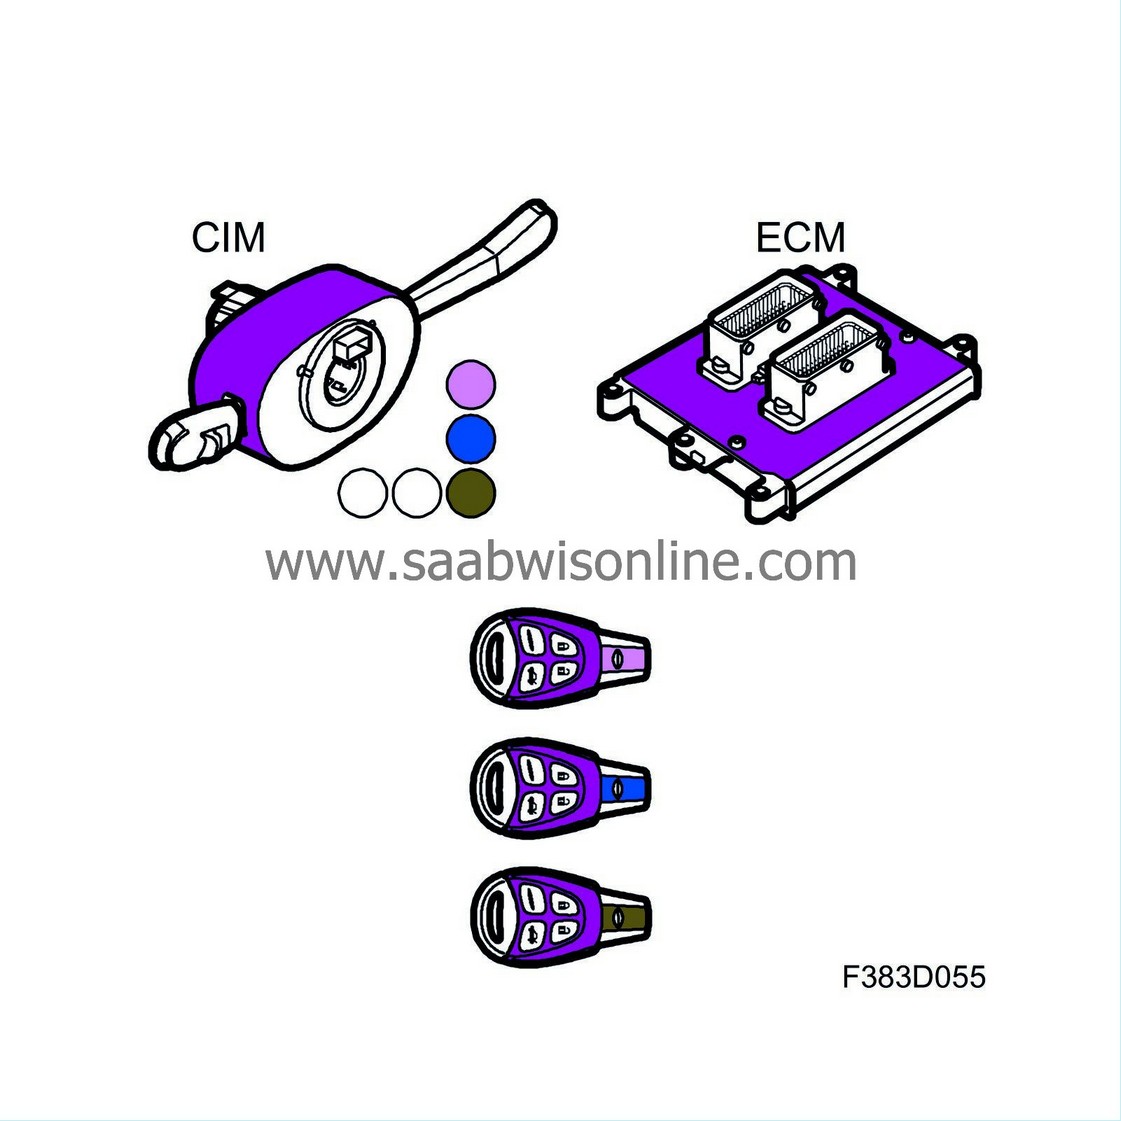
Figure 17: The illustration shows the same CIM, ECM and keys as in figure 16, but with the master key code copied from CIM to ECM and the keys, illustrated here in purple. The keys' individual key code has also been copied to CIM.
| Replacing ECM and CIM with used units |
Before “Add” ECM and CIM:
Figure 18: A used CIM with a master key code, illustrated here in pink. The keys are used and therefore also have the pink master key code. ECM has a previously programmed master key code, illustrated here in orange.
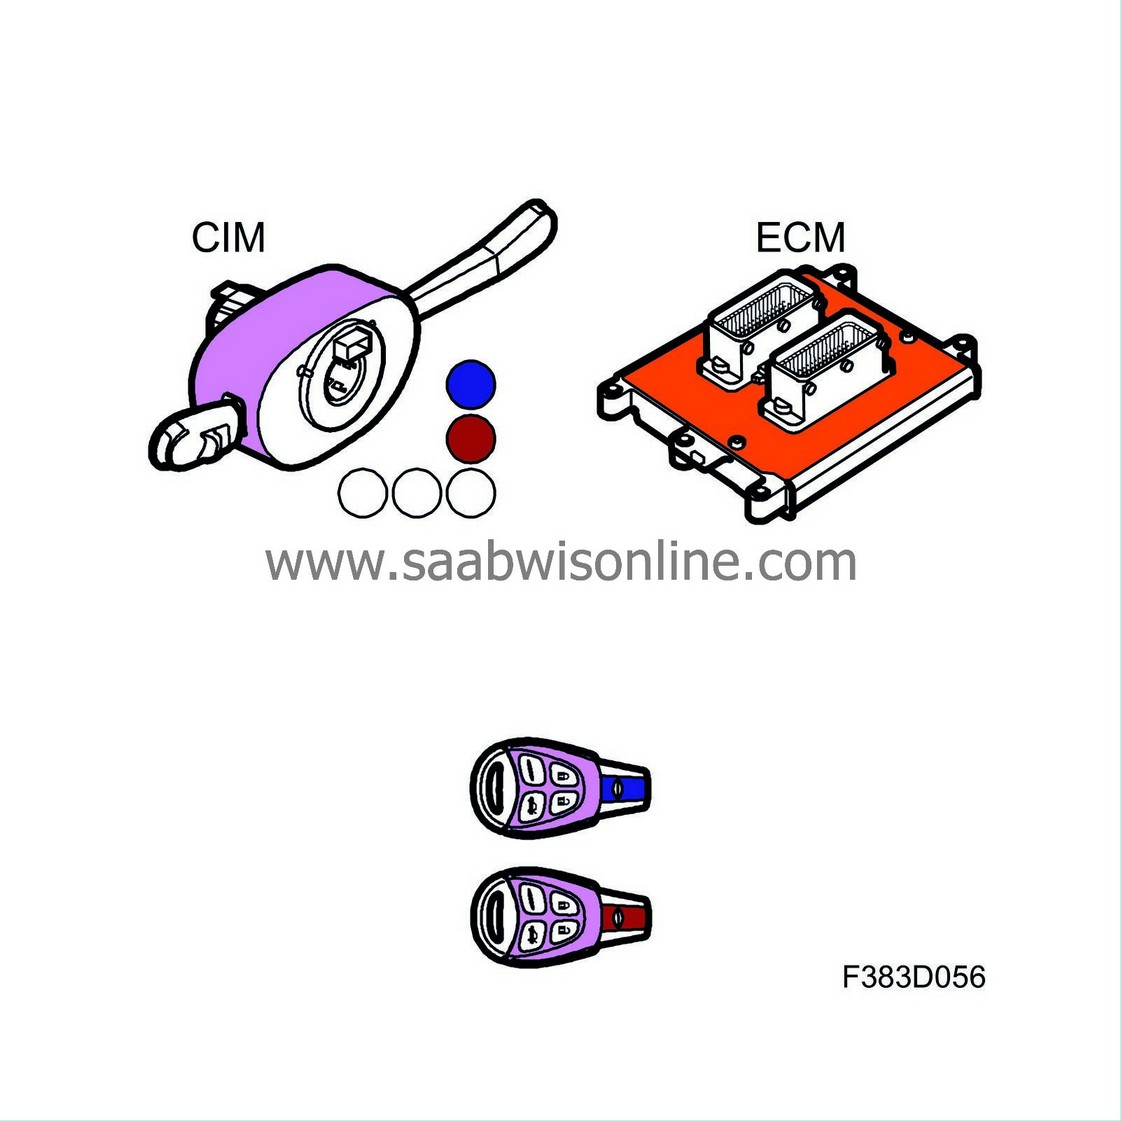
During "Add" CIM:
It does not matter if the ECM unit is new (in transport mode) or used (previously "added" or "removed").
At least one key that "belongs" to the fitted CIM must be used.
| • |
When "Add" CIM is carried out using Tech2, the master key code is copied from CIM to ECM.
|
|
| • |
When programming the keys, Tech2 asks if you wish to skip key programming.
|
|
| - |
Answer "Yes" to skip key programming and keep the existing old keys that belong to the CIM that was fitted.
|
| - |
Answer "No" to reprogram old and new keys.
|
| • |
The keys that worked previously will no longer be functional. They were previously "added" to the CIM unit that was removed.
|
|
| • |
The keys that belong to the fitted CIM unit must be used.
|
|
| Note | ||
|
Carry out "Add" ECM after "Add" CIM has been carried out. |
After “Add” ECM and CIM:
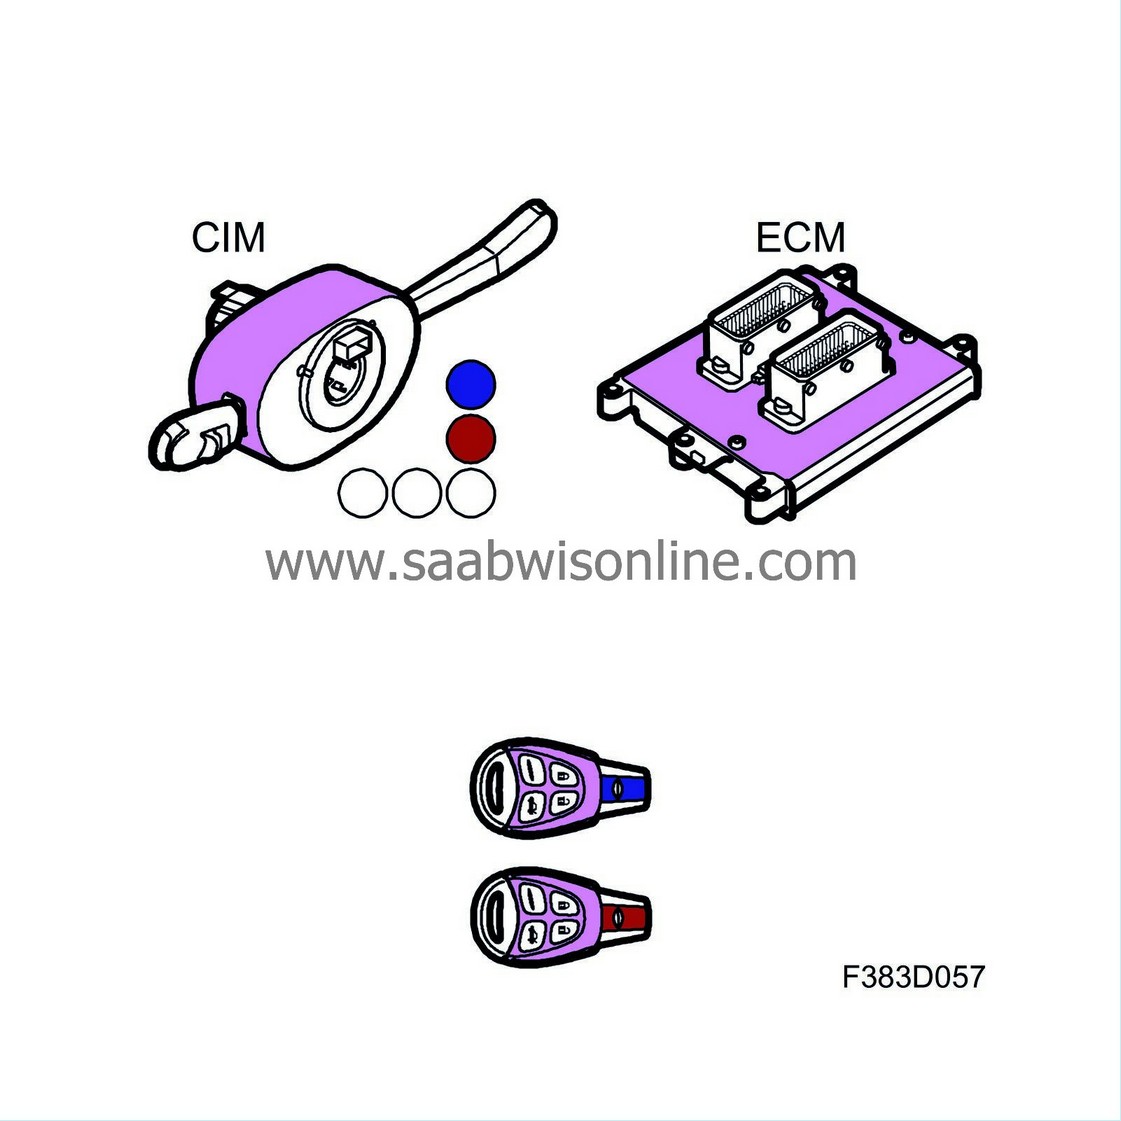
Figure 19: The illustration shows the same CIM and ECM as in figure 18, with the master key code copied from CIM to ECM. The keys are used and therefore also have the pink master key code.
| Add keys |
Before “Add” keys:
Figure 20: CIM, ECM and three keys with a common master key code, illustrated in green. Two of the keys are new and therefore do not have the master key code but all of the keys have different individual key codes.
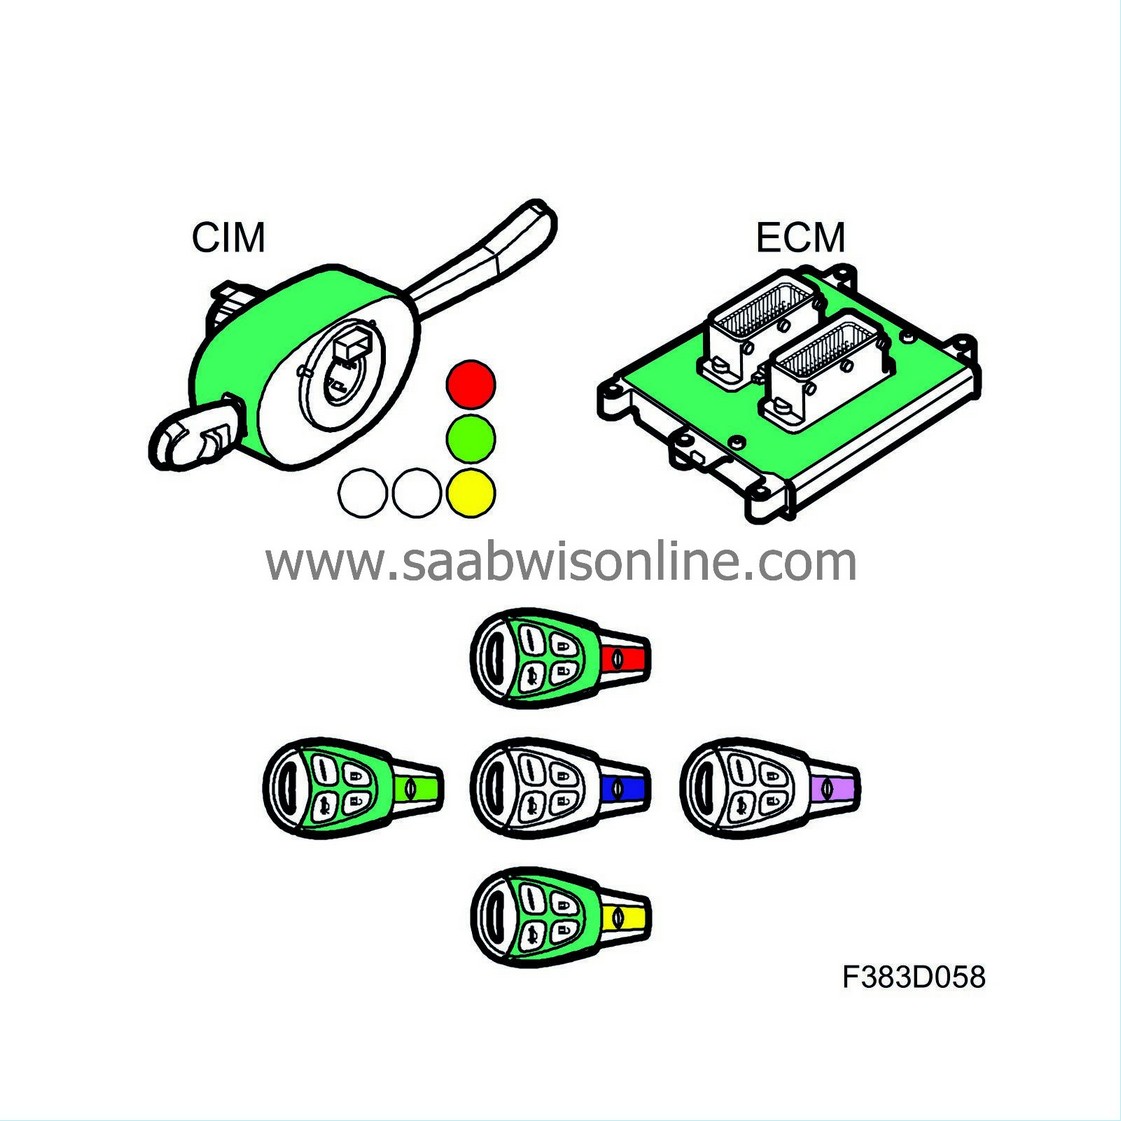
During "Add" keys:
All keys that shall be used must be on hand when programming starts. The first key programmed must be one of the keys that "belongs" to the CIM that was fitted.
| • |
When carrying out "Add" keys using Tech2, the master key code is copied from CIM to the key. The individual key code is copied from the key to CIM.
|
|
| • |
No more than five keys can be programmed to a CIM.
|
|
After “Add” keys:
Figure 21: The illustration shows the same CIM, ECM and keys as in figure 20. The two new keys are now programmed with the same master key code.
