Airbag, passenger (333P)
| Airbag, passenger (333P) |
|
|||||||
| To remove |
|
|||||||
| 1. |
Ignition in position LOCK.
|
|
| 2. |
Remove the
A-pillar trim
on the passenger side.
|
|
| 3. |
Dismantle the dashboard's side cover.

|
|
| 4. |
Dismantle the nuts holding the dashboard on the passenger side.
|
|
| 5. |
Dismantle the scuff plate and the wheel housing's inner side panel.
|
|
| 6. |
Remove
the glove box.
.
|
|
| 7. |
Remove the glove box's lock and moulding.

|
|
| 8. |
Remove the airbag unit screw from the steering column member.

|
||||||||||
| 9. |
Release the lock on the passenger airbag connectors by pulling out the secondary catches. Unplug the 2 passenger airbag connectors.
|
|
| 10. |
Remove the
ashtray
.
|
|
| 11. |
Remove the centre console's front storage compartment.

|
|
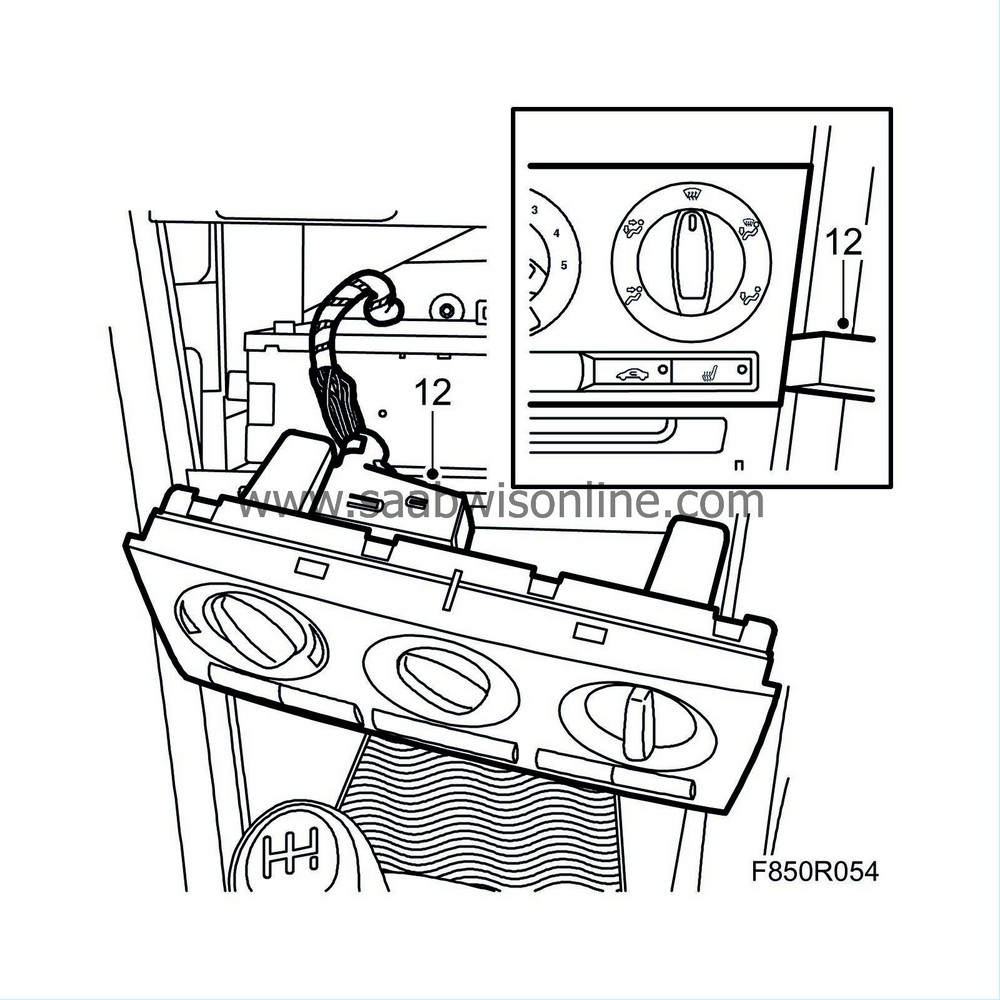
| 12. |
Remove the ACC or MCC unit from the panel. Use
82 93 474 Removal tool
.
|
|
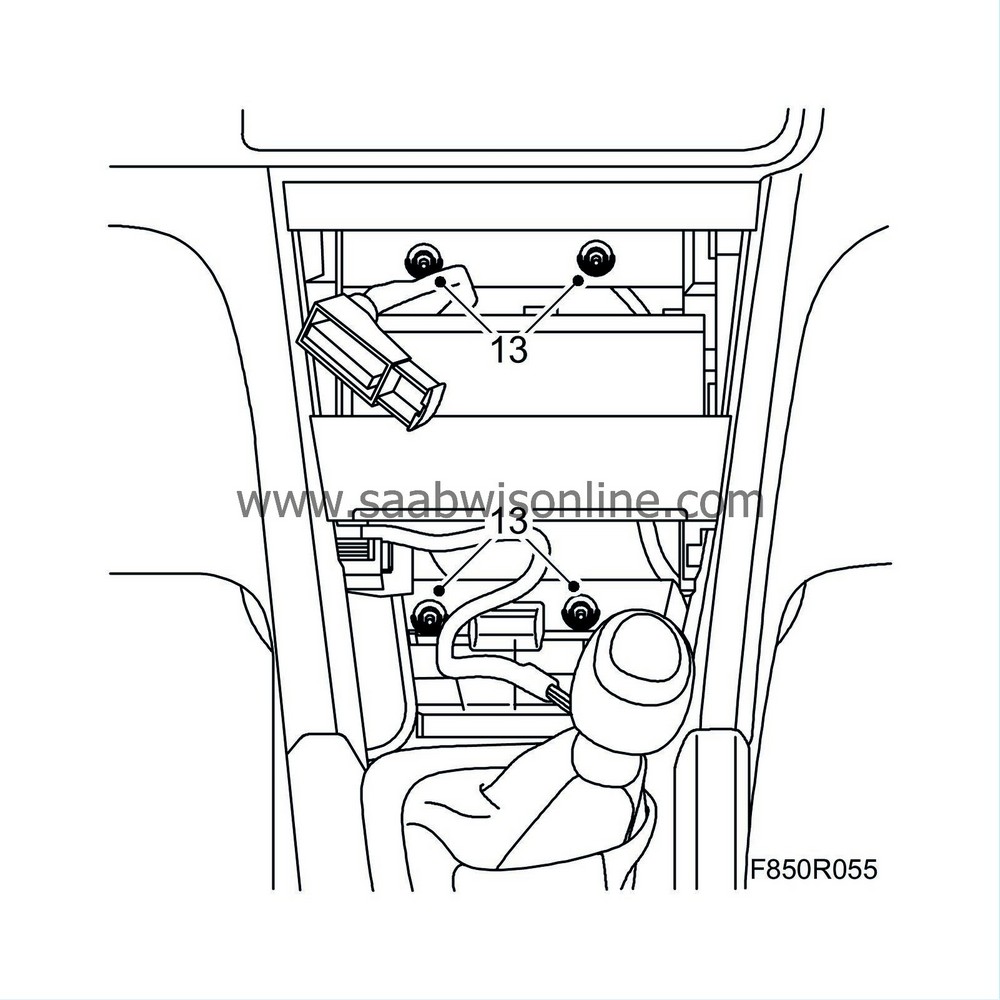
| 13. |
Dismantle the nuts holding the dashboard.
|
|
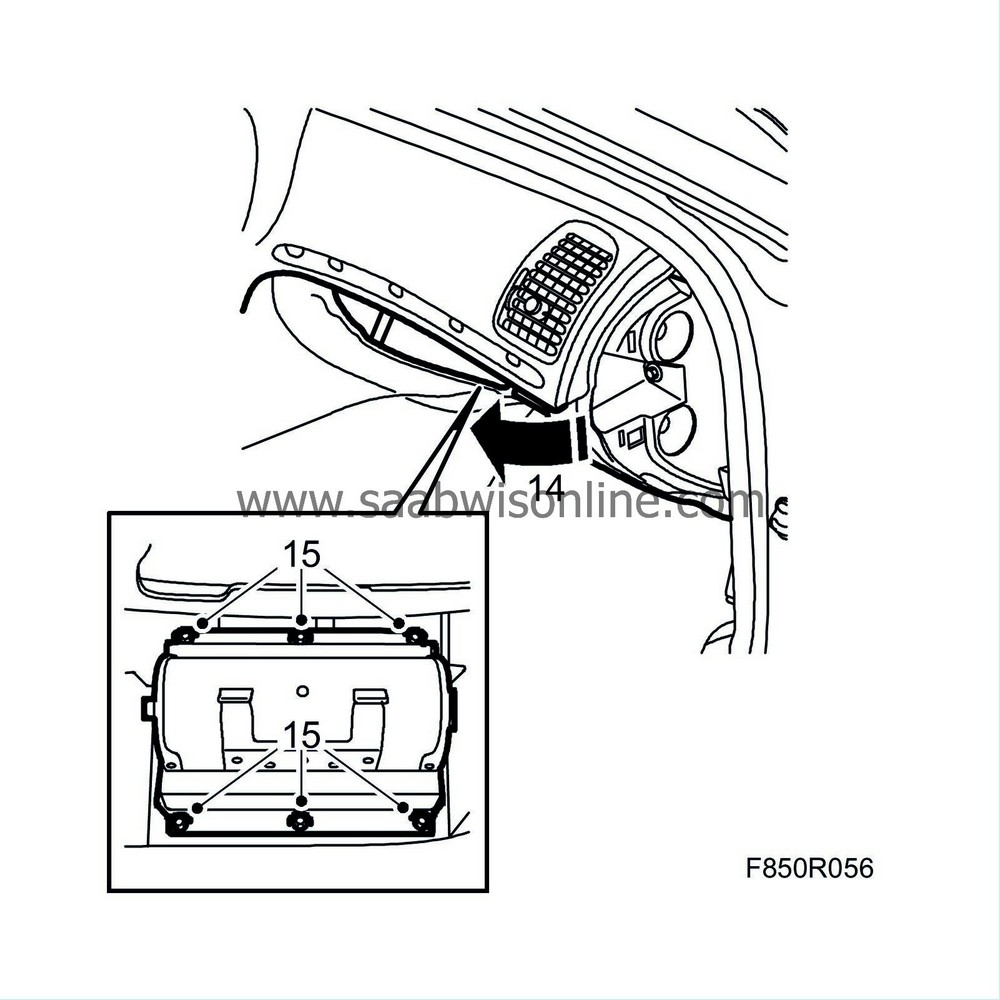
| 14. |
Carefully pull out the dashboard a few centimetres from the A-pillar on the passenger side.
|
|
| 15. |
Remove the airbag upper and lower nuts from the dashboard.
|
|
| 16. |
Carefully lift down the airbag unit out from the dashboard.
|
|
| To fit |
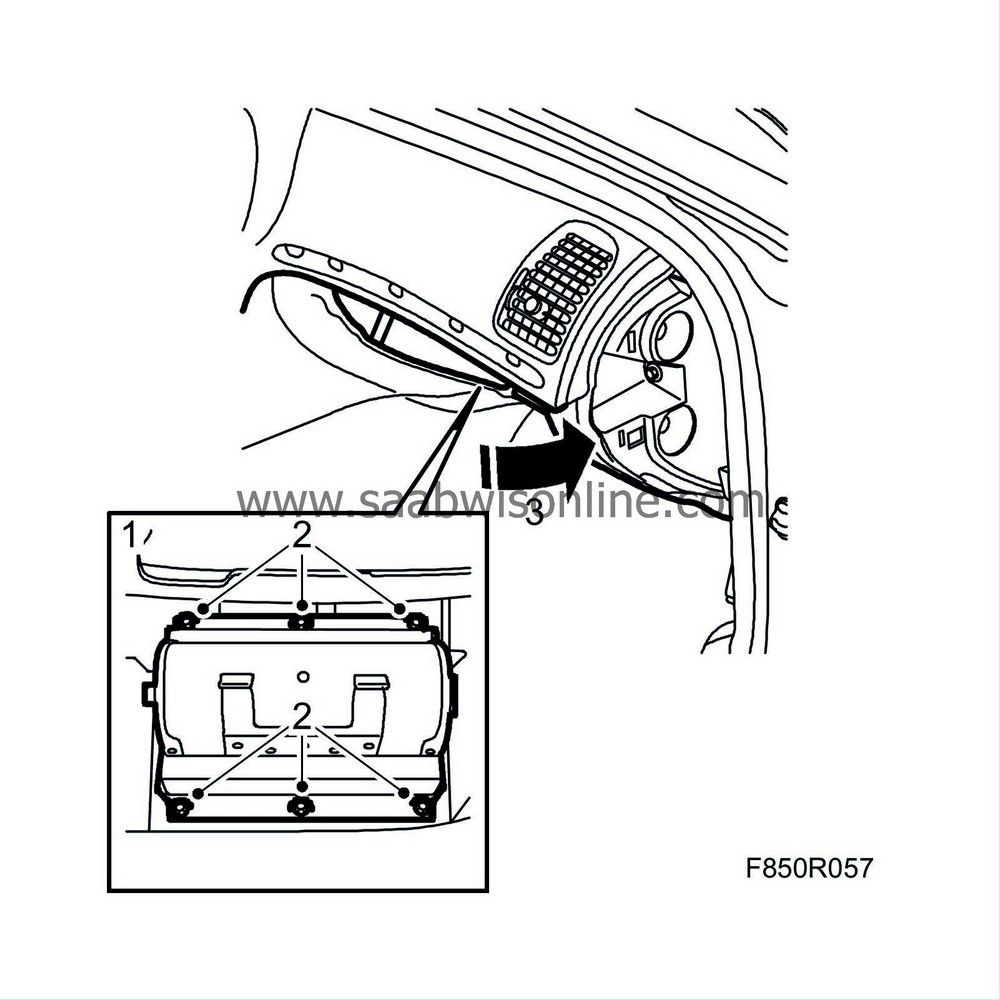
| 1. |
Insert the passenger airbag and position it in the panel shell.
|
|
| 2. |
Fit the nuts on the passenger airbag's upper and lower edges.
Tightening torque 10 Nm (8 lbf ft) |
|
| 3. |
Screw the dashboard into position.
|
|
| 4. |
Fit the nuts that hold the centre of the dashboard.
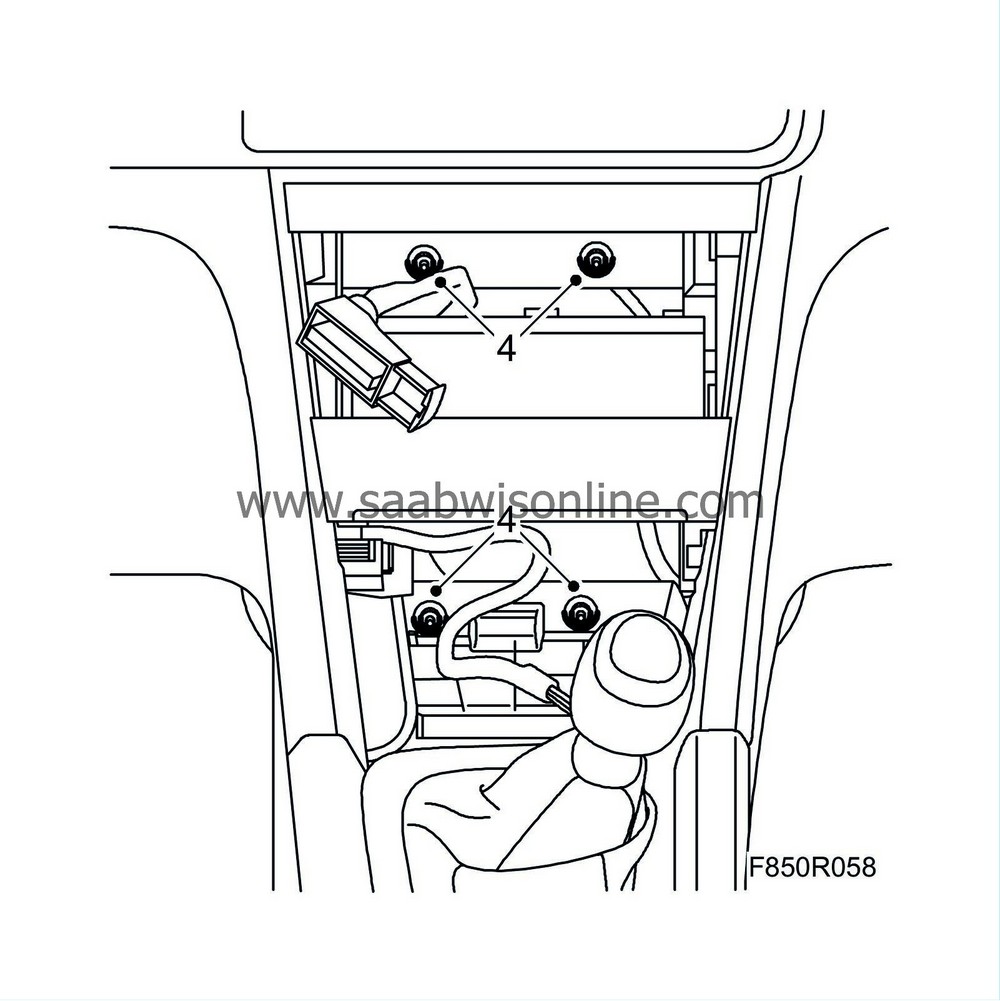
|
|
| 5. |
Fit the ACC or MCC to the panel.
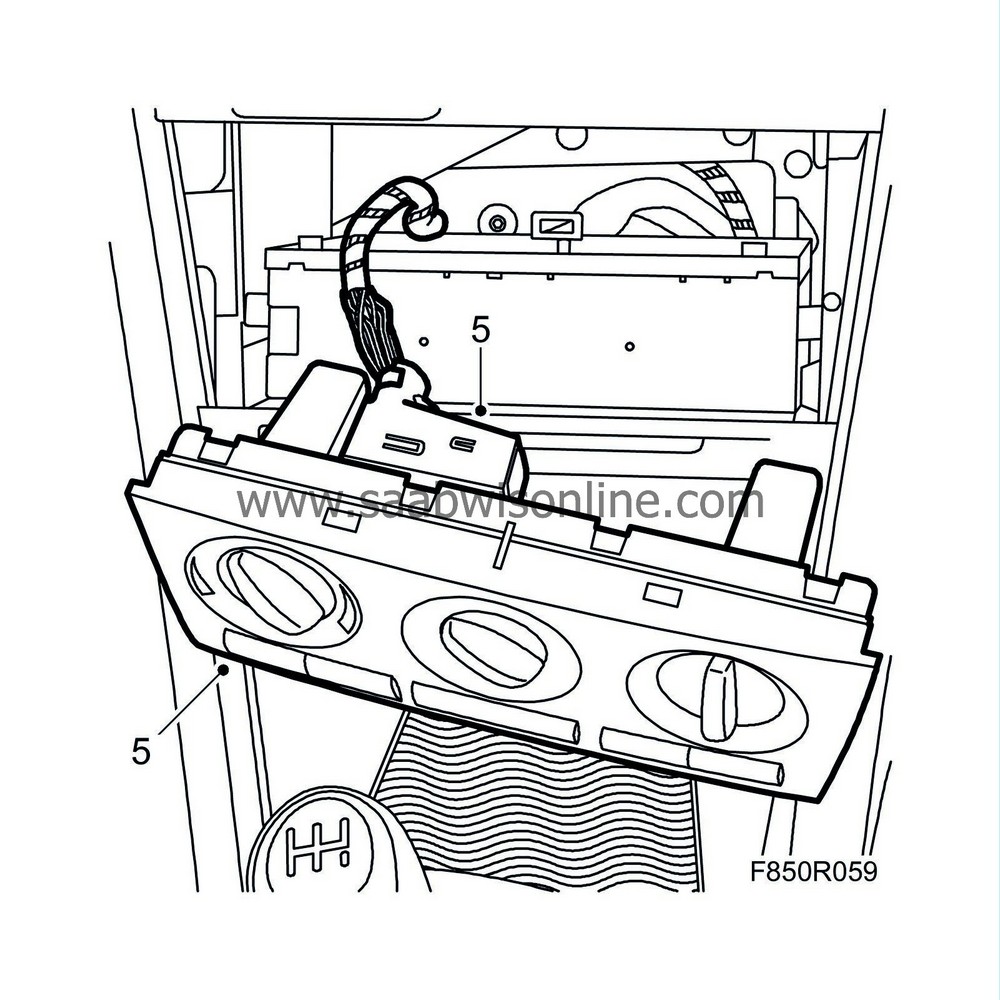
|
|
| 6. |
Fit the centre console front storage compartment.

|
|
| 7. |
Fit the
ashtray
.
|
||||||||||
| 8. |
Connect the 2 passenger airbag connectors. Make sure to press the secondary catch into place on the connectors.
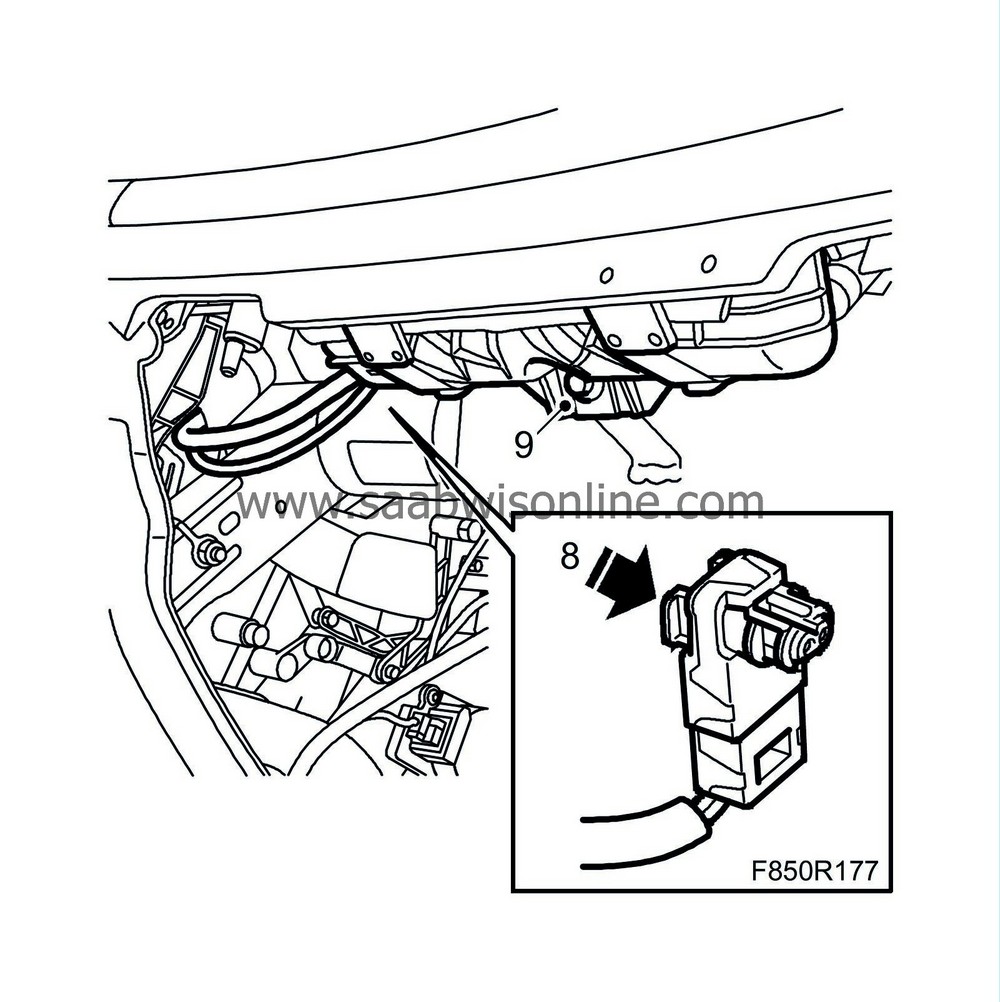
|
|
| 9. |
Fit the airbag unit's two screws on the steering wheel member.
Tightening torque 5 Nm (4) |
|
| 10. |
Fit the glove box's lock and moulding.
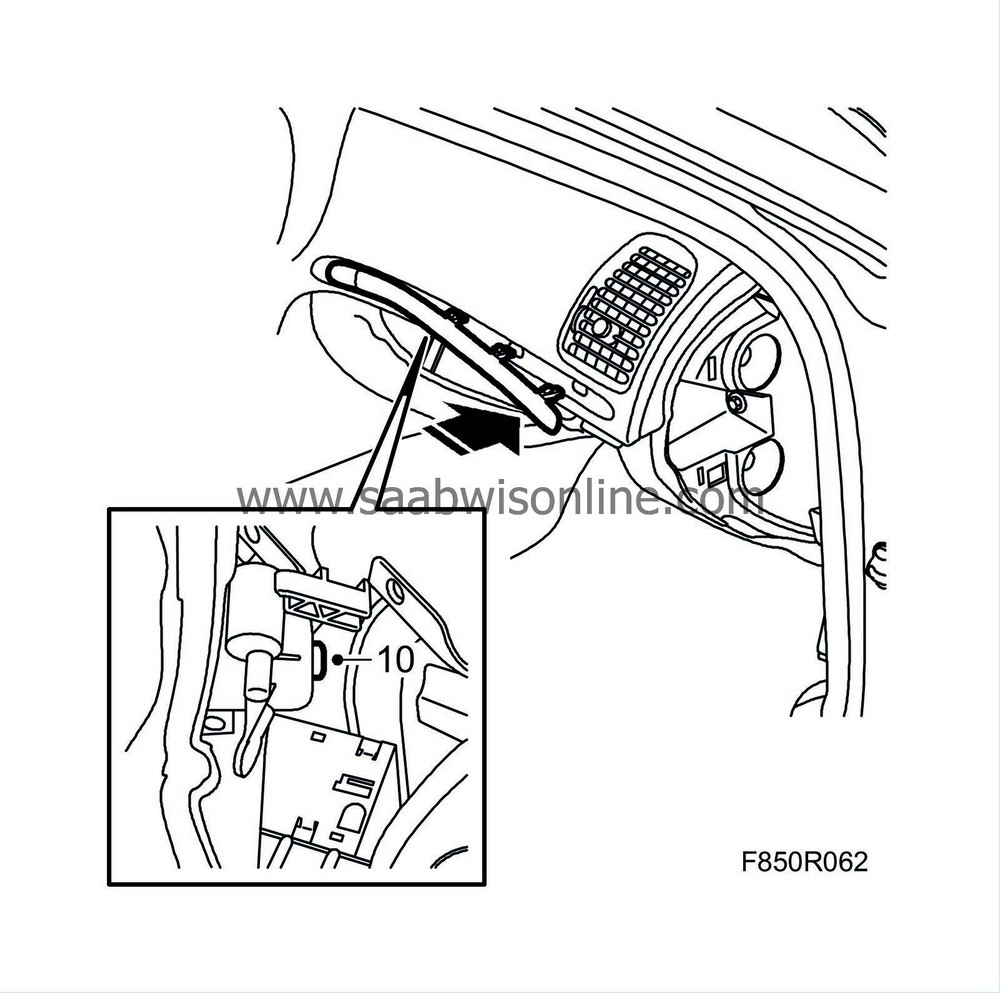
|
|
| 11. |
Refit
the glove box
.
|
|
| 12. |
Fit the wheel housing's inner side panel and scuff plate.

|
|
| 13. |
Fit the nuts holding the dashboard on the passenger side.
|
|
| 14. |
Fit the dashboard's side cover.
|
|
| 15. |
Fit the
A-pillar's trim
on the passenger side.
|
|
| 16. |
Connect the battery.
|
|
| 17. |
Turn on the ignition and check the airbag system and control module with the diagnostic tool as follows:
Connect the diagnostic tool to the data link connector under the dashboard. Delete any diagnostic trouble codes. Turn the ignition OFF and then ON again. Wait at least 10 seconds with the ignition on. Check whether a diagnostic trouble code is shown: If a fault code is displayed: Carry out fault diagnosis as instructed for each respective diagnostic trouble code. If a fault code is not displayed: Disconnect the diagnostic tool. |
|
| 18. |
Carry out
Measures after disconnecting the battery
.
|
|

 Warning

