Upper radiator crossmember
| Upper radiator crossmember |
| To remove |
| 1. |
Remove the battery cover. Remove the battery air duct. Pull up the washer fluid filling pipe.
|
|
| 2. |
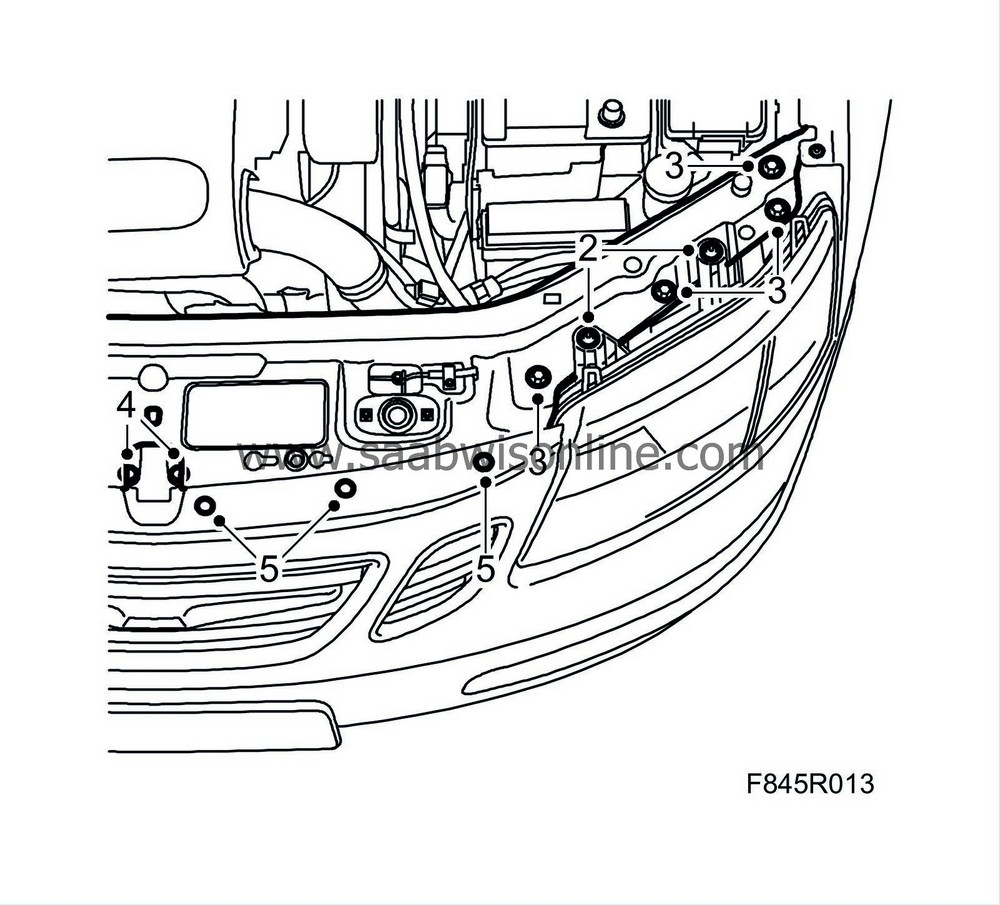
Remove the upper retaining bolts on the headlamps.
|
|
| 3. |
Remove the bolts holding the member to the headlamp frame.
|
|
| 4. |
Remove the bolts to the middle stay.
Diesel : Remove the mounting for the AC pipe. |
|
| 5. |
Remove the clip for the bumper shell.
|
|
| 6. |
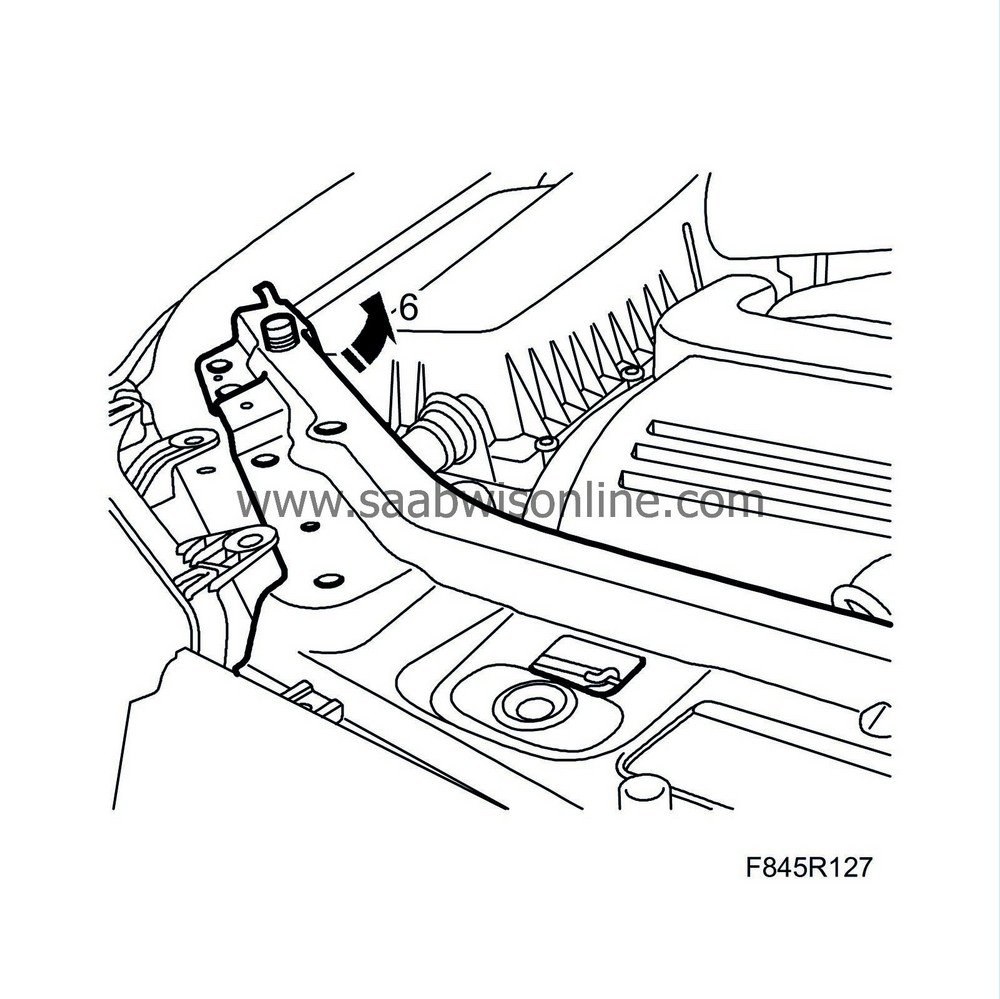
Undo the radiator crossmember on the right-hand side. Pull back and lift it slightly so that it goes free from the AC pipe. Take care not to break the fastening lugs during removal.
|
|
| 7. |
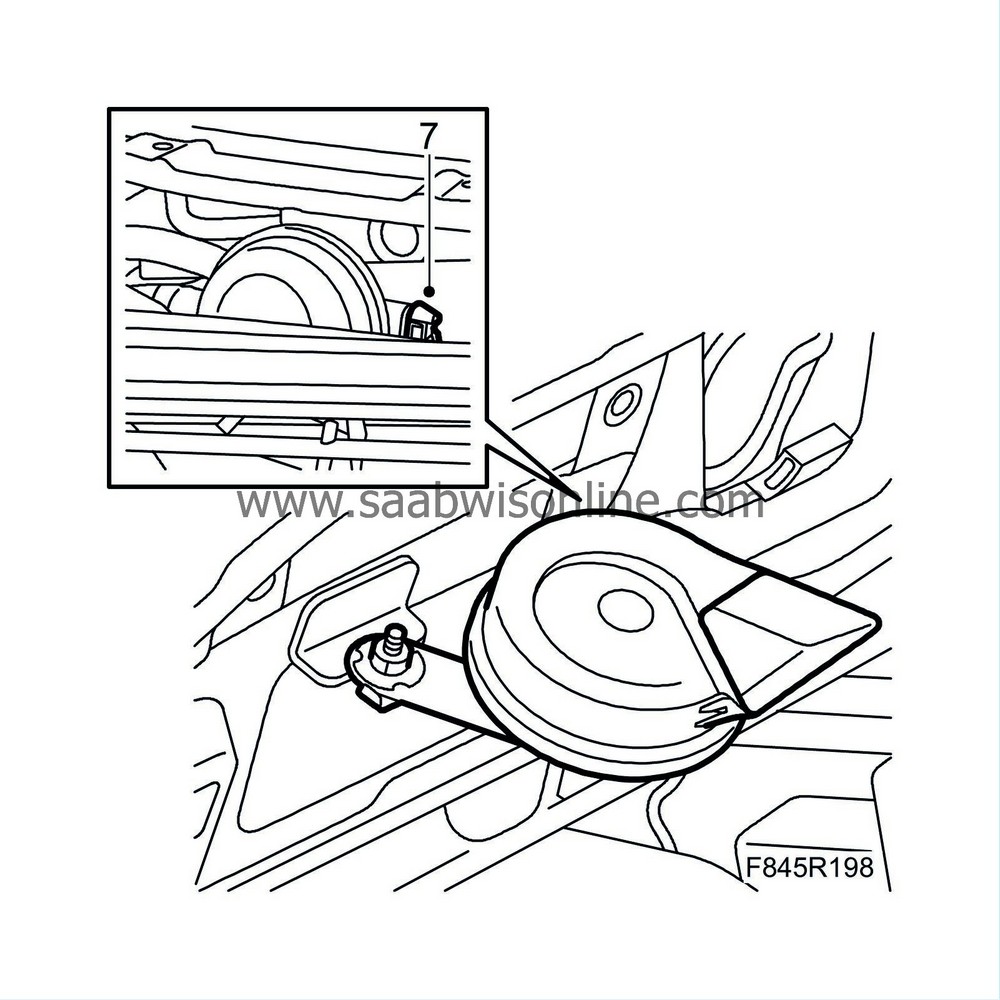
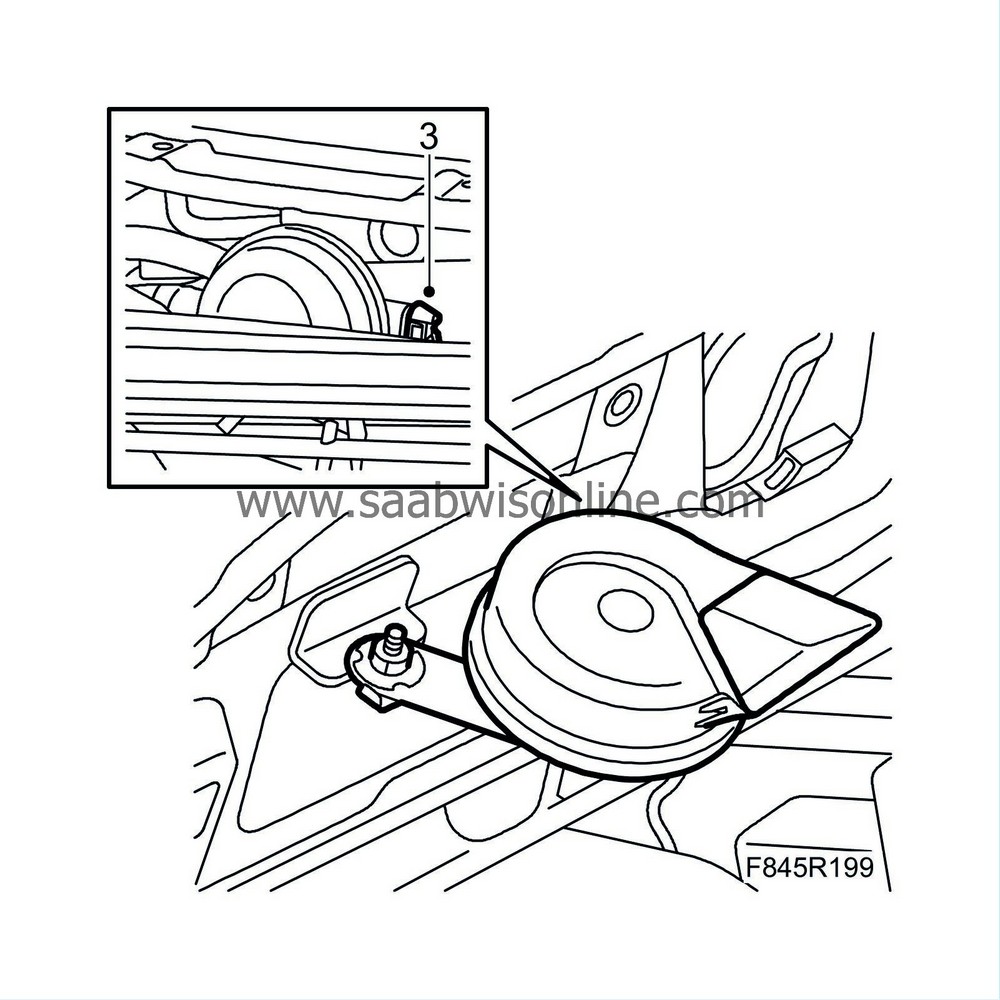
Cars with horn at radiator crossmember
: Disconnect the horn connector by releasing the circlip on the back of the connector.
|
|
| 9. |
Diesel M05
: The following must be done when fitting a new radiator crossmember:
|
|
| 9.a. |
Z19:
Cut the radiator crossmember's mounting lug toward the AC pipe. Apply rustproofing agent to the cut surface.
|
| 9.b. |
Z19:
Fit a new bracket for the turbo delivery valve. Check the distance to the AC pipe. Bend the bracket by hand if the valve is touching the pipe.
|
| To fit |
| 1. |
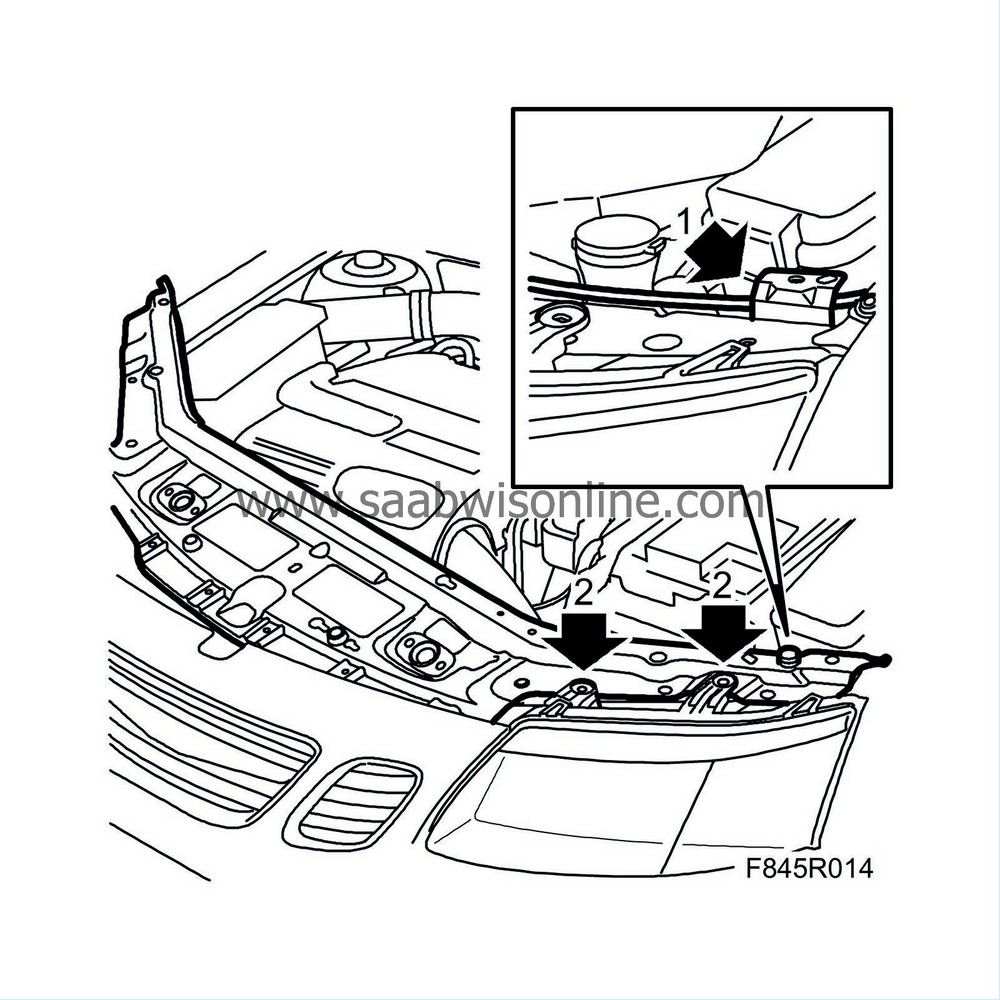
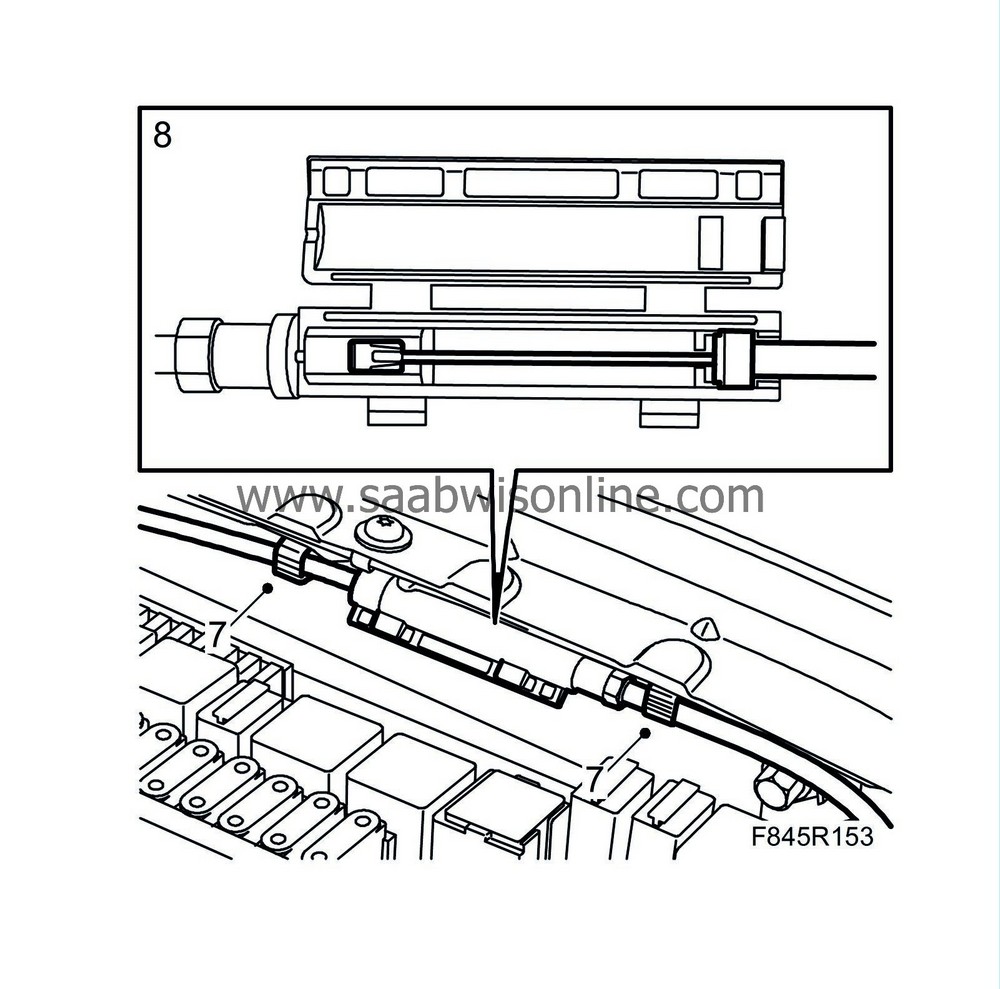
Fit the bonnet lock cable quick release coupling where applicable and press the clip onto the body. Place the lock cable under the mounting.
|
|
| 2. |
Insert the crossmember from the left-hand side between the headlamp retaining lugs and the headlamp frame and under the bumper shell.
|
|
| 3. |
Cars with horn at radiator crossmember
: Fit the horn connector.
|
|
| 4. |
Make sure the middle stay is located behind the crossmember. Pressing the stay to its correct location.
|
|
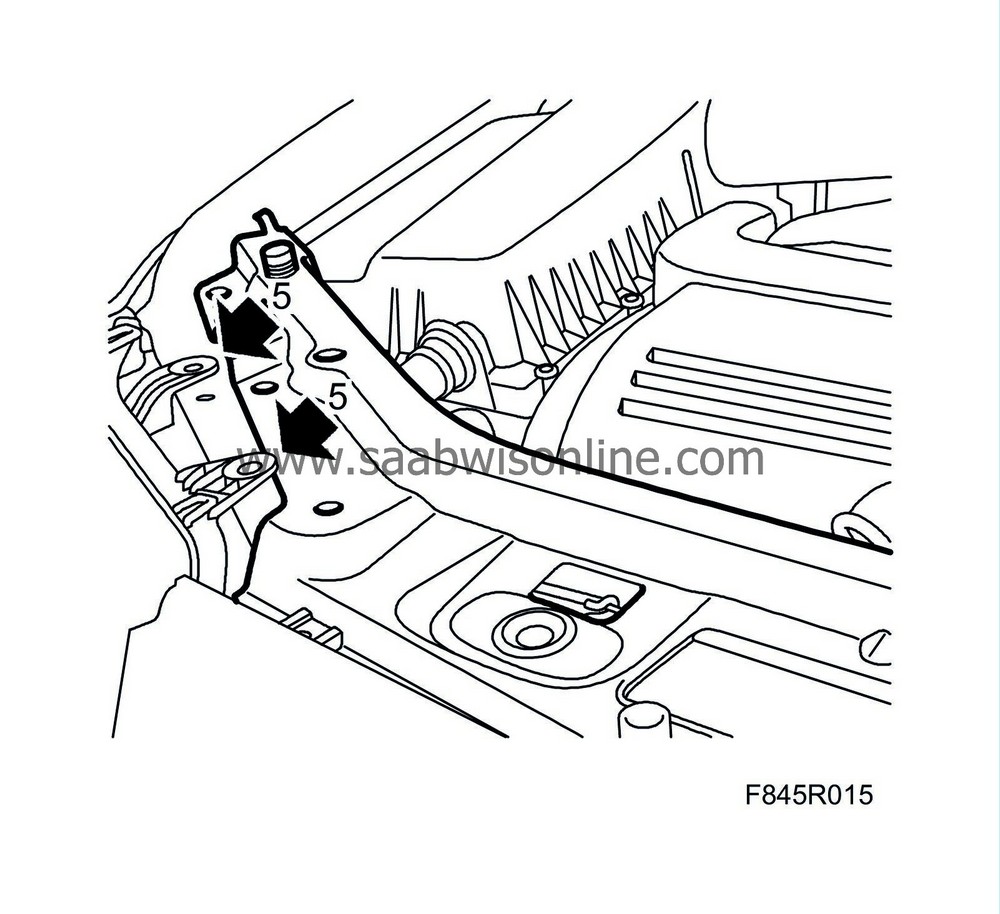
| 5. |
Move the crossmember forward and position it under the right-hand headlamp mountings. Lift the headlamp mountings slightly.
|
|
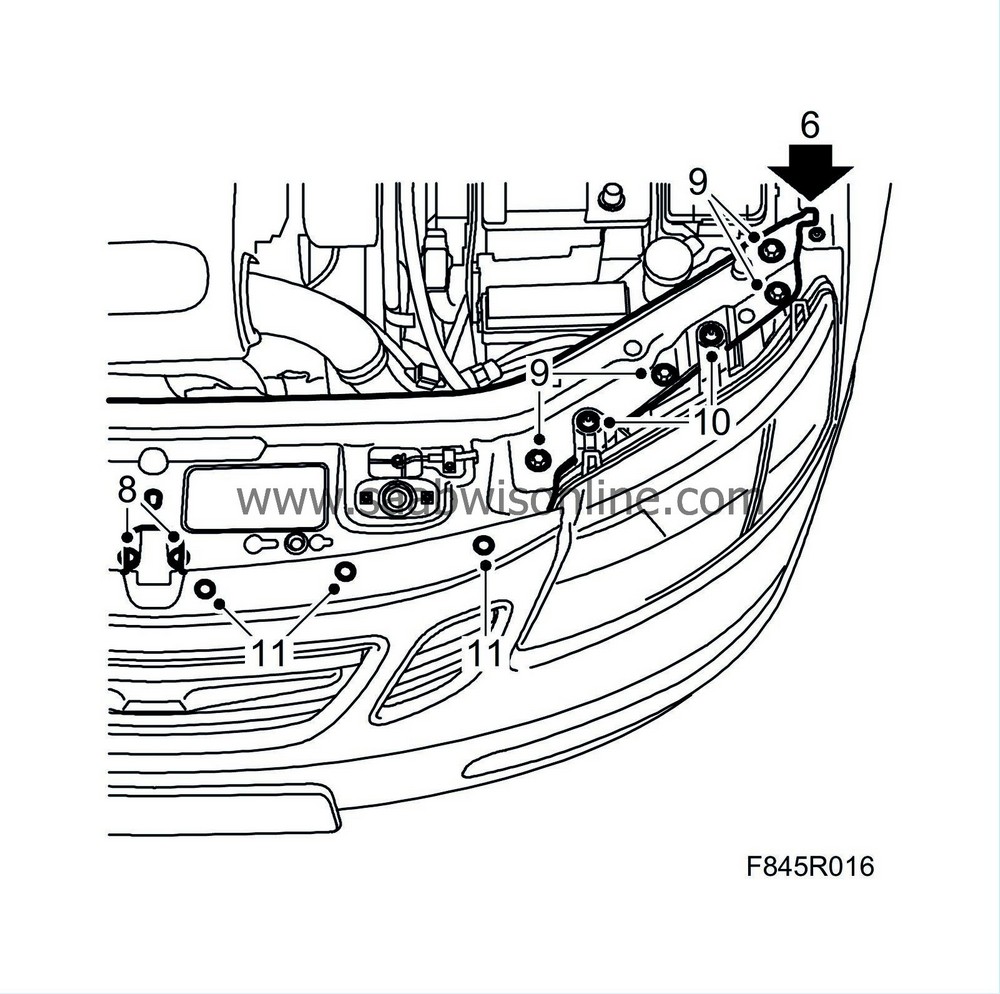
| 6. |
Adjust the crossmember so that its guide lugs are located as illustrated.
|
|
| 7. |
Put in all the bolts.
|
|
| 8. |
Tighten first the middle stay bolts to obtain the correct fit.
|
|
| 9. |
Tighten the bolts holding the crossmember to the headlamp frame.
Diesel : Fit the mounting for the AC pipe. |
|
| 10. |
Tighten the upper retaining bolts on the headlamps.
|
|
| 11. |
Fit the bumper shell clips.
|
|
| 12. |
Fit the washer fluid reservoir filling pipe. Fit the battery cover and the air tube.
Check the operation of the bonnet lock. |
|

 Warning

