Rear door's upper rubber moulding
| Rear door's upper rubber moulding |
| Removing |
| 1. |
Open the window fully.
|
|
| 2. |
Remove the rear door trim
and fold down the moisture barrier.
|
|
| 3. |
Remove the
Rear window frame cover
.
|
|
| 4. |
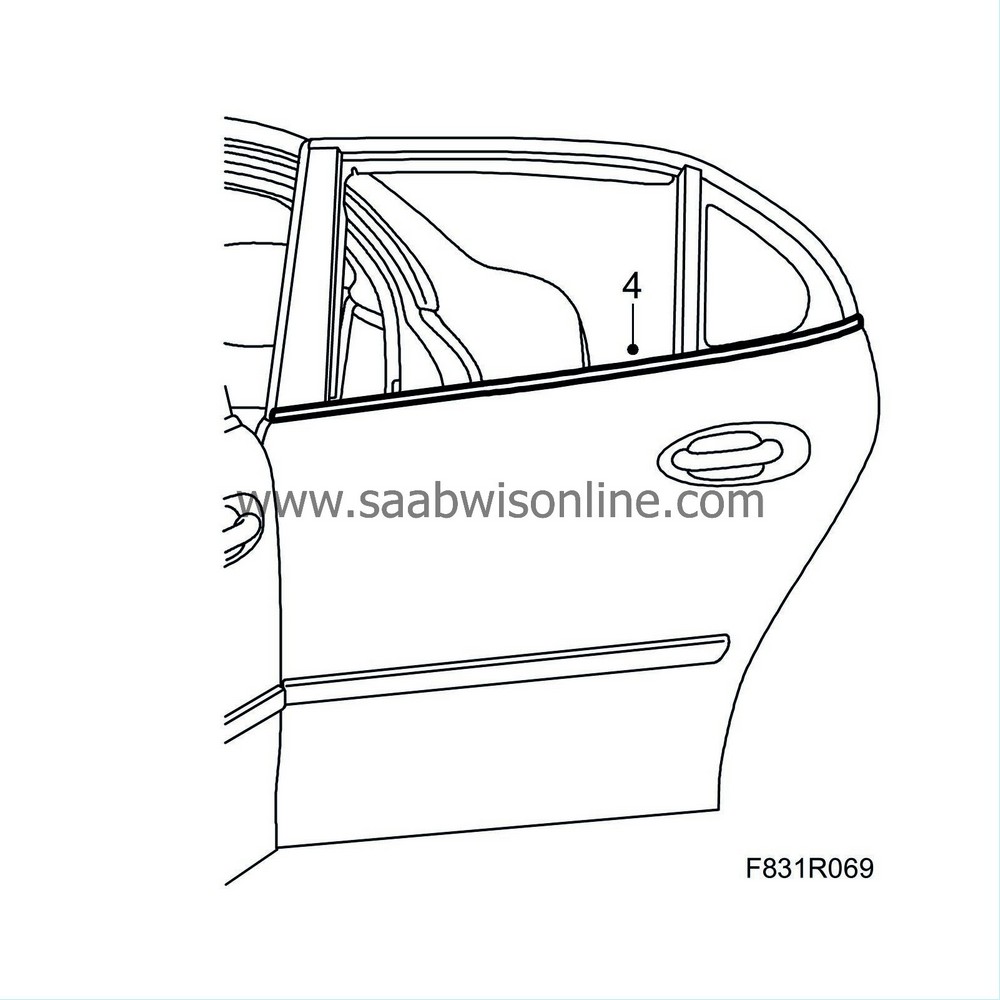
Remove the outer weatherstrip by using
82 93 474 Removal tool
.
|
|
| 5. |
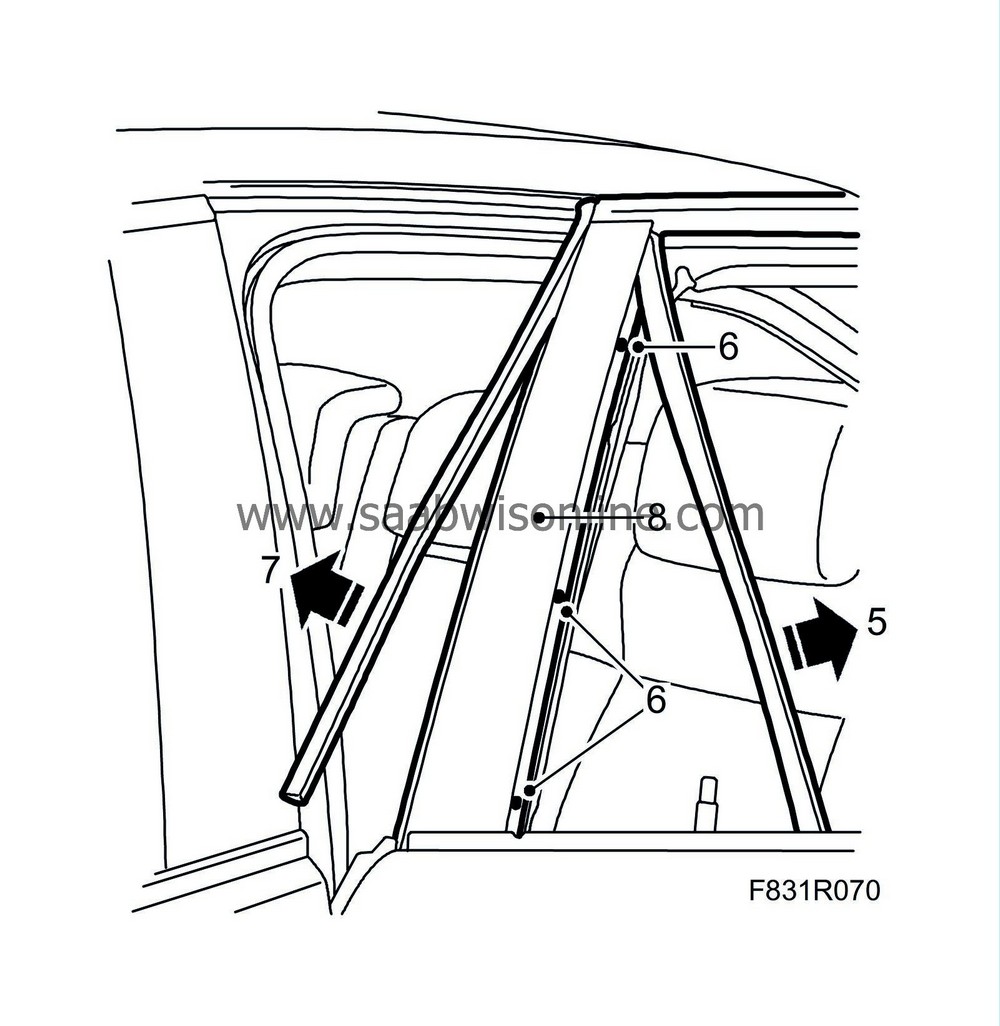
Pull the front U-moulding up from the glass channel.
|
|
| 6. |
Remove the screws on the front glass channel.
|
|
| 7. |
Loosen the front side strip.
|
|
| 8. |
Lift up the front glass channel.
|
|
| 9. |
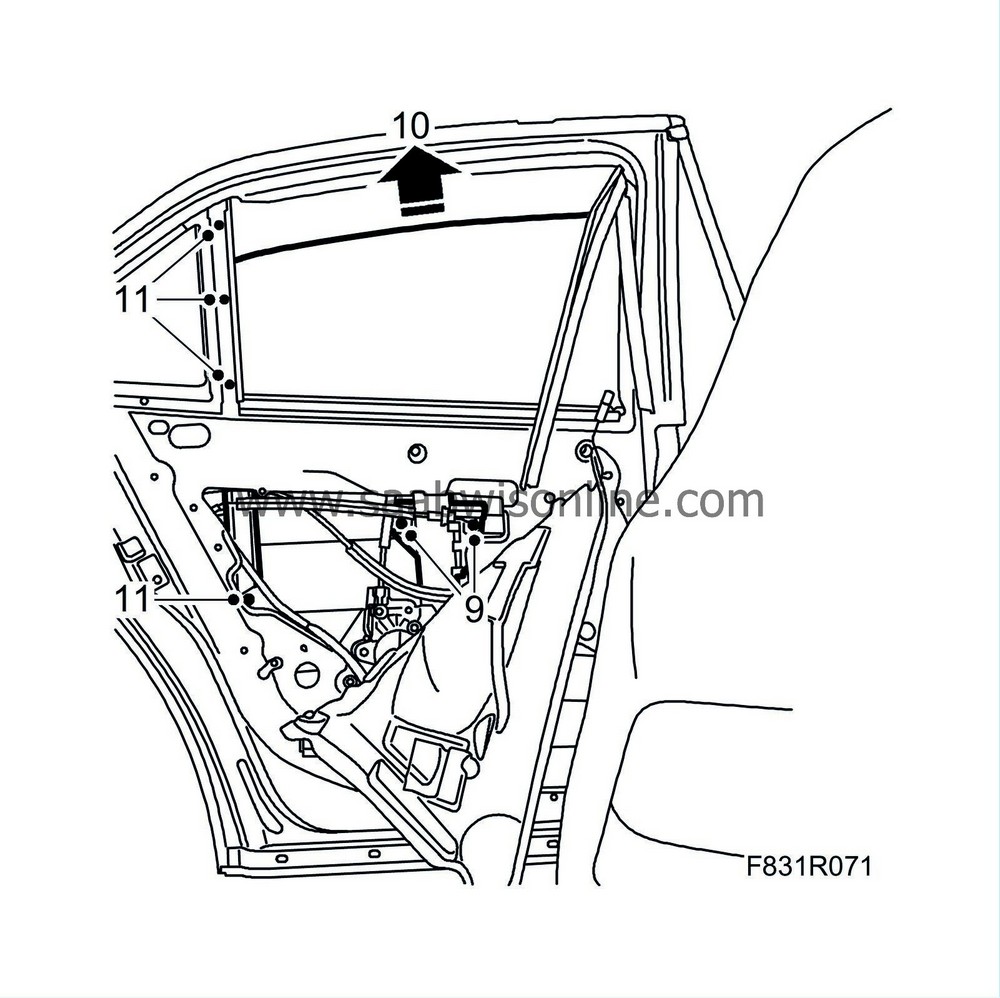
Raise the window so that you can access the window screws. Remove the window screws.
|
|
| 10. |
Lift out the window.
|
|
| 11. |
Remove the rear glass channels screws.
|
|
| 12. |
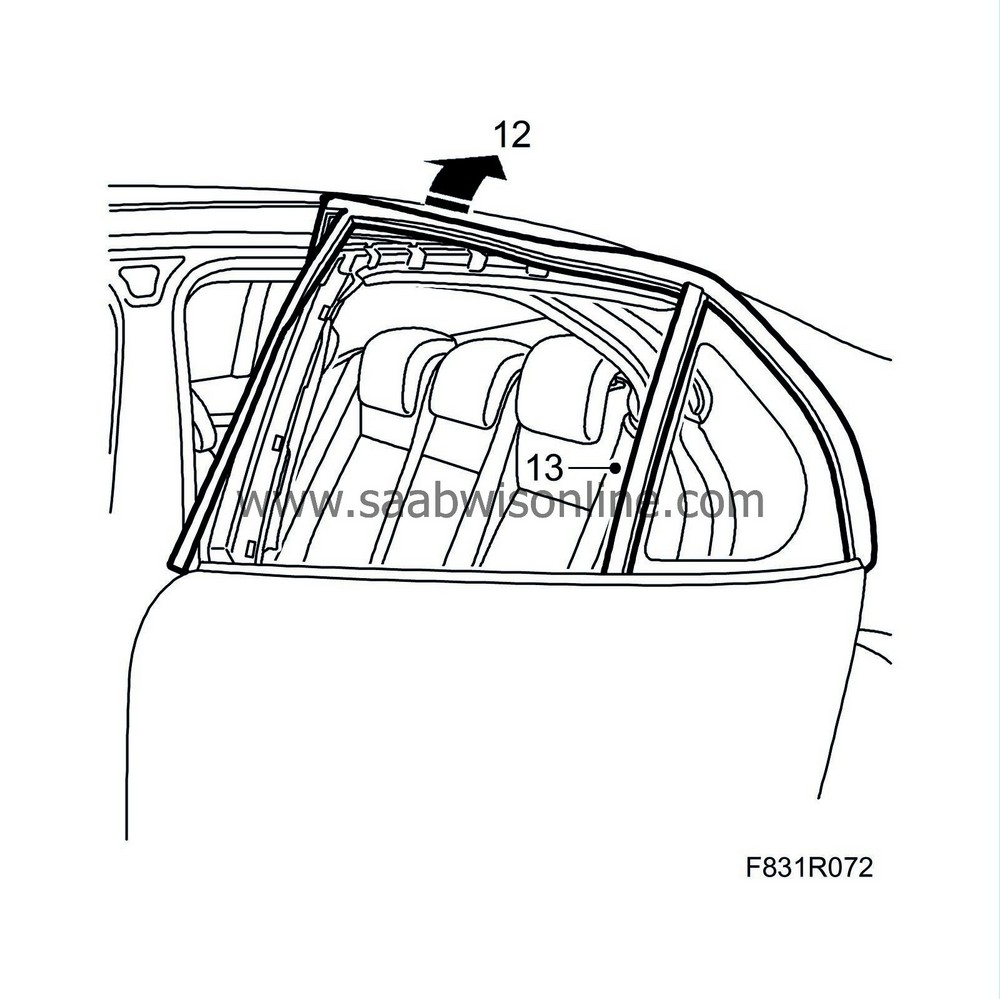
Remove the entire upper door moulding.
|
|
| 13. |
Remove the rear glass channel together with the rubber moulding.
|
|
| 14. |
Slip out the moulding from the rail.
|
|
| Fitting |
| 1. |
Position the rear glass channel together with the rubber moulding. Fit the glass channel's lower screw.
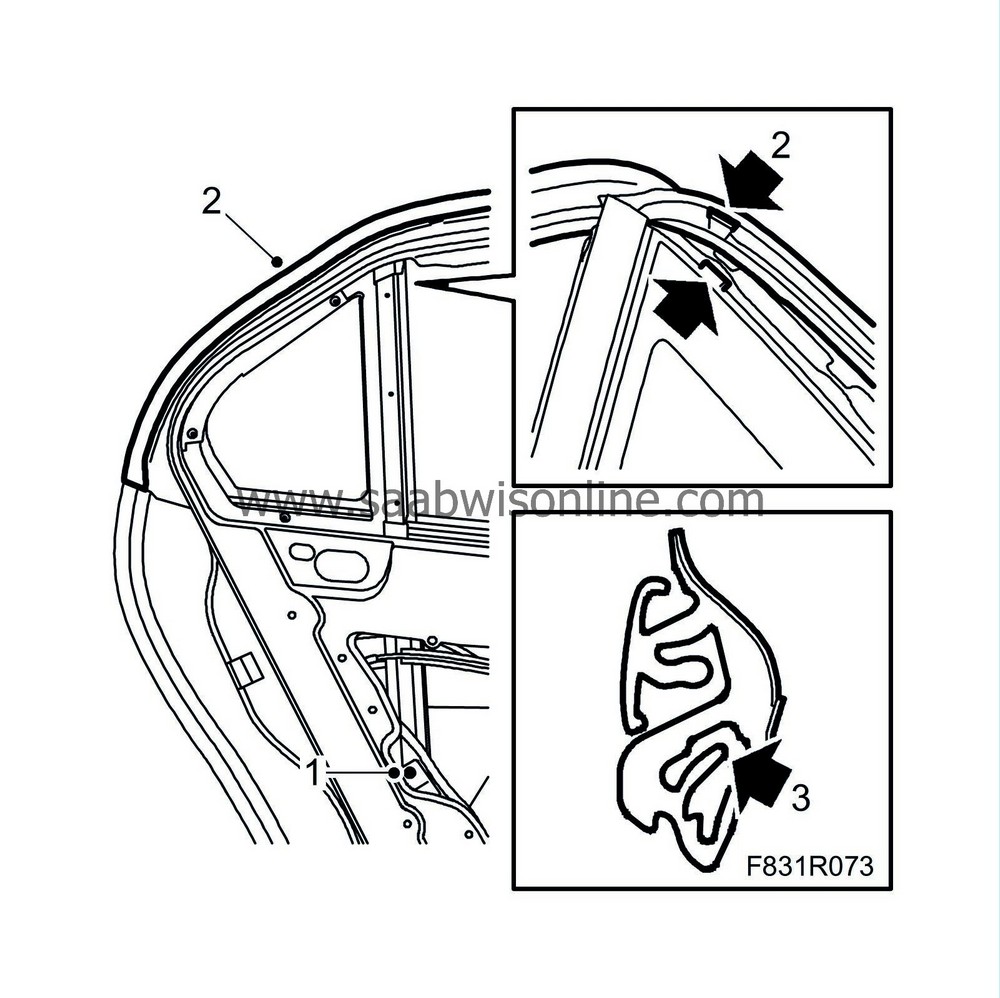
|
|
| 2. |
Fit the moulding over the window frame using
82 93 474 Removal tool
. Start by fitting the moulding around the fixed side window. Make sure that the locating lug is aligned with the recess in the moulding.
|
|
| 3. |
Push the moulding from the outside so that it fits against the fixed side window. Make sure the moulding's inner flap lies over the door's plate flange.
|
|
| 5. |
Remove the inner weatherstrip.
|
|
| 6. |
Fit the side window by angling it in towards the rear U-strip and pressing down the window towards the brackets.
Make sure the window lies against the rear U-strip. Fit the window's screws. 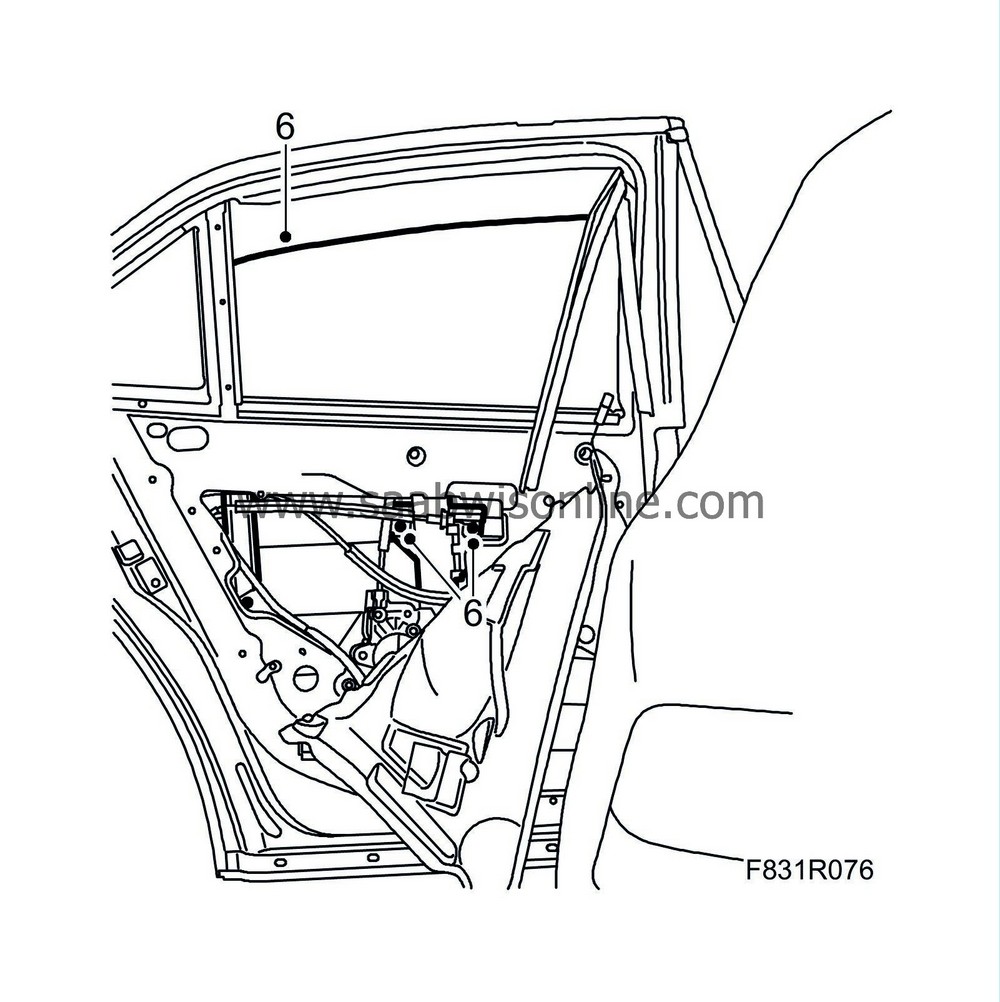
|
|
| 7. |
Open the window fully.
|
|
| 8. |
Fit the front glass channel.

|
|
| 9. |
Fit the front moulding. Make sure the lower part fits against the door's side strip.
|
|
| 10. |
Wind up the window about 5 cm to move the window a little.
|
|
| 11. |
Fit the front U-moulding by pushing it down towards the glass channel. Help by moving the window backward a little.
|
|
| 12. |
Continue fitting the U-moulding into the glass channel by pushing it down some more. Help by moving the window backward a little.
|
|
| 13. |
Lower the window completely and fit the rest of the moulding. Press in the moulding towards the glass channel. Check the operation of the side window.
|
|
| 14. |
Fit the outer and inner weatherstrips.
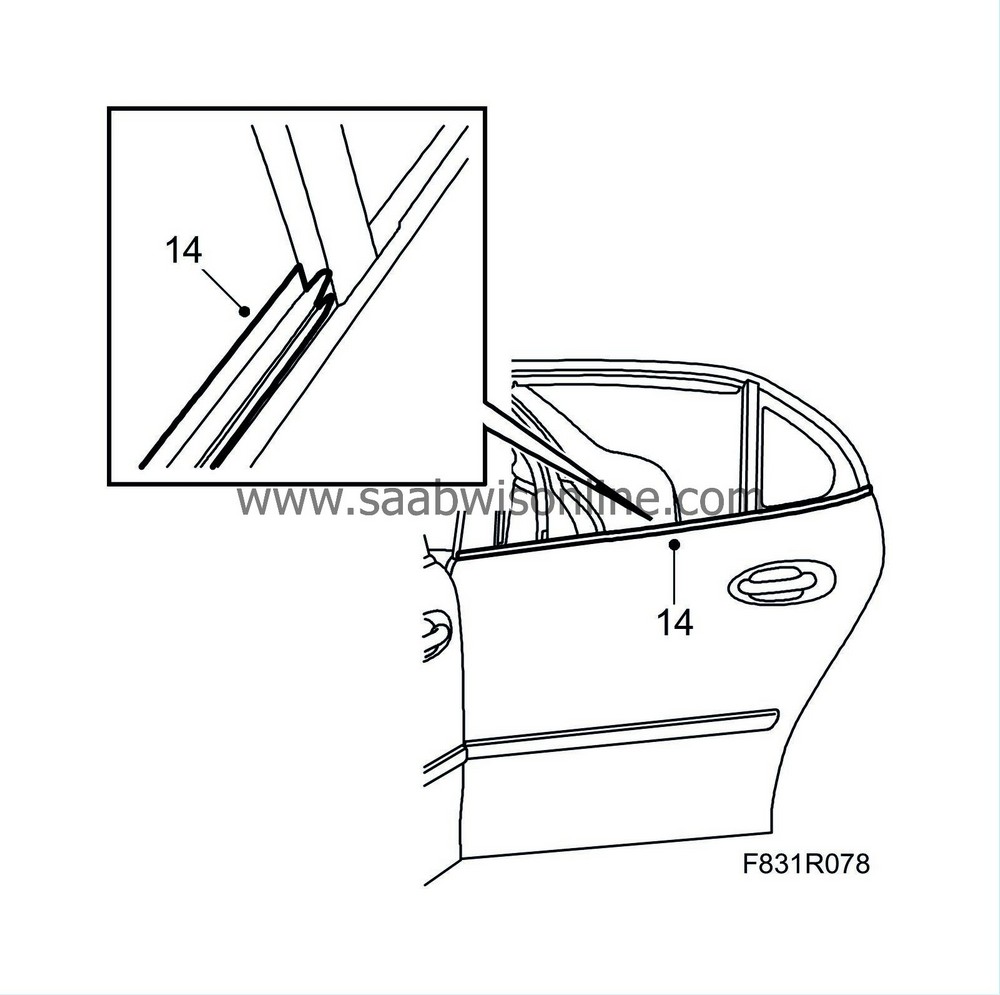
|
|
| 15. |
Fit the window frame cover
.
|
|
| 16. |
Fit the moisture barrier and
door trim
.
|
|
| 17. |
Cars with pinch protection:
Perform
Programming of the pinch protection
.
|
|


