Window lift, front
| Window lift, front |
| To remove |
| 1. |
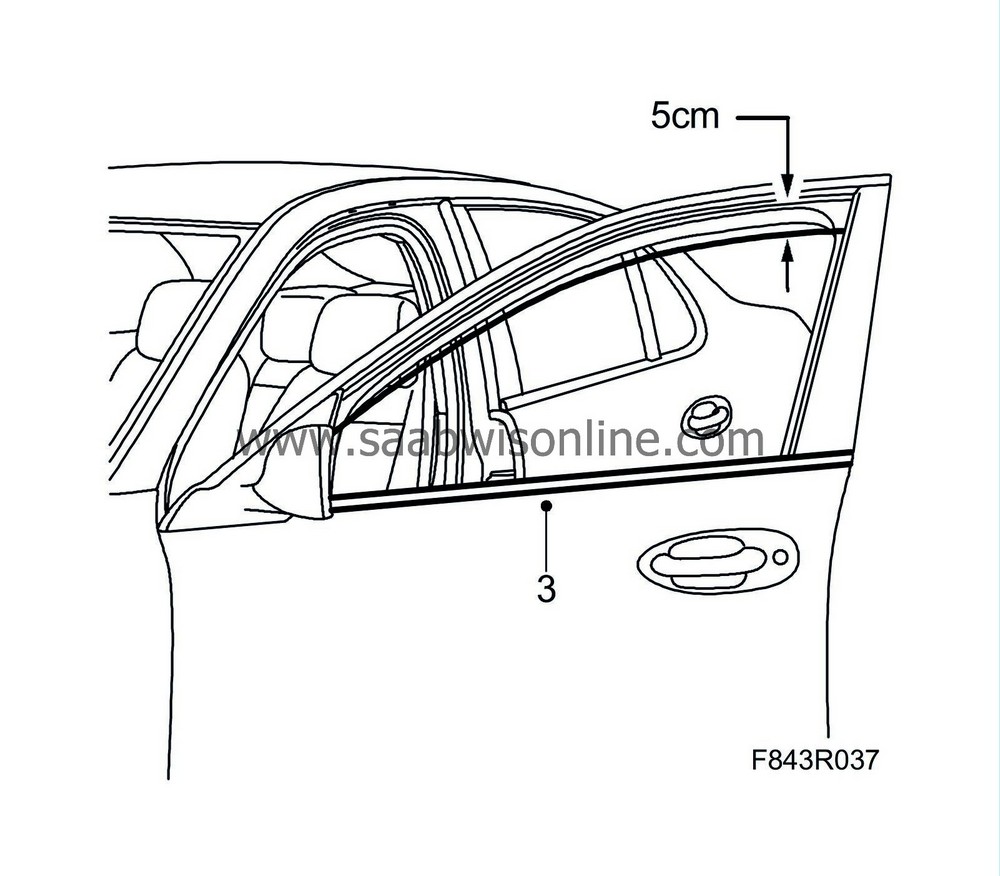
Open the window about 5 cm.
|
|
| 2. |
Remove
Door trim, front, 4D
and fold down the water barrier.
|
|
| 3. |
Remove the outer weatherstrip for the window. Lift the rear end using the removal tool.
Pull out the moulding from the base of the door mirror. |
|
| 4. |
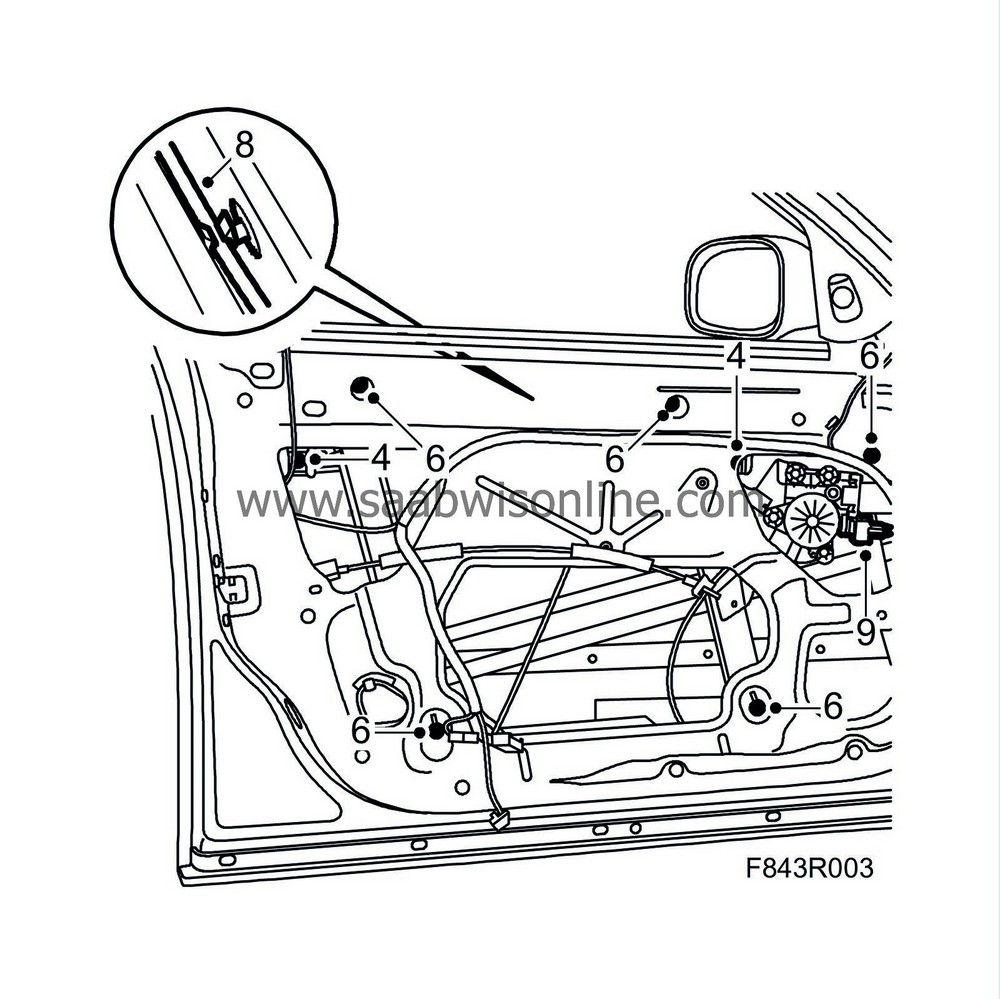
Slacken the bolts to release the window.
|
|
| 5. |
Lift the rear end of the window. Hold it at an angle and lift it up.
|
|
| 6. |
Remove the nuts and bolt securing the window lift.
|
|
| 7. |
Press out the window lift so that the studs come free of the mounting holes.
|
|
| 8. |
Remove the upper lift cable from the clip.
|
|
| 9. |
Unplug the motor.
|
|
| 10. |
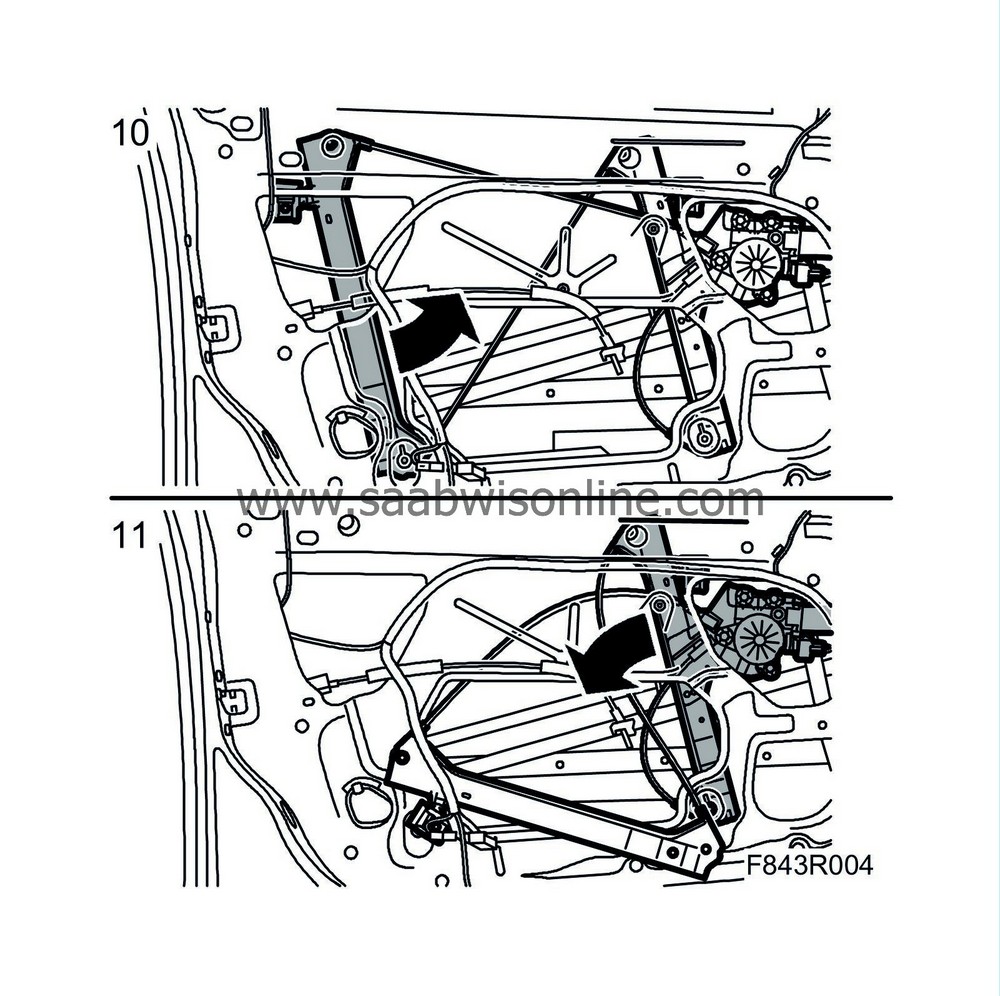
Angle out the rear guide channel through the hole.
|
|
| 11. |
Continue with the front guide channel and motor.
|
|
| To fit |
| 1. |
Make sure the rubberised mountings for the window lift are in place.
Angle in the motor first and insert the studs into the mounting holes. 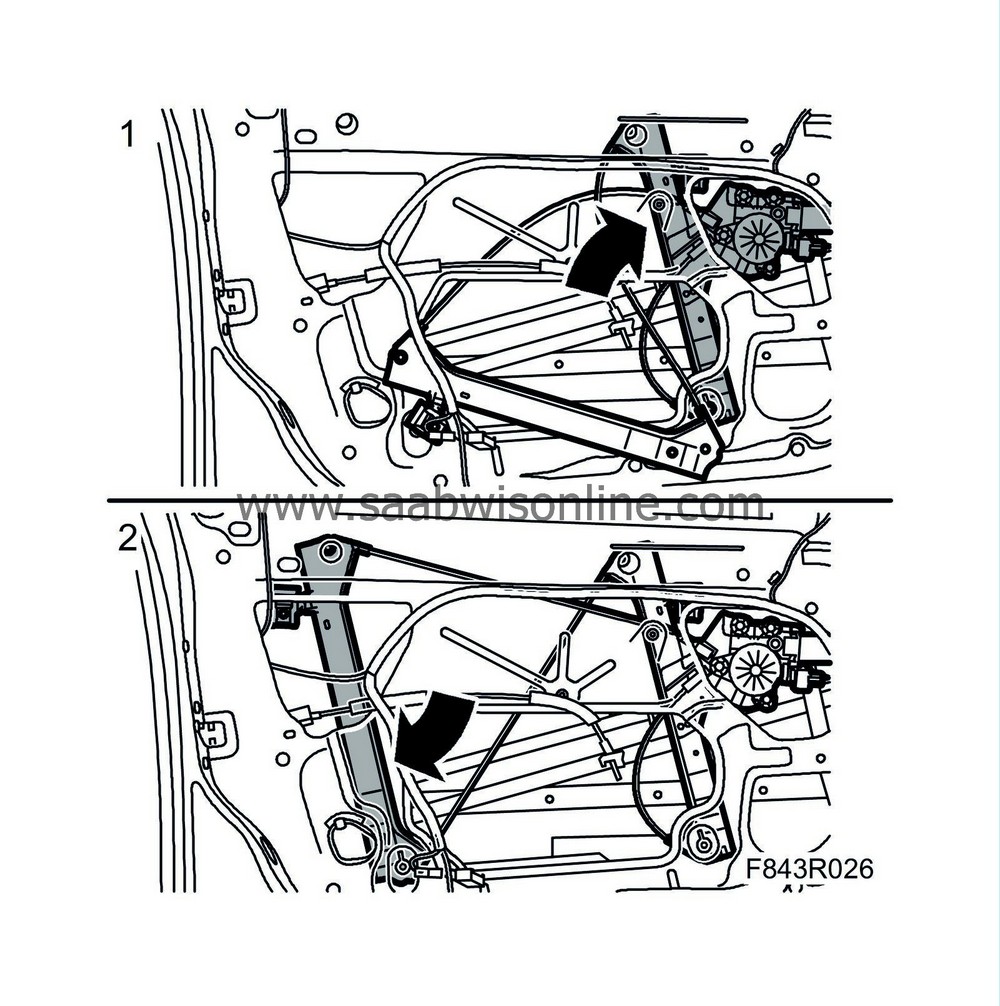
|
|
| 2. |
Continue with the other section and insert the studs into the mounting holes.
|
|
| 3. |
Fit the upper lift cable to the clip.

|
|
| 4. |
Fit the nuts and bolt. Fit the upper ones first.
|
|
| 5. |
Plug in the connector.
|
|
| 6. |
Fit the front of the window into the U-moulding. Hold the rear edge at an angle so that it locates in the U-moulding. Make sure the window is located properly in the U-moulding by closing and opening the window.
|
|
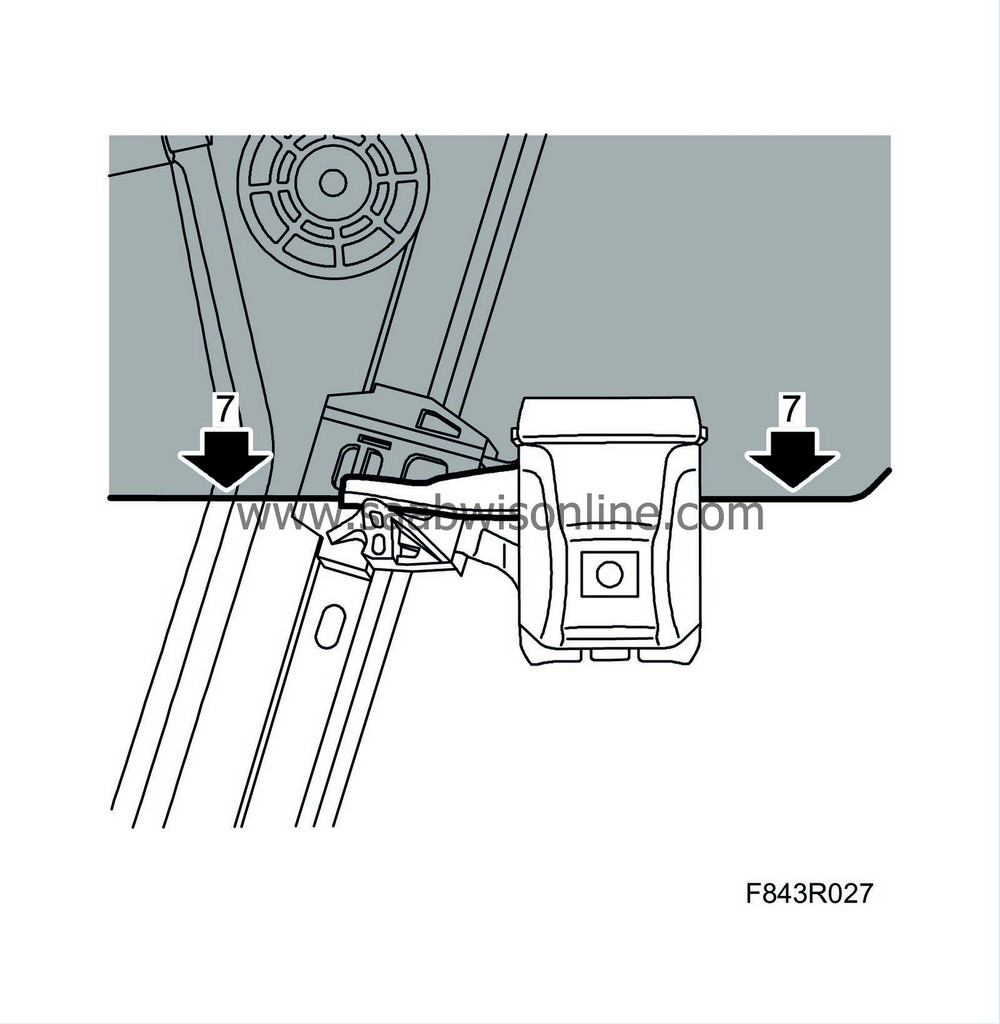
| 7. |
Press down the window so that it rests against the rubberised window mountings (illustration viewed from outside).
|
|
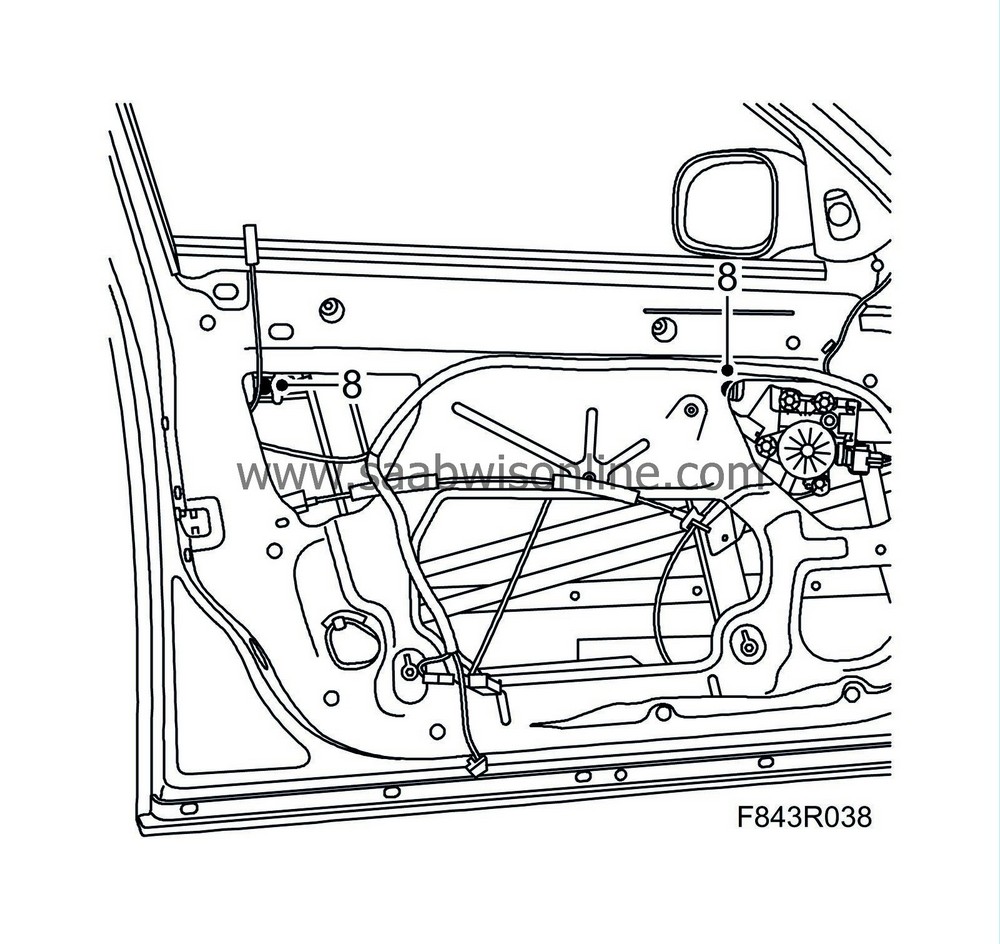
| 8. |
Tighten the bolts securing the window.
|
|
| 9. |
Fit the outer weatherstrip.
|
|
| 10. |
Plug in the window lift connector to the door trim. Close and open the window a few times to check its operation.
|
|
| 11. |
Fit the water barrier and
Door trim, front, 4D
.
|
|
| 12. |
Cars with pinch protection:
Perform
Calibration of pinch protection.
|
|
| 13. |
Clean the window.
|
|


