Headlining
| Headlining |
| To remove |
| 1. |
Open the soft top fully and leave the soft top cover open.
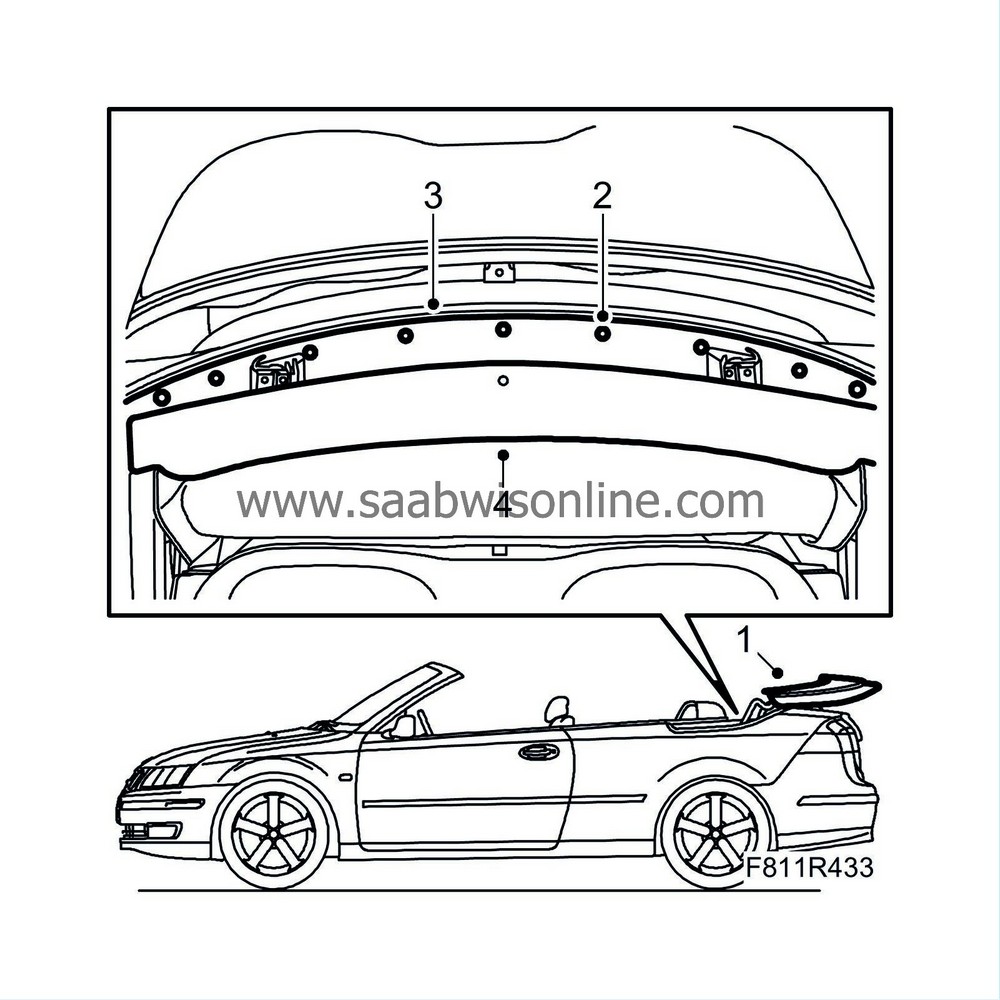
|
|
| 2. |
Remove the cover plate clip.
|
|
| 3. |
Carefully remove the cover plate.
|
|
| 4. |
Remove the cover by pulling it backwards.
|
|
| 5. |
Undo the first bow plastic plugs.
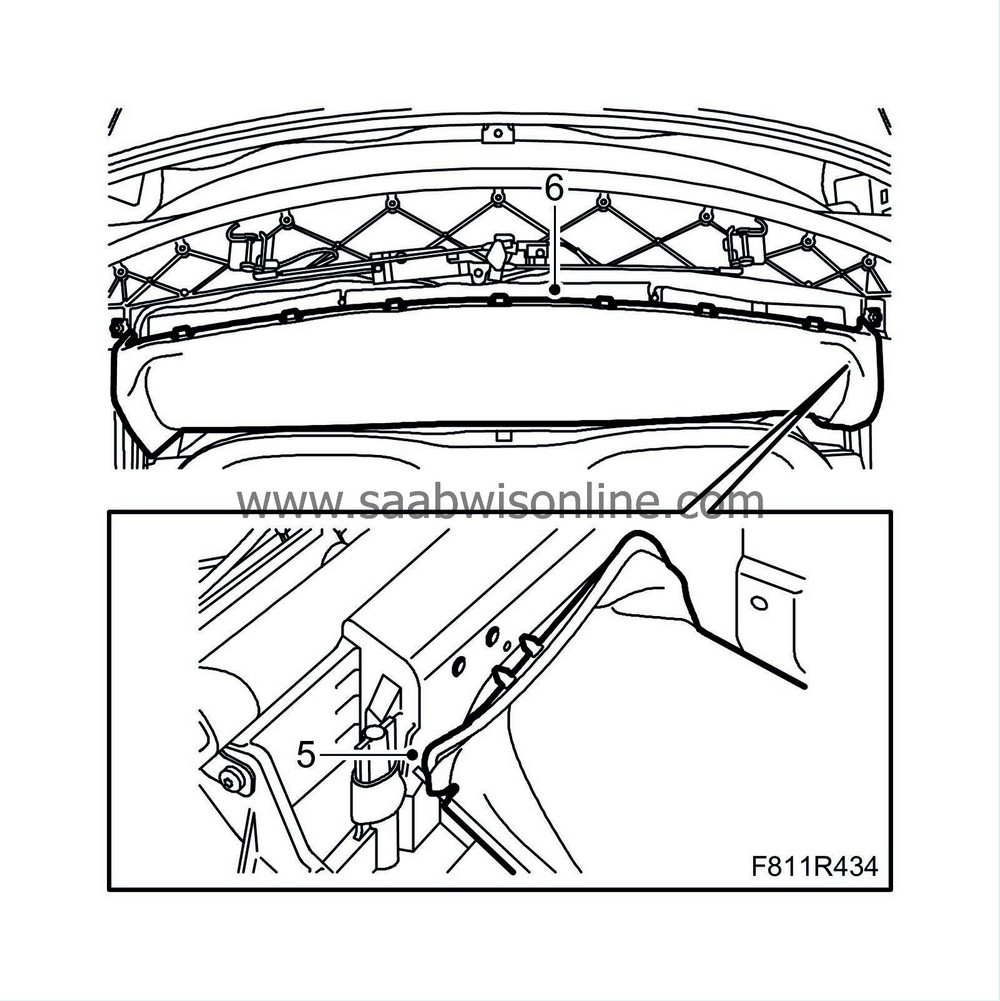
|
|
| 6. |
Detach the headlining from the first bow hooks.
|
|
| 7. |
Operate the soft top half way down and secure it with the soft top support.
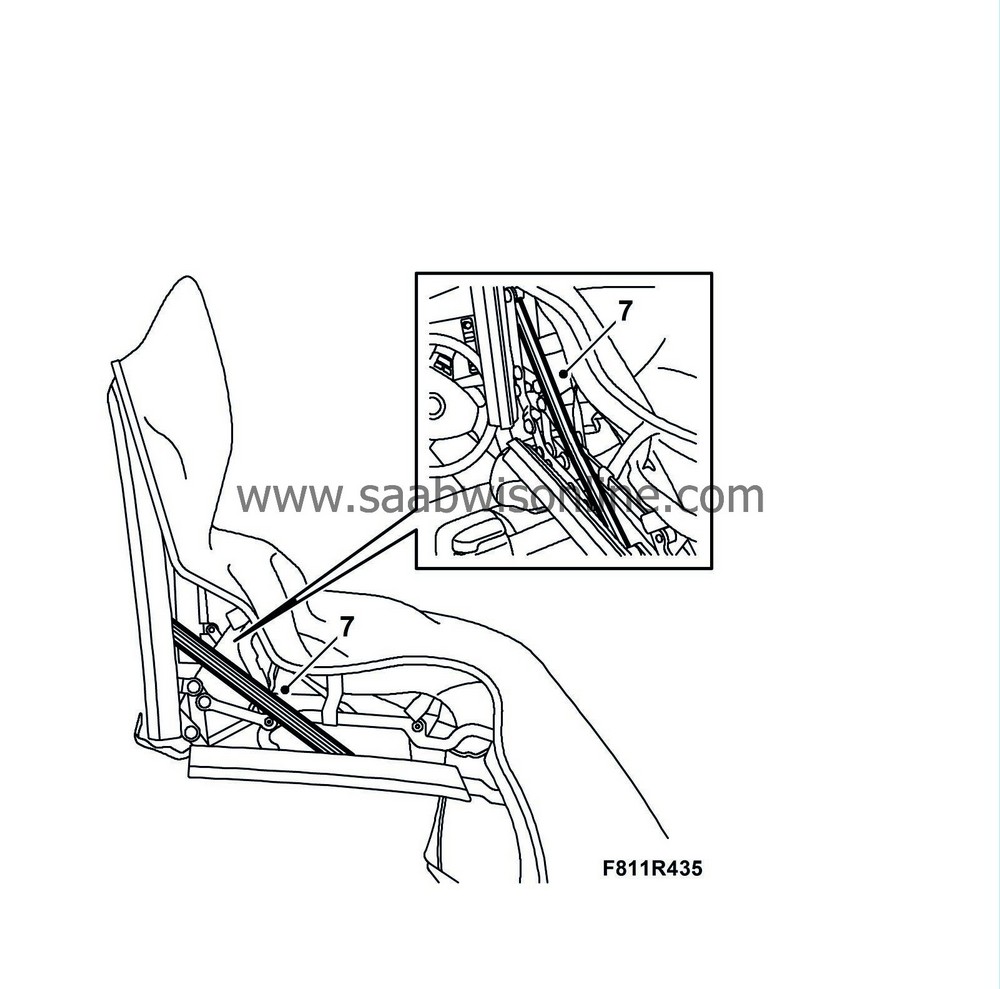
|
|
| 8. |
Use
84 71 179 Removal tool, clips
and remove the second bow plastic clip.
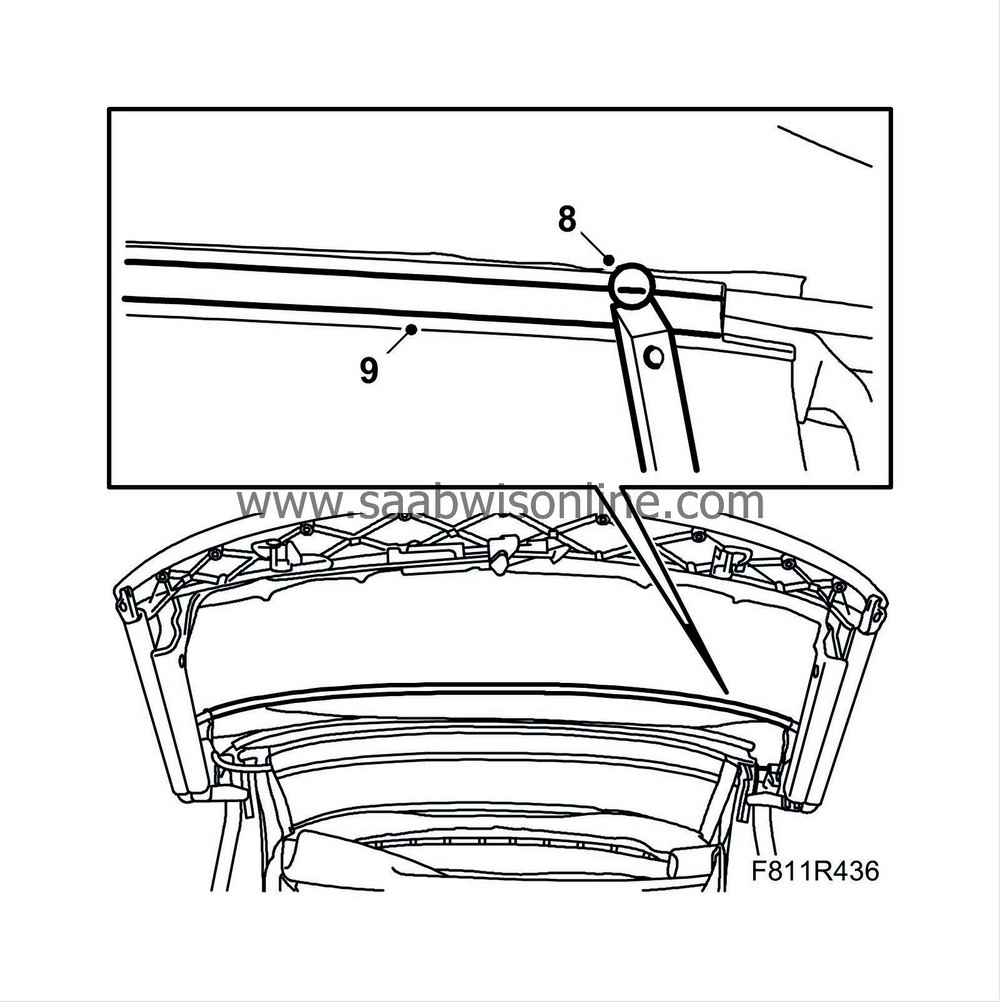
|
|
| 9. |
Pull the headlining plastic holder from the second bow.
|
|
| 10. |
Use
82 93 474 Removal tool
to remove the third bow plastic clip.
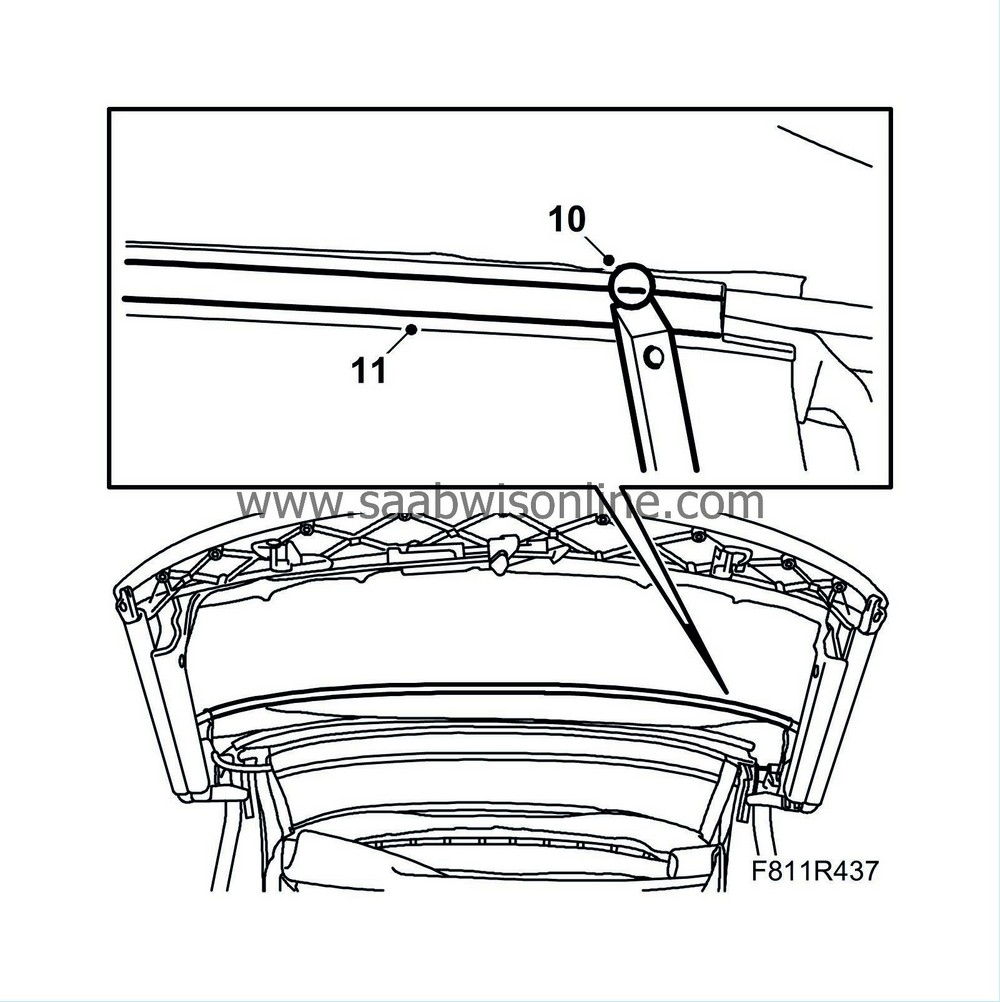
|
|
| 11. |
Pull the headlining plastic holder from the third bow.
|
|
| 12. |
Detach the headlining from the rear rails by puling it out of the mounting on both sides.
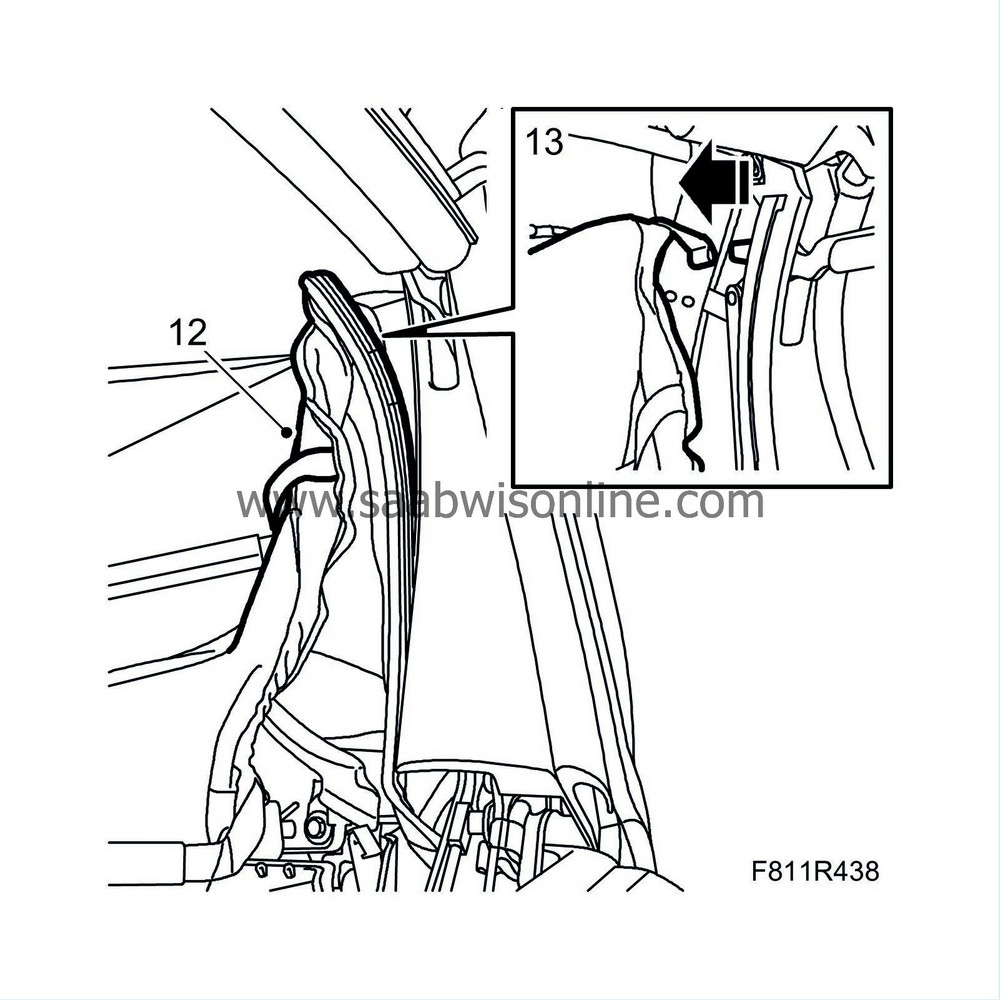
|
|
| 13. |
Pull the headlining rubber straps out of the headlining attaching eyelets.
|
|
| 14. |
Use
82 93 474 Removal tool
to remove the plastic clip from the fourth bow.
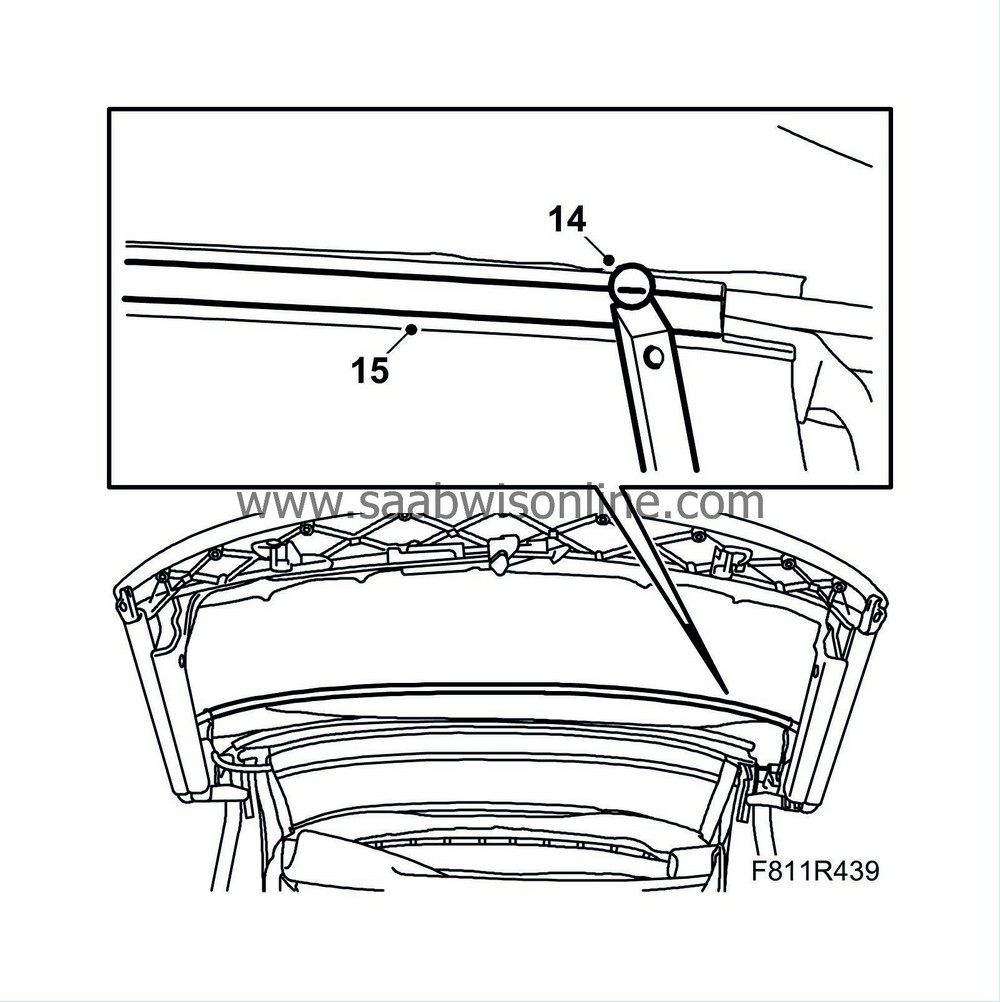
|
|
| 15. |
Pull the headlining plastic holder from the fourth bow.
|
|
| 16. |
Remove the soft top support and close the soft top.
|
|
| 17. |
Raise the sixth bow and support it with the soft top support.
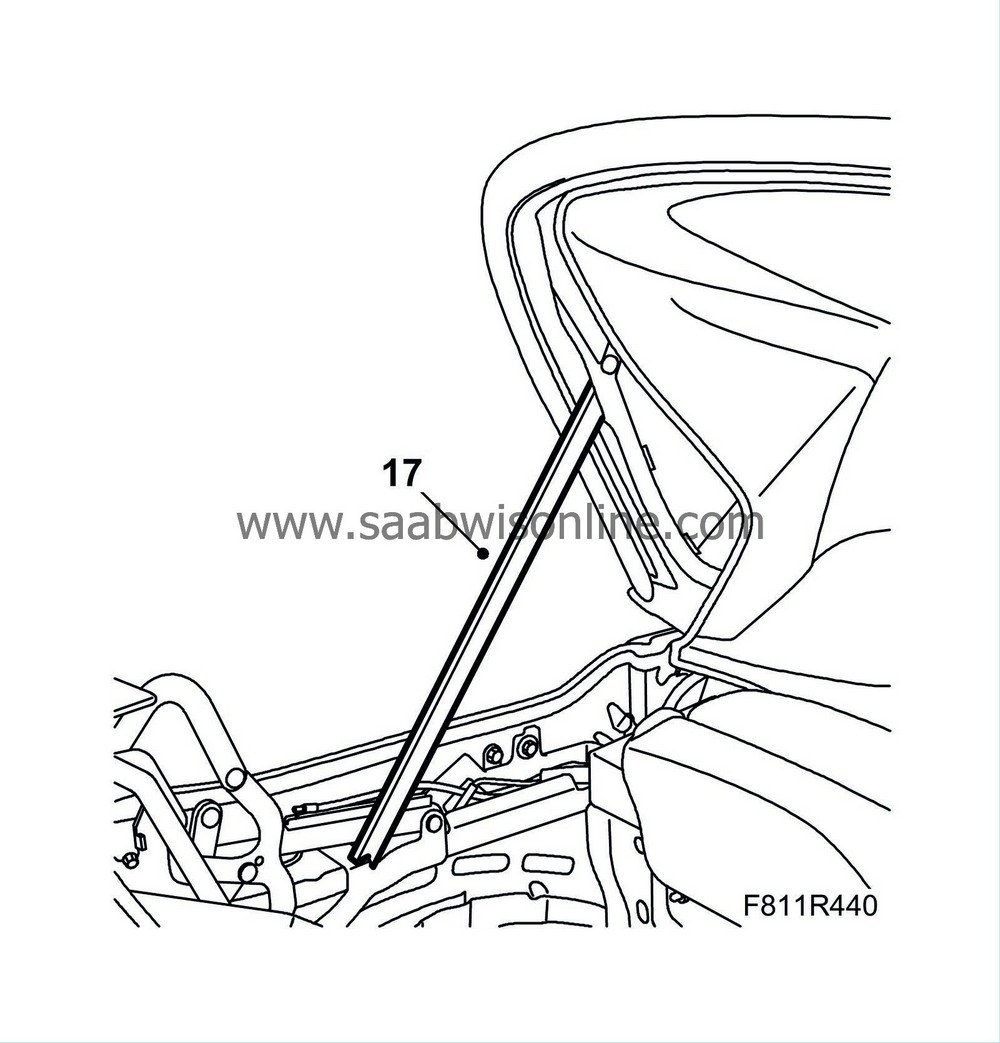
|
|
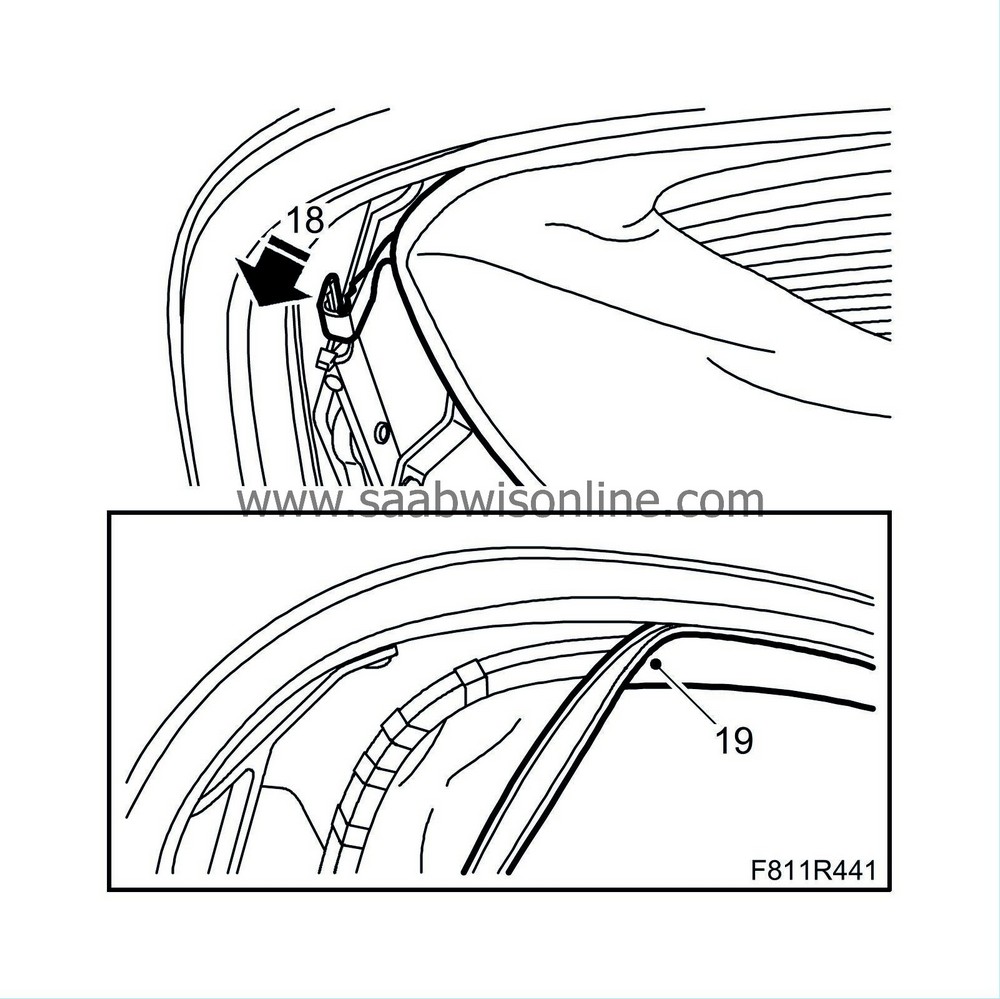
| 18. |
Undo the headlining plastic clip.
|
|
| 19. |
Pull the headlining edging from the sixth bow groove.
|
|
| Dismantling the headlining and rear window |
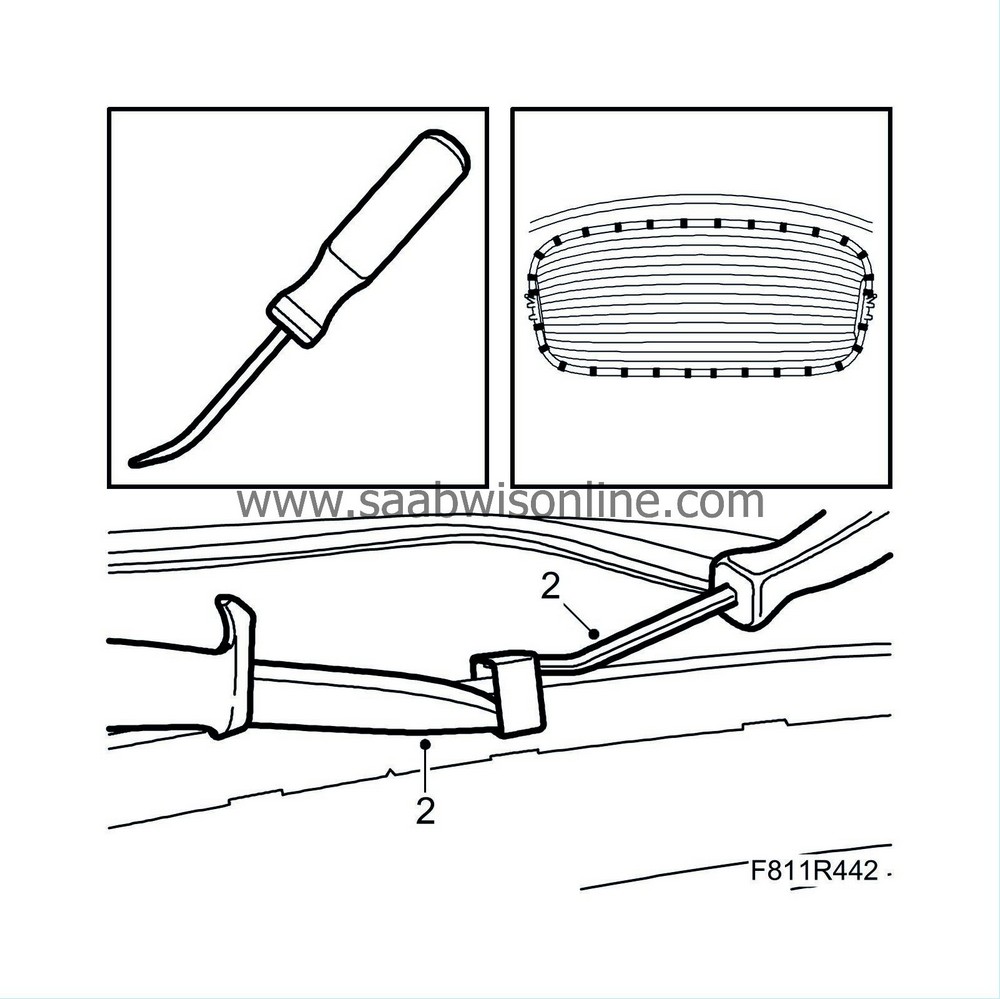
| 1. |
Manufacture a tool as shown in the illustration.
|
|
| 2. |
Lift up the clip with the tool and place a knife underneath. It is not necessary to remove the clips. Lift them somewhat sideways from the window frame as illustrated. Follow after with the knife to protect the window frame.
|
|
| 3. |
Continue in the same manner with the remaining clips.
|
|
| Assembling the headlining |
| Note | ||
|
Change or touch up the window frame if it is damaged. |
| 1. |
Place the headlining against the window frame and insert the edge of the headlining under the inner frame. Press the clips back against the window frame.

|
|
| To fit |
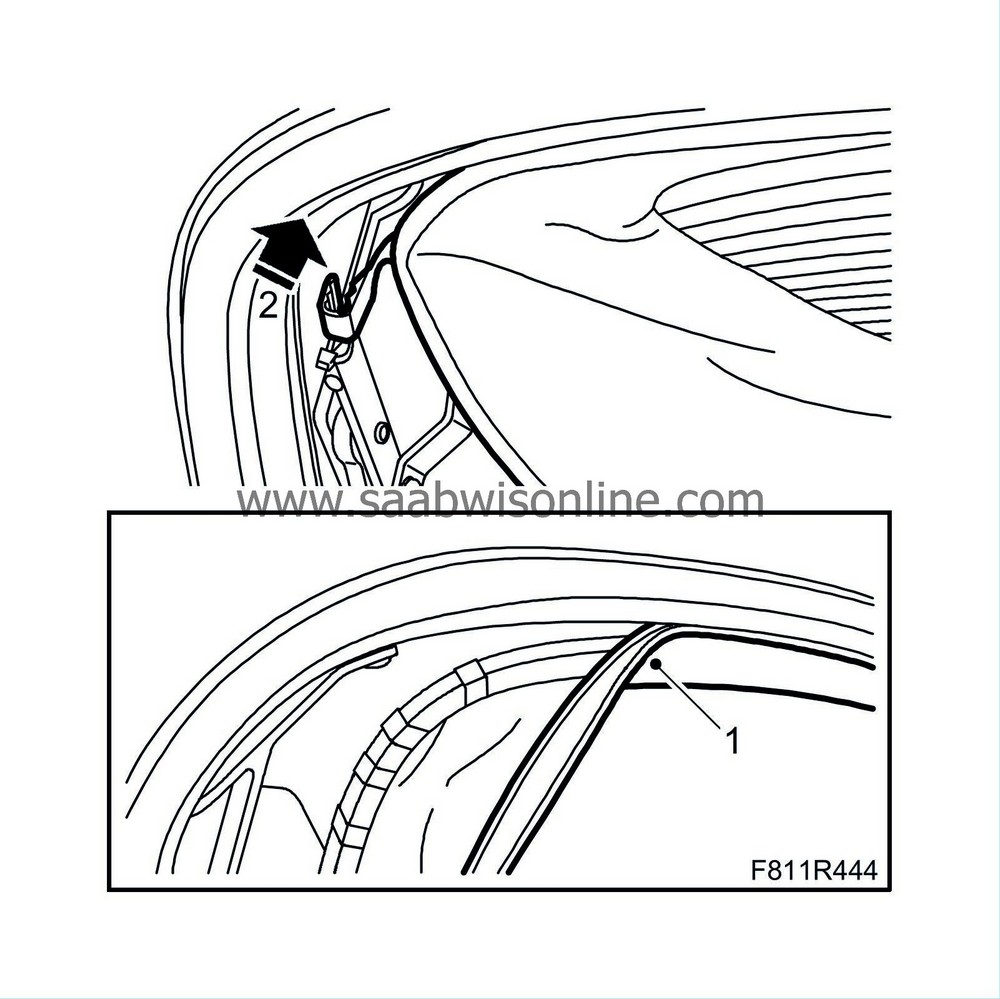
| 1. |
Press the headlining edging strip into the attaching profile.
|
|
| 2. |
Fit the plastic clip to the sixth bow.
|
|
| 3. |
Operate the soft top half way up and secure it with the soft top support.
|
|
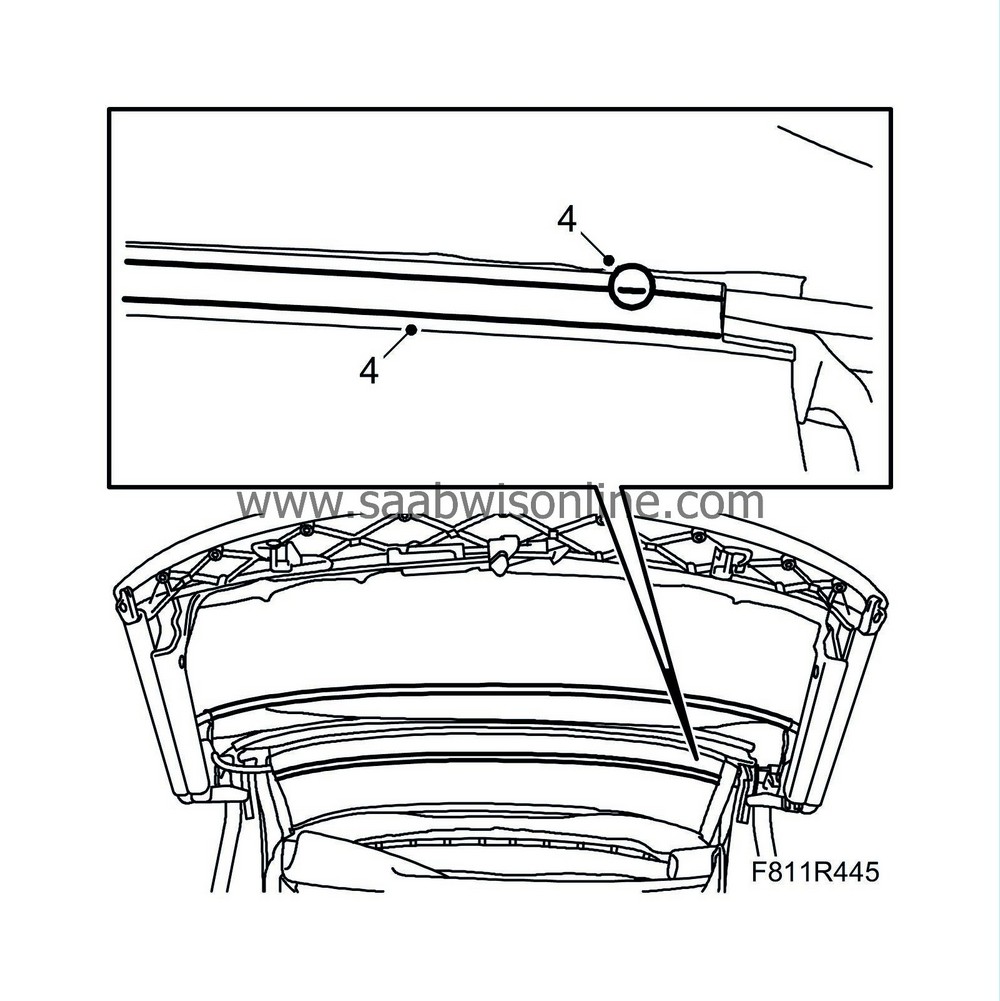
| 4. |
Press the headlining plastic holder onto the bows. Fit the plastic holder clips.
|
|
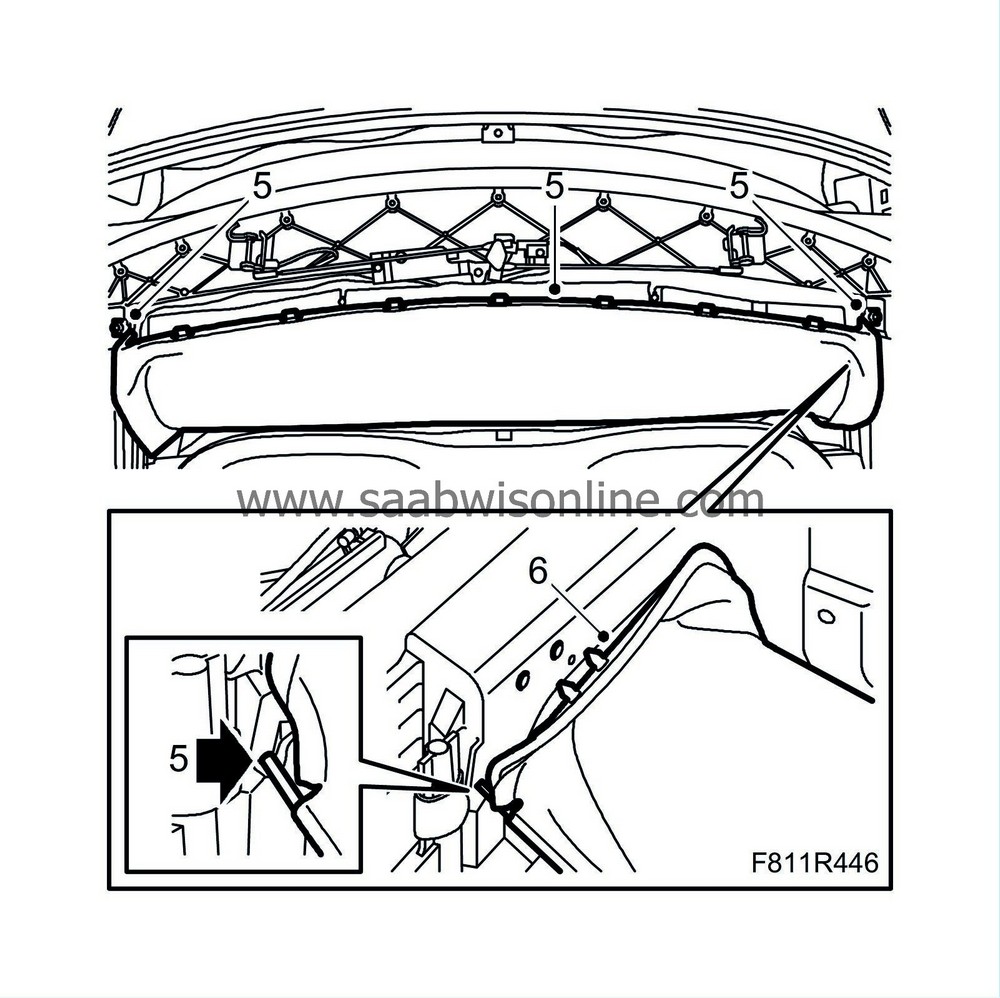
| 5. |
Hook the wire rod to the headlining on the first bow. The wire rod must be lying in the depression.
|
|
| 6. |
Fit the plastic plugs for the headlining to the first bow.
|
|
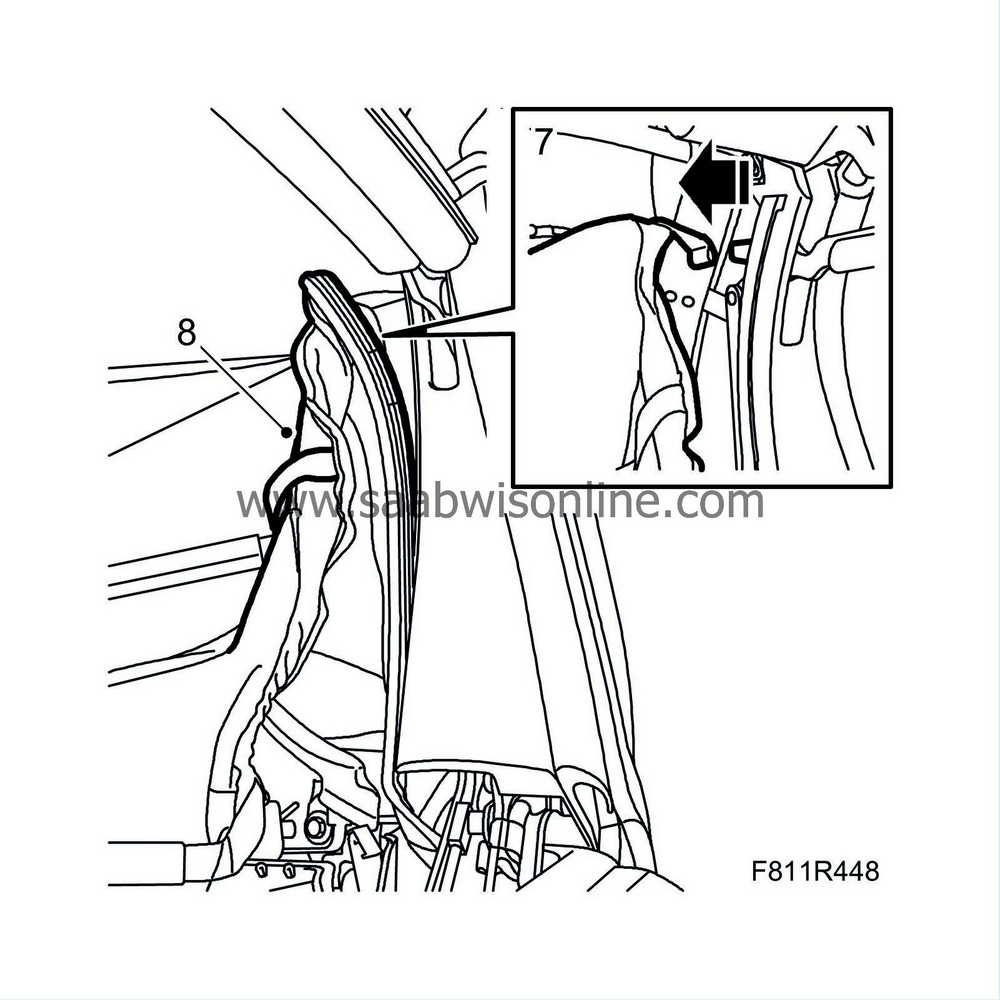
| 7. |
Fit the headlining rubber strap to the hook on the rear rail.
|
|
| 8. |
Fit the headlining to the rear rails by pressing in the headlining rail.
|
|
| 9. |
Close the soft top manually to check that the headlining is fitted correctly.
|
|
| 10. |
Operate the soft top automatically a few times to check the function.
|
|
| 11. |
Open the soft top and leave the soft top cover open.
|
|
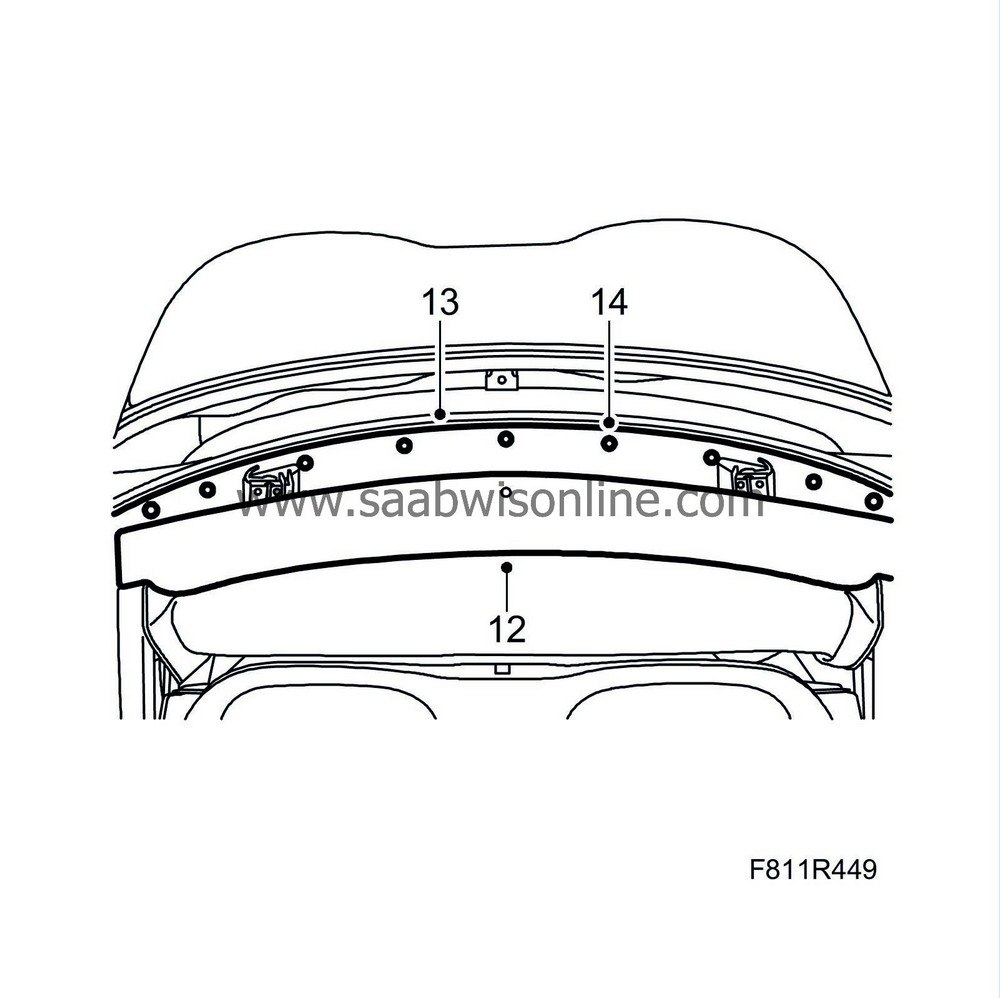
| 12. |
Fit the cover.
|
|
| 13. |
Fit the cover plate.
|
|
| 14. |
Fit the cover plate clip.
|
|
| 15. |
Connect the diagnostics tool and erase any diagnostic trouble code.
|
|


