Light setting, headlamps (US/CA)
|
|
Light setting, headlamps (US/CA)
|
|
1.
|
Check that all tyres have the correct air pressure.
|
|
2.
|
Check that there is no load in the car.
|
|
3.
|
Check fuel quantity. Compensate with load in the luggage compartment:
half tank - 25 kg; empty tank - 50 kg
|
|
4.
|
One person or a 75 kg load should be in the driver's seat.
|
|
5.
|
The car should be free from snow and ice.
|
|
6.
|
Park the car on a flat surface.
|
|
7.
|
Stabilise the suspension by rocking the car.
|
|
8.
|
Check the mounting of the bulb in the headlamp.
|
|
9.
|
Switch on the ignition.
|
|
Light setting against a wall
|
|
1.
|
Park the car 25 ft (7.6 m) from the wall.

|
Note
|
|
The headlamps should be set with a 2 inch downward angle at 25 ft (5 cm at 7.6 m)
|
|
|
2.
|
Measure from the ground to the mark on the headlamp lens, deduct 2 inches (5 cm) and note the measurement.
|
|
3.
|
Take the same measurement as noted in point 2. Draw a horizontal line as wide as the car on the wall.
|
|
4.
|
Xenon headlamp:
Start the engine, allow the headlamps to do a reference shine and then switch off the engine.
|
|
5.
|
Switch on dipped beam.
|
|
6.
|
Screen off the headlamp not being set.
|
|
7.
|
When the light setting is correct, the base line of the light image should match the horizontal line on the wall.
|
|
8.
|
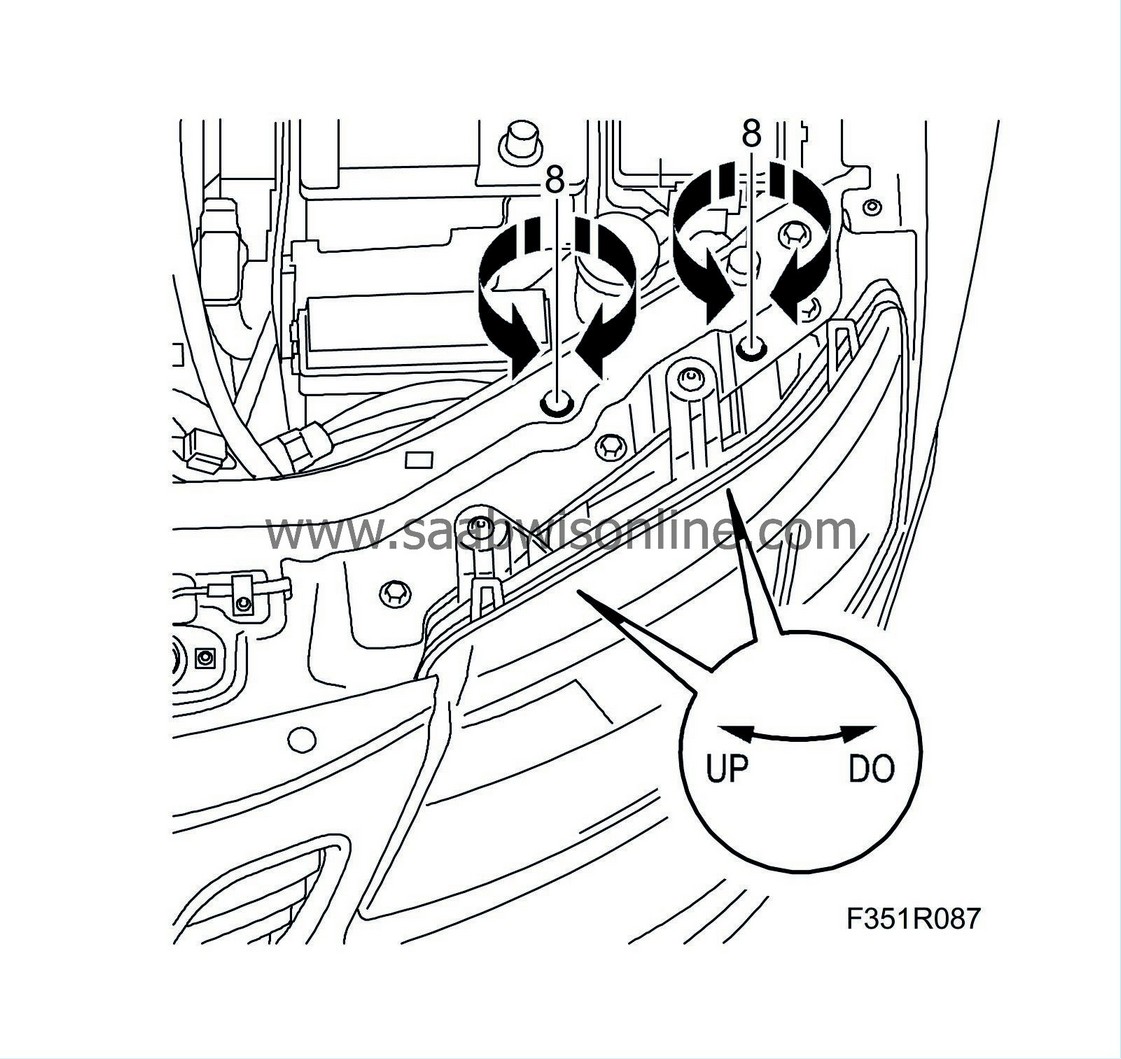
Adjust the light image vertically until the base line matches the horizontal line on the wall. Tighten both screws equally in the same direction.

|
|
Light setting with special equipment
|
|
1.
|
For handling of light setting equipment, see the user's manual from the manufacturer.
|
|
2.
|
Adjust the light image vertically. Tighten both screws equally in the same direction.
|


