Changing Passenger Presence System
| Changing Passenger Presence System |
Manual seat
|
||||||||||
| To remove |
| 1. |
Move the passenger seat all the way forward and fold forward the backrest.
|
|
| 2. |
Disconnect the negative battery terminal.
|
|
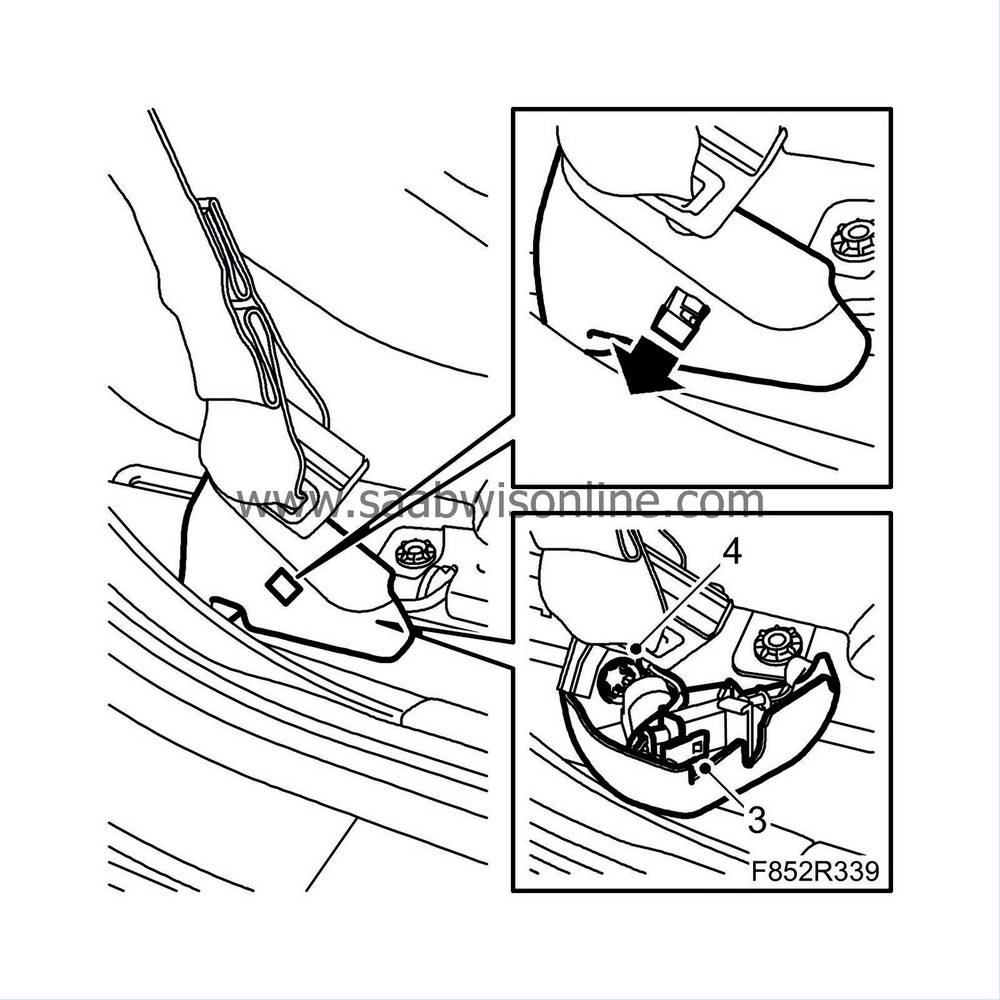
| 3. |
Detach the belt force sensor connector at its anchor point on the floor.
|
|
| 4. |
Remove the cover and seatbelt mounting from the seat.
|
|
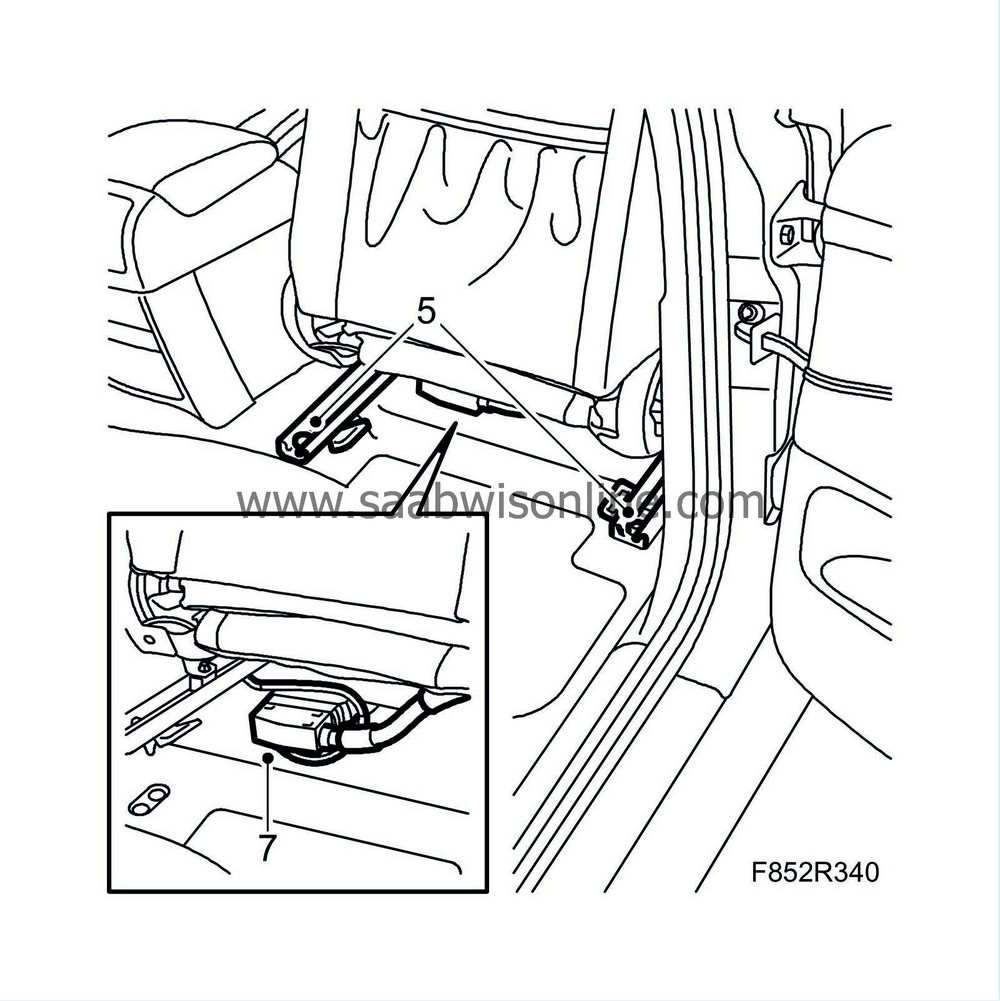
| 5. |
Remove the two rear retaining bolts from the seat.
|
|
| 6. |
Tip the seat forward.
|
|
| 7. |
Unplug the connector on the seat.
|
|
| 8. |
Pull the seat back to unhook the mountings. Carefully remove the seat.
|
|
| 9. |
Place the seat on a clean surface.
|
|
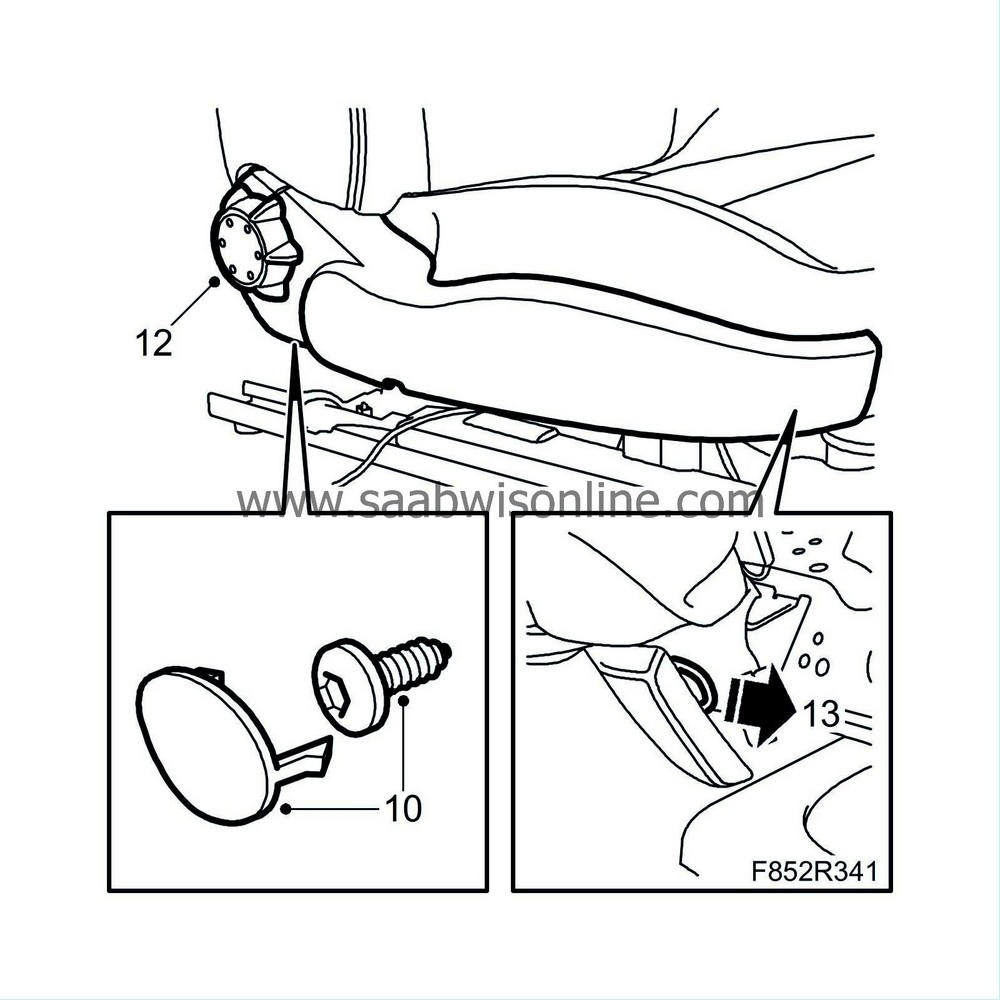
| 10. |
Remove the protective cover for the side panel rear bolt and remove the bolt.
|
|
| 11. |
Place the seat so that that the bottom is easily accessible.
|
|
| 12. |
Remove the backrest adjuster knob.
|
|
| 13. |
Remove the front R-clip from the side panel.
|
|
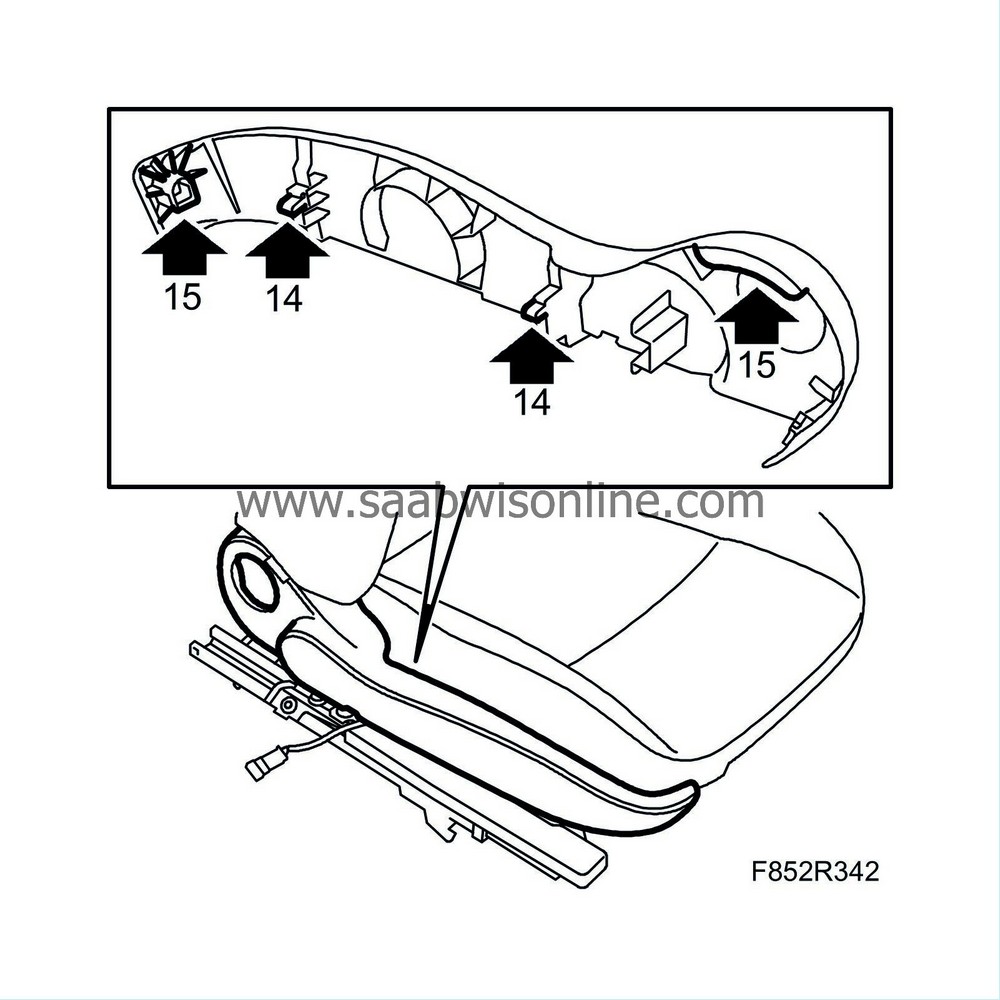
| 14. |
Pinch together the side panel clips with a suitable tool so that the side panel can be released.
|
|
| 15. |
Remove the side panel by first undoing it from its front mounting and then sliding it back.
|
|
| 16. |
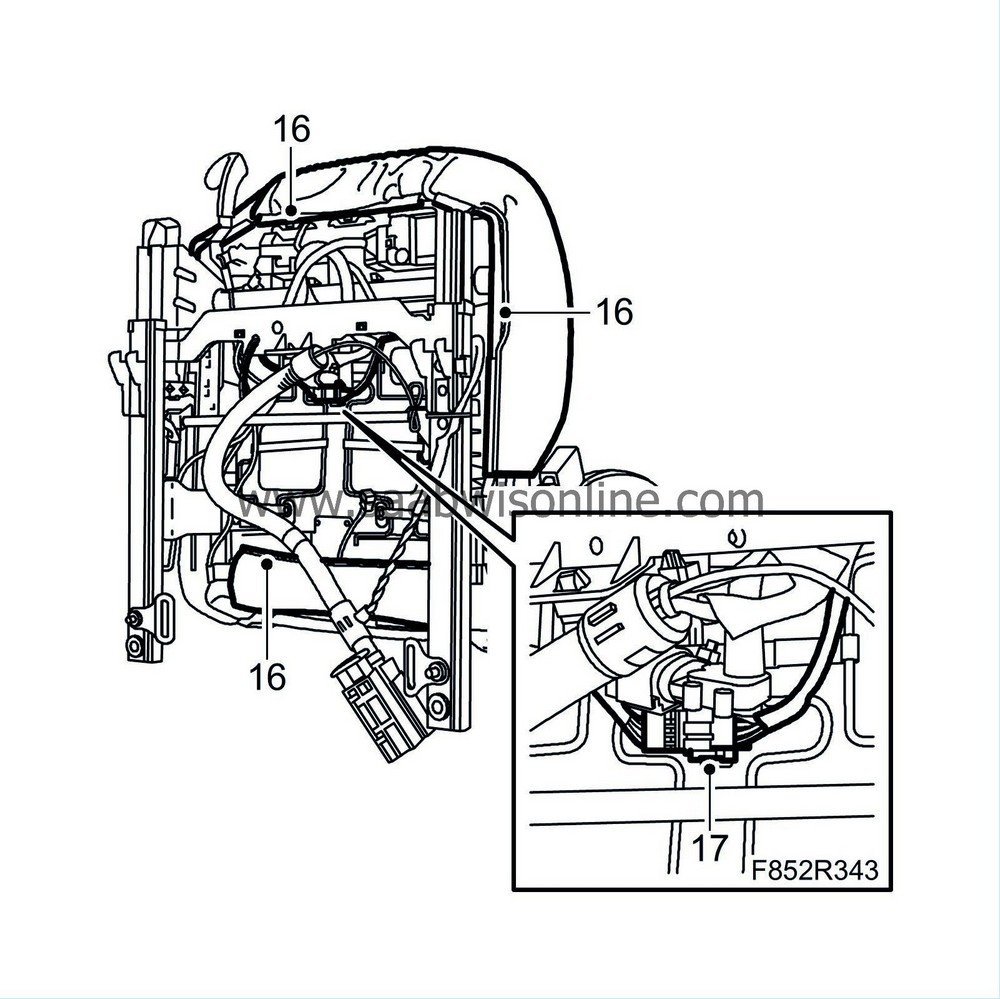
Remove the seat cushion upholstery strips at the front, rear and sides.
|
|
| 17. |
Unplug the seat heating connector.
|
|
| 18. |
Carefully lift off the foam cushion with upholstery from the frame.
|
|
| 19. |
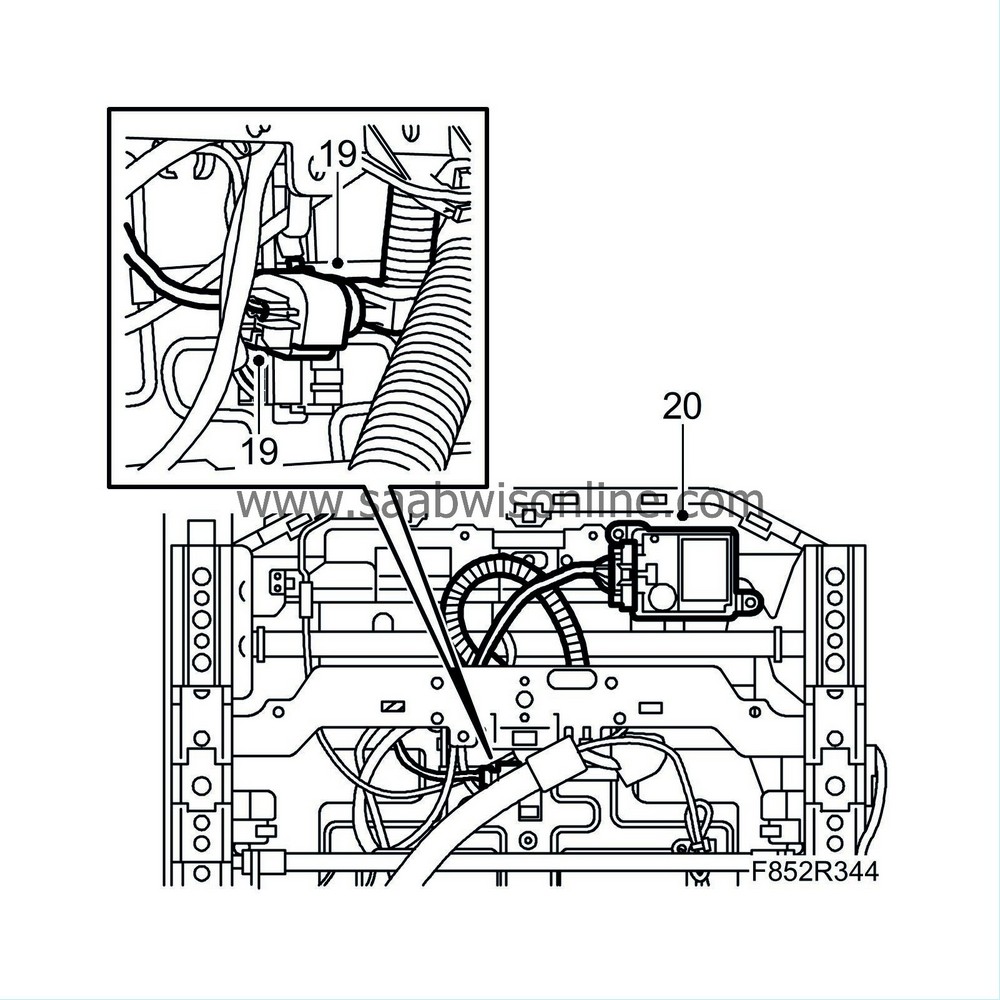
Undo the attachment and remove the pressure sensor connector.
|
|
| 20. |
Remove the control module connector.
|
|
| 21. |
Unscrew the control module from the bracket.

|
|
| 22. |
Unsnap the plate with silicone mat from the spring mat.
|
|
| 23. |
Remove the bolts and extract the bracket from the seat frame.

|
|
| 24. |
Lift off the bracket, plate and silicone mat as one unit.
|
|
| 25. |
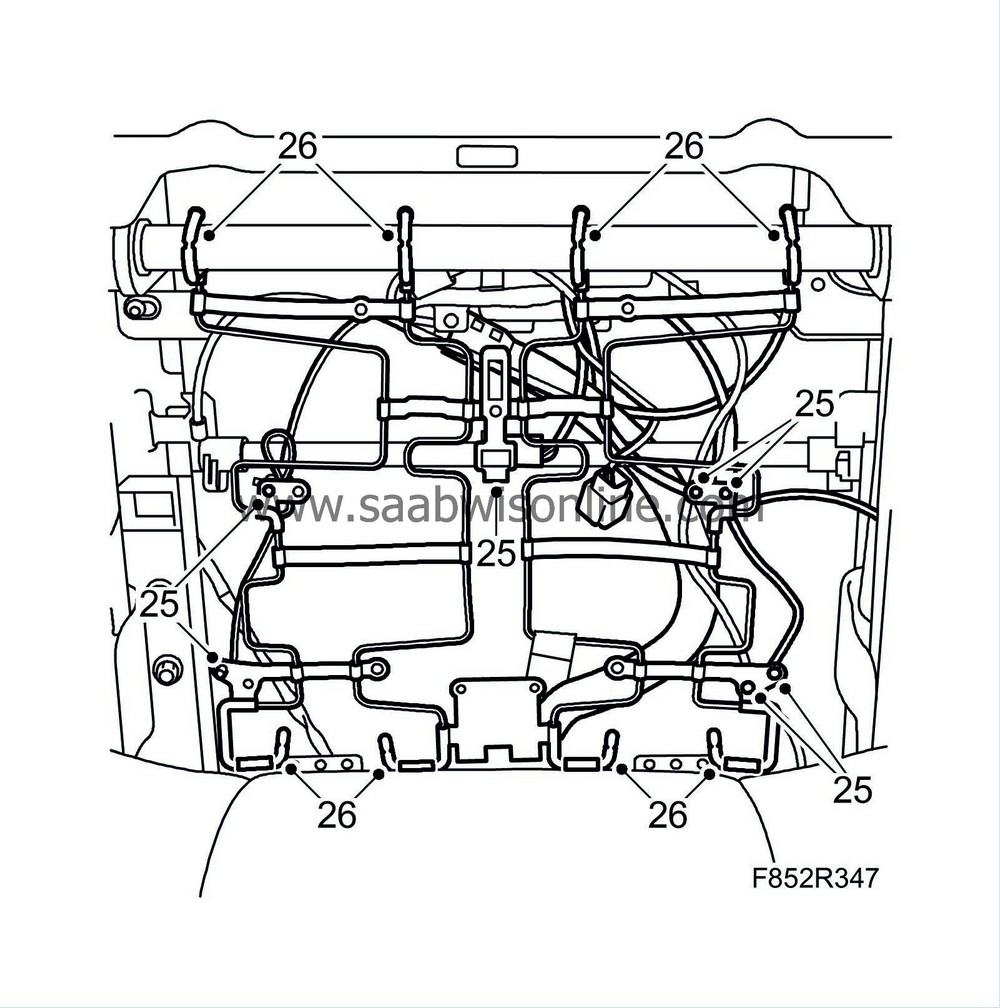
Detach the wiring harness from the spring mat (not the location of the cable ties).
|
|
| 26. |
Remove the spring mat.
|
|
| 27. |
Remove the upholstery from the foam cushion, see
Front seat cushion upholstery
|
|
| To fit |
|
|||||||
| 1. |
Check the following:
|
|
| 1.A. |
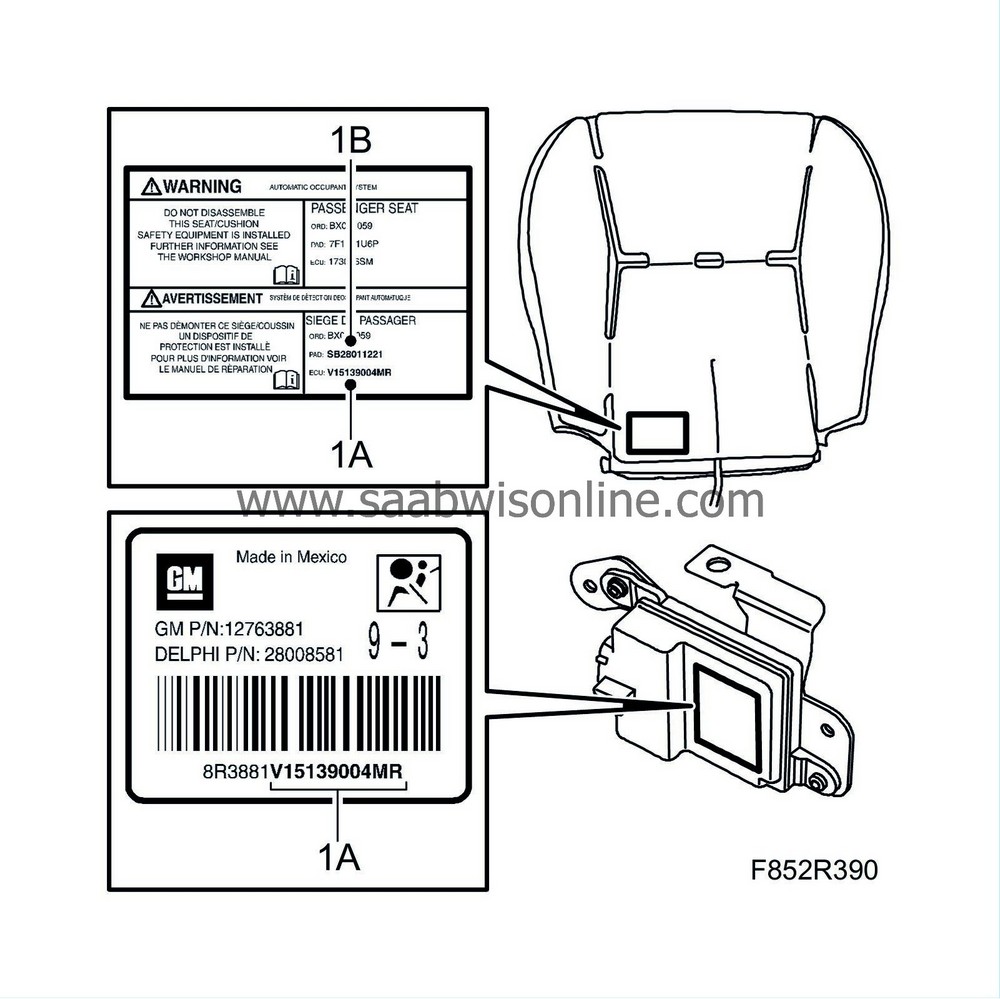
The control module reference number must match the ECU number on the foam cushion label.
|
| 1.B. |
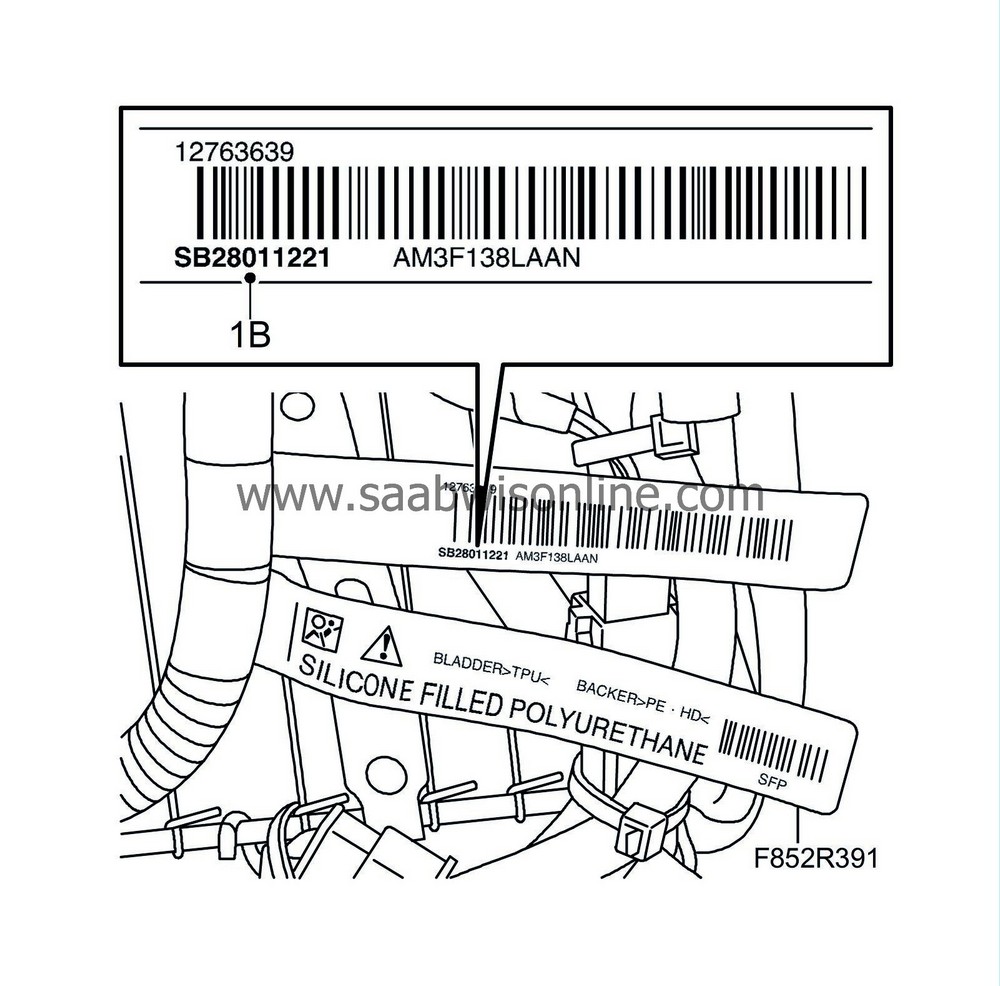
The pressure sensor's PAD no. must match the foam cushion label.
|
| 2. |
Fit the upholstery to the foam cushion, see
Front seat cushion upholstery
|
|
| 3. |
Fit the spring mat.

|
|
| 4. |
Fit the wiring harness and secure with cable ties.
|
|
| 5. |
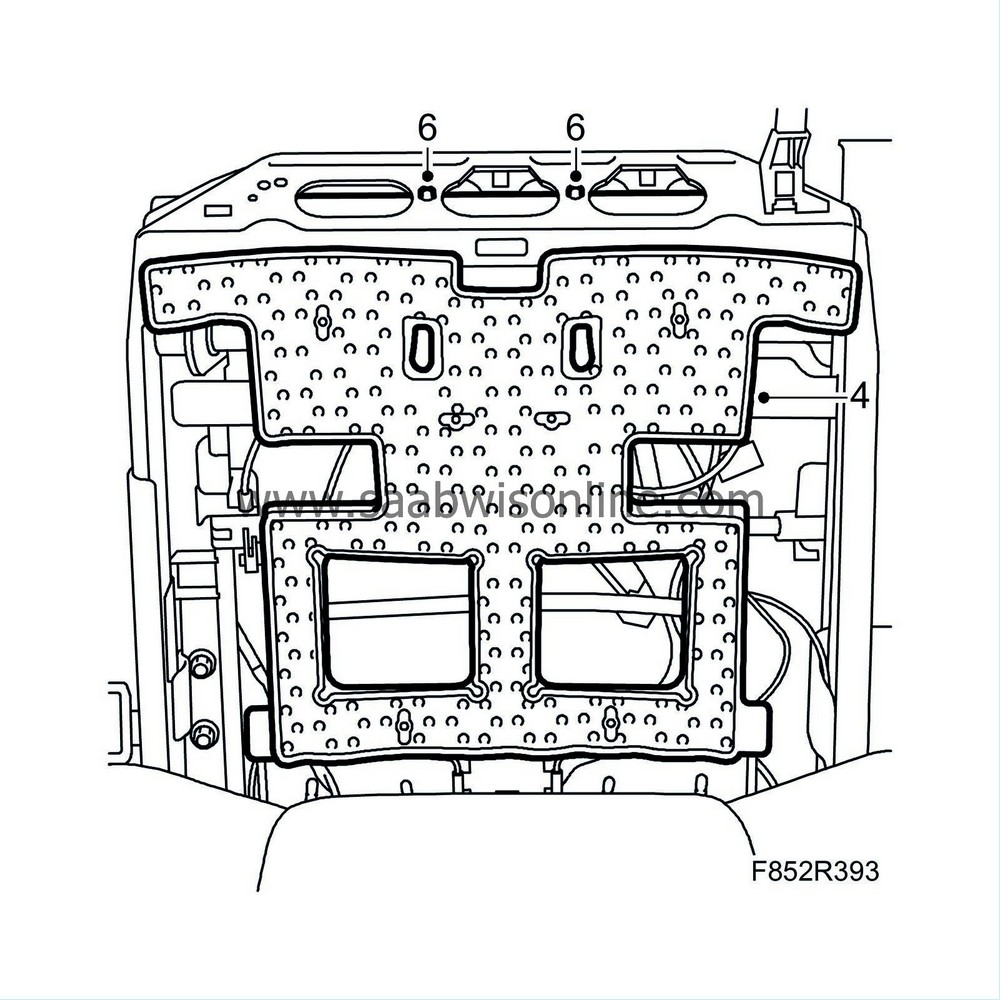
Put the bracket, plate and silicone mat in place.
|
|
| 6. |
Insert the bracket and fit with the bolts.

|
|
| 7. |
Press the plate onto the spring mat.
|
|
| 8. |
Fit the control module to the bracket.
|
|
| 9. |
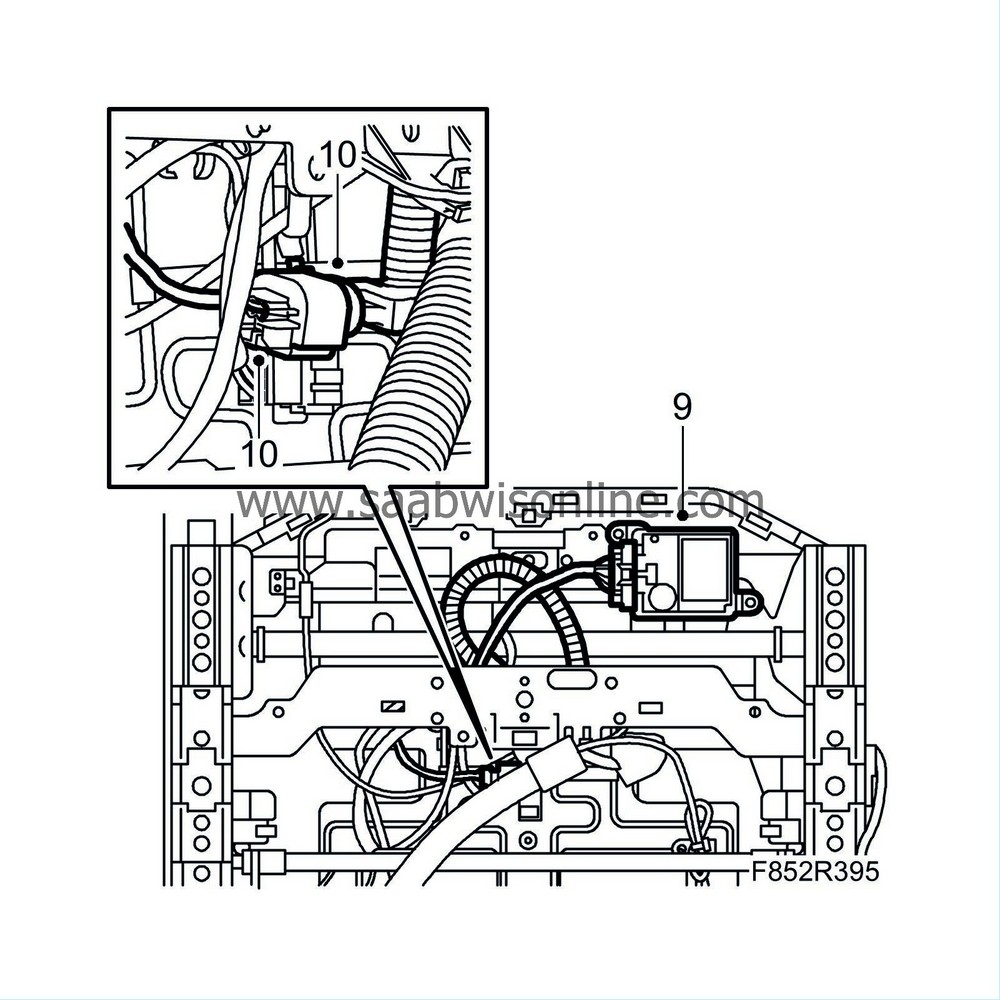
Connect the control module connector.
|
|
| 10. |
Plug in the pressure sensor connector and secure it with cable ties.
|
|
| 11. |
Put in place the seat cushion and extract the heating pad cable.
|
|||||||
| 12. |
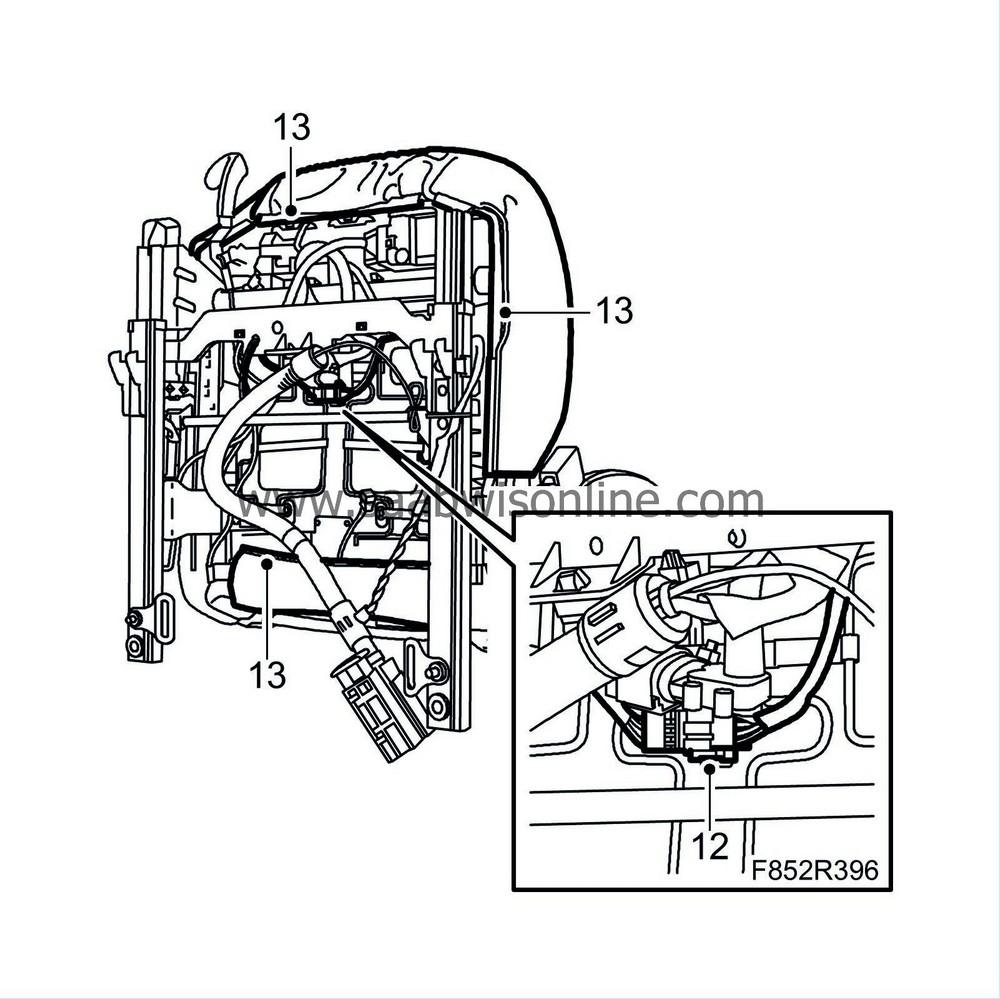
Plug in the seat heating connector.
|
|
| 13. |
Fit the seat cushion upholstery strips at the front, rear and sides.
|
|
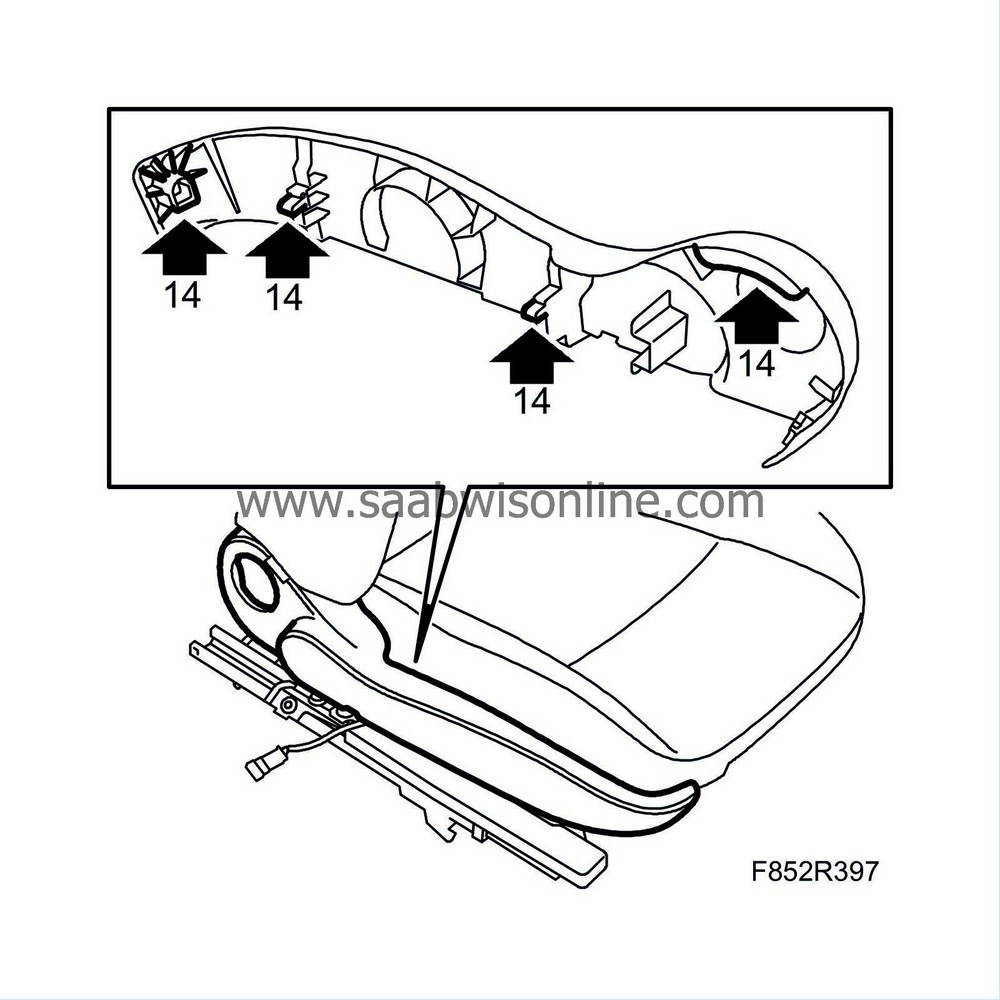
| 14. |
Fit the side panel. Start at the front edge.
|
|
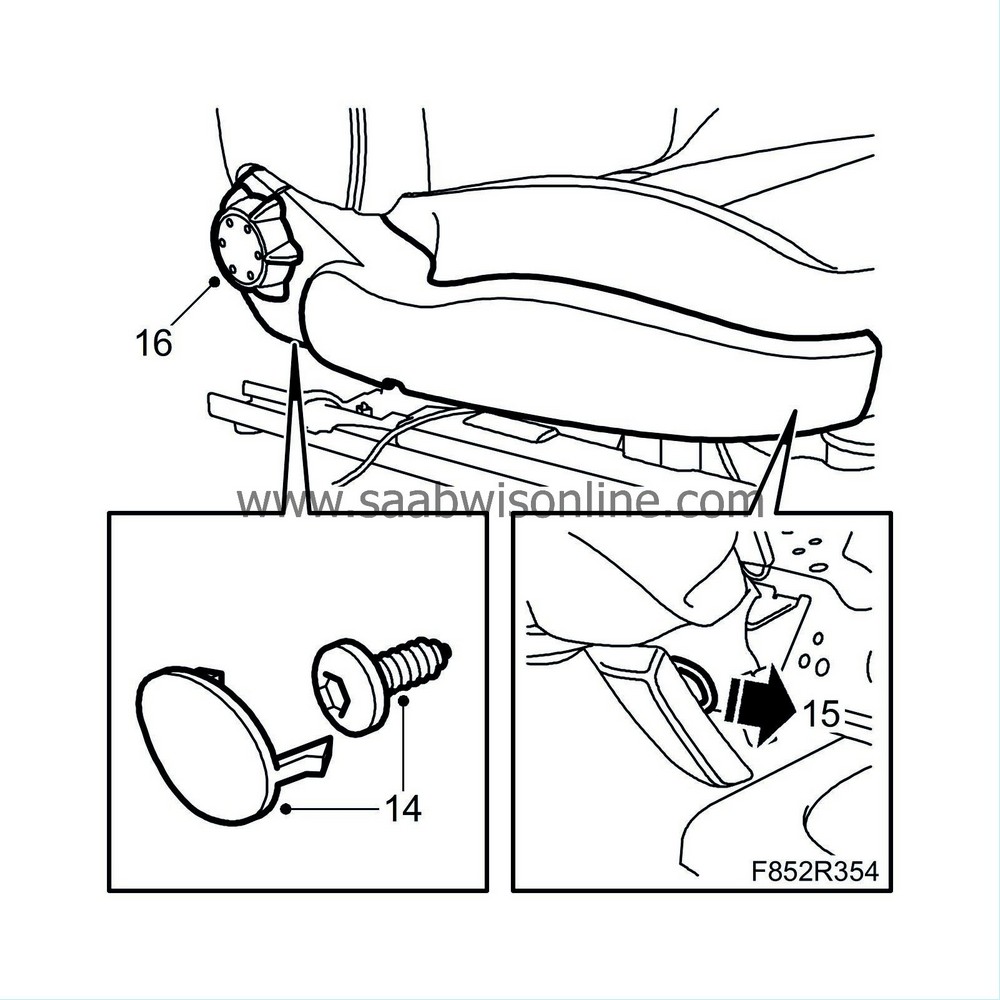
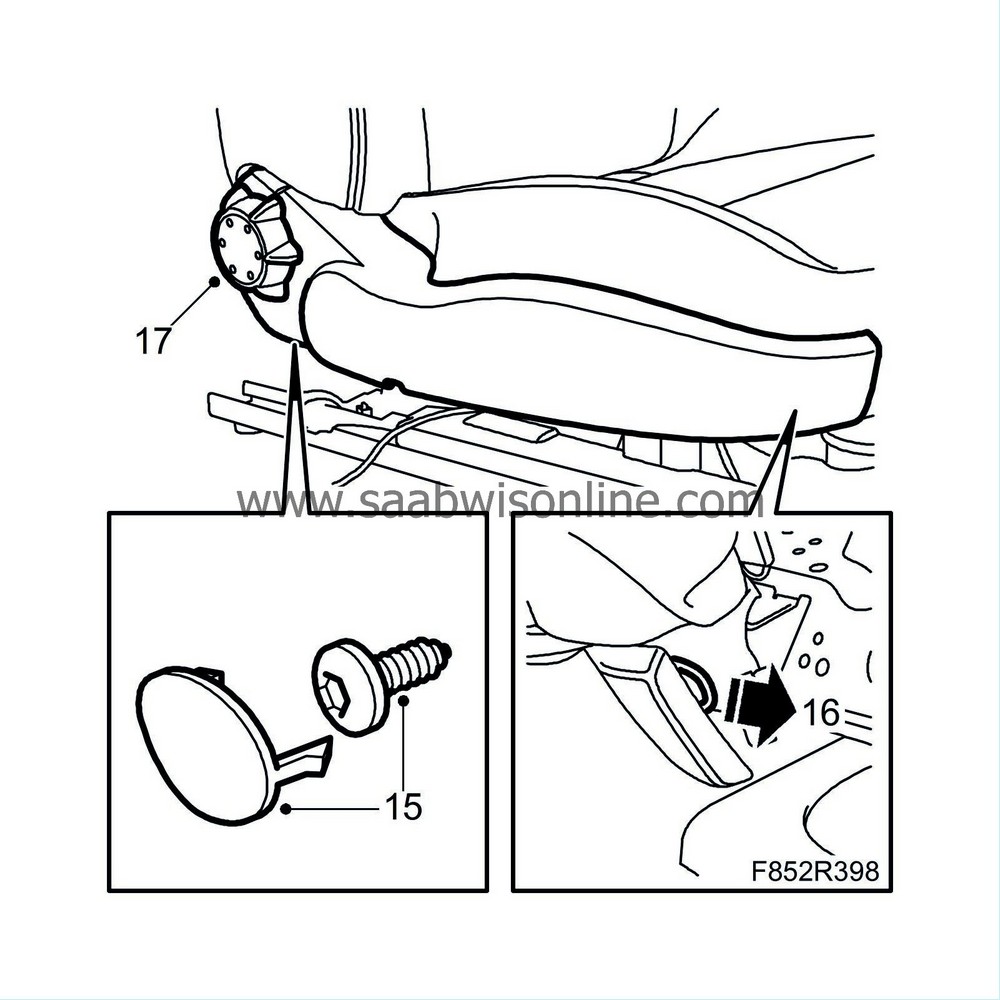
| 15. |
Fit the side panel rear bolt and protective cover.
|
|
| 16. |
Fit the front R-clip to the side panel.
|
|
| 17. |
Fit the backrest adjuster knob.
|
|
| 18. |
Carefully lift in and position the seat. Tip the seat forward.
|
|
| 19. |
Plug in the connector on the seat.

|
|
| 20. |
Set the seat in its correct position. Be careful that the fitting hooks locate themselves correctly into their brackets, and fit the rear retaining bolts. Use
Thread locking adhesive, Loctite 242
.
Tightening torque 30 Nm (22 lbf ft) |
|
| 21. |
Fit the seatbelt mounting and cover to the seat.
Tightening torque 30 Nm (22 lbf ft) 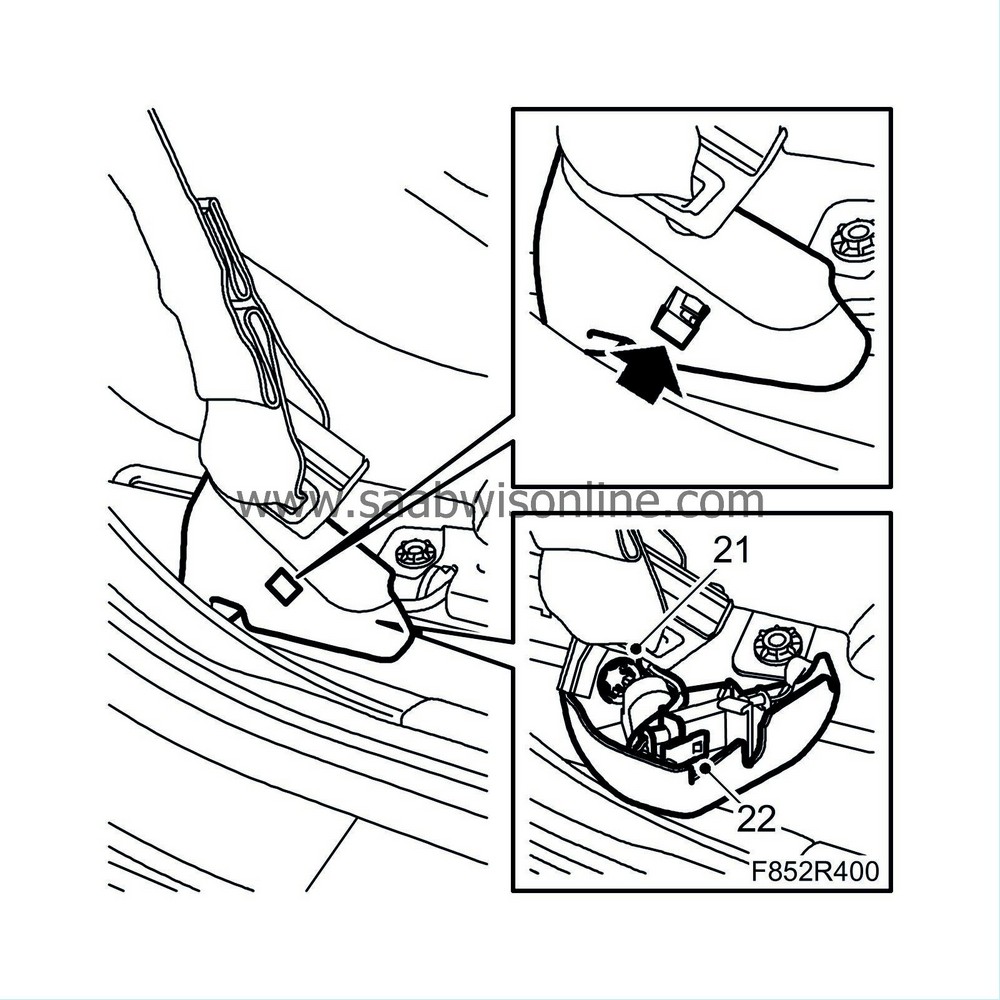
|
|
| 22. |
Plug in the belt force sensor connector at its anchor point on the floor.
|
|
| 23. |
Connect the negative battery terminal.
|
|
| 24. |
Read and clear any diagnostic trouble codes with Tech2.
|
|
| 25. |
Calibrate as follows:
|
|
| • |
Sit in the seat and press down the cushion.
|
| 26. |
Carry out
Measures after disconnecting the battery
.
|
|

 Warning

