Wiring harness, boot lid, 4D
| Wiring harness, boot lid, 4D |
| To remove |
| Note | ||
|
If the car is equipped with a radio other than a genuine Saab radio, check that the customer has the radio code before commencing work. |
| 1. |
Undo the cable for the battery's negative terminal.
|
|
| 2. |
Remove the
C-pillar trim
.
|
|
| 3. |
Remove the
Boot lid trim
.
|
|
| 4. |
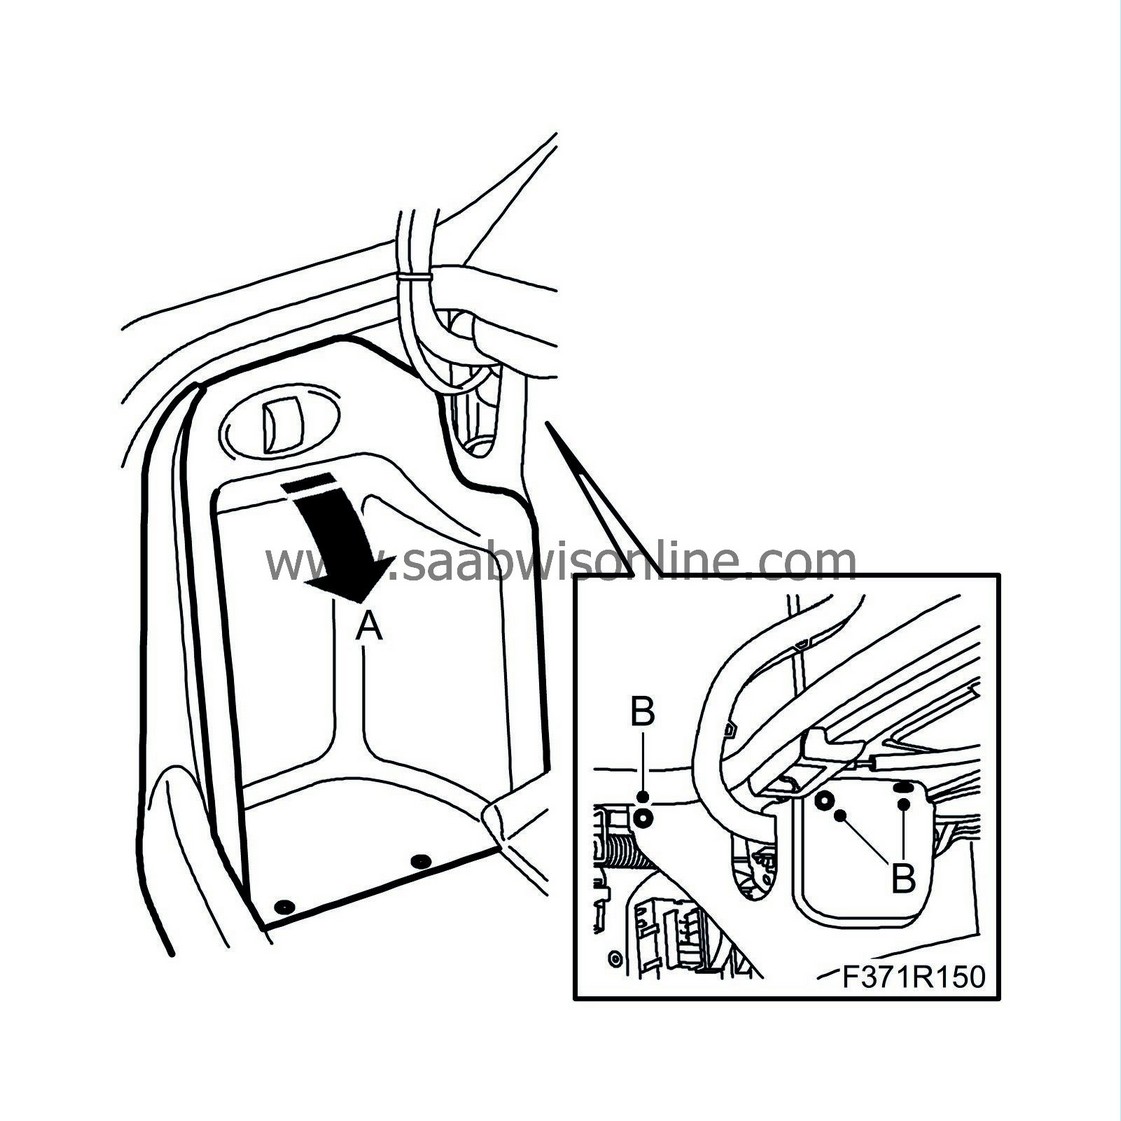
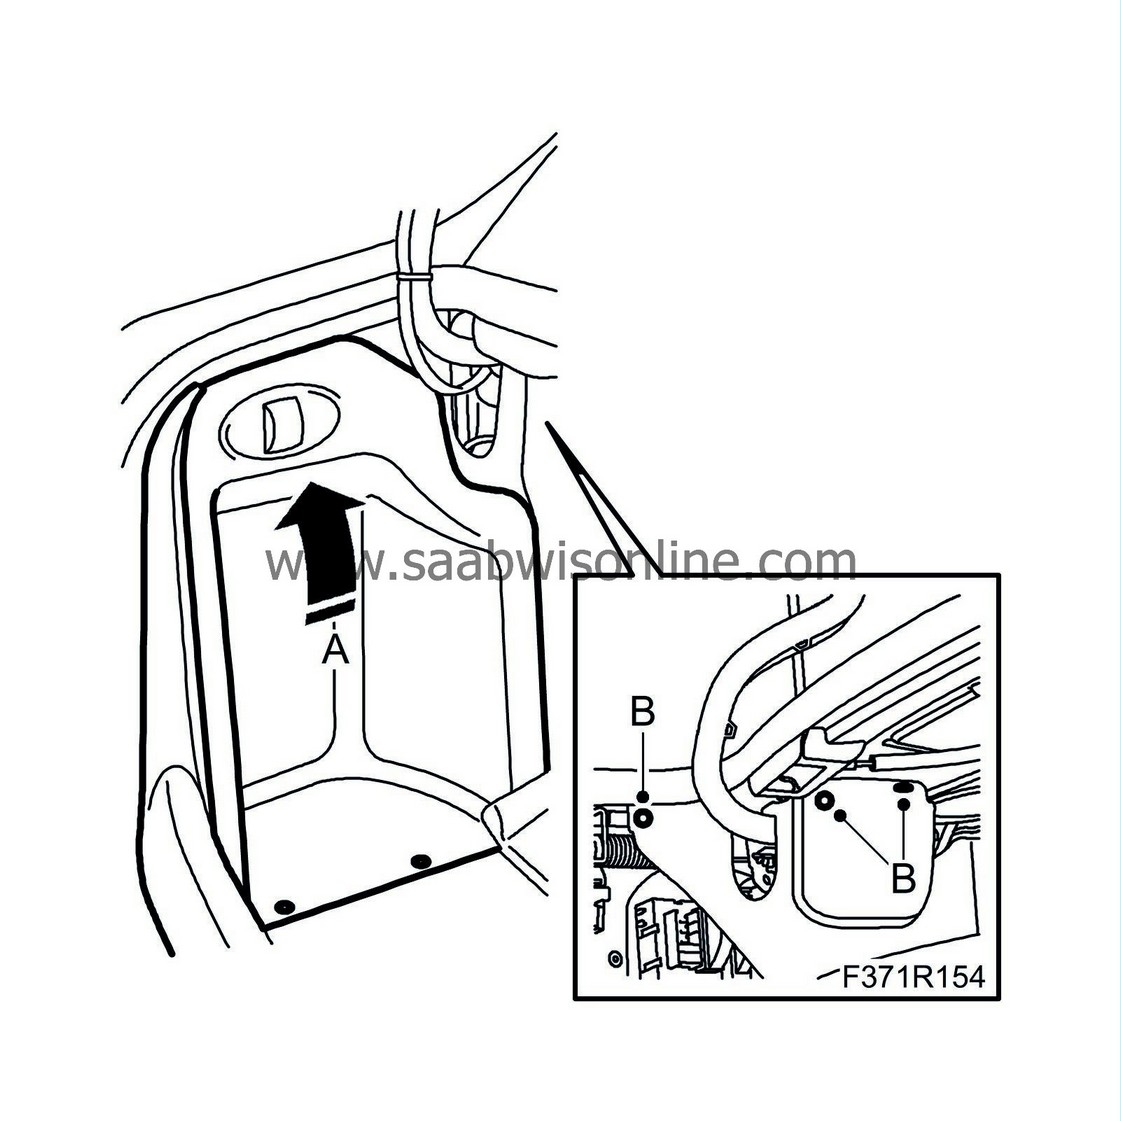
Fold down the left-hand inspection cover (A).
|
|
| 5. |
Dismantle the clips (B) x 3. Left-hand side trim, luggage compartment.
|
|
| 6. |
Remove the wiring harness.
|
|
| • |
Carefully mark all connectors before disconnecting them from their components.
|
| • |
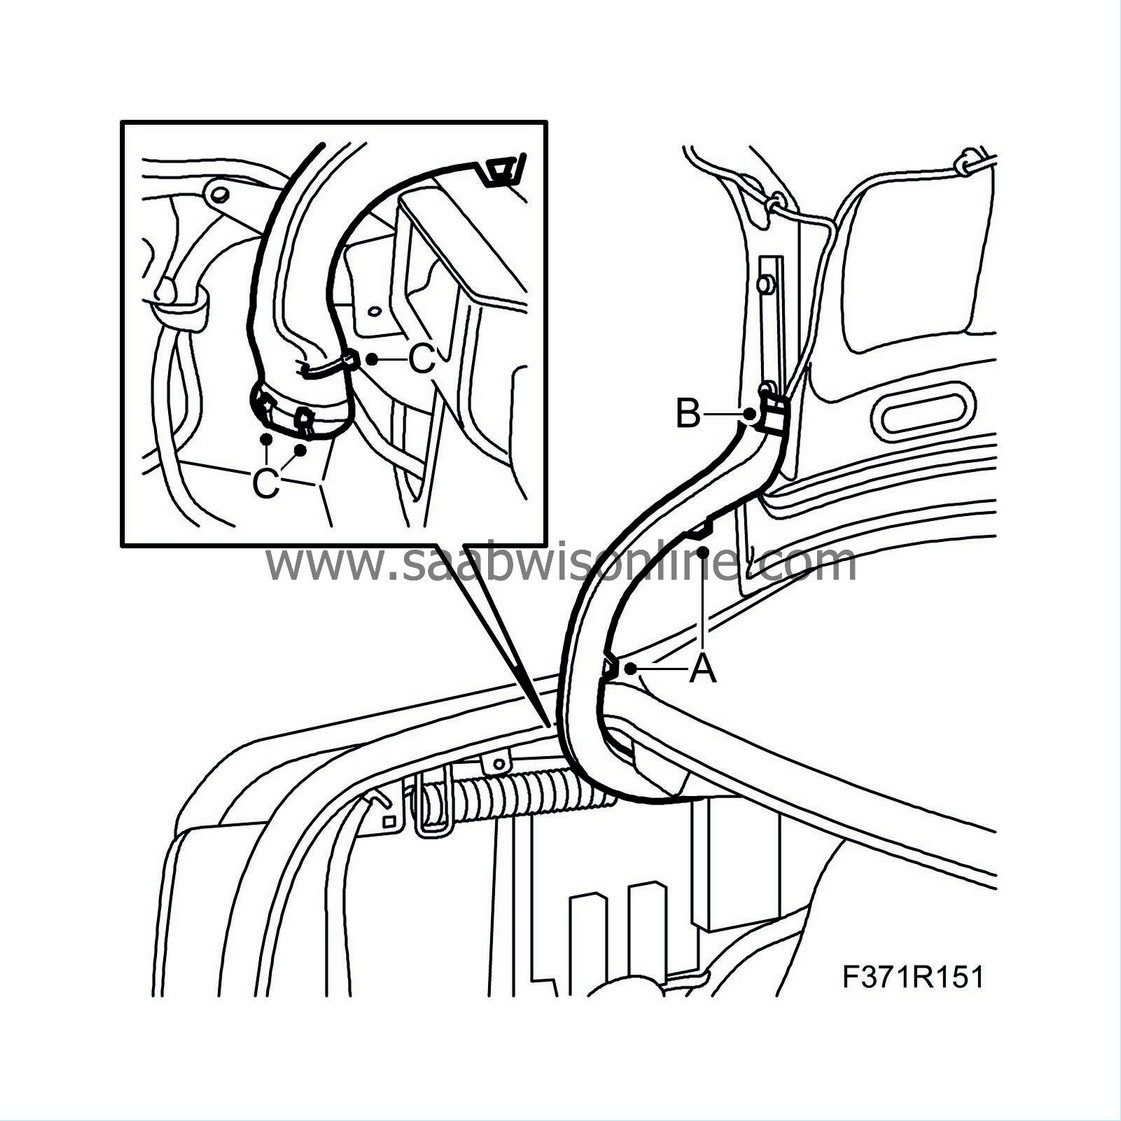
Detach the cable duct (A) on the left-hand hinge for the boot lid.
|
| • |
Remove the tape (B) and the cable ties (C) x 3 that hold the wiring harness.
|
| • |
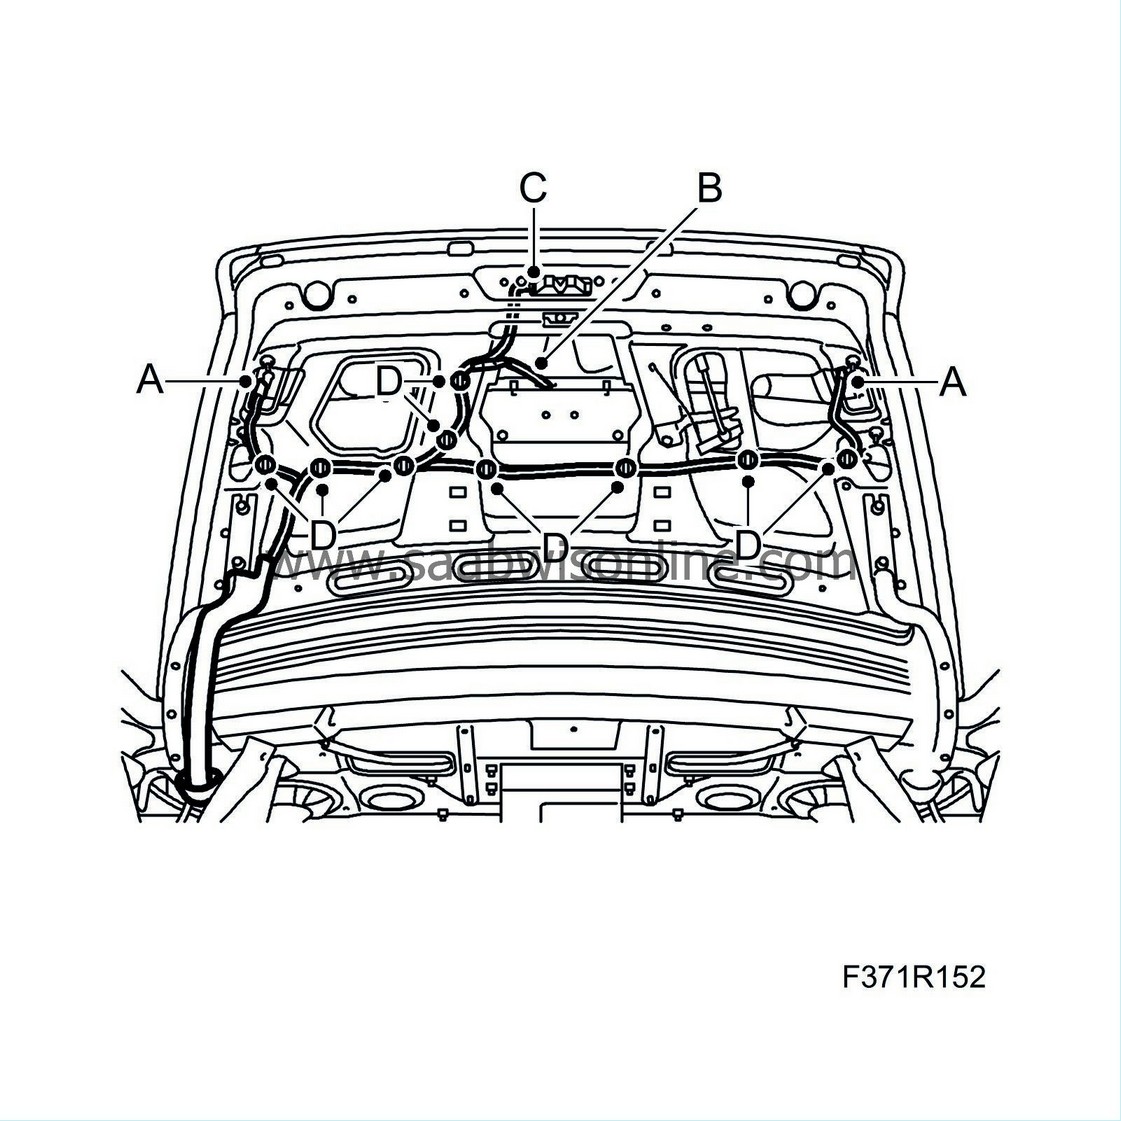
Unplug the connectors (A) for both rear lamps.
|
| • |
Unplug the connector (B) for the number plate lighting.
|
| • |
Unplug the connector (C) for the boot lid lock.
|
| • |
If the wiring harness is being re-used, remove the clips (D), x 9, carefully so that they can be re-used.
|
| • |
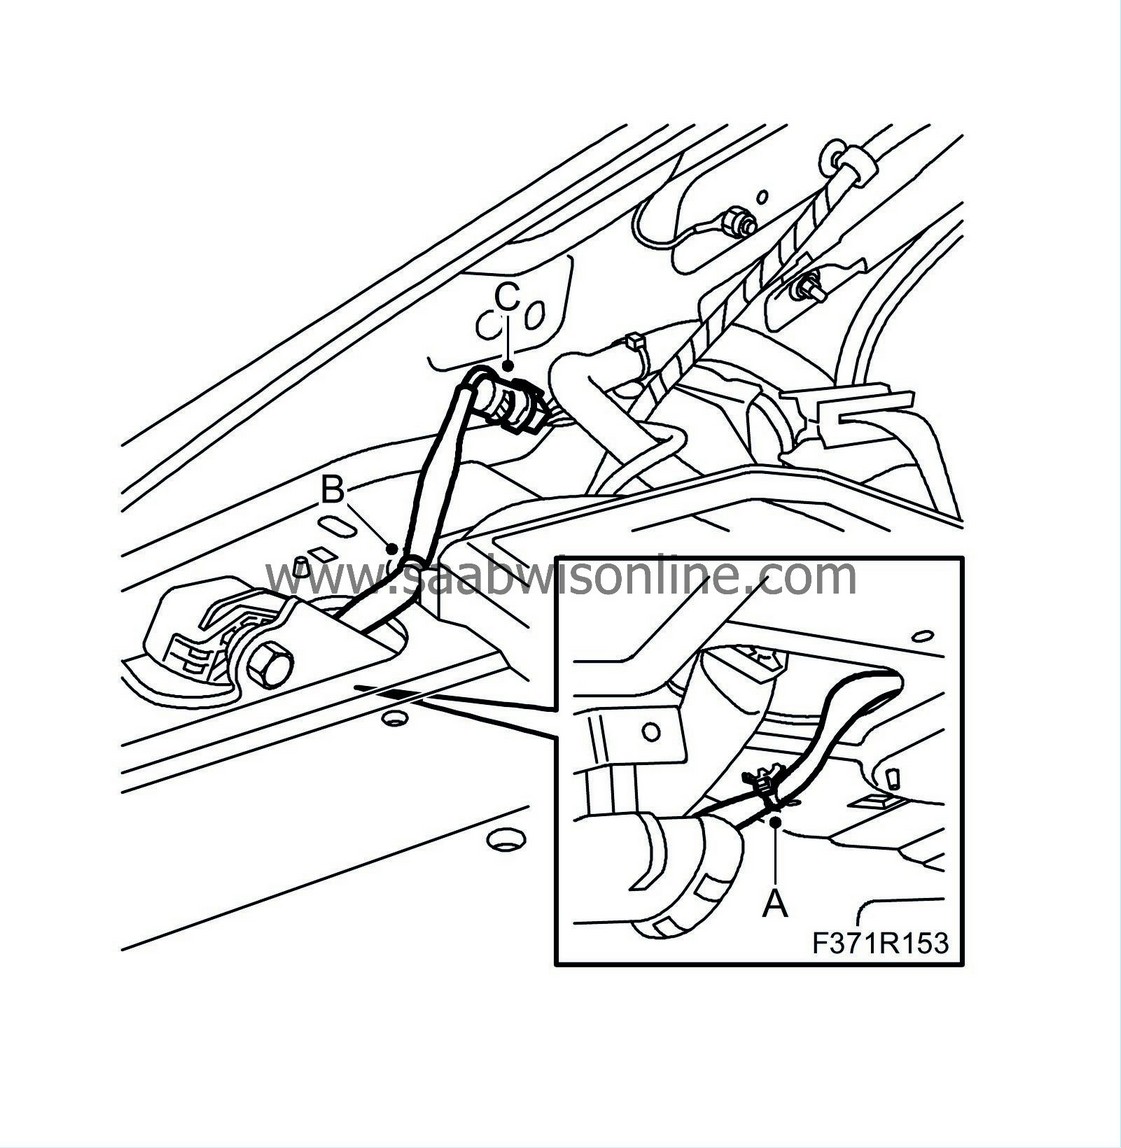
Undo the clip (A) x 1 and the clip (B) x 1.
|
| • |
Unplug the wiring harness connector (C) at the C-pillar and pull the wiring harness out via the luggage compartment.
|
| To fit |
| 1. |
Fit the door harness.
|
|
| • |
Route the new wiring harness the same way as the old one and secure it in the same way.
Take care that all grommets are firmly sealed. |
| • |
Plug in the connectors to the respective component. If in doubt, consult the wiring diagrams/component lists of the system in question.
|
| • |
Plug the wiring harness into the connector (C) at the C-pillar.

|
| • |
Fit the clip (B) x 1 and the clip (A) x 1.
|
| • |
Fit the clips (D) x 9 for the boot lid.

|
| • |
Plug in the connector (C) for the boot lid lock.
|
| • |
Plug in the connector (B) for the number plate lighting.
|
| • |
Plug in the connectors (A) for both rear lamps.
|
| • |
Secure the wiring harness with tape (B) and cable ties (C) x 3 to the cable duct (A).

|
| • |
Secure the cable duct (A) for the left-hand hinge for the boot lid.
|
| 2. |
Fit the clips (B) x 3. Left-hand side trim, luggage compartment.
|
|
| 3. |
Fold up the left-hand inspection cover (A).
|
|
| 4. |
Fit the
Boot lid trim
.
|
|
| 5. |
Fit the
C-pillar trim
.
|
|
| 6. |
Connect the negative cable of the battery.
|
|
| 7. |
Set the clock and program any radio code.
|
|
| 8. |
Cars with pinch protection: Carry out
Programming the pinch protection
.
|
|
| Important | ||
|
Fasten the wiring harness correctly so that there is no risk of it chafing or rattling. |
||
| Note | ||
|
Spray all the connectors with "Kontakt 61" to prevent verdigris formation. Clean all the grounding points and coat them with Vaseline. |


