Wiring harness, roof, 4D
| Wiring harness, roof, 4D |
| To remove |
| 1. |
Undo the cable for the battery's negative terminal.
|
|
| 2. |
Remove the headlining, see
Headlining, 4D
or
Headlining, 4D, US/CA
.
|
|
| 3. |
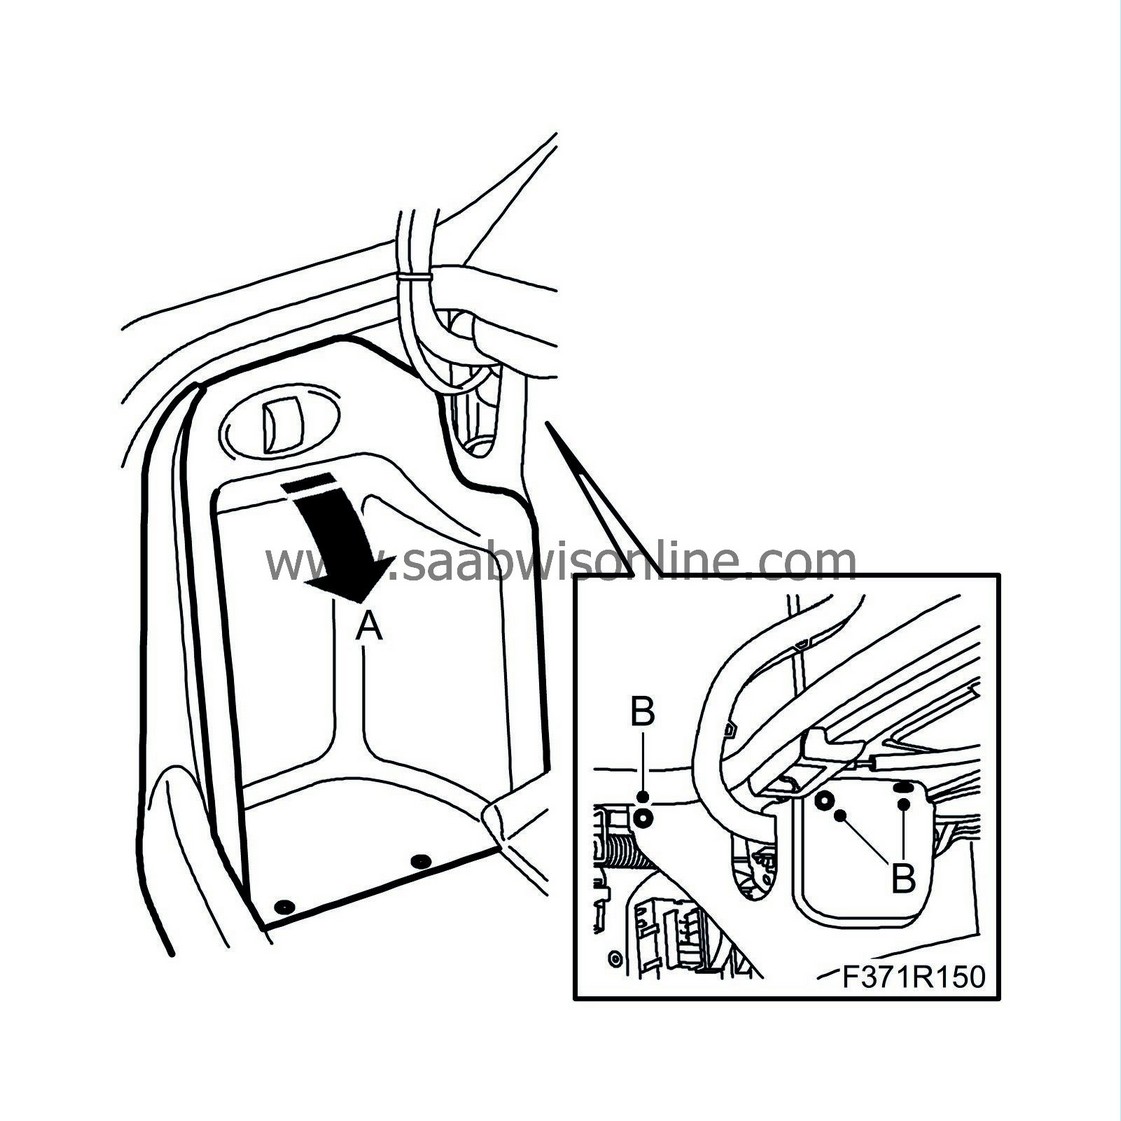
Remove the clips (B) for the left-hand side trim and fold down the inspection cover (A).
|
|
| 4. |
Remove the left-hand rear
speaker
.
|
|
| 5. |
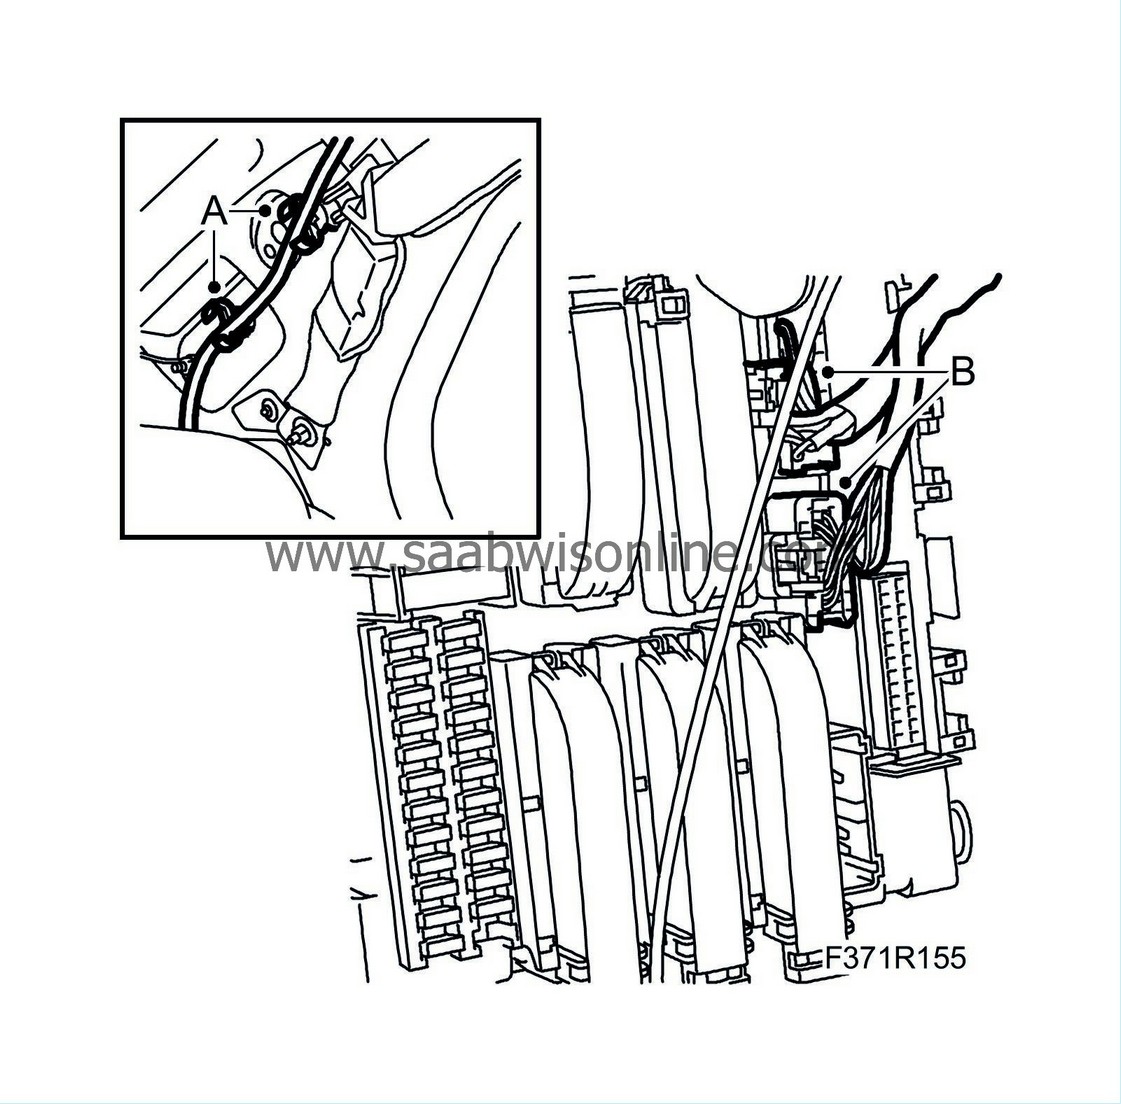
Open the clips (A) for the wiring harness for the left-hand C-pillar.
|
|
| 6. |
Unplug the connectors (B) from the REC and route the wiring harness up through the parcel shelf.
|
|
| 7. |
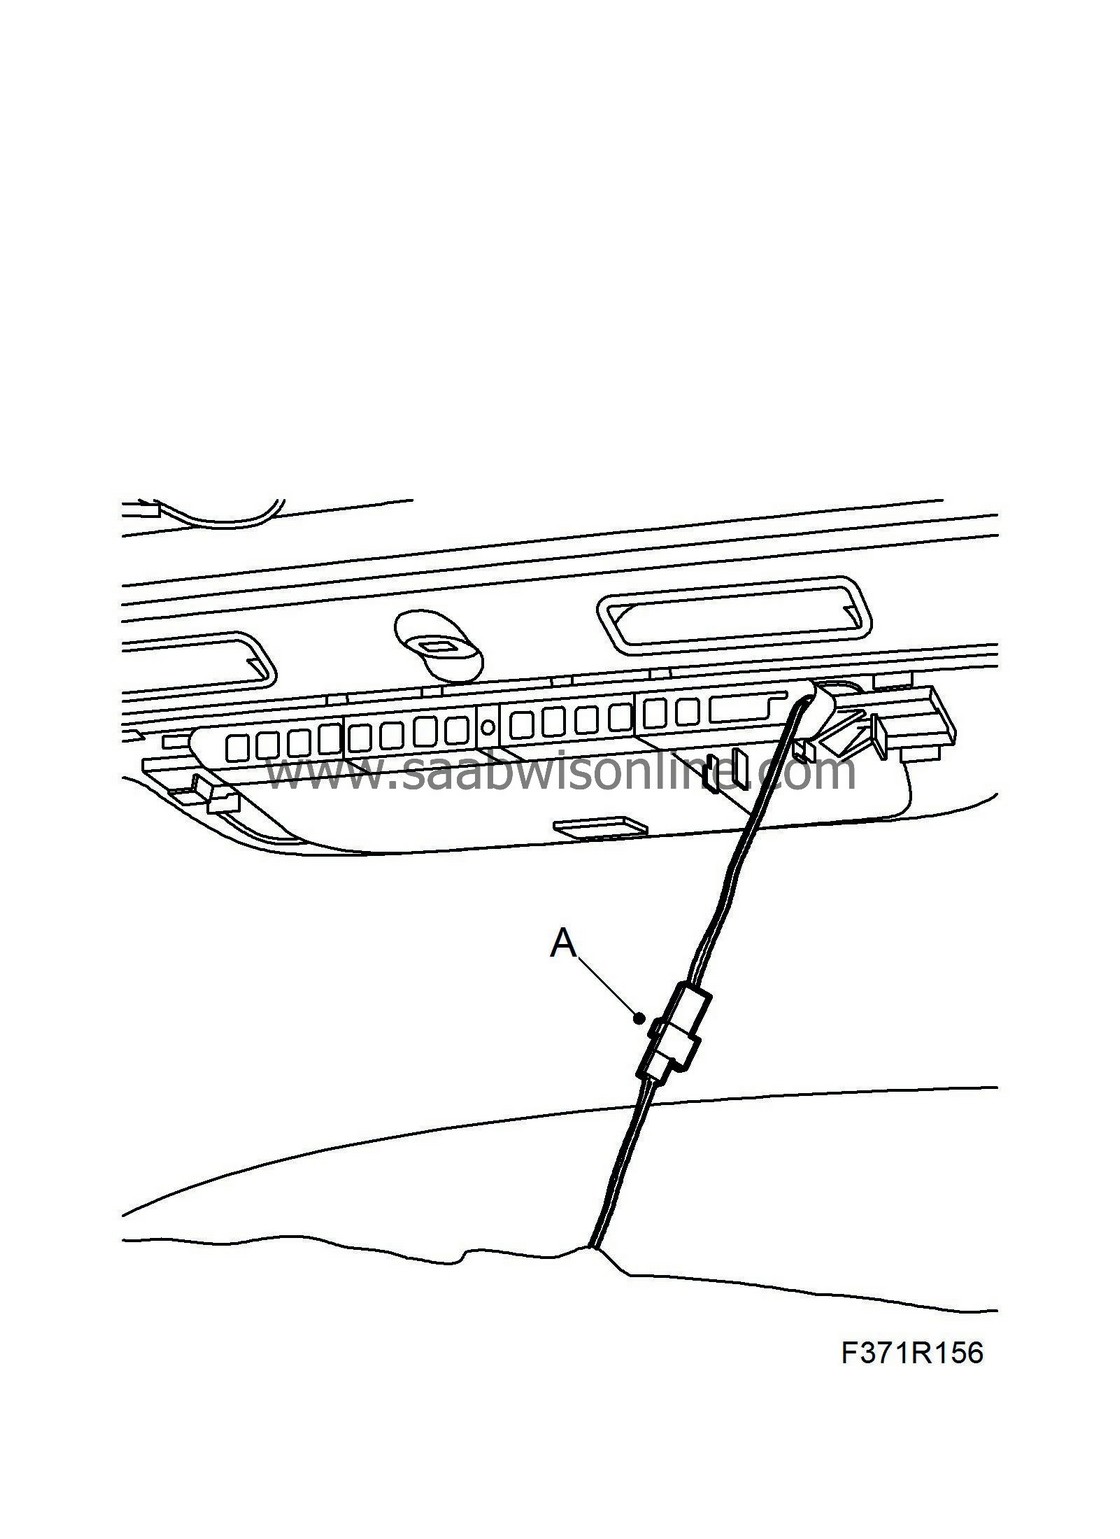
Unplug the connector (A) for the high-level rear light.
|
|
| 8. |
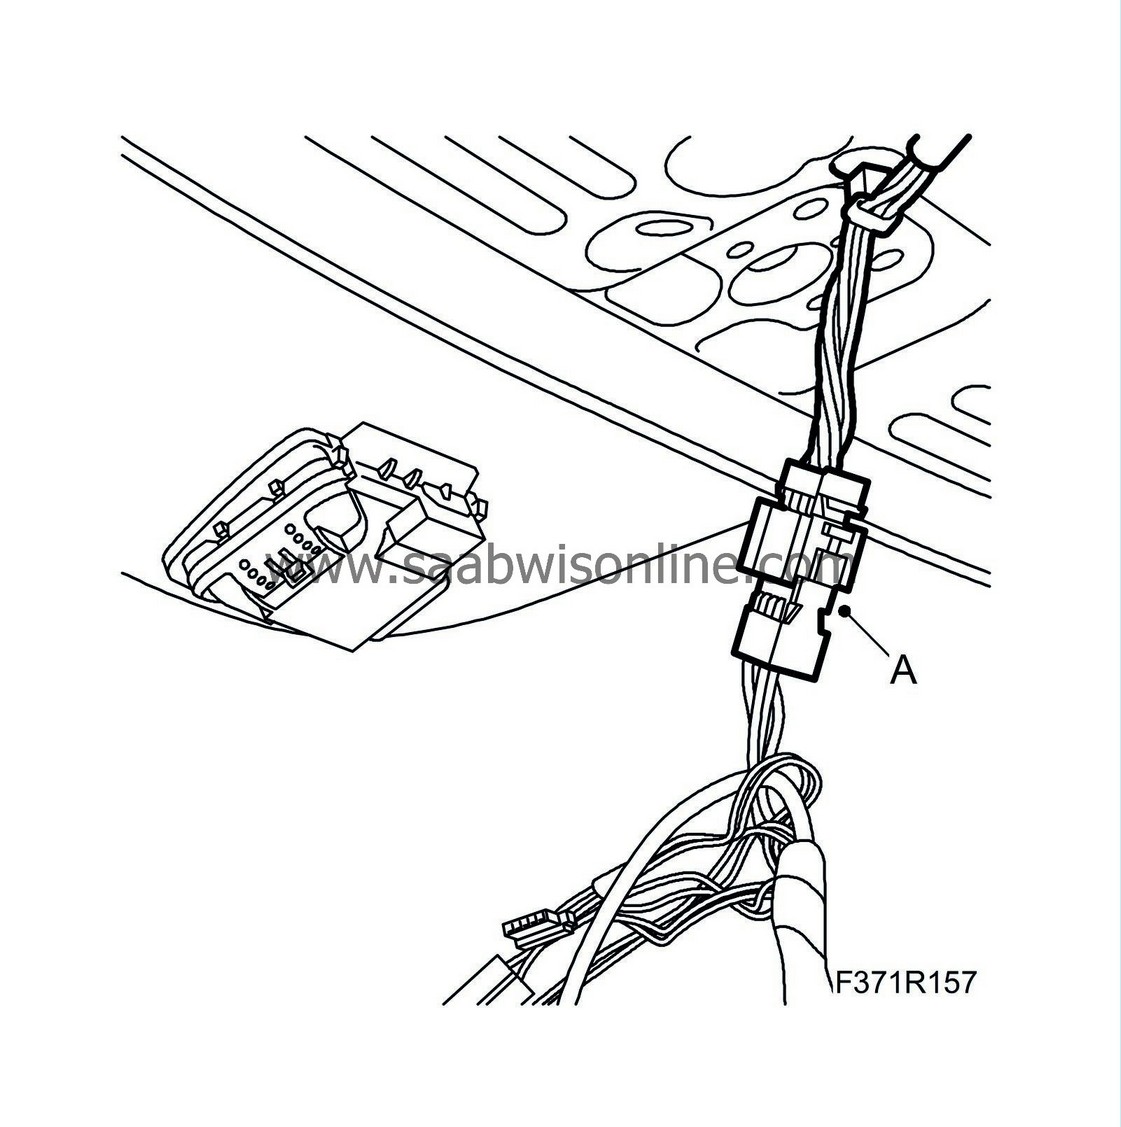
Unplug the connector (A) at the front edge of the headlining.
|
|
| 9. |
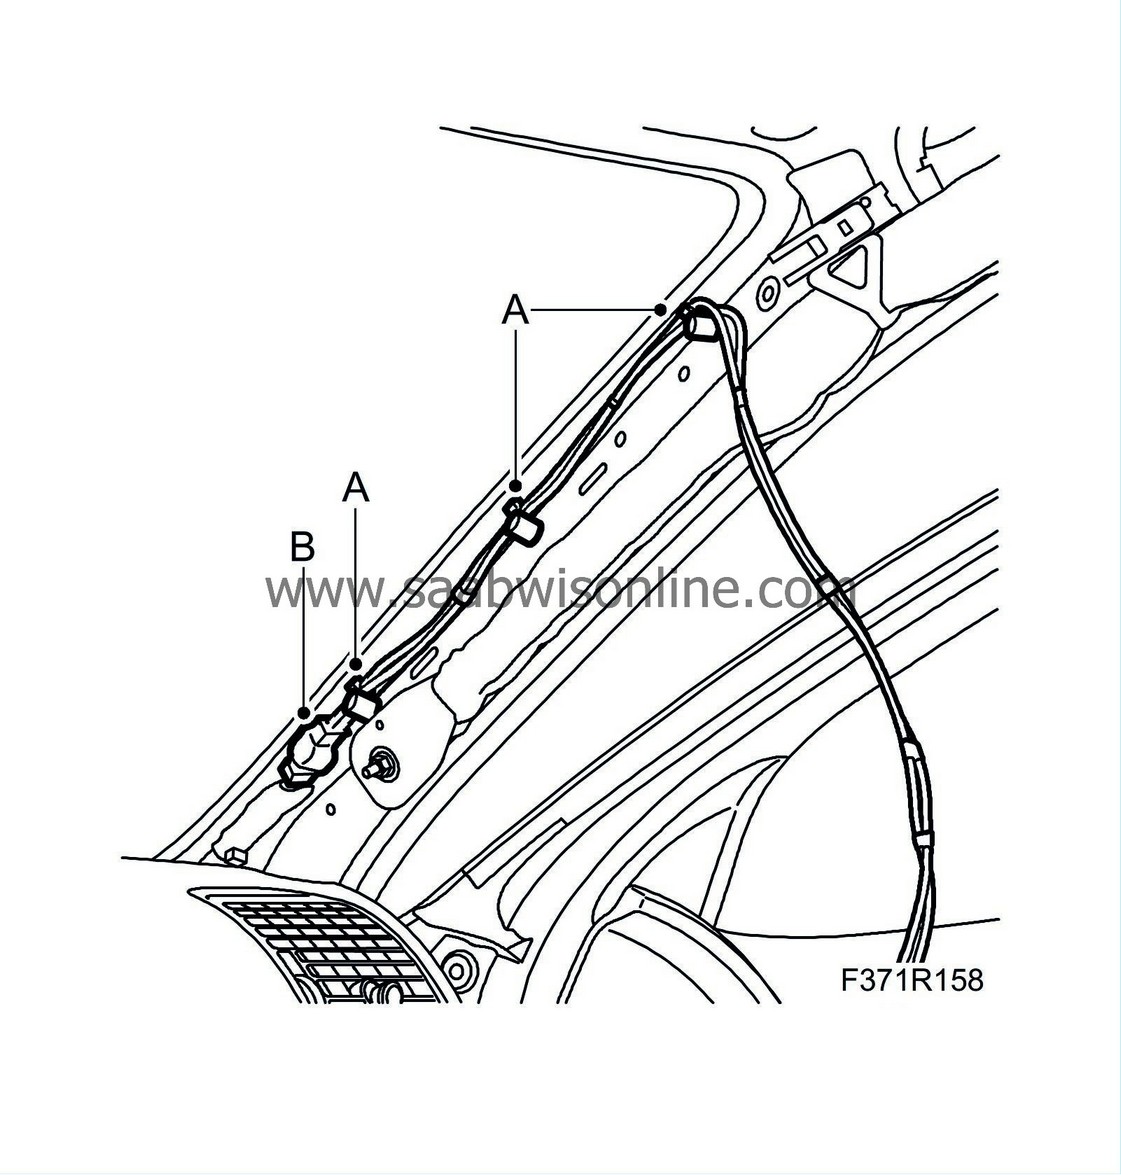
Undo the clips (A) and unplug the connector (B) at the right-hand A-pillar.
|
|
| 10. |
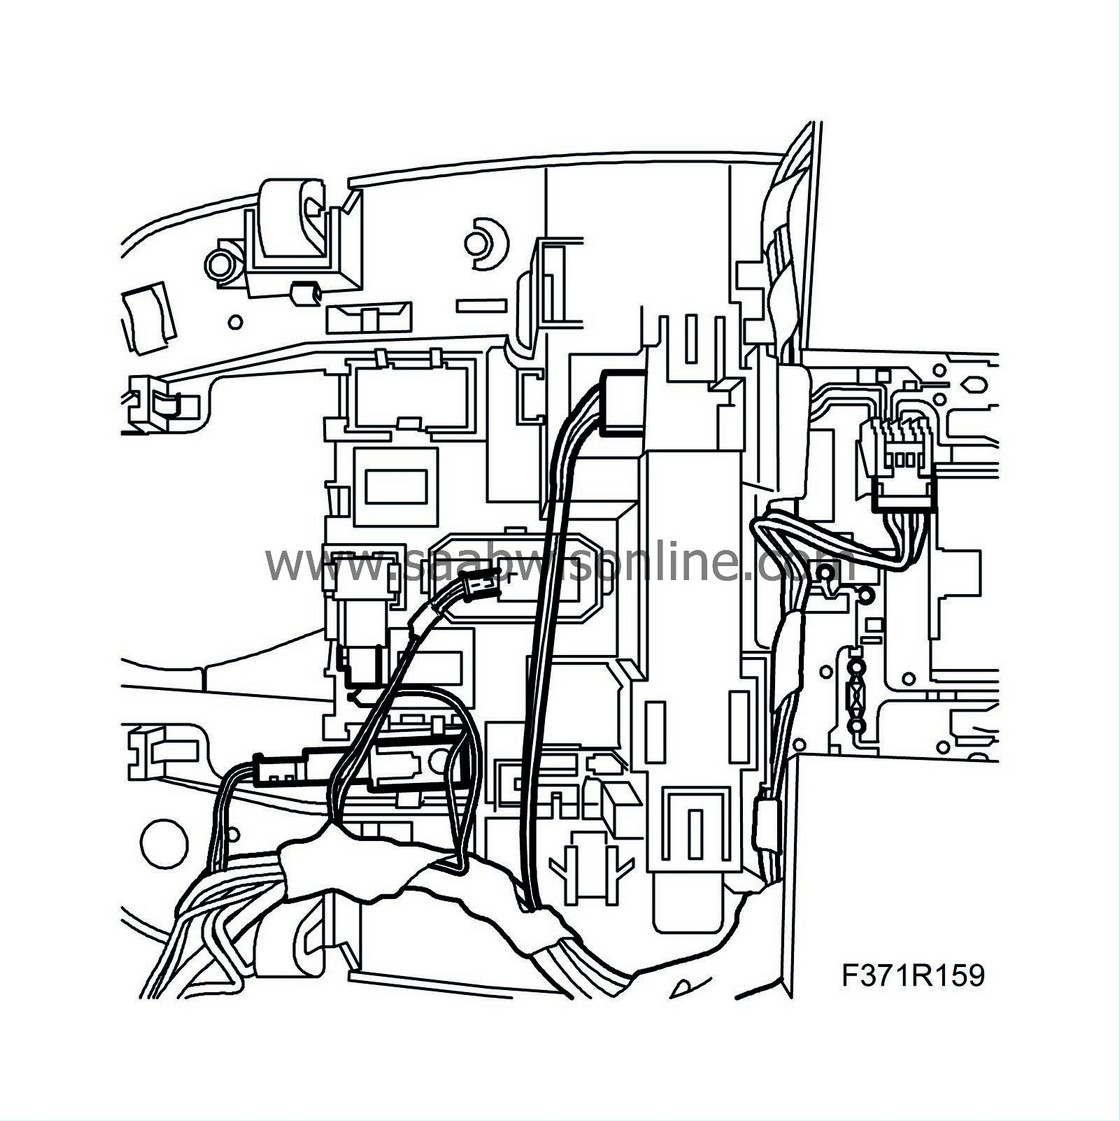
Unplug the connectors for the microphone, interior lightning, anti-theft alarm, interior temperature sensor and the sunroof.
|
|
| 11. |
Unplug the connector (A) for the rear roof lighting.

|
|
| 12. |
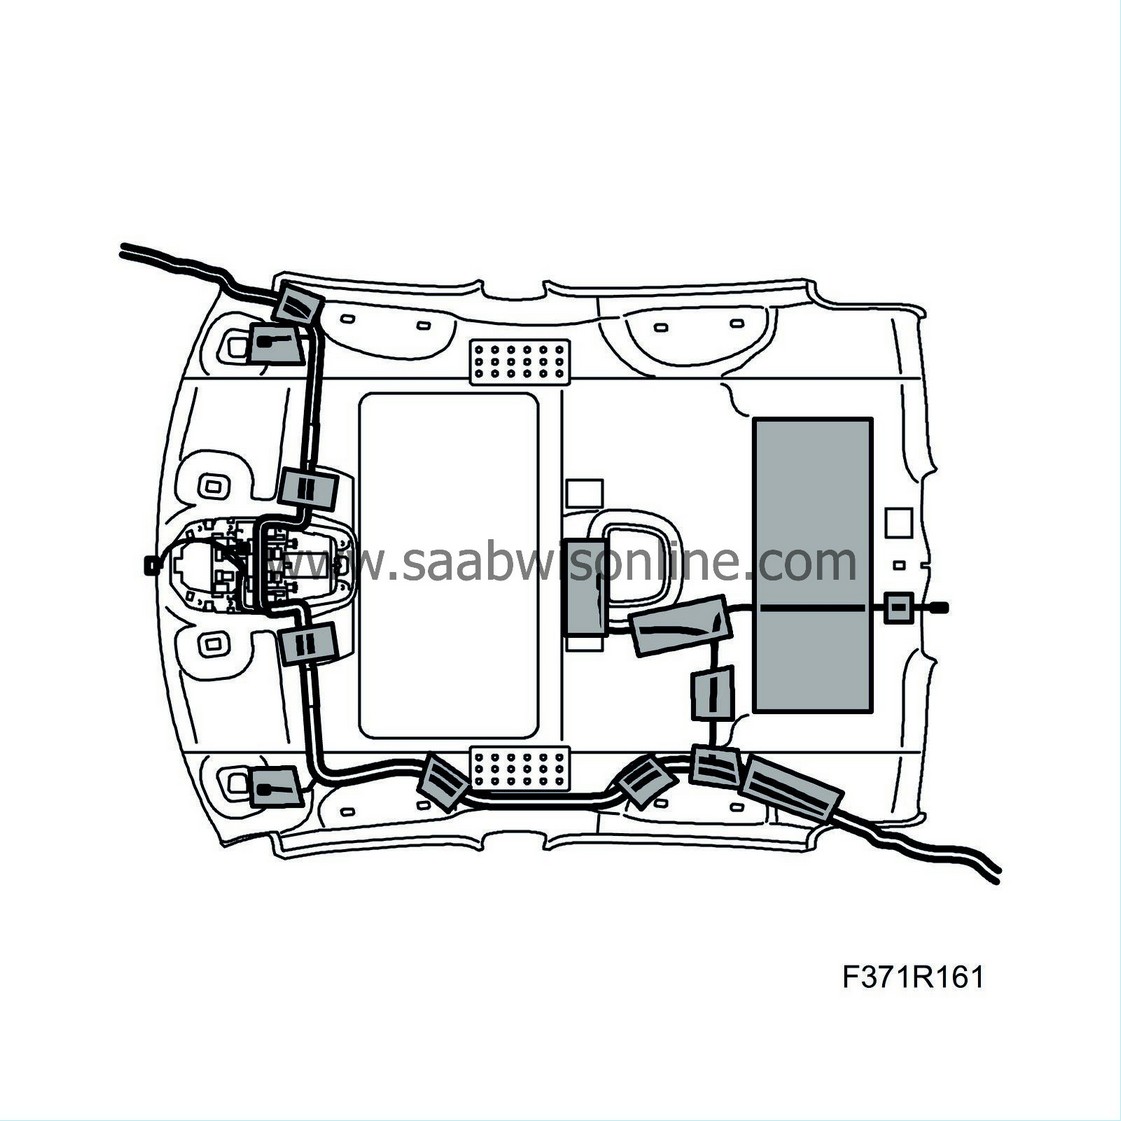
Remove the wiring harness from the headlining and remove the tape carefully.
|
||||||||||
| To fit |
| Important | ||
|
Fasten the wiring harness correctly so that there is no risk of it chafing or rattling. |
||
| Note | ||
|
Spray all the connectors with "Kontakt 61" or similar to prevent verdigris formation. Clean all the grounding points and coat them with Vaseline. |
| 1. |
Position the wiring harness and affix with new tape.

|
||||||||||
| 2. |
Plug in the connector (A) for the rear roof lighting.

|
|
| 3. |
Plug in the connectors for the microphone, interior lightning, anti-theft alarm, interior temperature sensor and the sunroof.

|
|
| 4. |
Plug in the connector (B) at the right-hand A-pillar and fasten the clips (A).

|
|
| 5. |
Plug in the connector (A) at the front edge of the headlining.

|
|
| 6. |
Plug in the connector (A) for the high-level rear light.

|
|
| 7. |
Route the wiring harness through the parcel shelf and plug in the connectors (B).

|
|
| 8. |
Close the clips (A) for the wiring harness on the left-hand C-pillar.
|
|
| 9. |
Fit the left-hand rear
speaker
.
|
|
| 10. |
Fit the clips (B) for the left-hand side trim and close the inspection cover (A).

|
|
| 11. |
Fit the headlining, see
Headlining, 4D
or
Headlining, 4D, US/CA
.
|
|
| 12. |
Connect the negative cable of the battery.
|
|
| 13. |
Set the clock and program any radio code.
|
|
| 14. |
Cars with pinch protection:
Carry out
Programming the pinch protection
.
|
|


