Inflatable curtain (732)
| Inflatable curtain (732) |
|
|||||||
| To remove |
|
|||||||
| 1. |
Turn the ignition key to the position LOCK.

|
|
| 2. |
Remove the headlining. See
Changing the headlining
or
Changing the headlining, US/CA
.
|
|
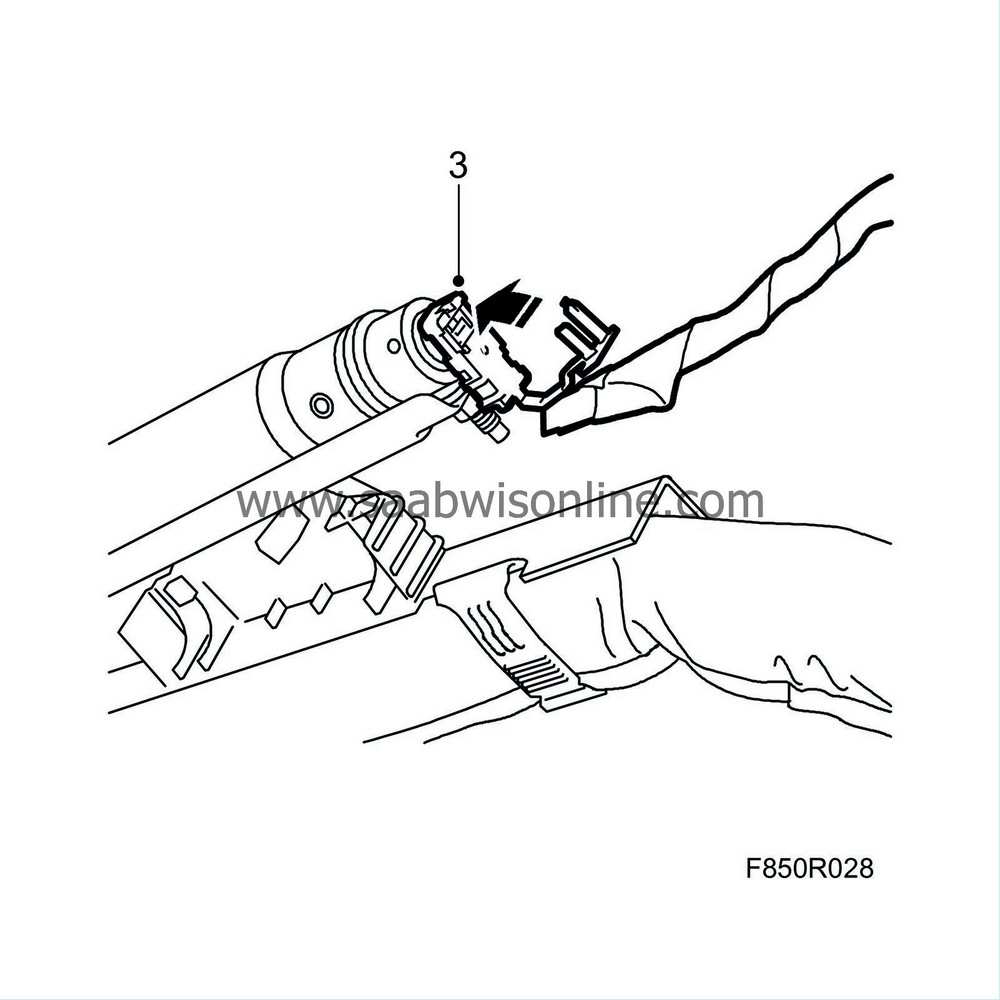
| 3. |
Dismantle the connector for the inflatable curtain gas generator by opening the rear piece of the connector and then pulling the connector straight out.

|
|
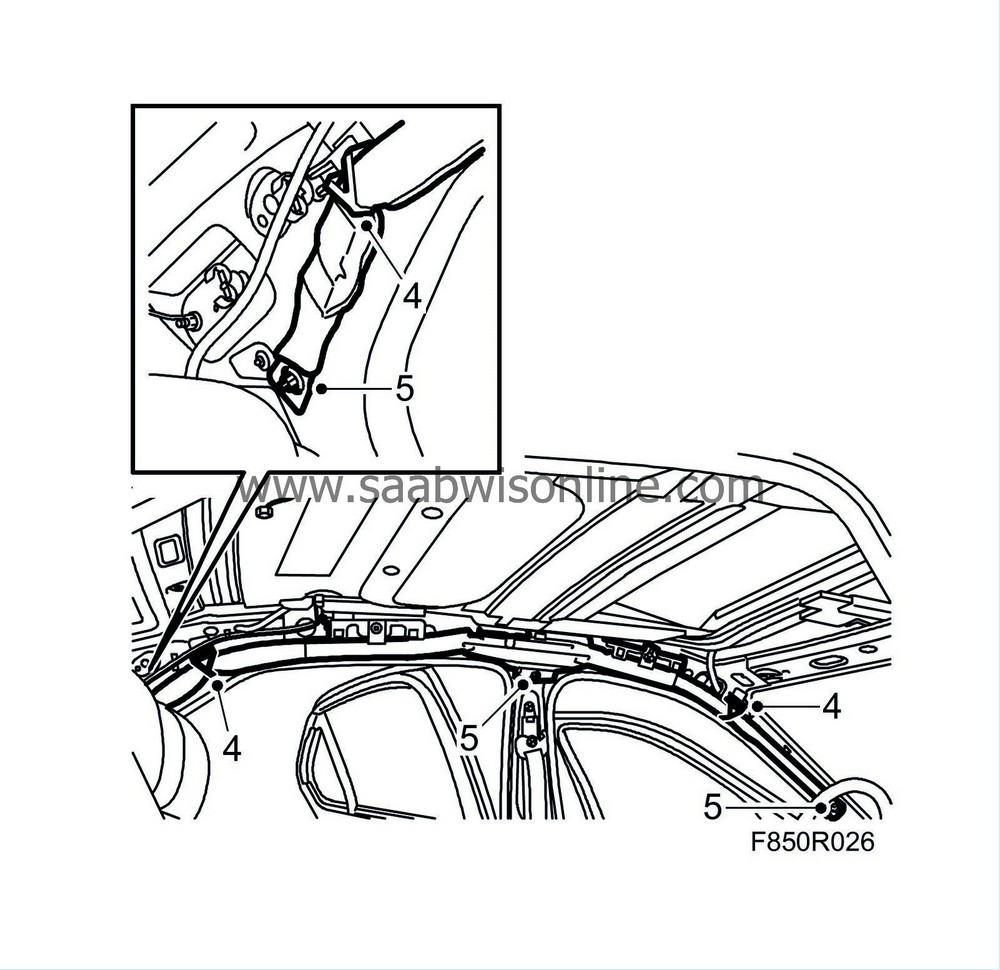
| 4. |
Dismantle the inflatable curtain's three tray clips.

|
|
| 5. |
Dismantle the screws holding the inflatable curtain.
|
|
| To fit |
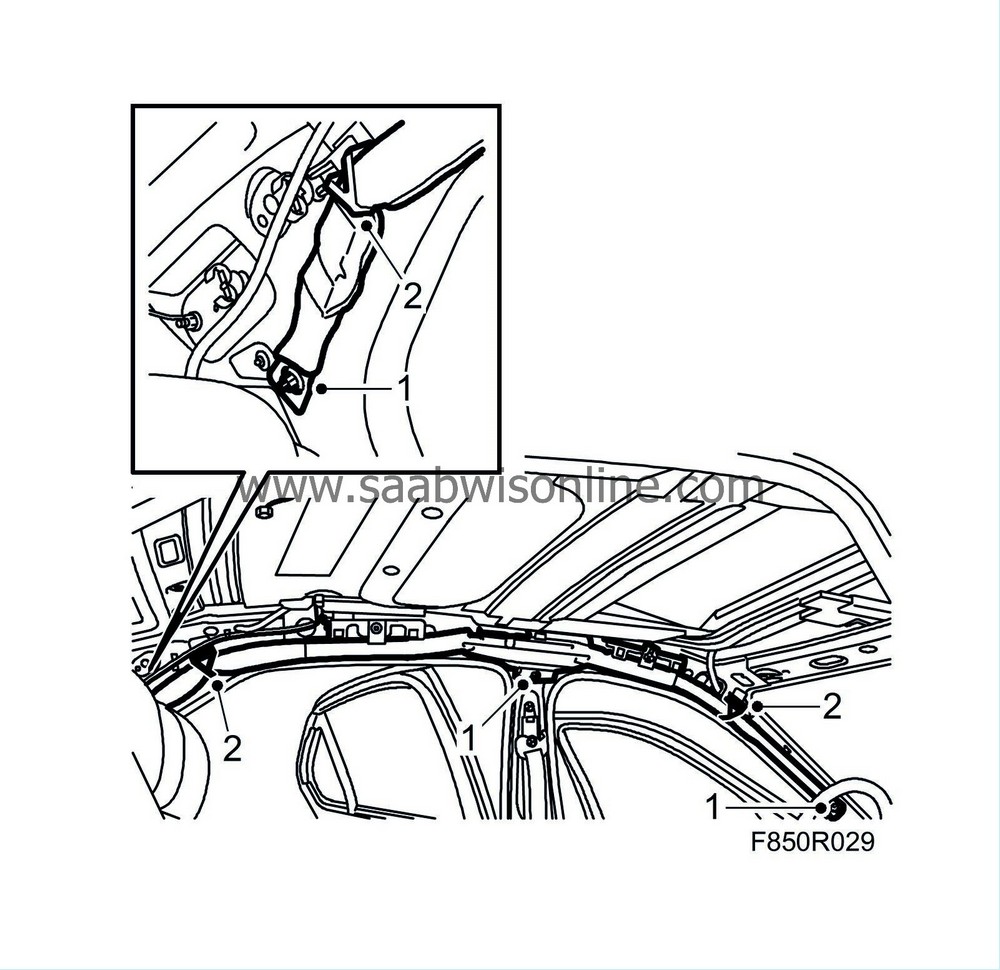
| 2. |
Press in the inflatable curtain's three tray clips. The tray clip
must always
be replaced when the inflatable curtain has been dismantled.
|
|
| 3. |
Connect the connector to the inflatable curtain's gas generator. Make sure you press in the rear piece on the connector.
|
|
| 4. |
Fit the headlining. See
Changing the headlining
or
Changing the headlining, US/CA.
|
|
| 5. |
Connect the battery.
|
|
| 6. |
Turn ON the ignition switch and check the airbag system and control module using the diagnostic tool as follows:
Connect the diagnostic tool to the data link connector under the dashboard. Delete any diagnostic trouble codes. Turn the ignition OFF and then ON again. Wait at least 1 minute with the ignition on. Check whether a diagnostic trouble code is shown: If a diagnostic trouble code is shown:Carry out fault diagnosis according to the instructions under respective trouble codes. If a diagnostic trouble code is not shown:The assembly was successful. Disconnect the diagnostic tool. |
|
| 7. |
Carry out
Measures after disconnecting the battery
.
|
|

 Warning


