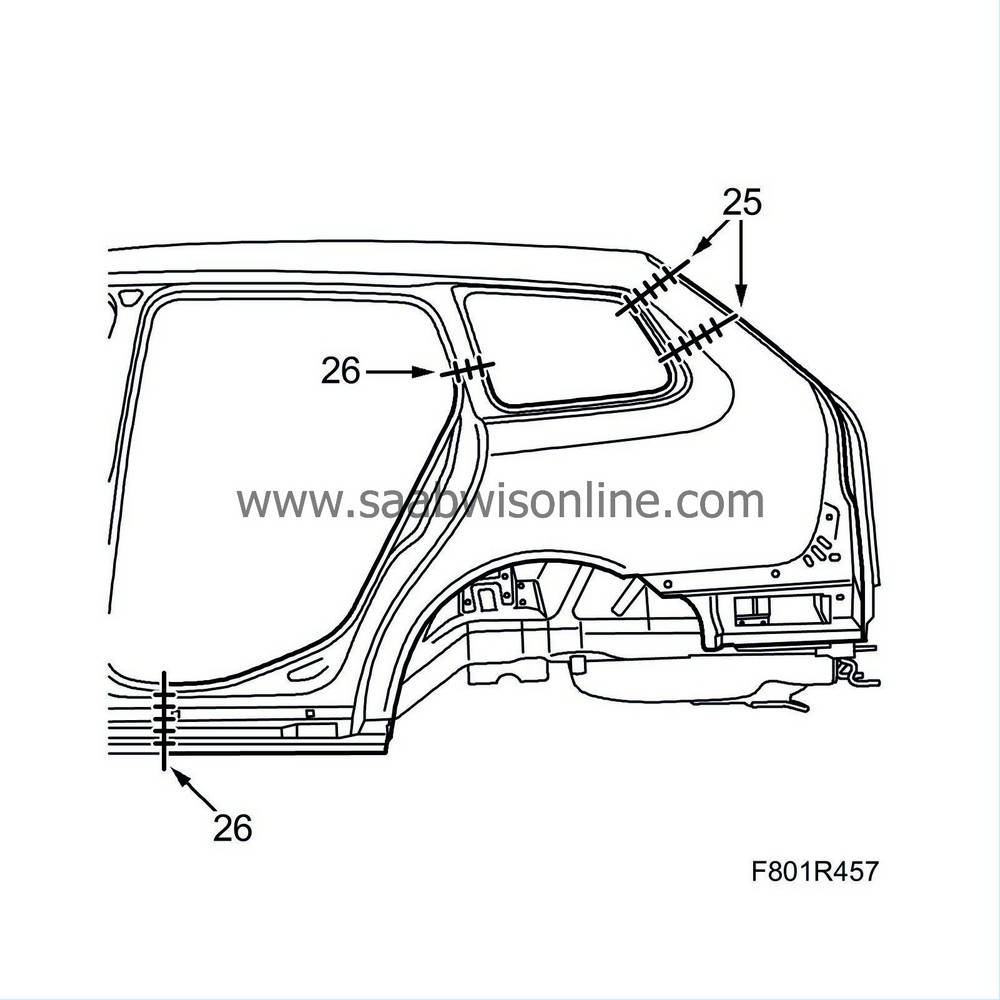
Part of rear side plate, 5D, spare part complete side
| Part of rear side plate, 5D, spare part complete side |
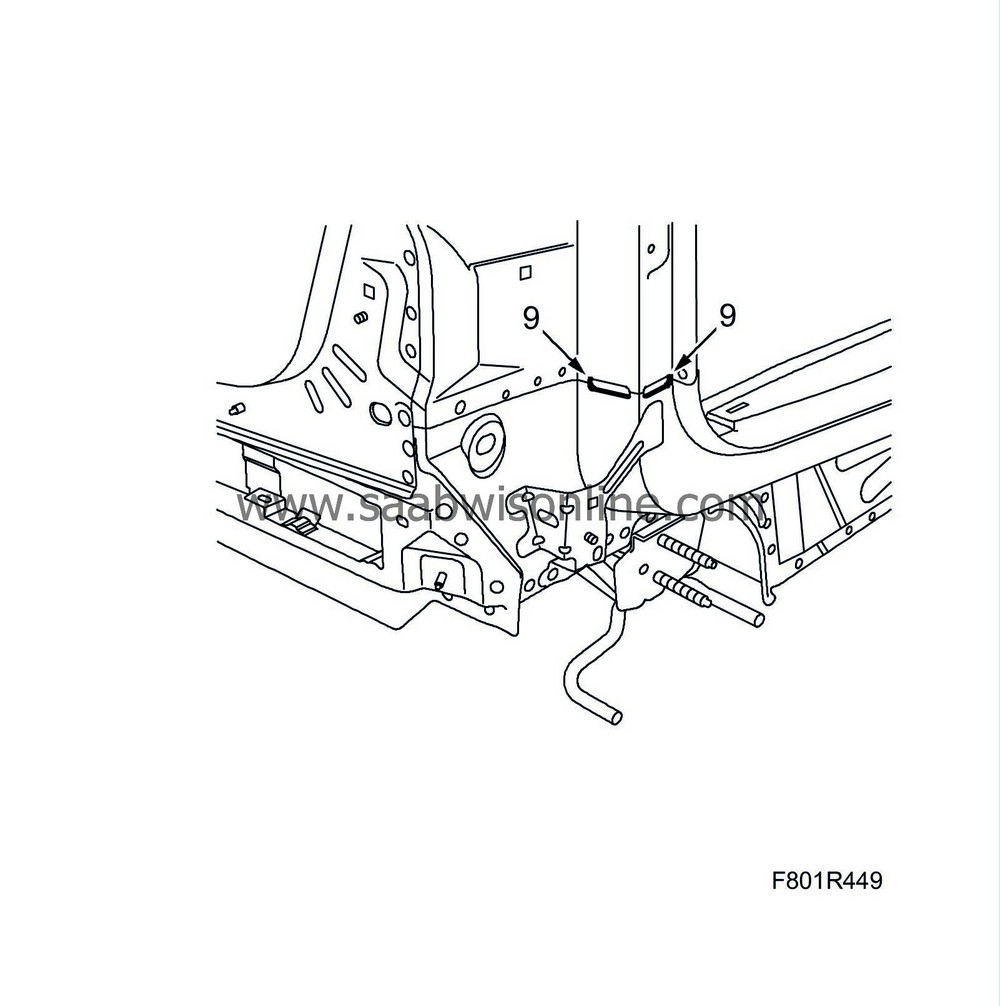
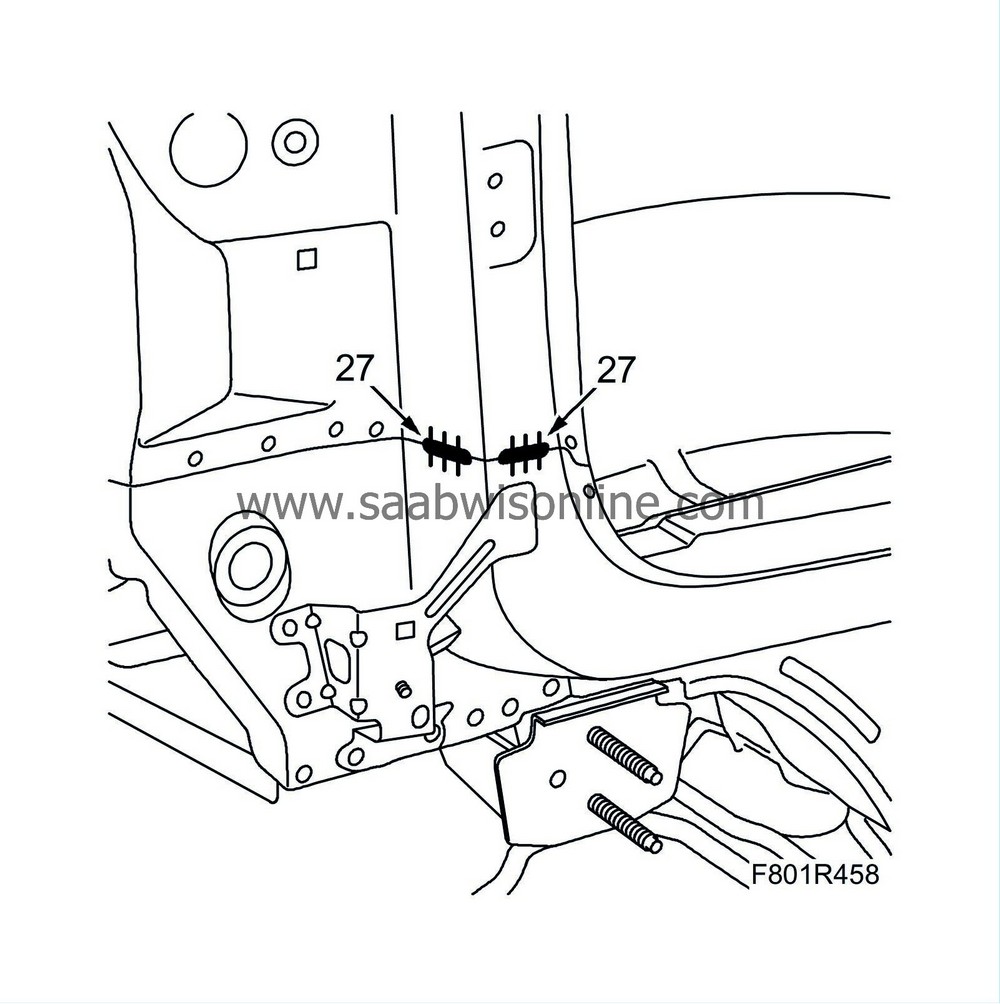
Certain welded joints on the car may be MIG brazed with bronze as the filling material. A MIG brazed seam may be recognised from the gold colour of the joint. A MIG brazing must always be replaced by a new MIG brazing.
|
|||||||
| Replacement |
| 1. |
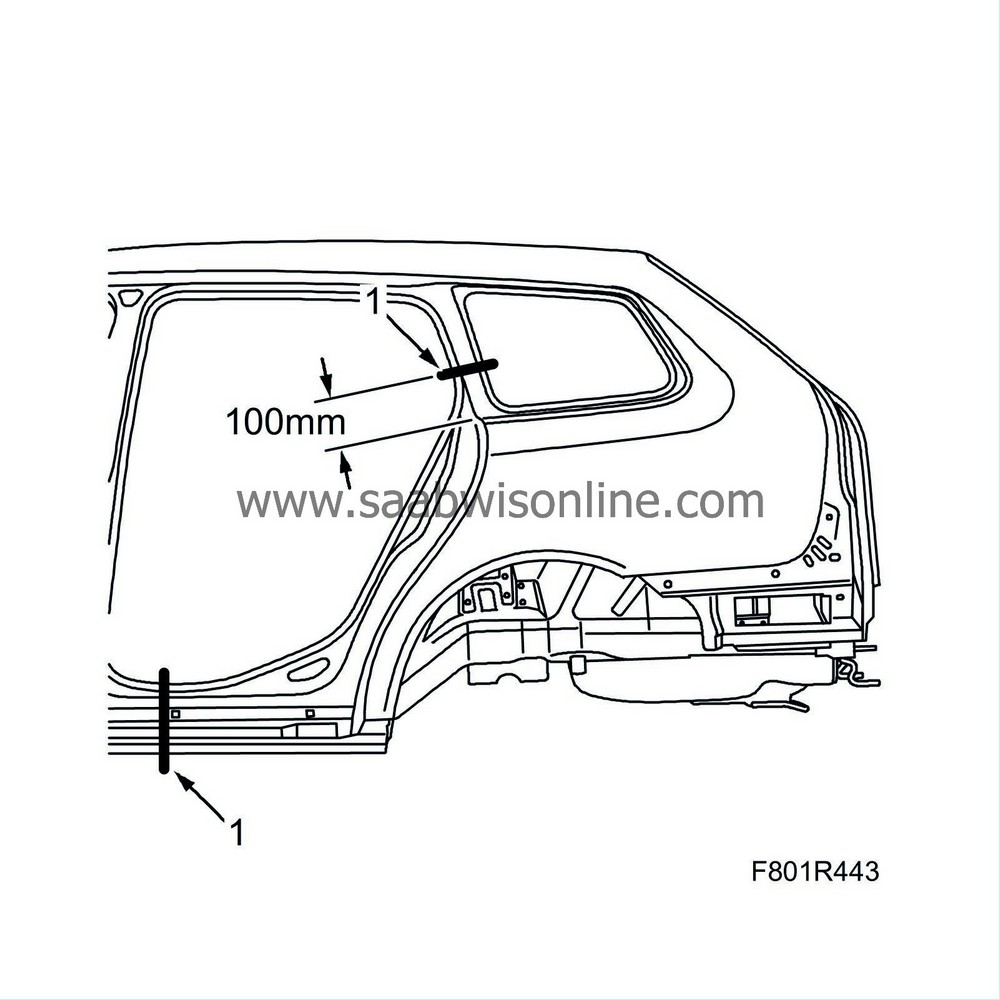
Cut according to the markings.
|
|
| 2. |
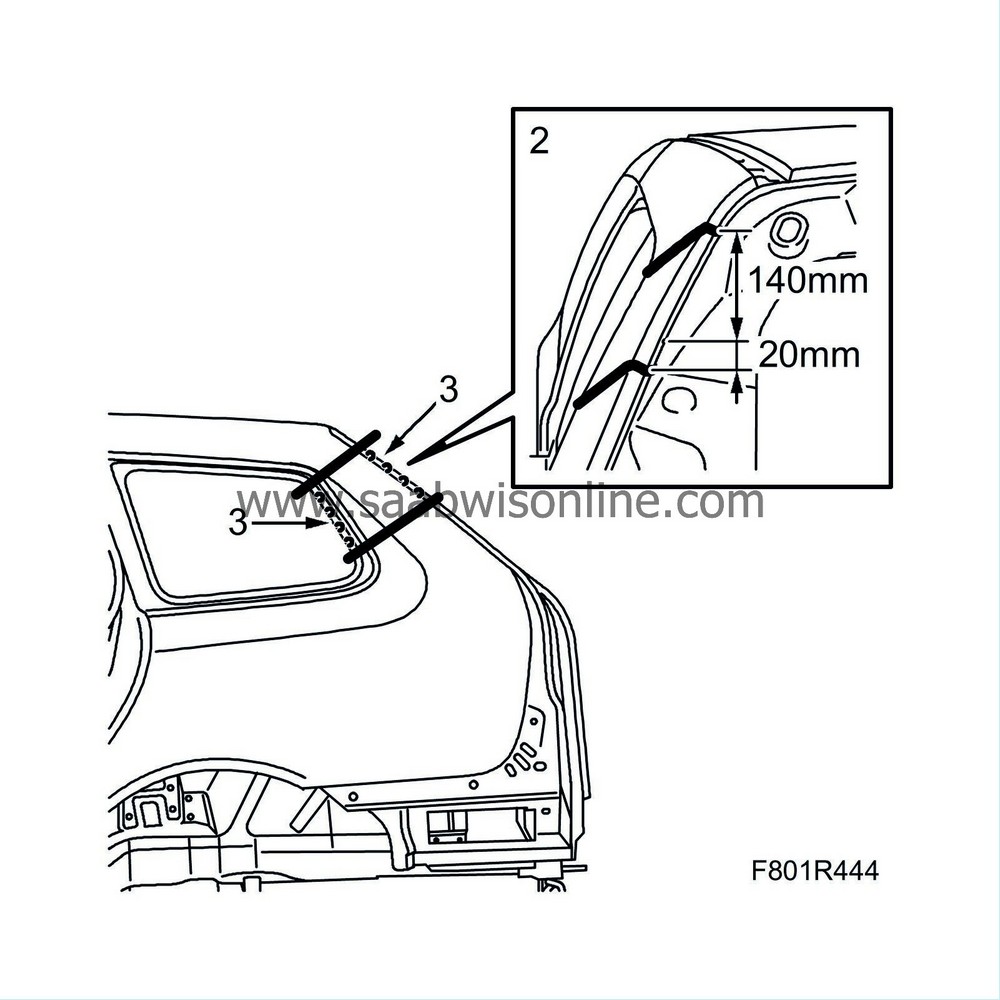
Cut as follows: 20 mm below the plate joint and 140 mm above the plate joint. The cutting is necessary in order to access the spot welds underneath.
|
|
| 3. |
Drill out the spot welds and lift away the loose piece.
|
|
| 4. |
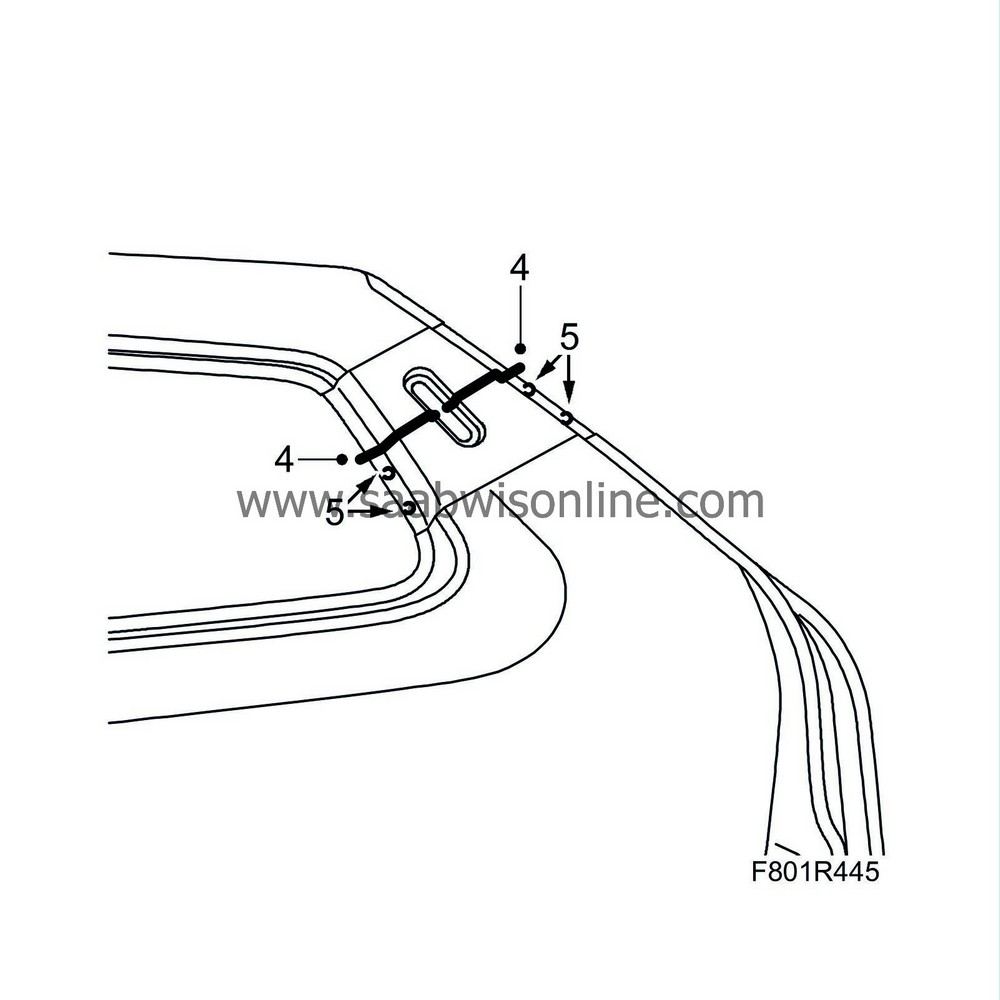
Cut the reinforcement. The cut must be made in the centre of the oval hole.
|
|
| 5. |
Drill out the spot welds on the inner reinforcement.
|
|
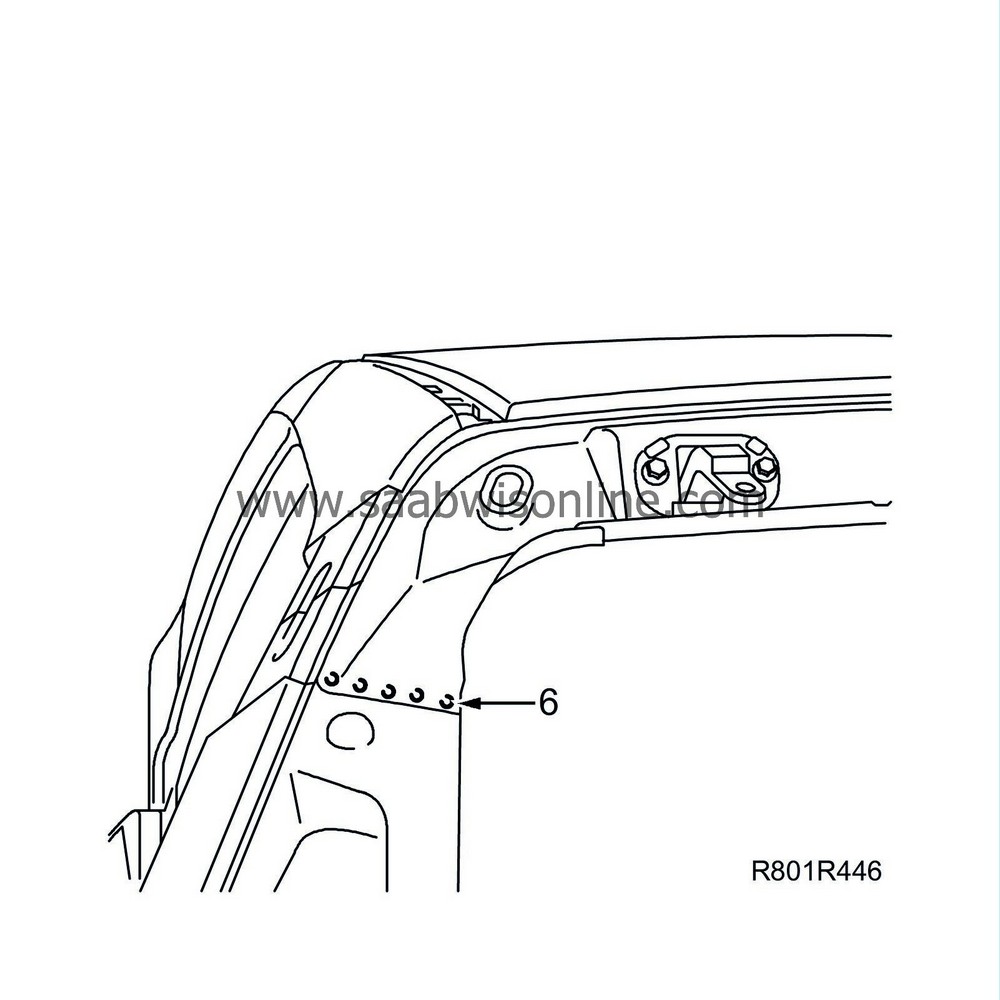
| 6. |
Drill out the spot welds on the inside to the reinforcement.
|
|
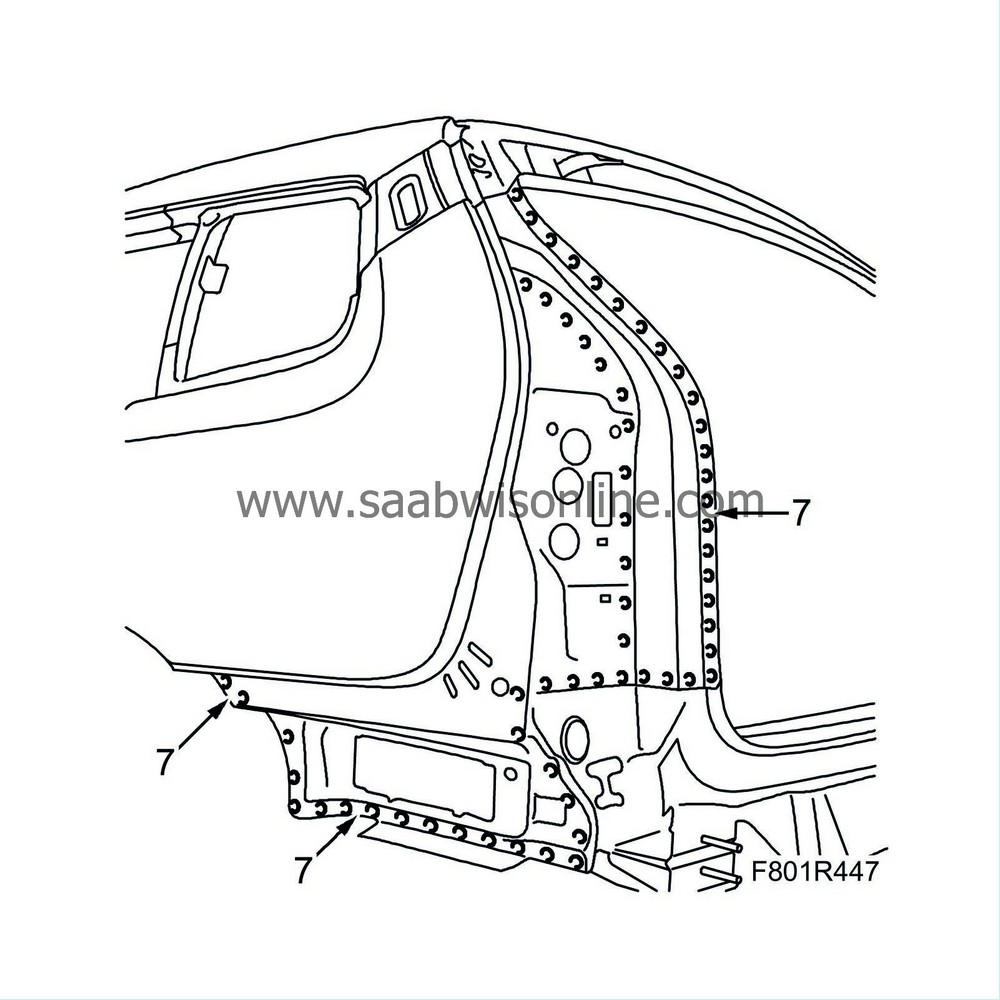
| 7. |
Drill out the spot welds at the rear light cluster plate.
|
|
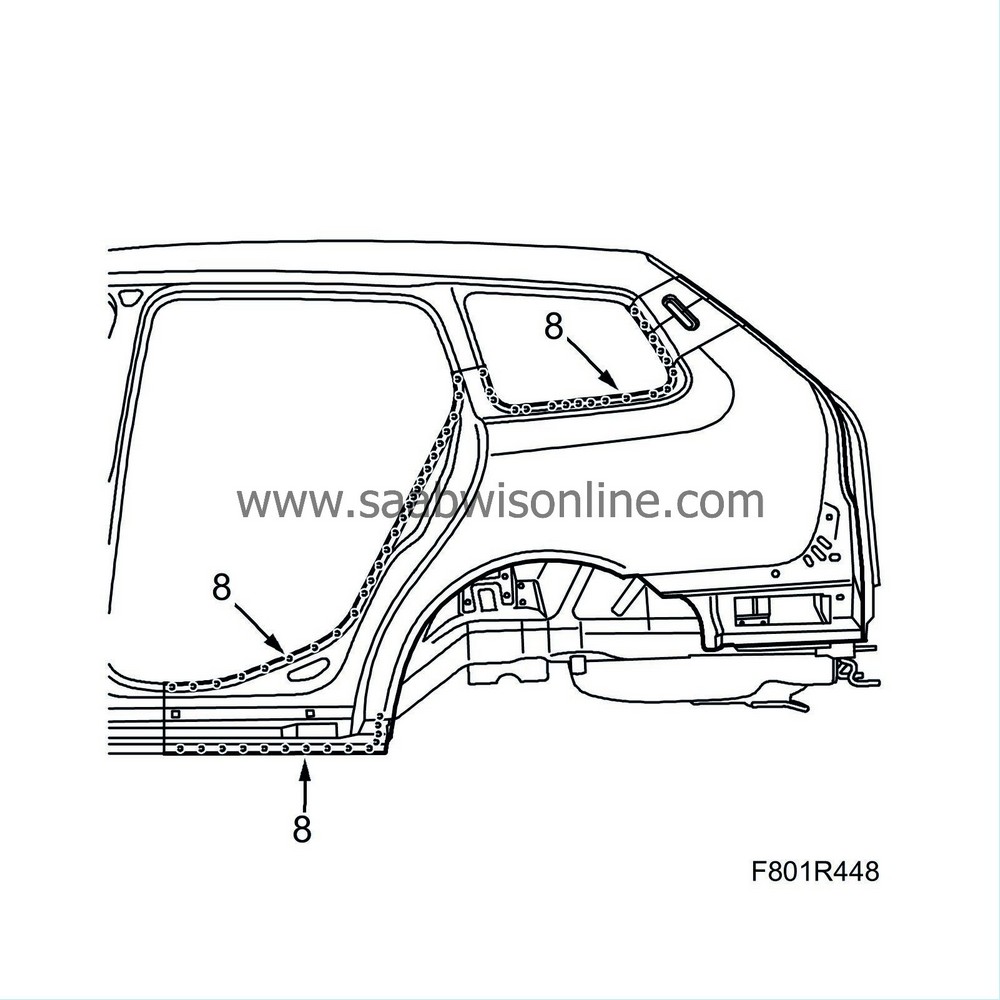
| 8. |
Drill out the spot welds by the door opening and the window opening.
|
|
| 9. |
Grind away the MIG brazing.
|
|
| 10. |
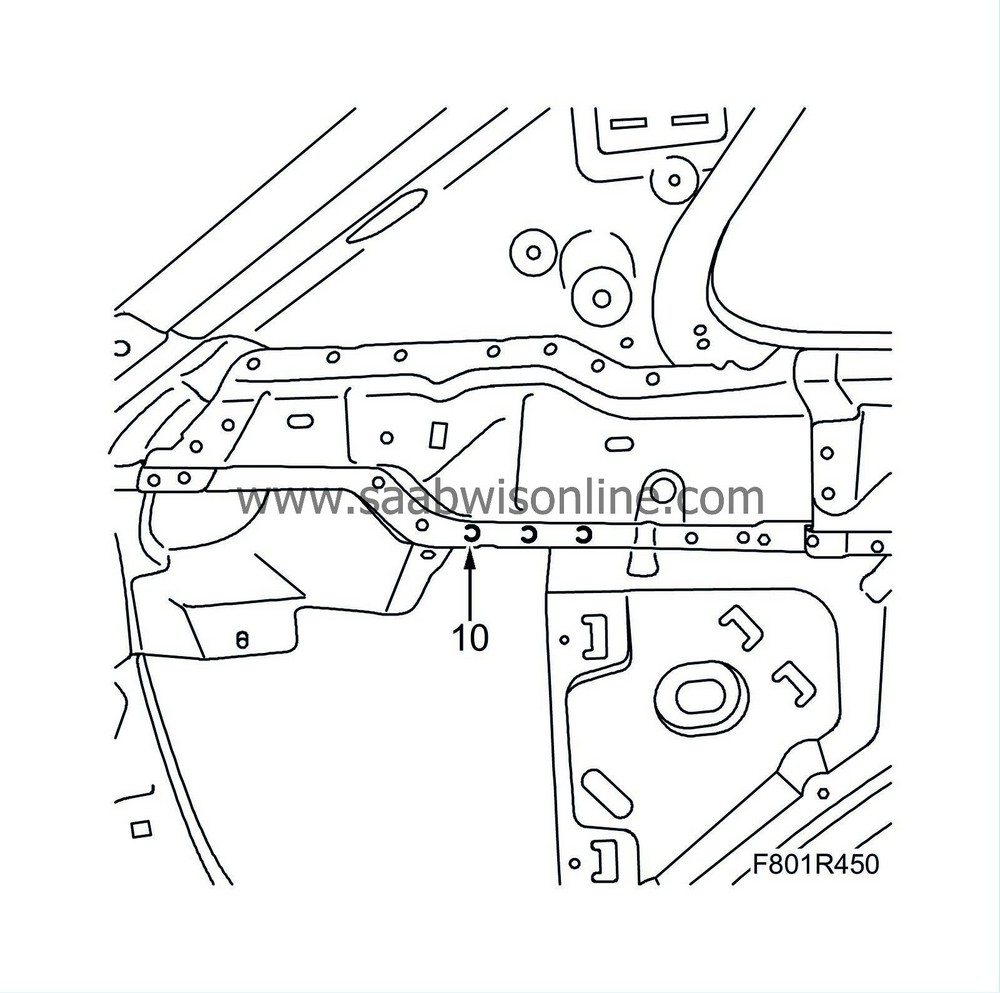
Drill out the spot welds in the luggage compartment.
|
|
| 11. |
Tap loose the side panel and break it loose from the wheel housing's adhesive.
|
|
| 12. |
Straighten any deformed panels. Adjust and align all fitting surfaces.
|
|
| 13. |
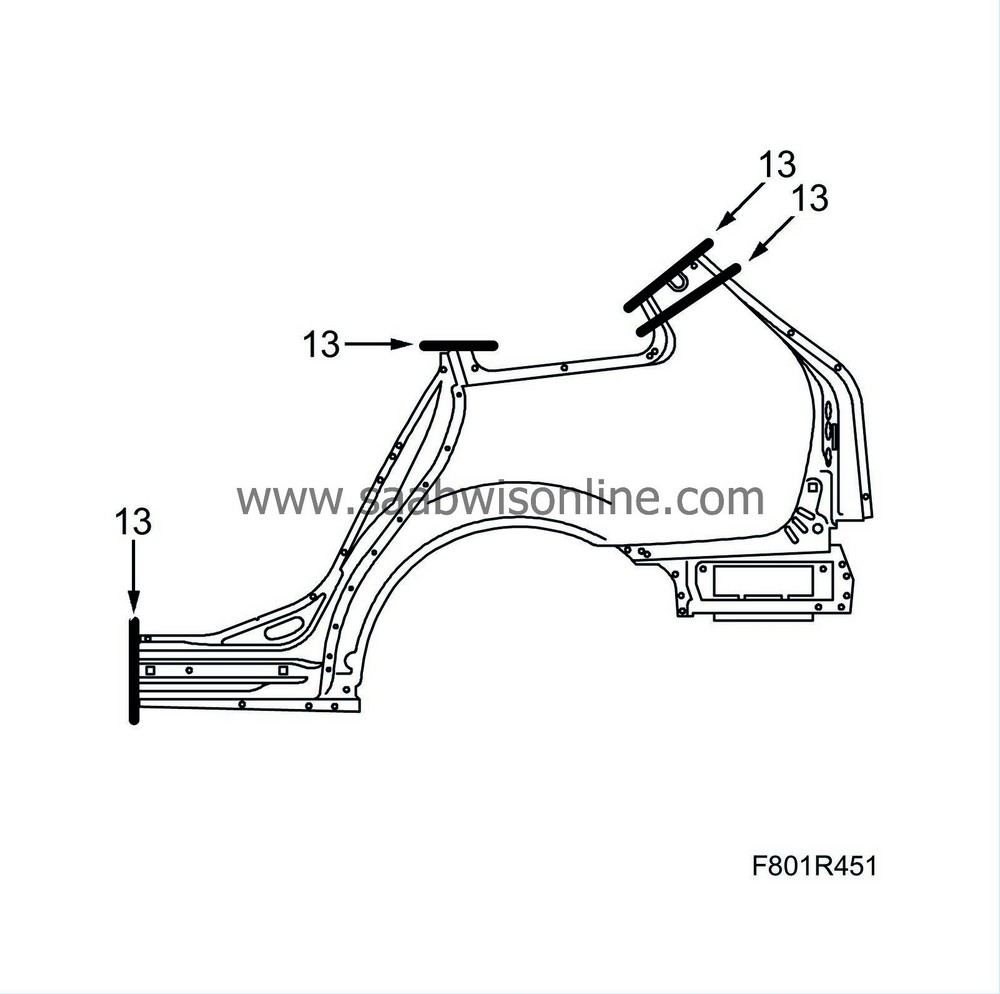
Cut the replacement panel so that it fits with the cuts previously made.
|
|
| 14. |
Cut away a piece in order to access the reinforcement. Cut the reinforcement so that it corresponds with the cutting on the car.
|
|
| 15. |
Drill out certain spot welds from the reinforcement so that it detaches from the section of the spare part that is not used.
|
|
| 16. |
Drill holes for plug welding where appropriate.
|
|
| 17. |
Grind clean the surfaces on the body and replacement panel that are to be welded.
|
|
| 18. |
Apply welding primer to the surfaces to be spot and plug welded. Use Teroson Zink Spray
Apply Teroson 6700 on the edge of the outer wheel housing. 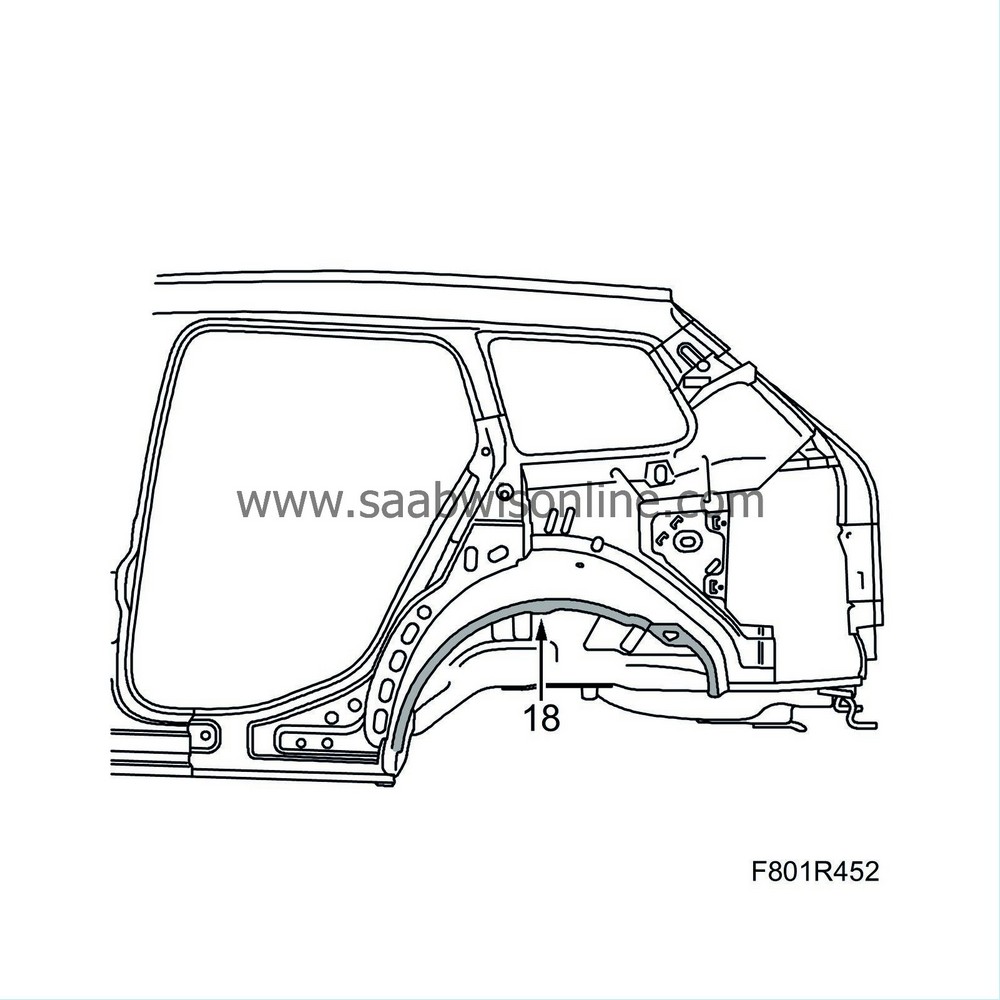
|
|
| 19. |
Fit the spare part in place and make fine adjustments.
|
|
| 20. |
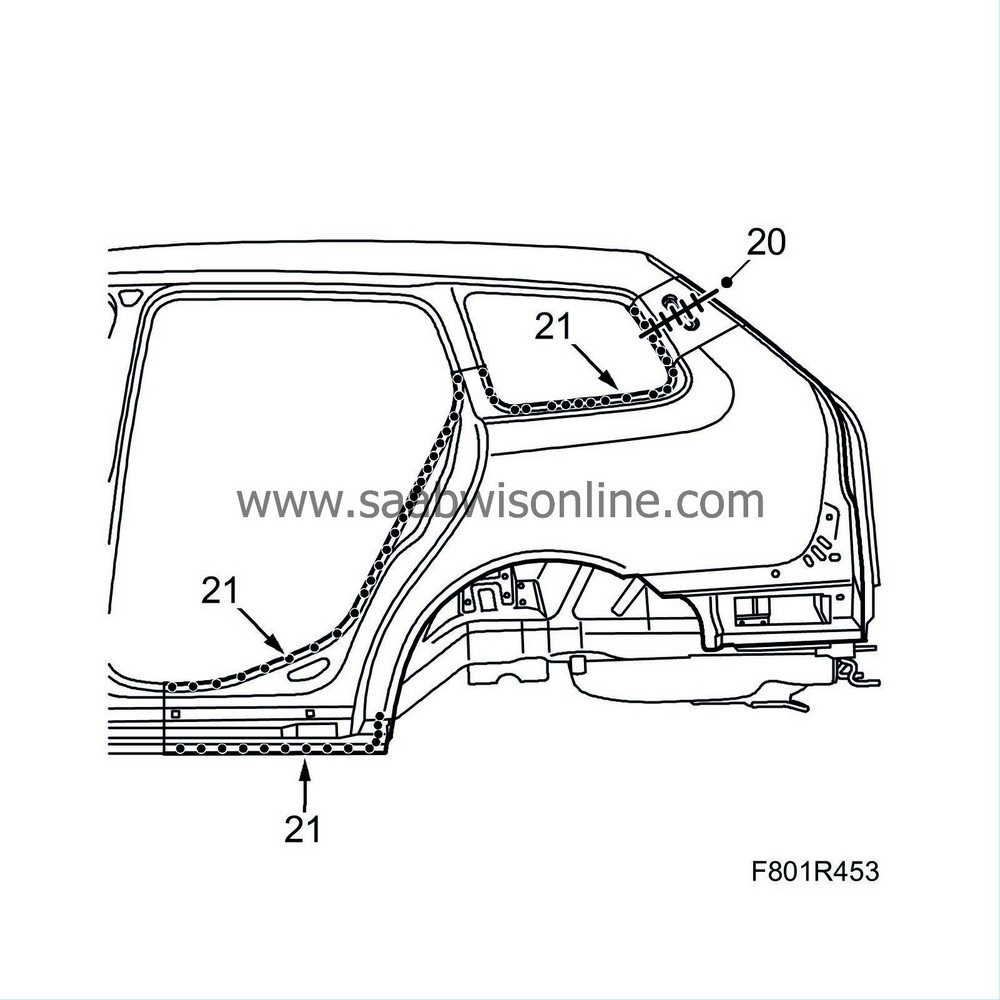
Fully weld the inner reinforcement.
|
|
| 21. |
Spot weld by the door opening and the window opening.
|
|
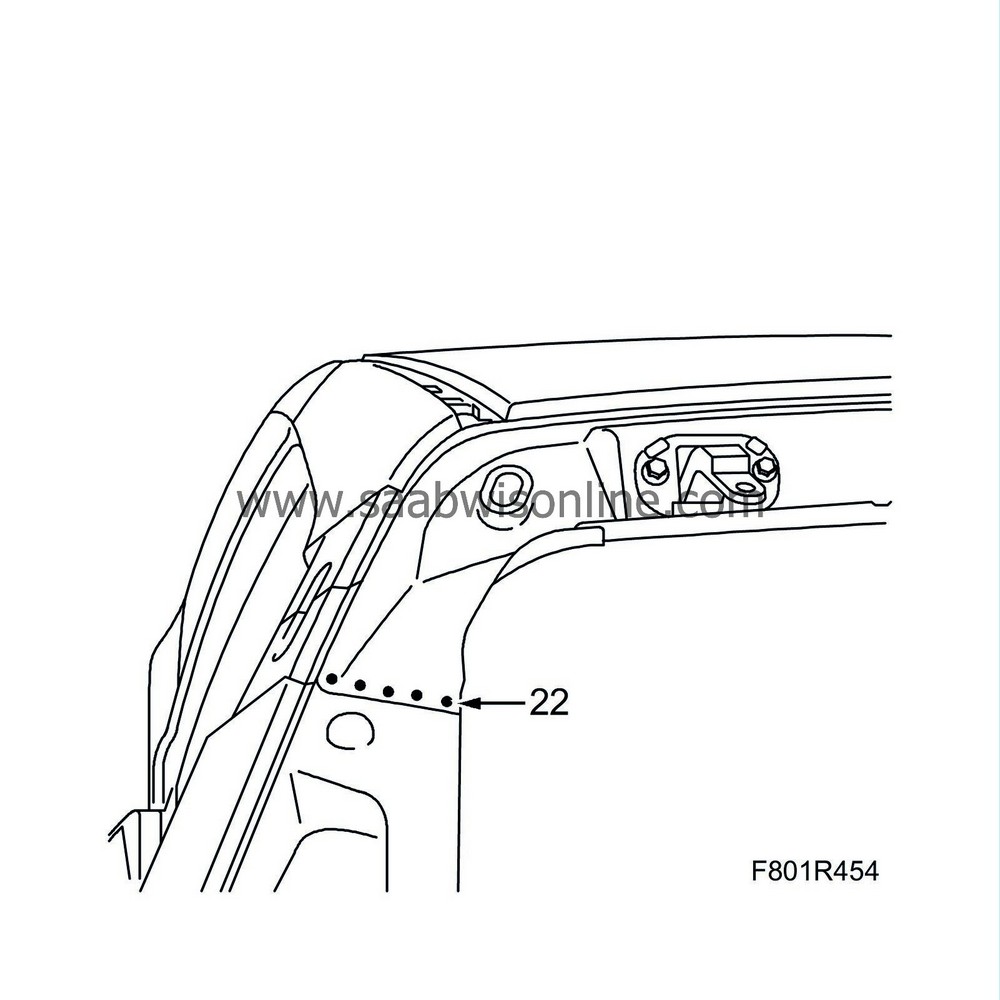
| 22. |
Spot weld on the inside to the reinforcement.
|
|
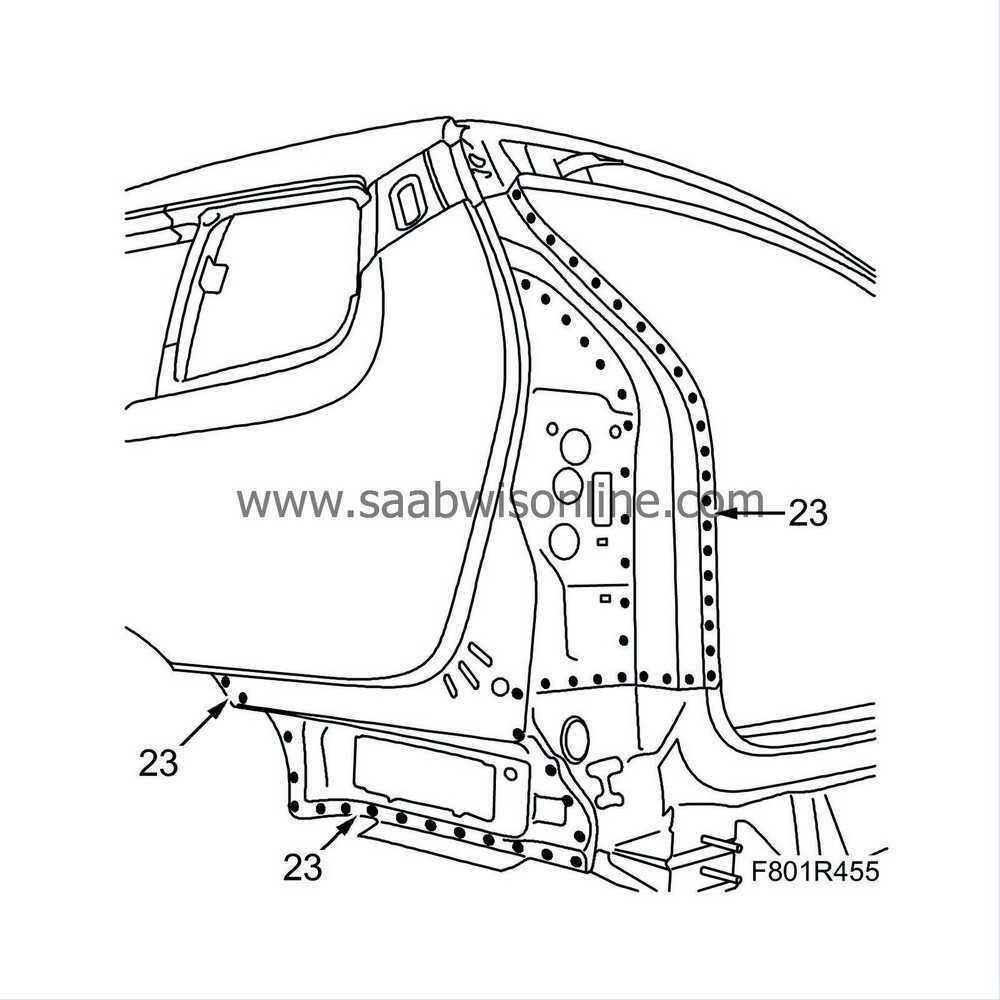
| 23. |
Plug weld at the rear light cluster plate.
|
|
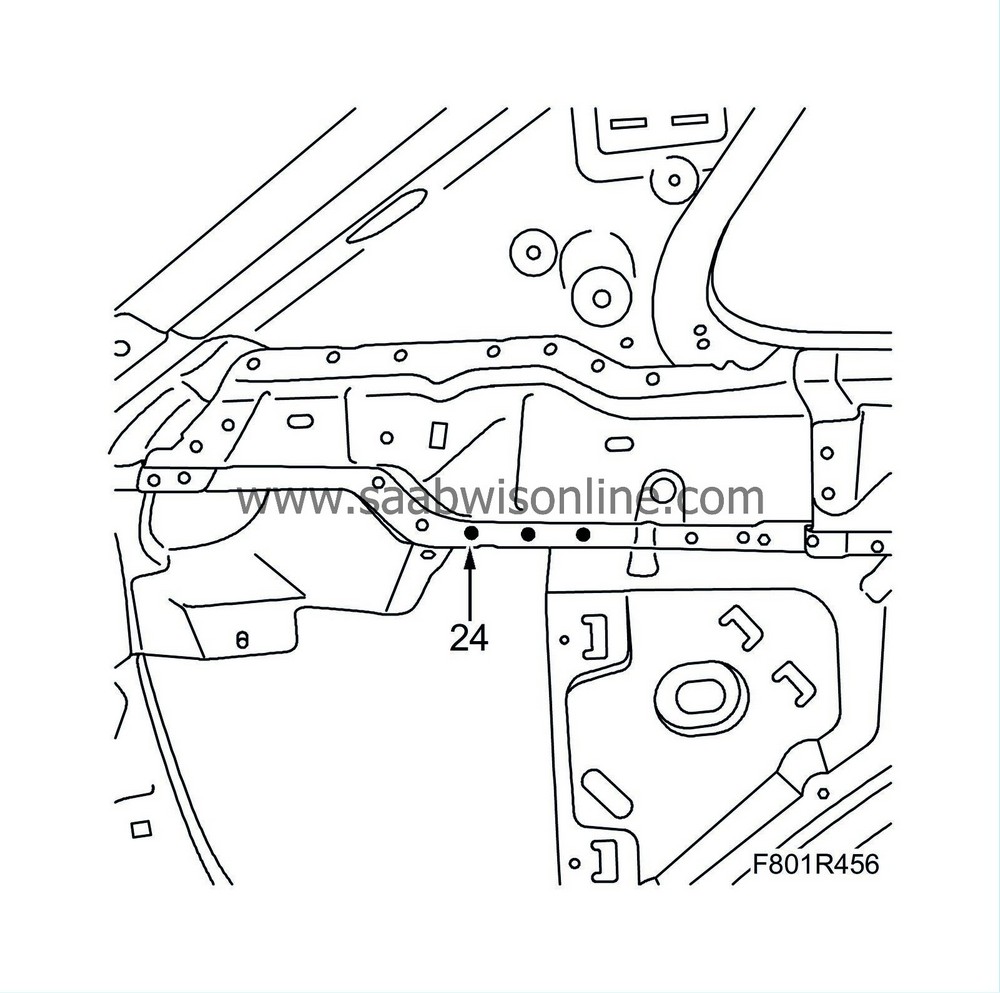
| 24. |
Plug weld in the luggage compartment
|
|
| 26. |
Fully weld all joints.
|
|
| 27. |
Replace the MIG braze.
|
|
| 28. |
Smooth off the welds.
|
|
| 29. |
Wash away surplus welding primer. Welding primer reduces the adhesion of paint, filler and sealant.
|
|
| 30. |
Apply primer to all bare metal surfaces.
|
|
| 31. |
Seal joints and seams with sealant.
|
|
| 32. |
Apply rust protector after painting. Use Terotex HV 400.
|
|

 Warning
