Lock cylinder, CV
| Lock cylinder, CV |
| To remove |
| 1. |
Lower the door window fully and then raise it roughly 10 cm. Remove
Door trim, CV
.
|
|
| 2. |
Remove the
Side window, door, CV
.
|
|
| 3. |
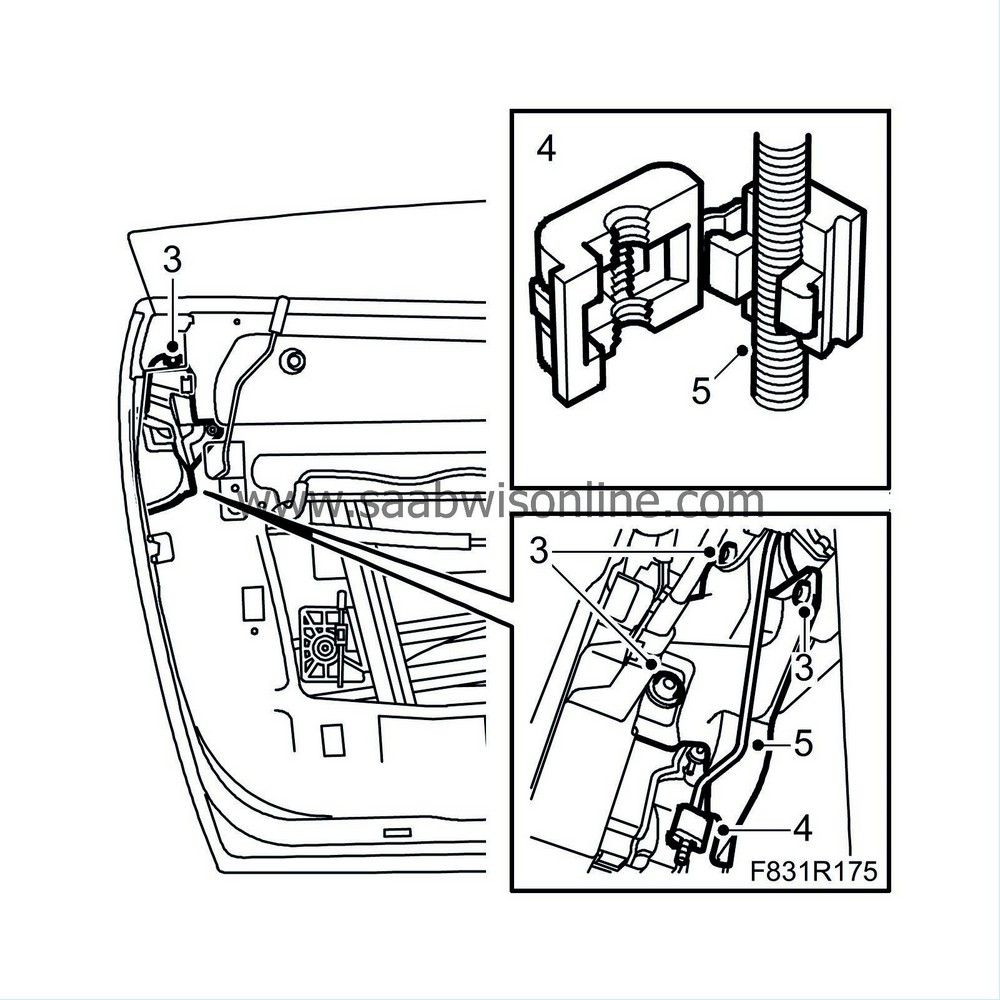
Cars with guard
: Remove the guard's screws.
|
|
| 4. |
Remove the lock cover from the rod.
|
|
| 5. |
Loosen the rod from the clip.
|
|
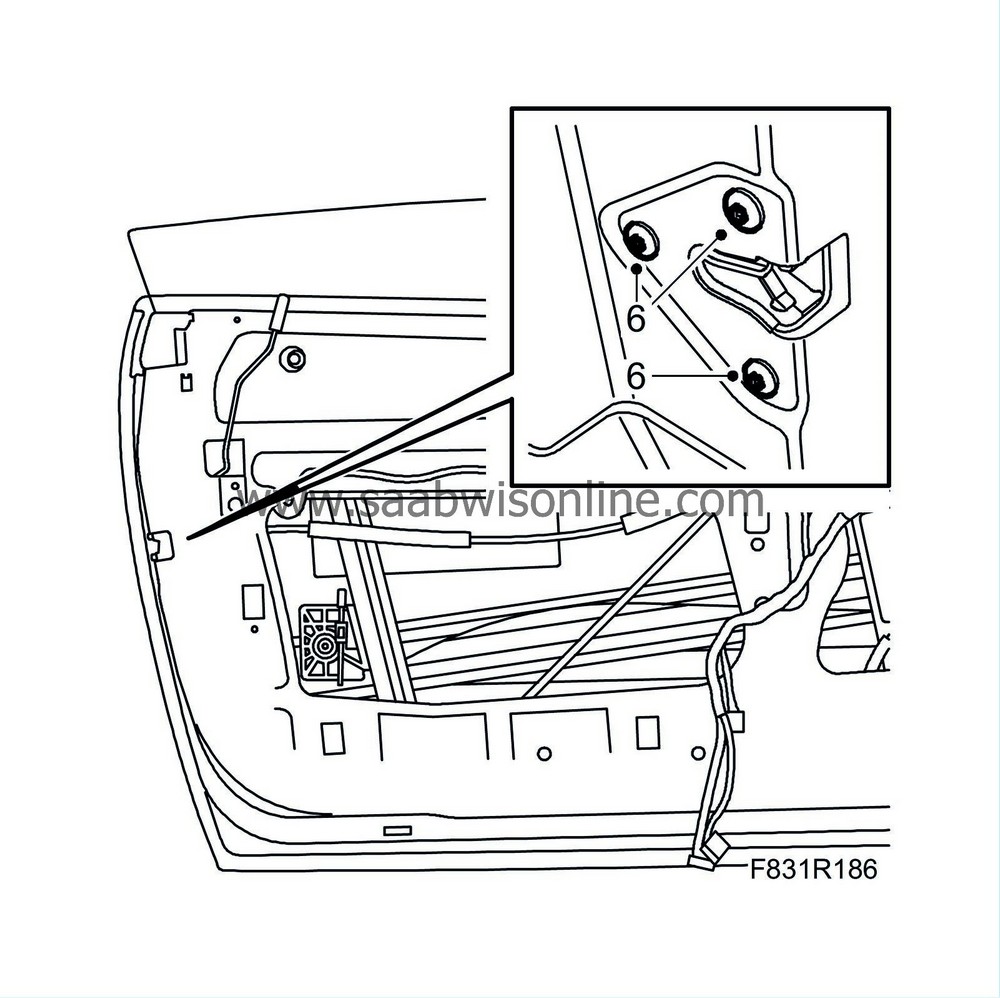
| 6. |
Remove the lock unit bolts. Allow the lock to hang freely.
|
|
| 7. |
Cars with guard
: Remove the guard by pulling the guard forward and downward and then lifting it out.
|
|
| 8. |
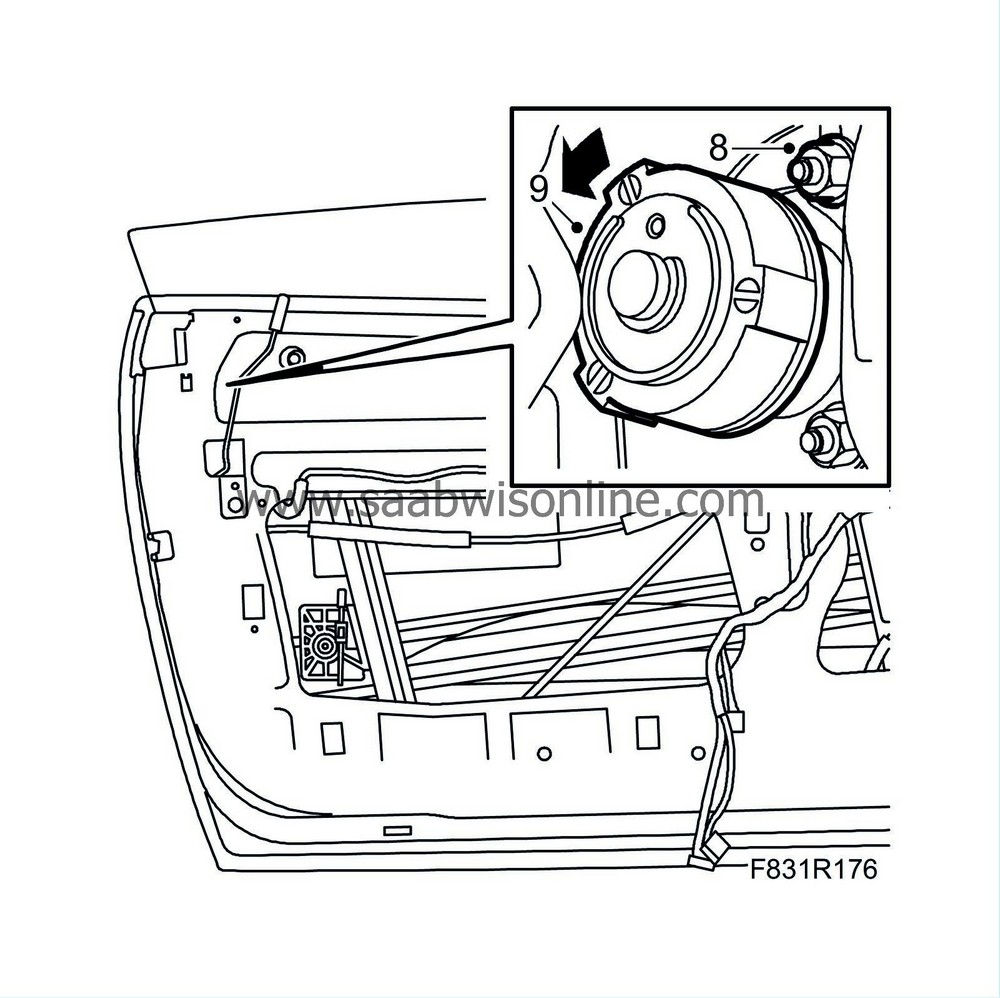
Remove the upper rear nut for the handle and lock cylinder.
|
|
| 9. |
Turn the lock cylinder anticlockwise and pull out the cylinder from the handle.
|
|
| 10. |
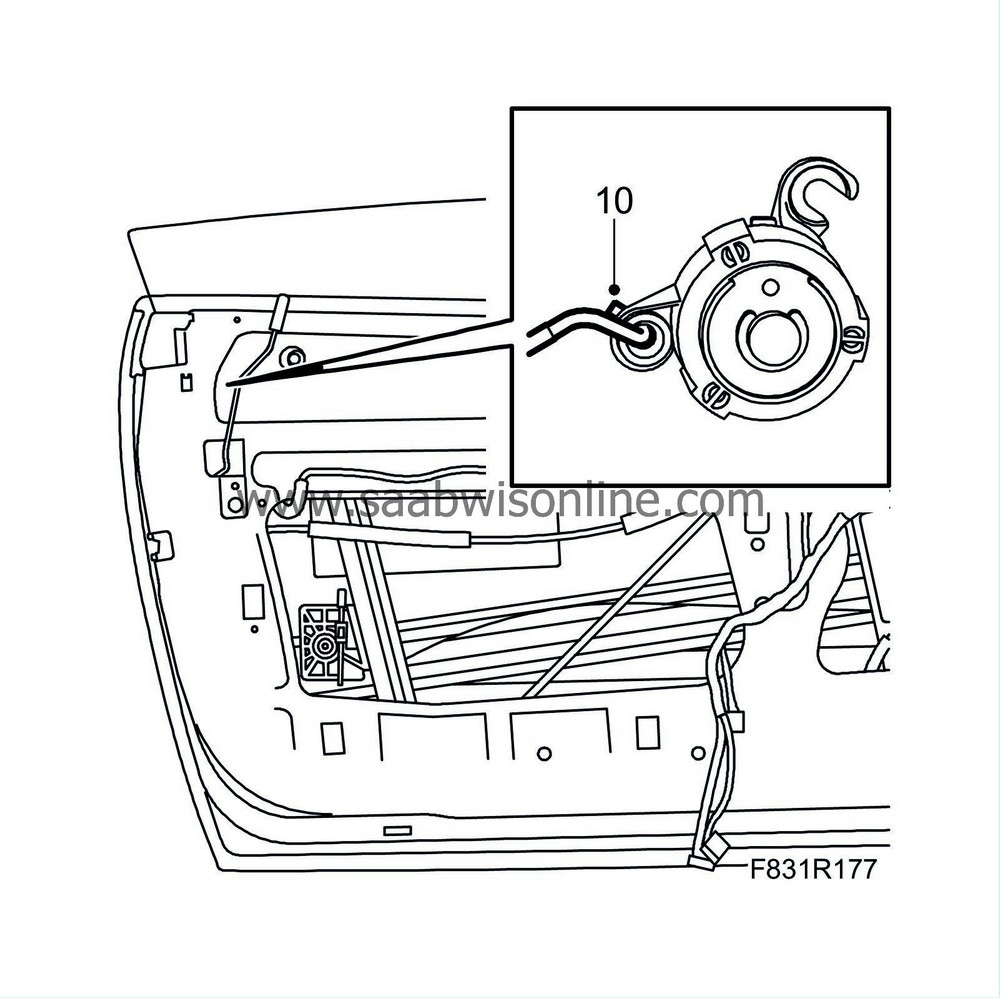
Unhook the cylinder and remove the cylinder from the lock rod.
|
|
| To fit |
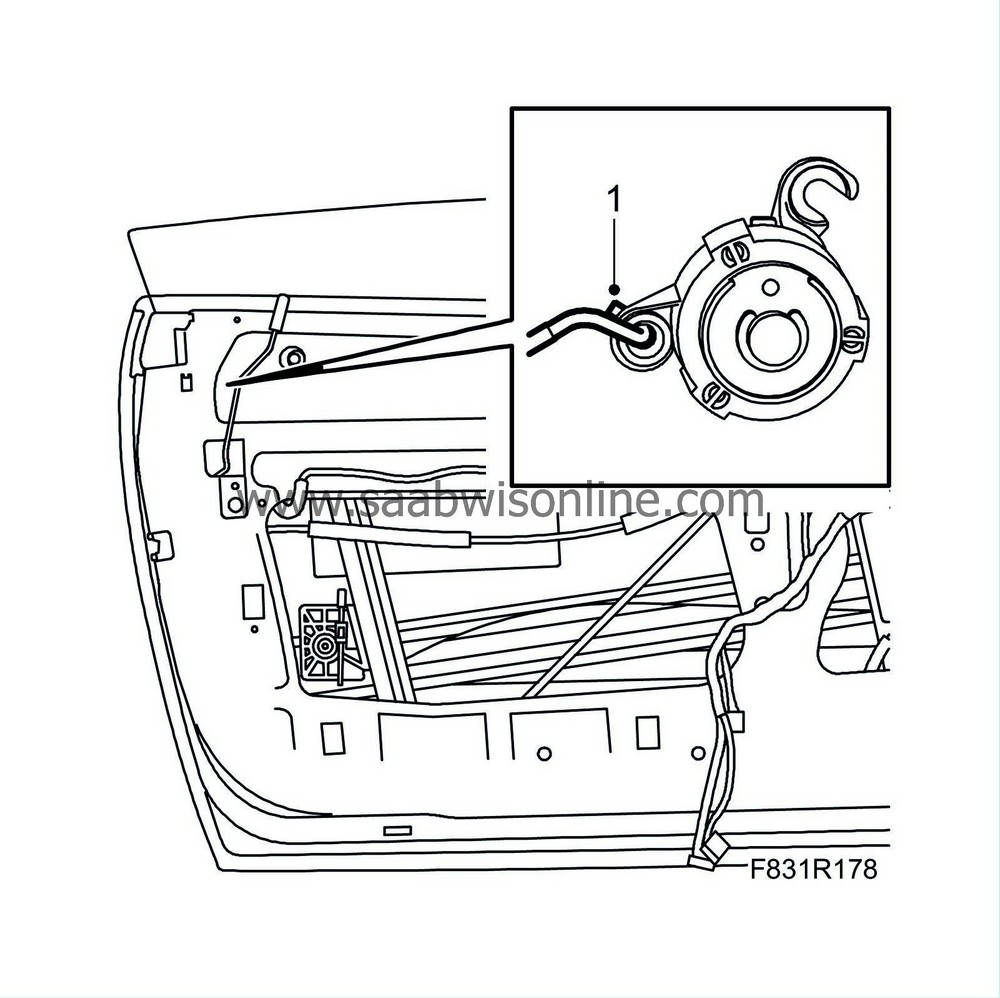
| 1. |
Hook the lock cylinder on the rod.
|
|
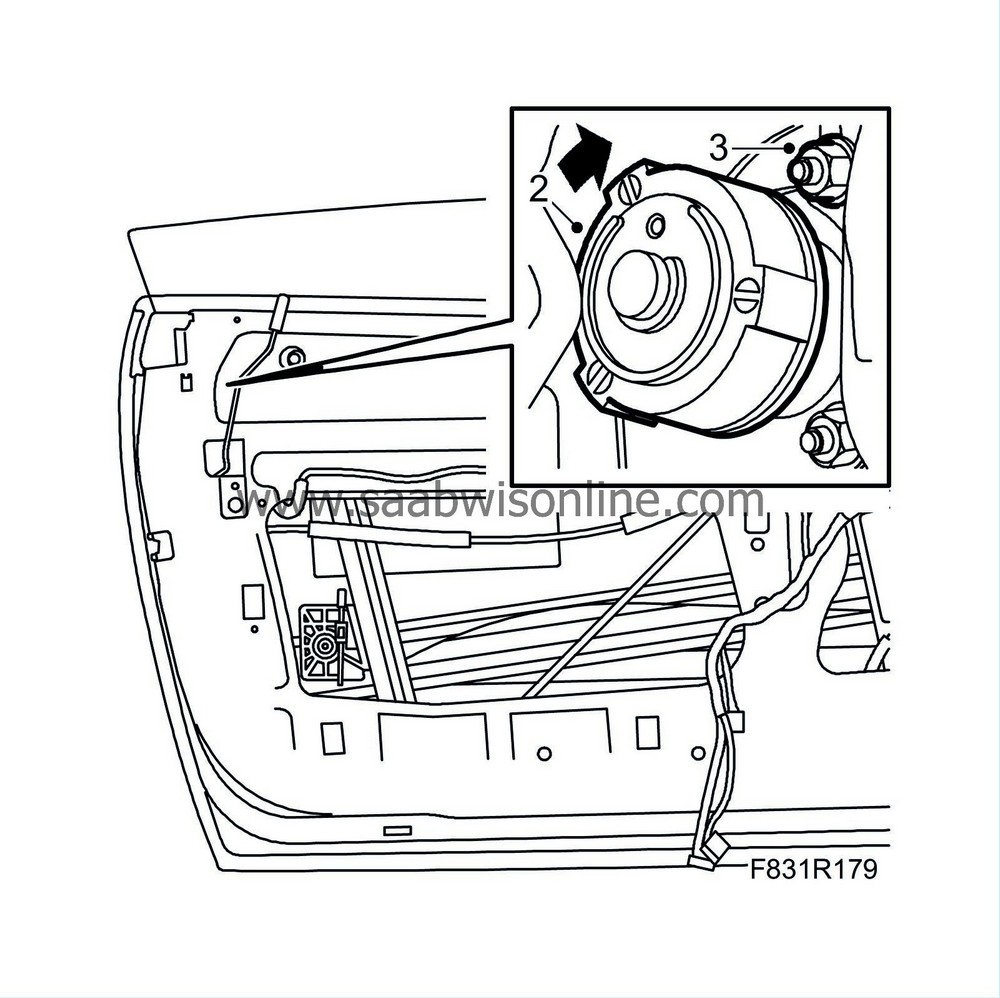
| 2. |
Fit the lock cylinder by pushing the lock cylinder and turning it clockwise.
|
|
| 3. |
Fit the handle's upper rear nut.
|
|
| 4. |
Cars with guard
: Insert the guard. Make sure the rod from the handle is in front of the guard.
|
|
| 5. |
Lift up the lock and secure it with a bolt. Also, thread the bolts for the guard (certain cars only) and lock. Start by tightening the lock bolts followed by the guard bolts.

|
|
| 6. |
Fit the rod in the clip.
|
|
| 7. |
Lift in the clip at the same time as you fit the lock cover to eliminate play.
|
|
| 8. |
Check the function of the lock, lock cylinder and the outer handle.
|
|
| 9. |
Fit the
Side window, door, CV
|
|
| 10. |
Fit the plastic water barrier.
|
|
| 11. |
Fit the
Door trim
.
|
|
| 12. |
Cars with pinch protection
: Perform
Programming of the pinch protection
.
|
|


