Fan cowling, B207
| Fan cowling, B207 |
| To remove |
| 1. |
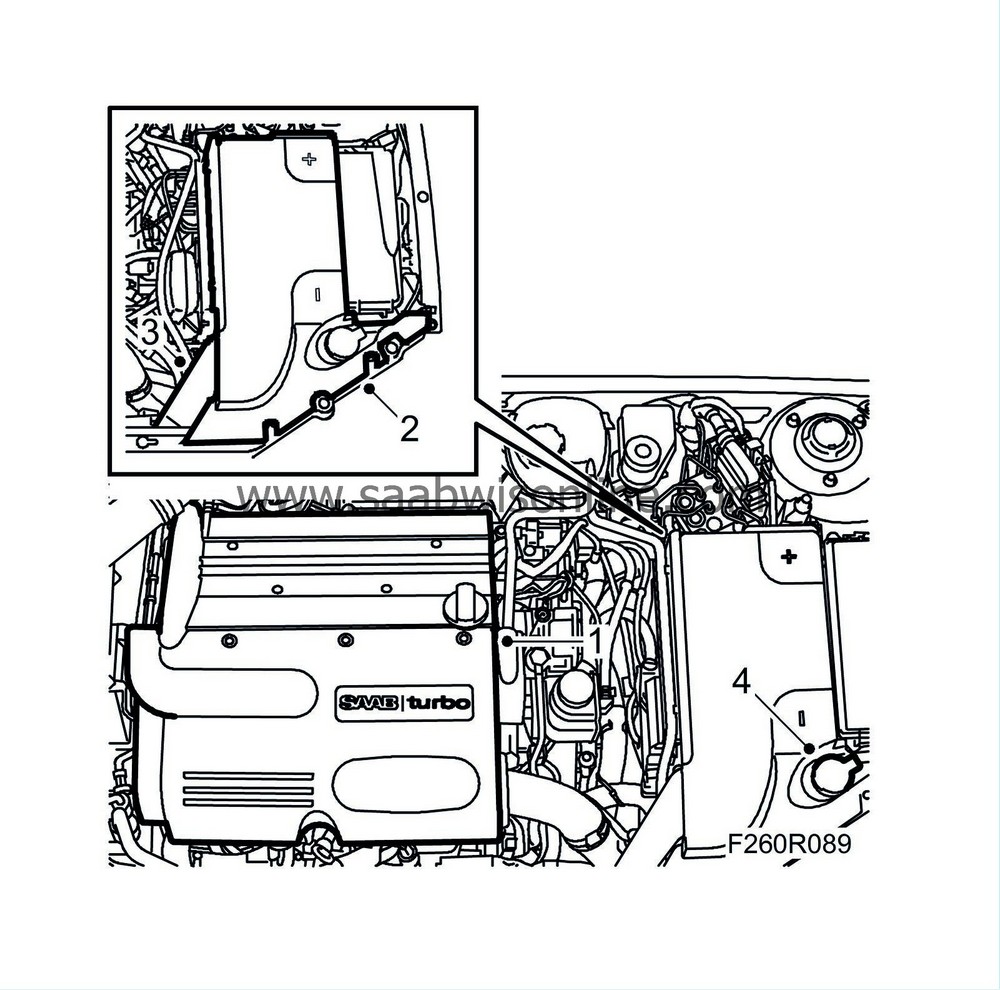
Remove the upper engine cover.
|
|
| 2. |
Remove the battery cover and release the cables from the battery.
|
|
| 3. |
Remove the battery cooling pipe by releasing it from the catch.
|
|
| 4. |
Remove the washer fluid filler pipe.
|
|
| 5. |
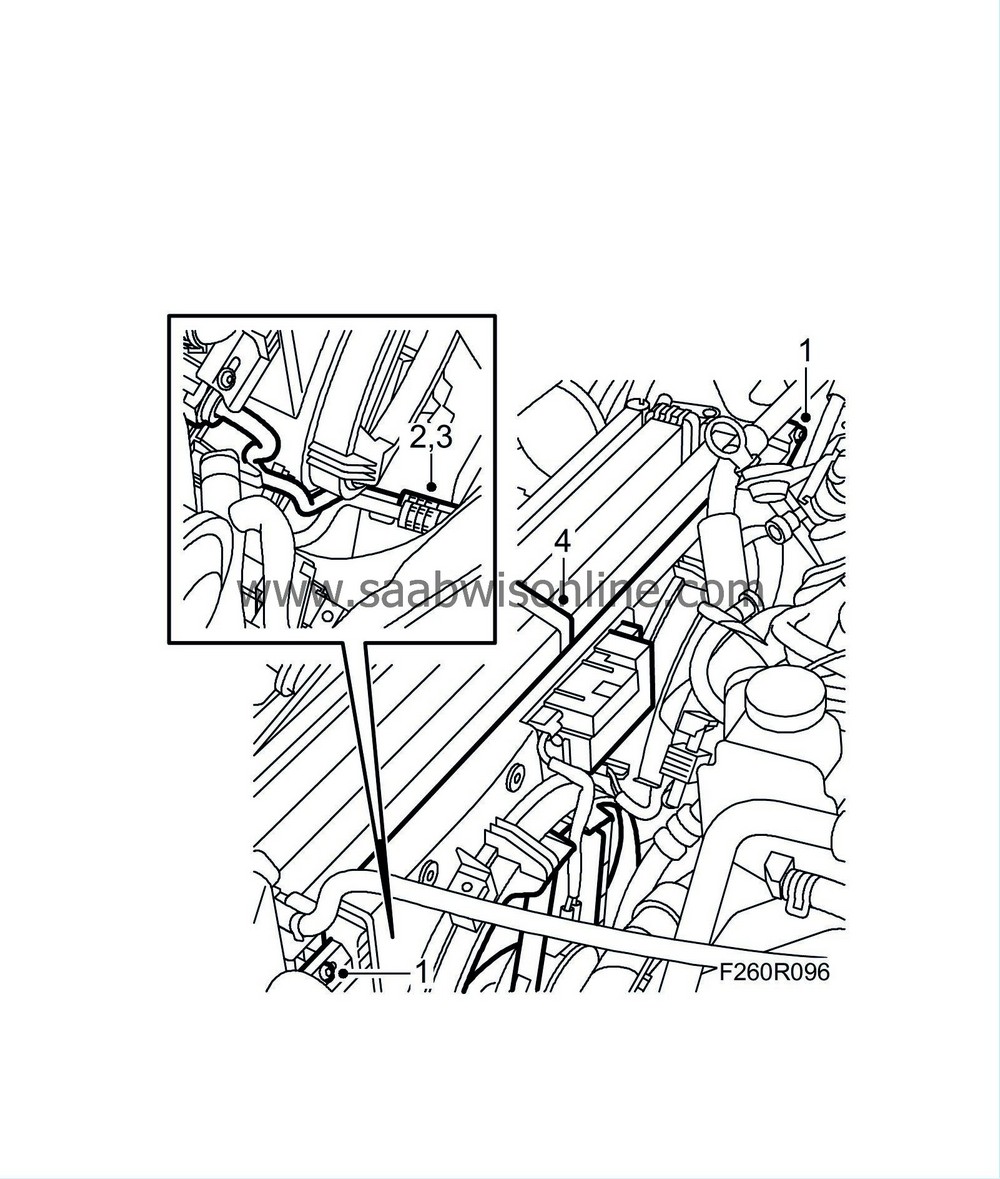
Remove the upper radiator member
.
|
|
| 6. |
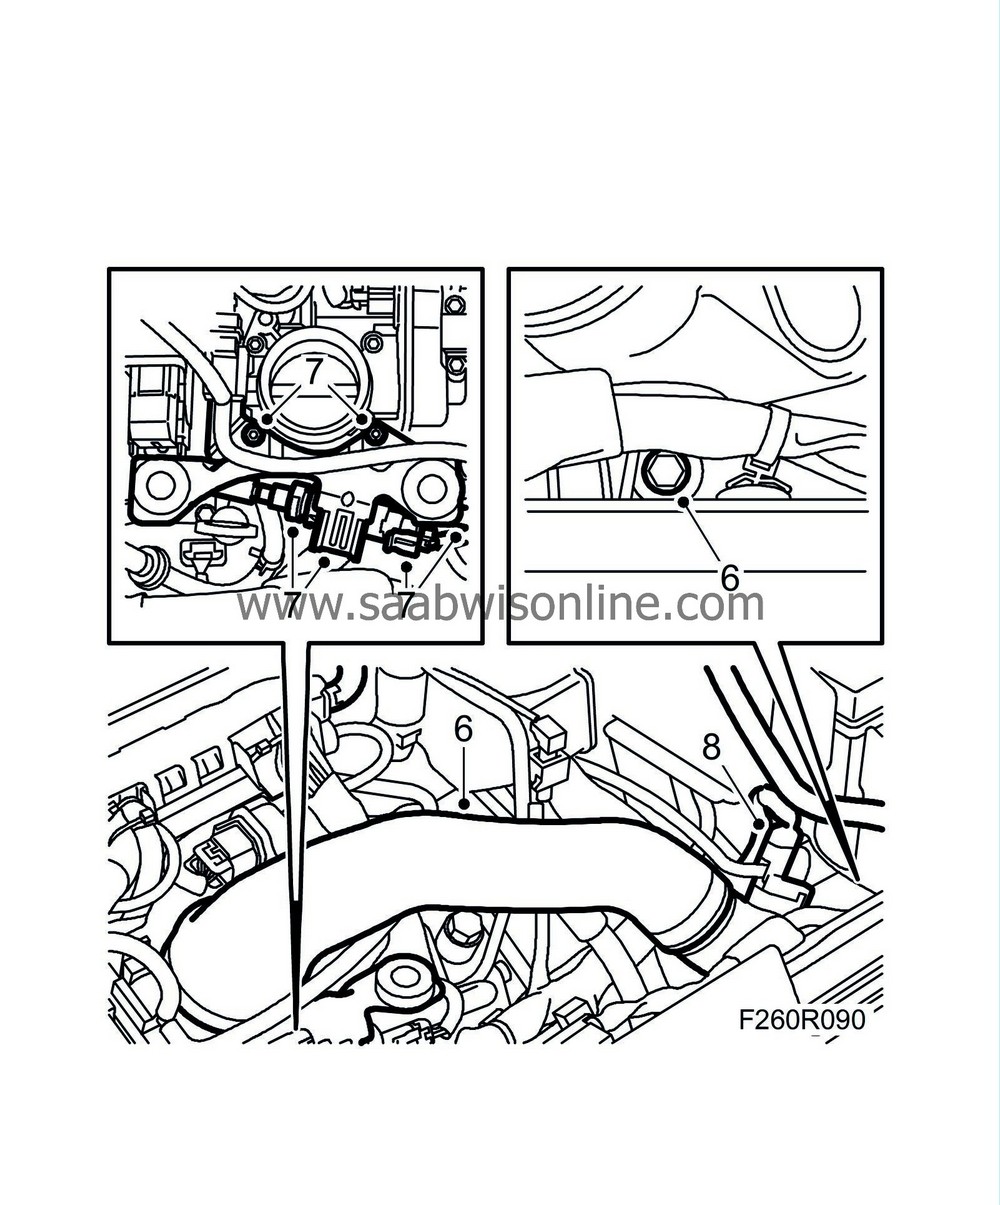
Detach the charge air hose from the throttle body and undo the upper charge air pipe bracket from the fan cowling.
|
|
| 7. |
Remove the bracket from the throttle body, disconnect the quick-release couplings and connectors from the EVAP canister purge valve and bend aside the bracket.
|
|
| 8. |
Unplug the connector and detach the hose from the pressure/temperature sensor on the charge air pipe.
|
|
| 9. |
Raise the car.
|
|
| 10. |
Remove the front spoiler shield. Detach the hose to the headlamp washer and unplug and remove the connector. See
spoiler shield, to remove
.
|
|
| 11. |
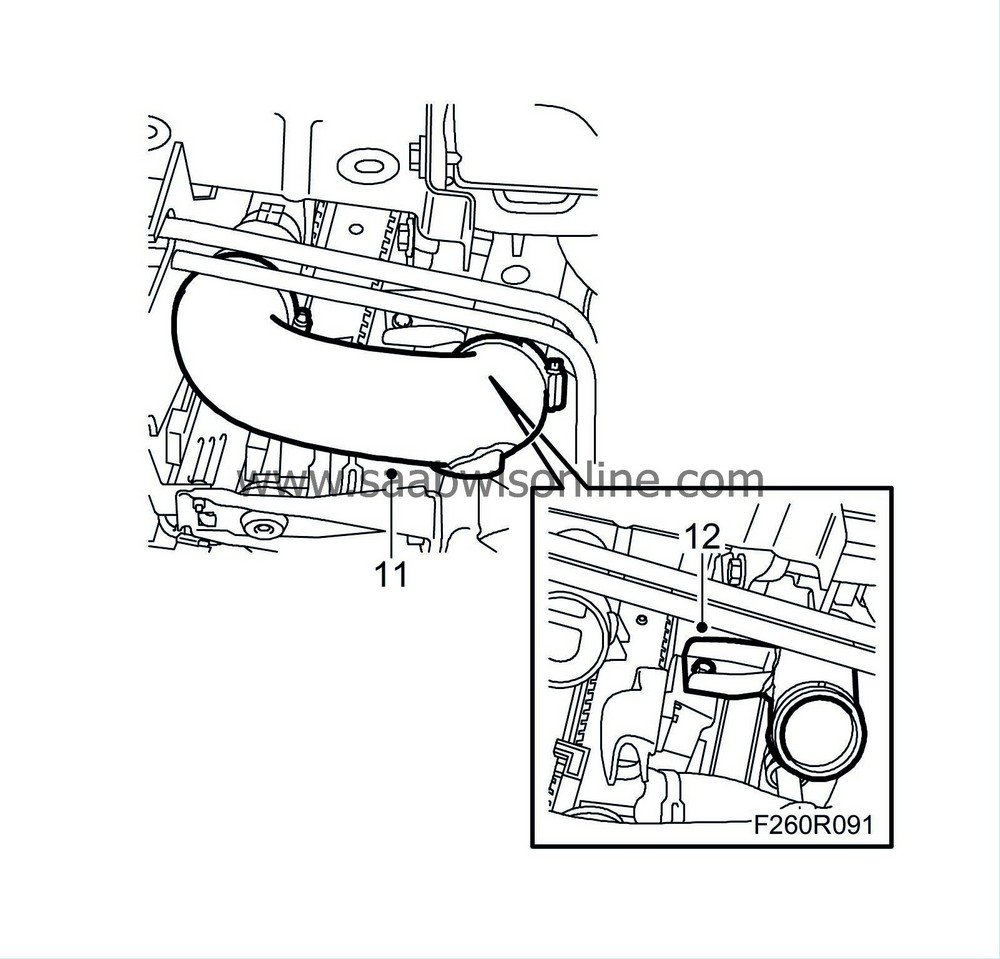
Disconnect the charge air hose from the charge air pipe.
|
|
| 12. |
Remove the lower charge air pipe mounting from the fan cowling.
|
|
| 13. |
Lower the car.
|
|
| 14. |
Remove the charge air pipe with hose.
|
|
| 15. |
Remove the battery.
|
|
| 16. |
Remove the cover from the battery box.

|
|
| 17. |
On cars with automatic transmission:
Unplug the connectors from the transmission control module.
|
|
| 18. |
Lift the cover and detach the connector.
|
|
| 19. |
Press in the catch and remove the electrical centre from the battery box.
|
|
| 20. |
Unplug the bonnet switch connector and remove the battery box.
|
|
| 21. |
Undo the clip holding the cables from the battery tray.
|
|
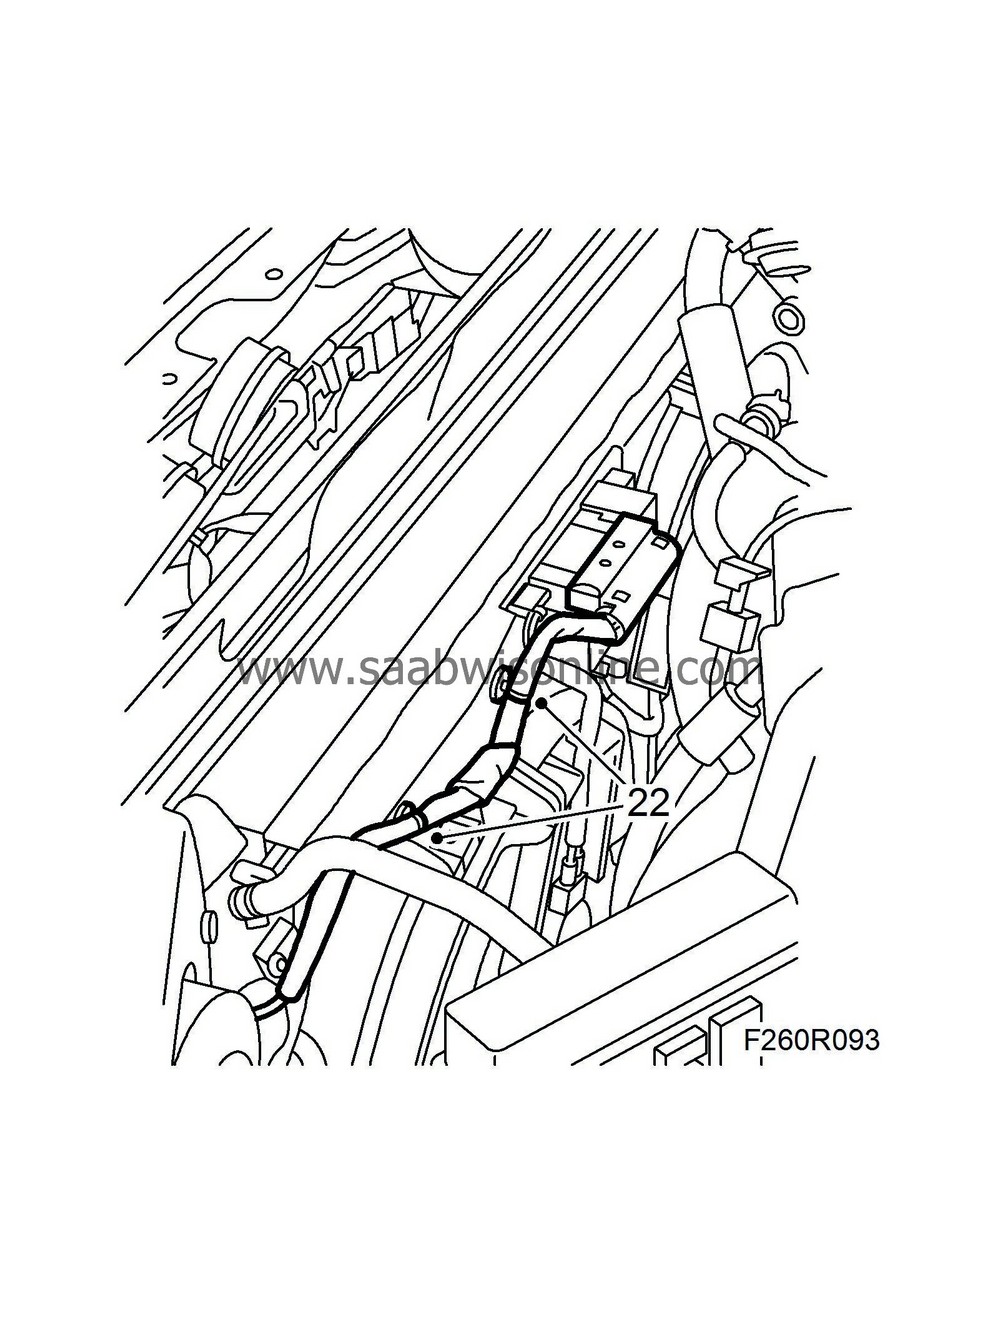
| 22. |
Detach the connector and the clip securing the cable from the fan cowling.
|
|
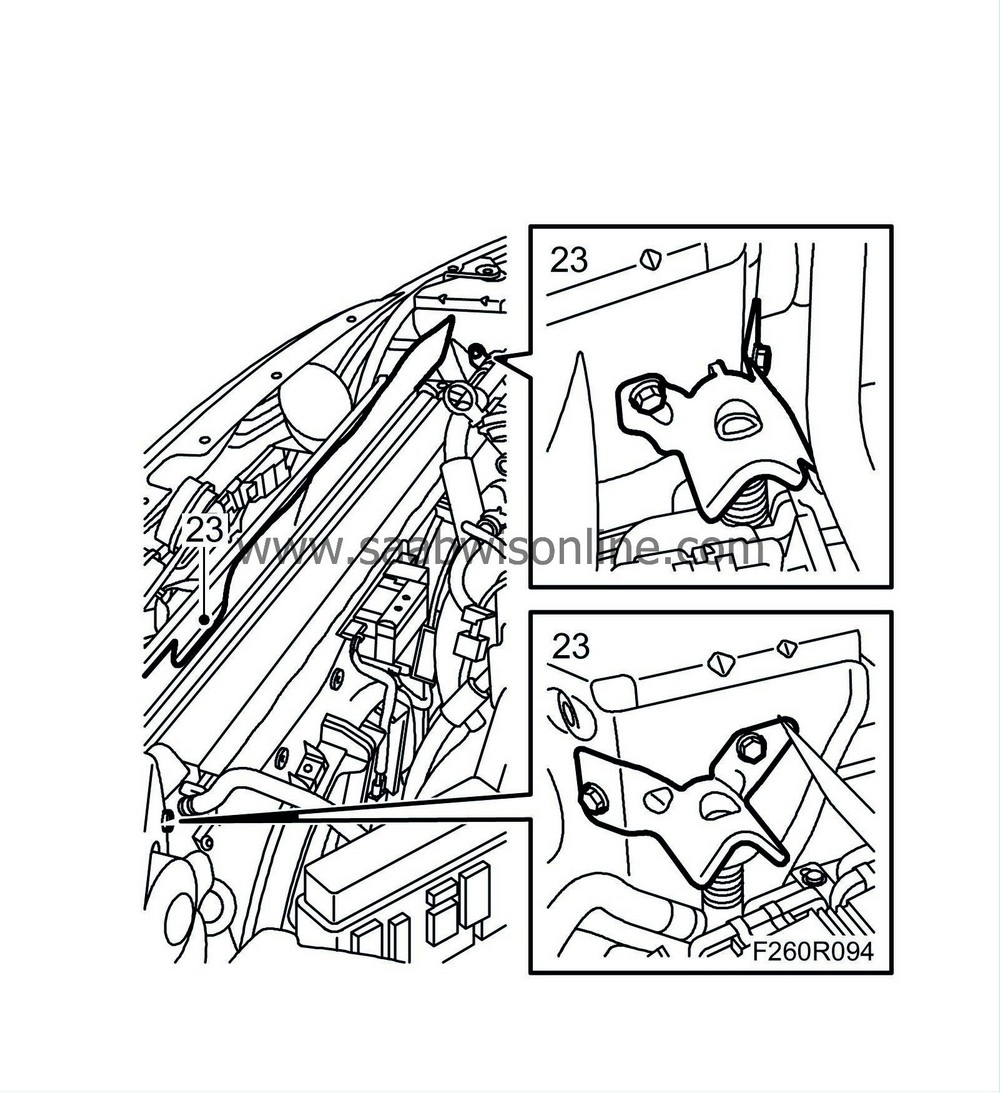
| 23. |
Remove the upper radiator cover and undo the upper radiator mounting from the body.
|
|
| 24. |
Undo and bend aside the lower radiator cover.
|
|
| 25. |
Fit
83 95 212 Strap
between the radiator and the radiator fan, move the radiator forward and secure it with the strap.

|
|
| 26. |
On cars with automatic transmission:
Remove the protector over the upper quick-release coupling, undo the oil pipe quick-release coupling using
87 92 806 Removal tool
and detach the upper oil pipe from the radiator. Plug the pipe and the quick-release couplings. Collect any oil spill. Undo the plastic clip holding both the oil pipes if necessary.
|
|
| 27. |
Undo the fan cowling retaining bolts and remove the cowling.
|
|
| To fit |
| 2. |
On cars with automatic transmission:
Remove the plugs, fit the pipe to its mounting on the radiator and connect the oil pipe to the quick-release coupling. Check that the pipe is connected properly to the quick-release coupling.
|
|
| 3. |
On cars with automatic transmission:
Move the protection over the quick-release coupling and secure the pipe to the lower plastic clip. Wipe away any oil spill.
|
|
| 4. |
Remove the strap.
|
|
| 5. |
Fit the lower radiator cover.
|
|
| 6. |
Fit the upper radiator brackets to the body.

|
|
| 7. |
Fit the upper radiator cover.
|
|
| 8. |
Bend back the bracket, connect the quick-release couplings and the connector to the EVAP canister purge valve, and fit the bracket to the throttle body.

|
|
| 9. |
Lower the charge air pipe with hose.
|
|
| 10. |
Fit the charge air hose to the throttle body and the upper charge air pipe to the fan cowling, do
not
tighten the bolt in the fan cowling.
|
|
| 11. |
Plug in the connector and attach the hose to the pressure/temperature sensor on the charge air pipe.
|
|
| 12. |
Plug in the connector to the radiator fans and secure the cables to the fan cowling with cable ties.

|
|
| 13. |
Raise the car.
|
|
| 14. |
Fit the lower charge air pipe to the fan cowling.

|
|
| 15. |
Fit the hose from the charge air cooler to the charge air pipe.
|
|
| 16. |
Fit the front spoiler shield and secure the hose to the headlamp washer. Fit and plug in the connector. See
spoiler shield, to fit
.
|
|
| 17. |
Lower the car.
|
|
| 18. |
Tighten the bolt for the charge air pipe in the fan cowling.
|
|
| 19. |
Fit the cable attachment to the battery box.
|
|
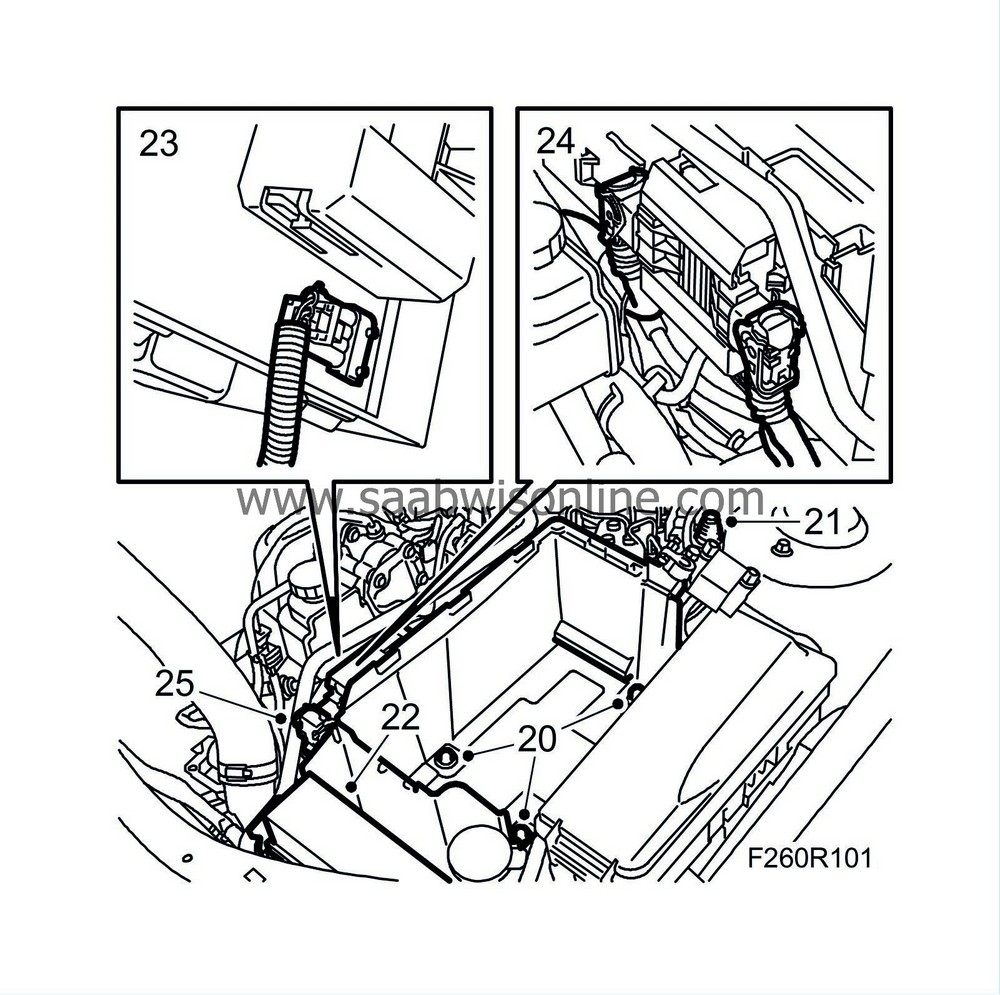
| 20. |
Fit the battery box.
|
|
| 21. |
Plug in the bonnet switch connector.
|
|
| 22. |
Fit the electrical centre in the battery box.
|
|
| 23. |
Secure the connector to the cowling.
|
|
| 24. |
On cars with automatic transmission:
Plug in the connectors to the transmission control module.
|
|
| 25. |
Fit the cover on the battery box.
|
|
| 26. |
Fit the battery, connect battery cables.
|
|
| 27. |
Fit the upper radiator member
.
|
|
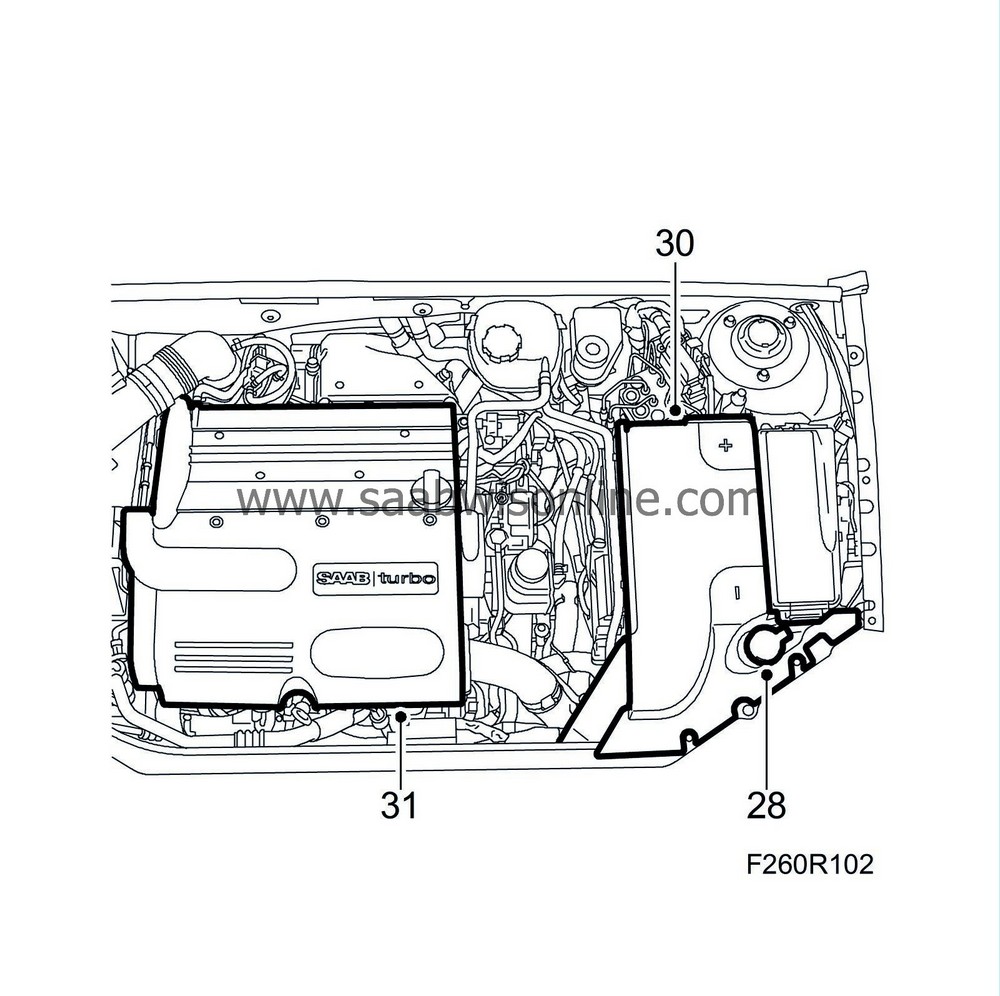
| 28. |
Fit the washer fluid filler pipe.
|
|
| 29. |
Fit the battery cooling pipe.
|
|
| 30. |
Fit the battery cover.
|
|
| 31. |
Fit the upper engine cover.
|
|
| 32. |
If the battery has been disconnected, see:
Procedure after reconnecting the battery
.
|
|

