Power steering return line, B284, 4WD, RHD
| Power steering return line, B284, 4WD, RHD |
| Important | ||
|
Scrupulous cleanliness must always be observed during all work with hydraulic components. |
||
| Important | ||
|
Always use wing covers when working in the engine bay. |
||
| To remove |
| 1. |
Secure the steering wheel in the straight-ahead position, for example using woven tape to secure it to the dashboard.
|
|
| 2. |
Remove the engine cover.
|
|
| 3. |
Suction the fluid out of the power steering fluid reservoir.
|
|
| 4. |
Remove the rubber strap (A).

|
|
| 5. |
Detach the return line (B) from the power steering fluid reservoir.
|
|
| 6. |
Remove the line from the clip on the engine.
|
|
| 7. |
Detach the upper bumper shell mountings.
|
|
| 8. |
Position two
83 95 212 Straps
over the radiator member and radiator assembly so they can be reached from beneath.
|
|
| 9. |
Raise the car.
|
|
| 10. |
Remove th spoiler shield bolts.
|
|
| 11. |
Suspend and secure the radiator assembly with two
83 95 212 Straps
over the radiator member.
|
|
| 12. |
Remove the
propeller shaft
.
|
|
| 13. |
Remove the bolt (A) securing the front torque arm to the subframe.

|
|
| 14. |
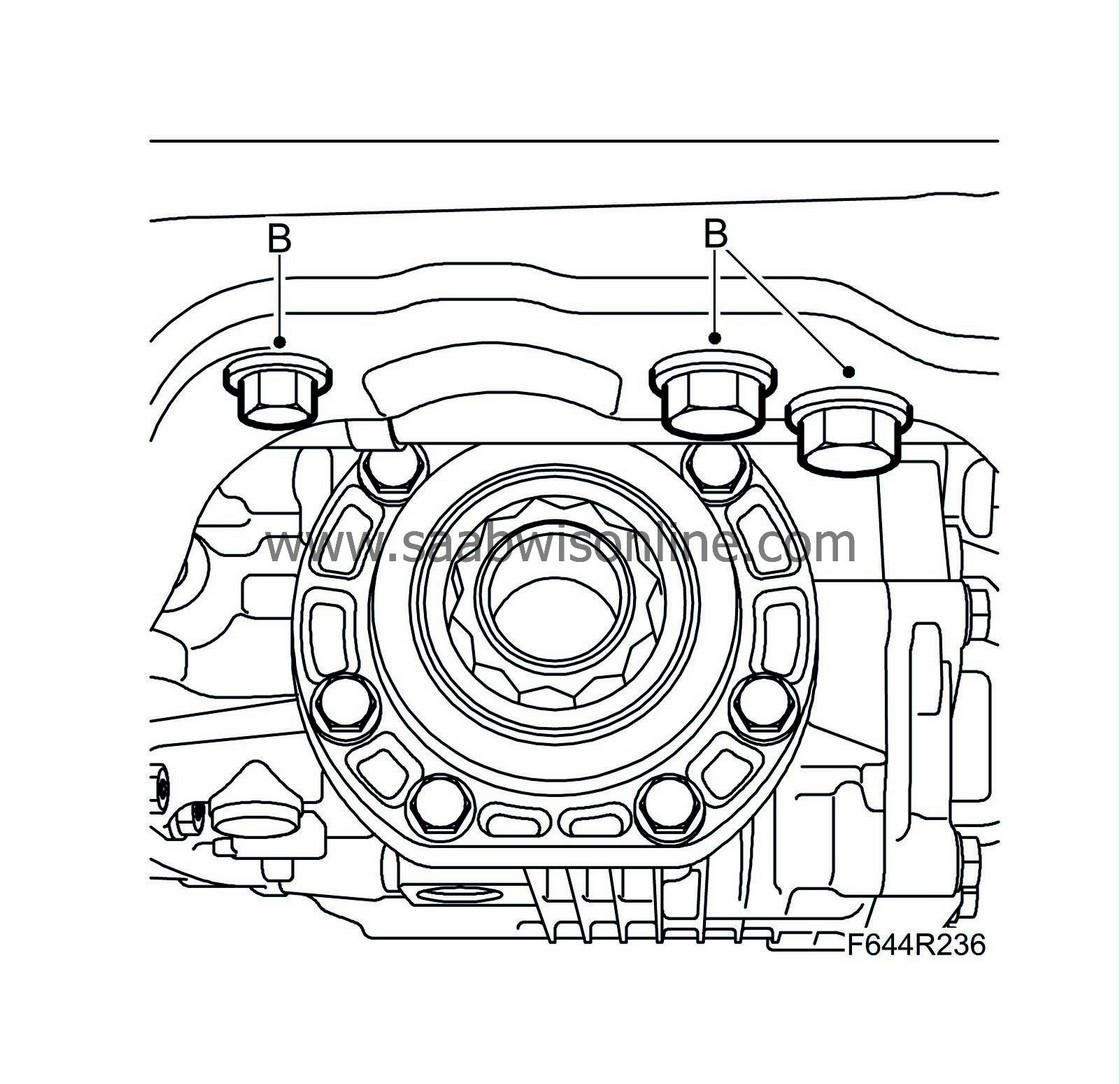
Remove the bolts (B) securing the rear torque arm to the subframe.

|
|
| 15. |
Position
83 95 311 Trolley lift
with
83 94 801 Parent fixture
and
83 96 137 Centring tool, subframe - body
.

|
|
| 16. |
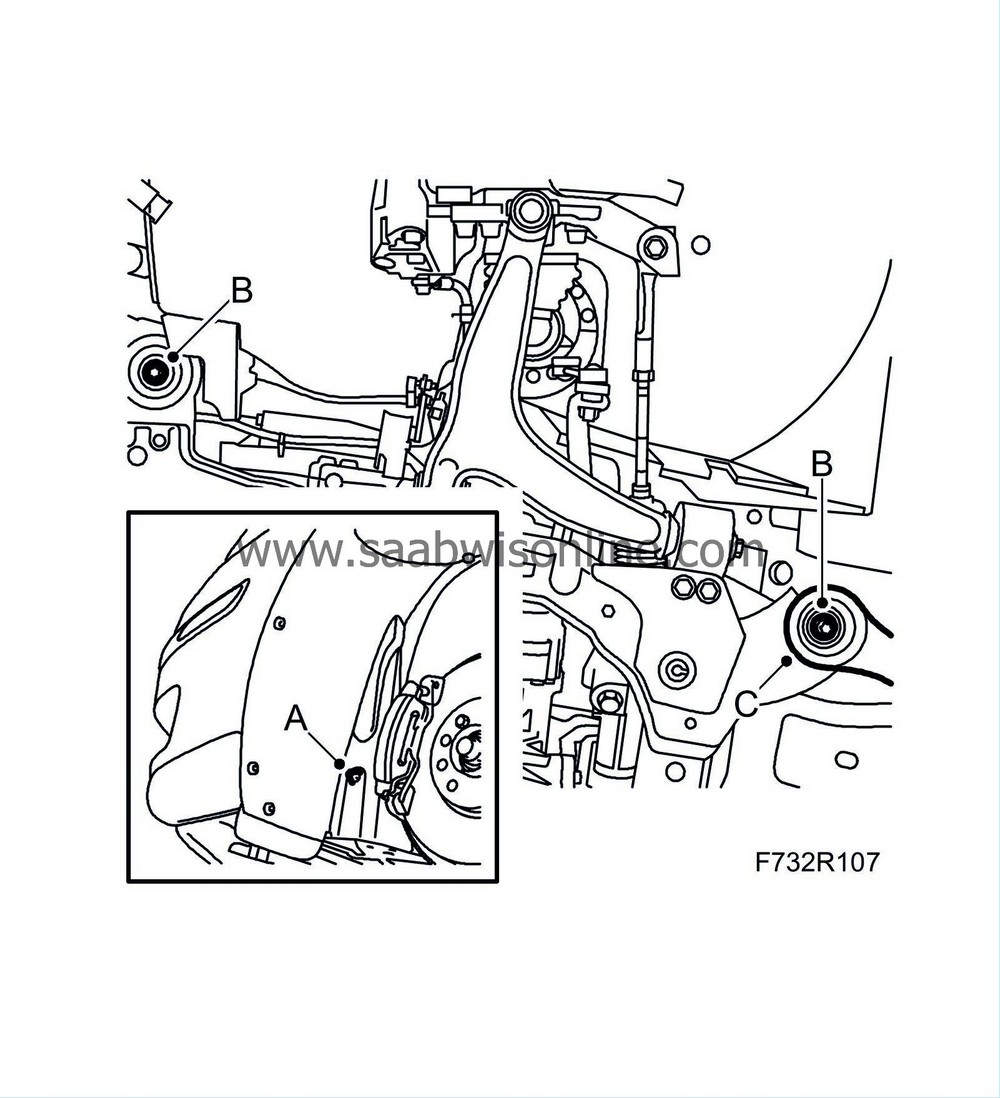
Remove the front parts of the wheel arch liner (A) and move it aside slightly.

|
|
| 17. |
Remove the subframe bolts (B) on both sides. Remove the stays (C) from the body.
|
|
| 18. |
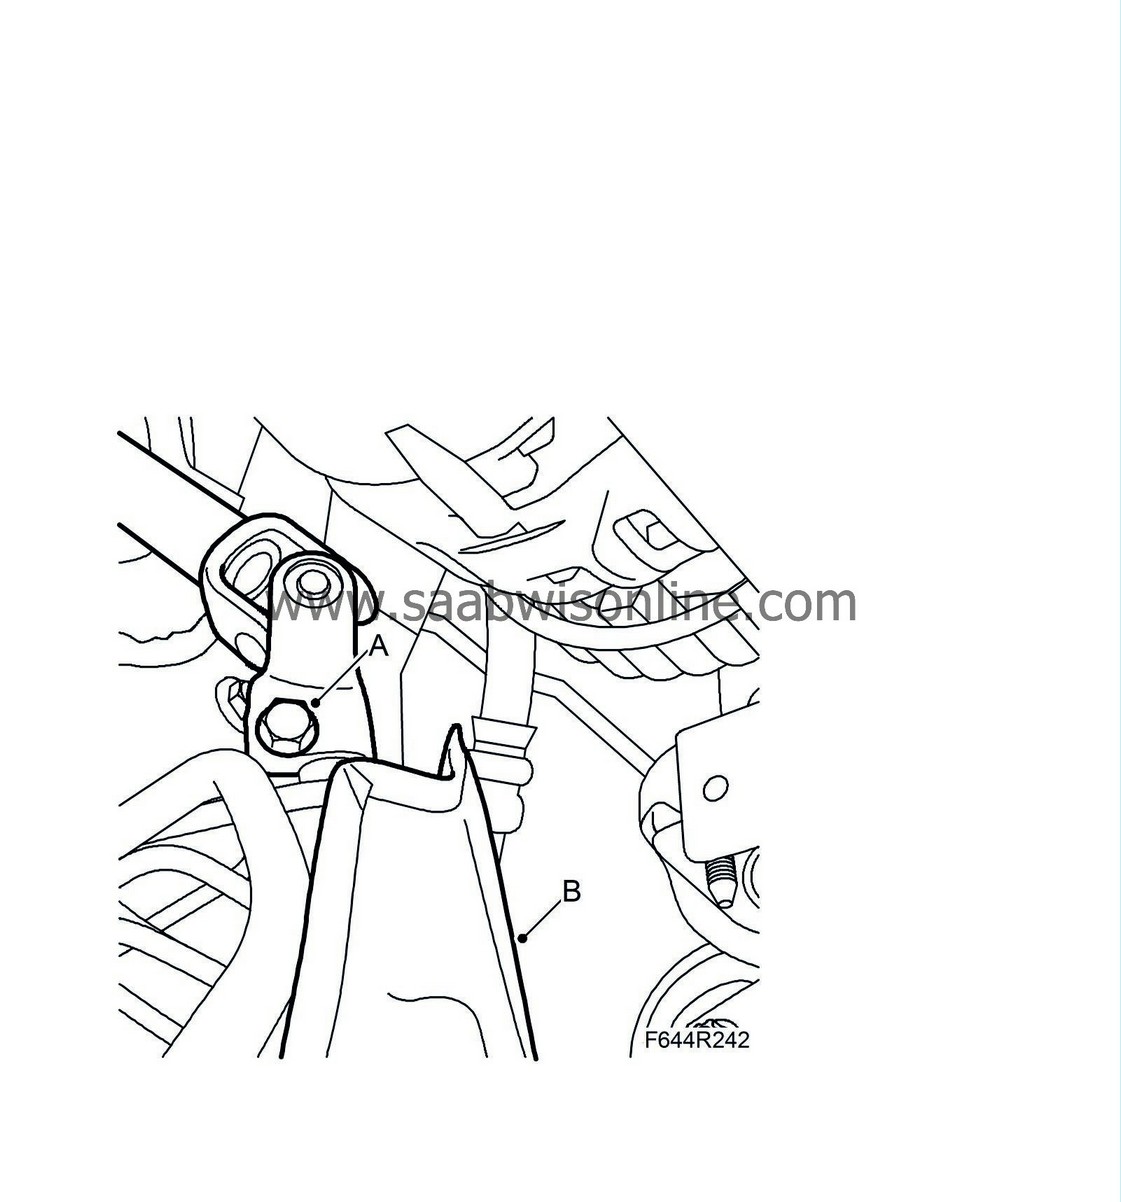
Detach the steering shaft joint (A) from the steering gear. Remove the heat shield (B) if necessary.

|
|
| 19. |
Lower the subframe approx. 100 mm (4 in).
|
|
| 20. |
Place a receptacle under the car. Detach the return line (A) from the steering gear and plug the connection.

|
|
| To fit |
| 1. |
Attach the return line (A) to the steering gear. Use new O-rings.
Tightening torque 12 Nm (9 lbf ft) 
|
|
| 2. |
Guide the return line through the clip to the power steering fluid reservoir.
|
|
| 3. |
Wipe away any oil spill from the subframe.
|
|
| 4. |
Raise the subframe and fit
83 96 137 Centring tool, subframe - body
against the guide holes in the body. Fit the stays and tighten the bolts.
Tightening torque, subframe: 75 Nm +135° (55 lbf ft +135°) Tightening torque, stay: 90 Nm +45° (67 lbf ft +45°) |
|
| 5. |
Fit the steering shaft joint (A) to the steering gear. Clean the threads and apply
Thread locking adhesive, Loctite 242
to the threads.
Tightening torque 30 Nm (22 lbf ft) 
|
|
| 6. |
Fit the heat shield (B) if it was removed.
|
|
| 7. |
Lower and remove the trolley lift. Fit the front parts of the wheel arch liner and fit the radiator hose to the holder in the subframe.
|
|
| 8. |
Remove the straps.
|
|
| 9. |
Fit th spoiler shield bolts.
|
|
| 10. |
Fit the front torque arm bolt.
Tightening torque: 60 Nm + 90° (50 lbf ft + 90°) |
|
| 11. |
Fit the bolts of the rear torque arm bracket.
Tightening torque, M10: 65 Nm (48 lbf ft) Tightening torque, M12: 120 Nm (88 lbf ft) |
|
| 12. |
Fit the
propeller shaft
.
|
|
| 13. |
Lower the car to the floor.
|
|
| 14. |
Fit the return line (B) to the power steering fluid reservoir.

|
|
| 15. |
Fit the rubber strap (A).
|
|
| 16. |
Fit the engine cover.
|
|
| 17. |
Attach the upper bumper shell mountings.
|
|
| 18. |
Fill the
power steering fluid
according to specification,
bleed the power steering system
and check for leaks.
|
|
| 19. |
Remove the tape or other means used to prevent the steering wheel from moving.
|
|


