Rear floor, complete, 5D
| Rear floor, complete, 5D |
| To remove |
| 1. |
Mount the car in an alignment jig and align as necessary.
|
|
| 2. |
Remove the
Rear bumper abutment, 5D
.
|
|
| 3. |
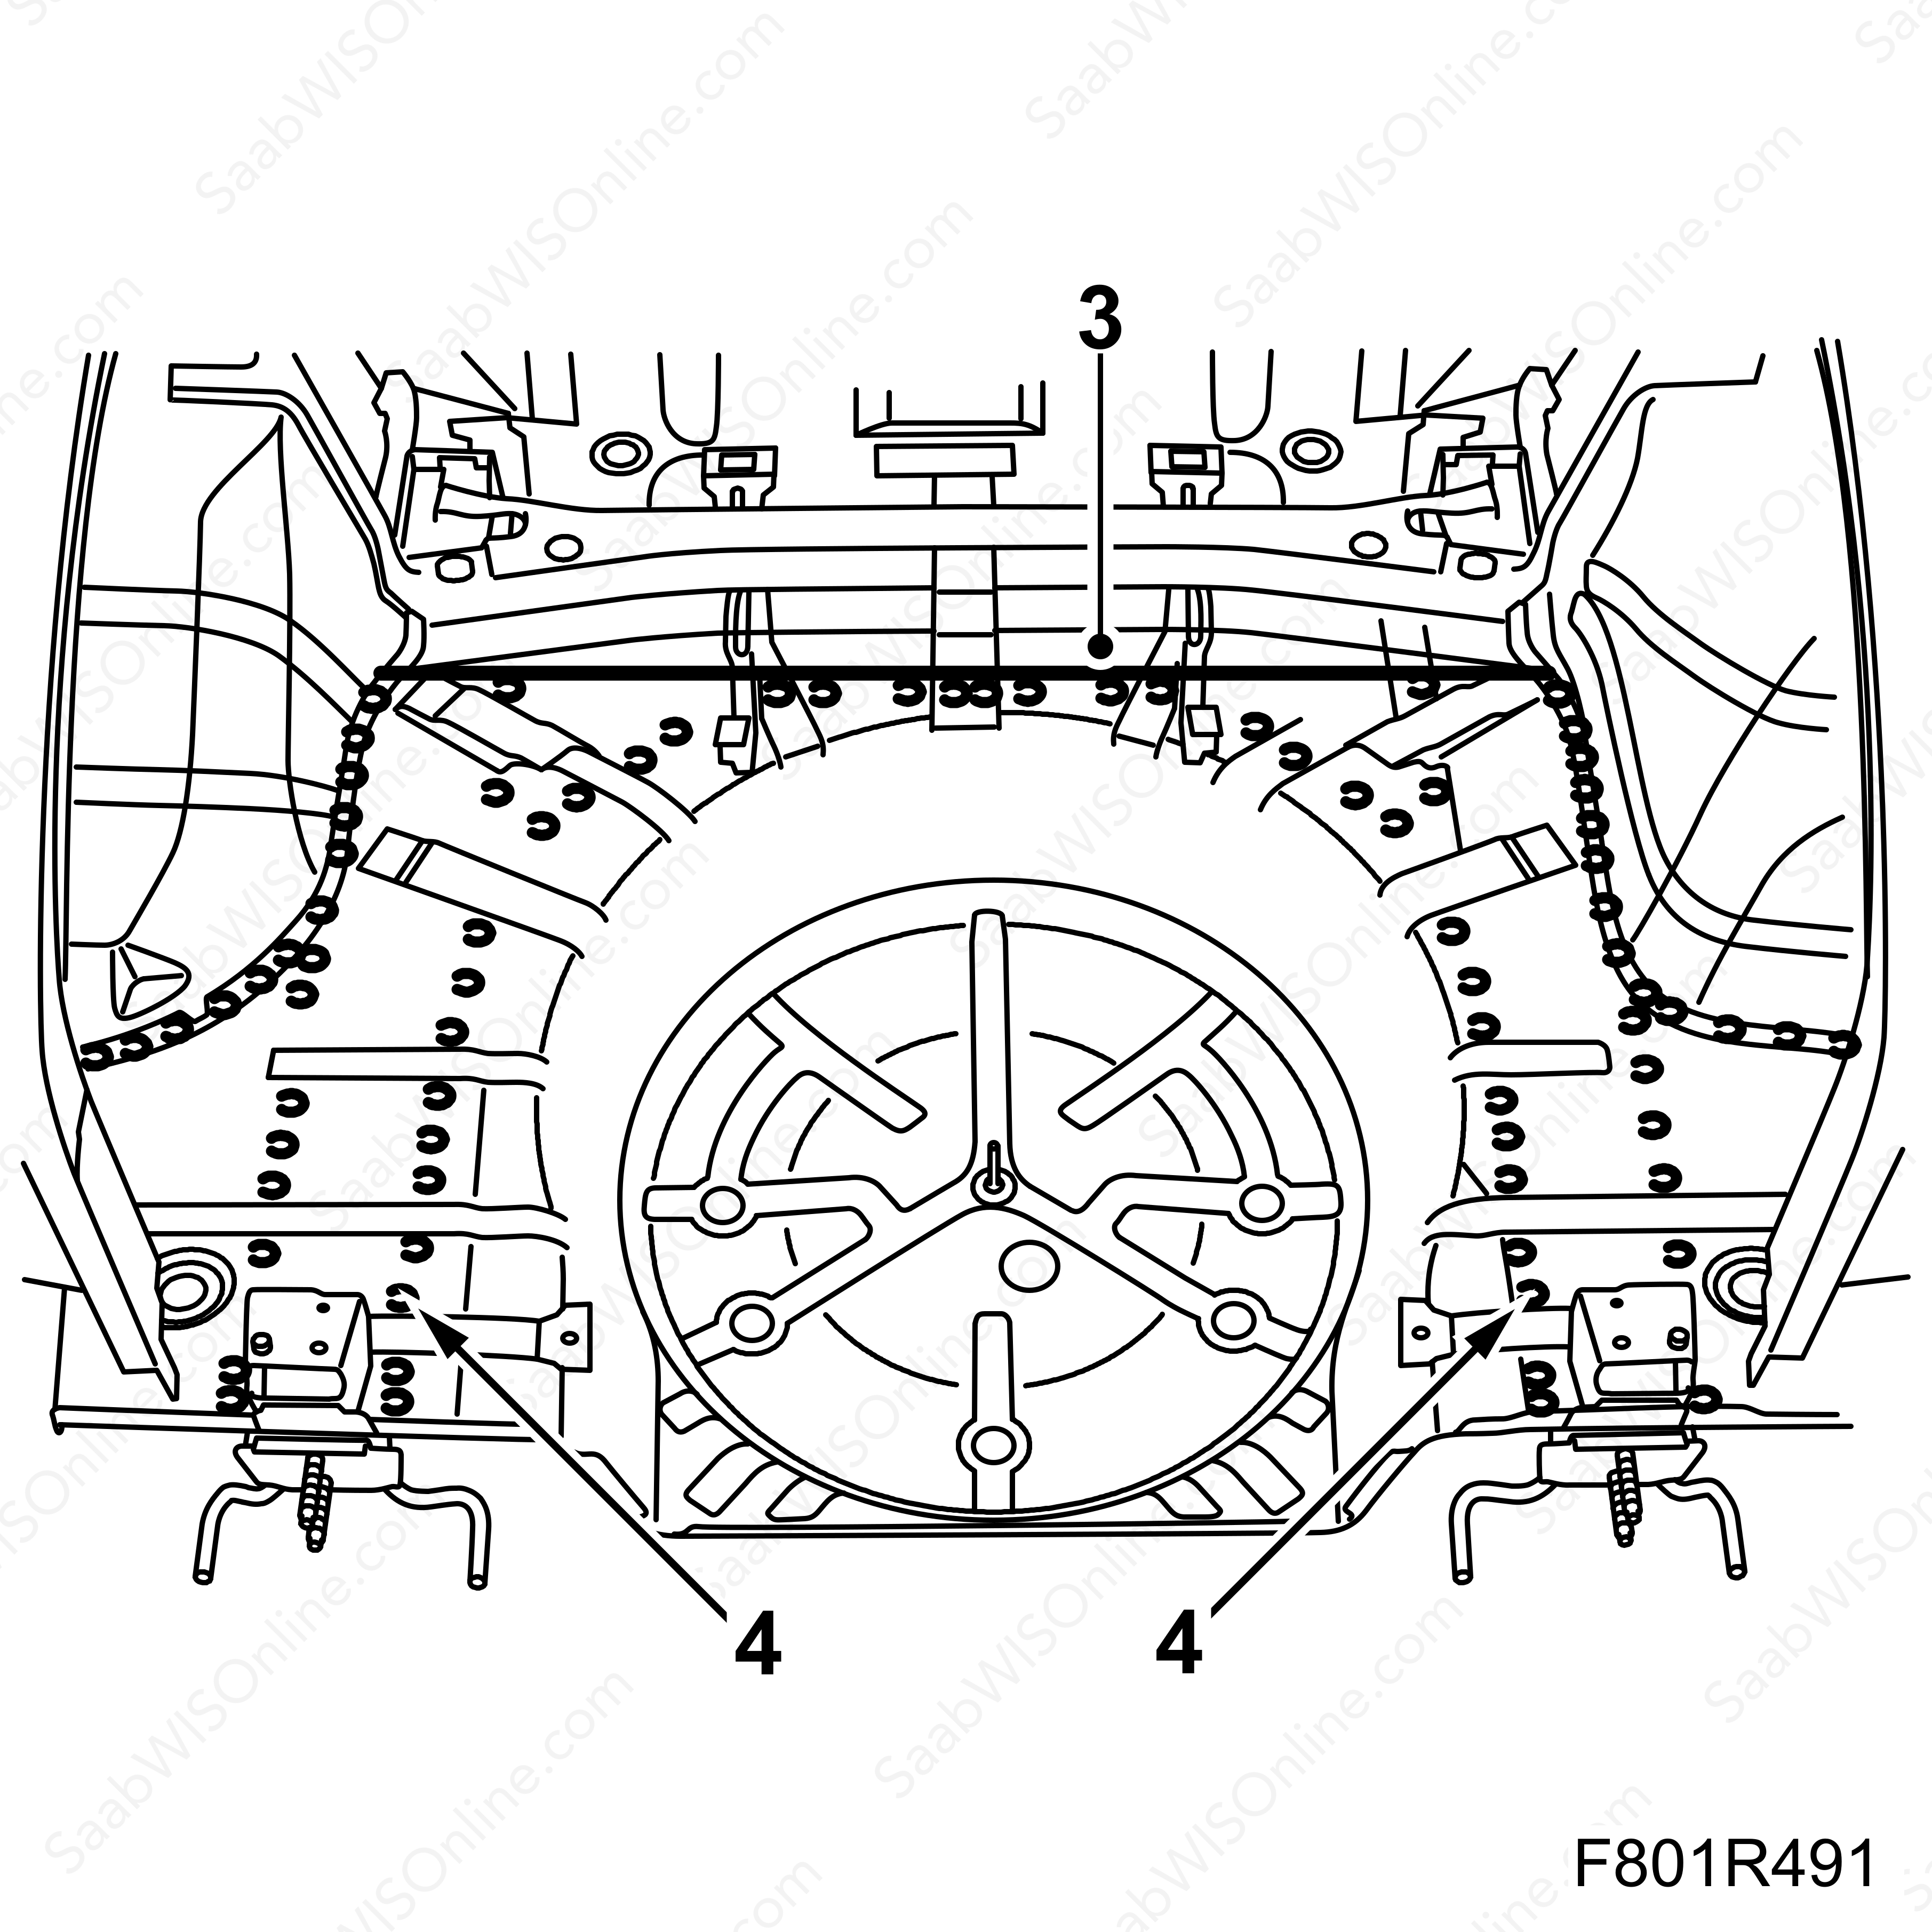
Measure out 90 mm from the crossmember and cut the floor straight across according to the marks.
|
|
| 4. |
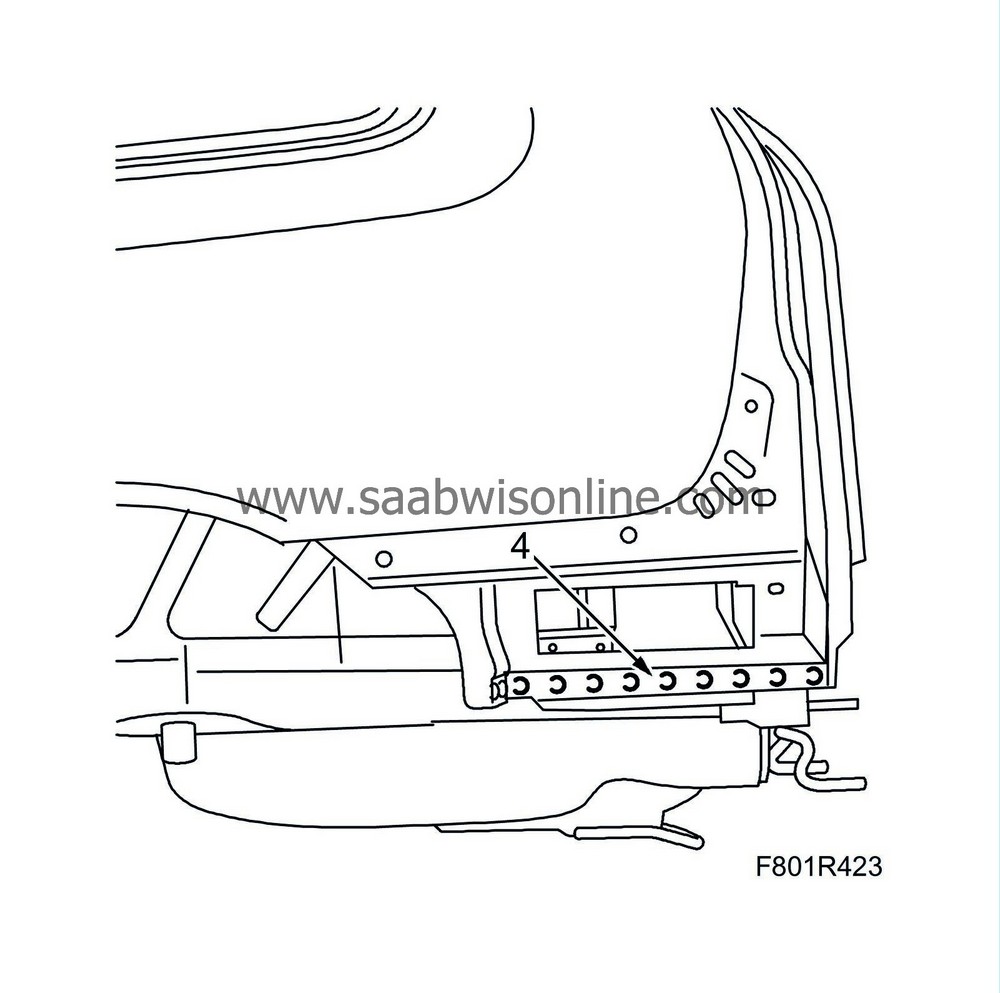
Drill out the spot welds.
|
|
| 5. |
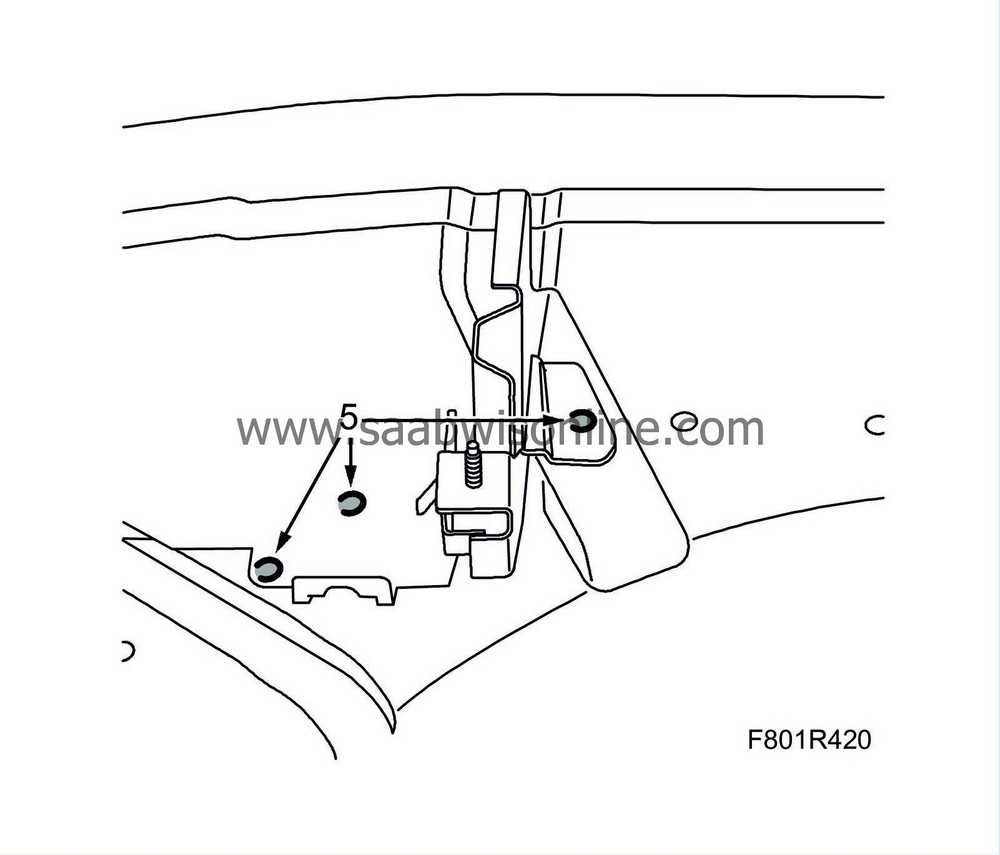
Drill out the spot welds through the bracket and the floor, double thickness of metal (marked in grey).
|
|
| 6. |
Remove the floor and align any deformed metal.
|
|
| To fit |
| 1. |
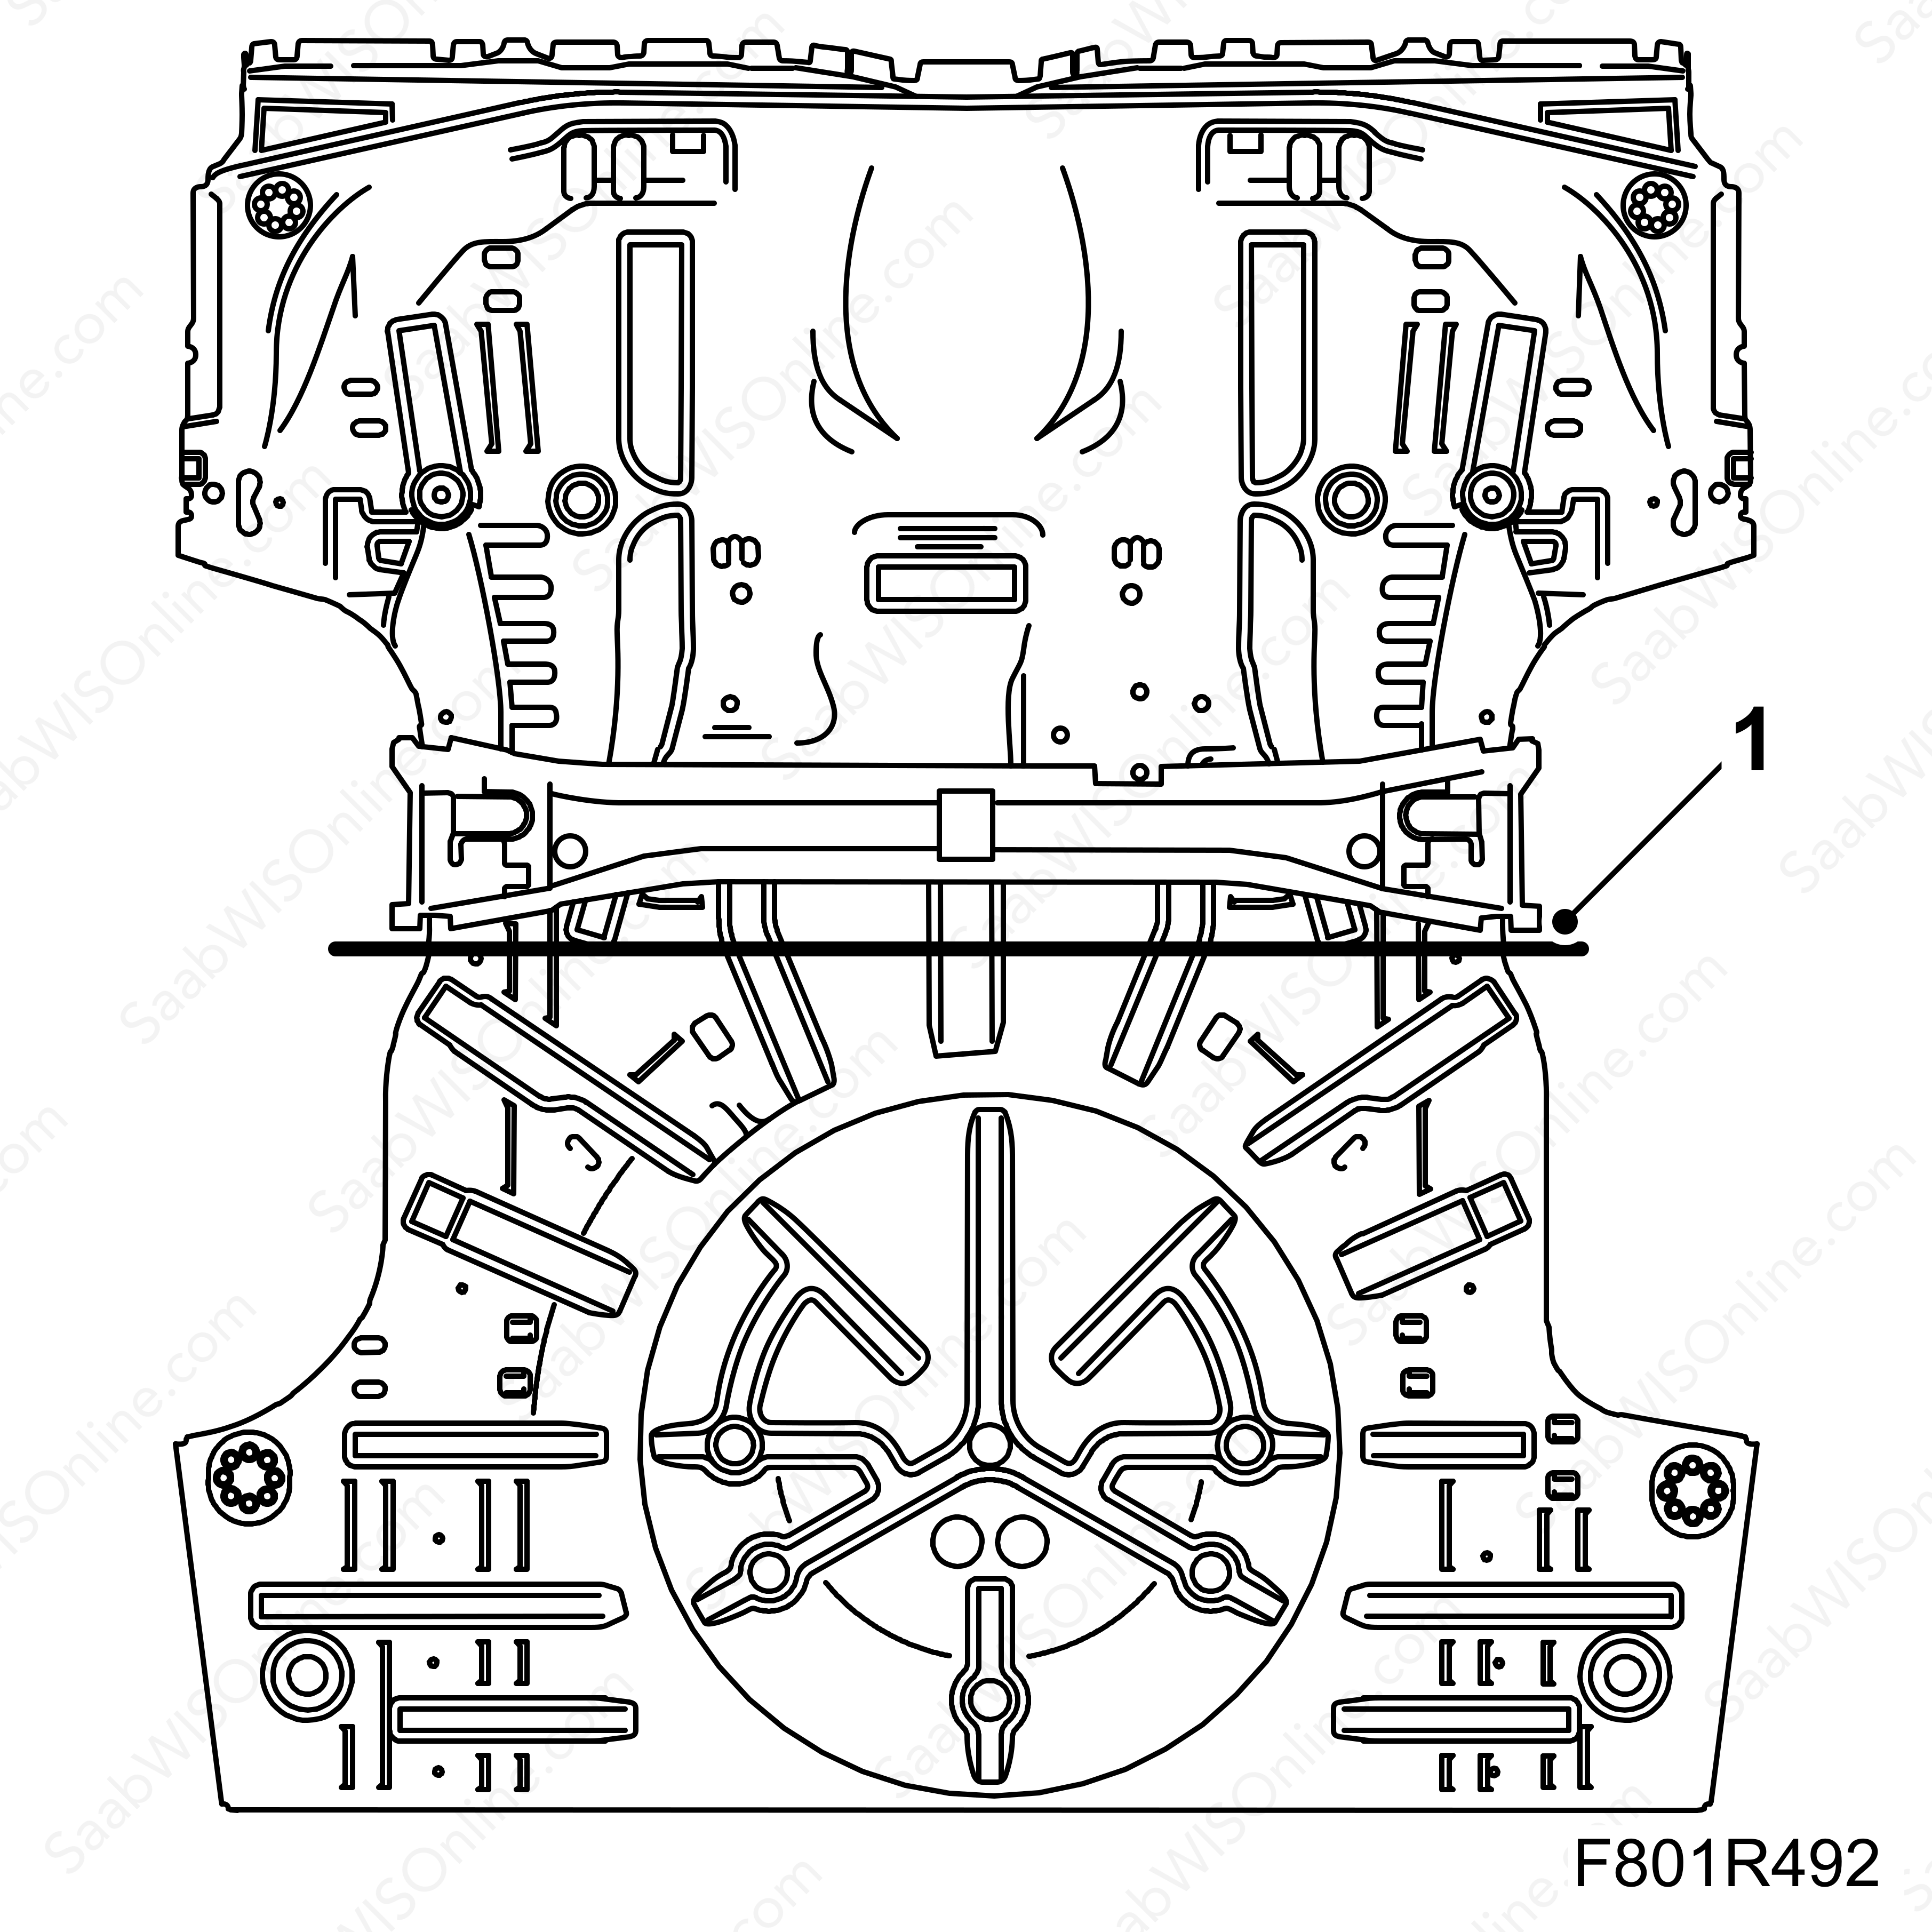
Cut the new floor in line with the crossmember. The spare part must overlap the old floor and lie against the crossmember.
|
|
| 2. |
Grind all surfaces that are to be welded.
|
|
| 3. |
Apply welding primer to all surfaces that are to be plug or spot welded.
|
|
| 4. |
Position the rear floor and secure with clamps. The spare part must overlap the old floor and lie against the crossmember.
|
|
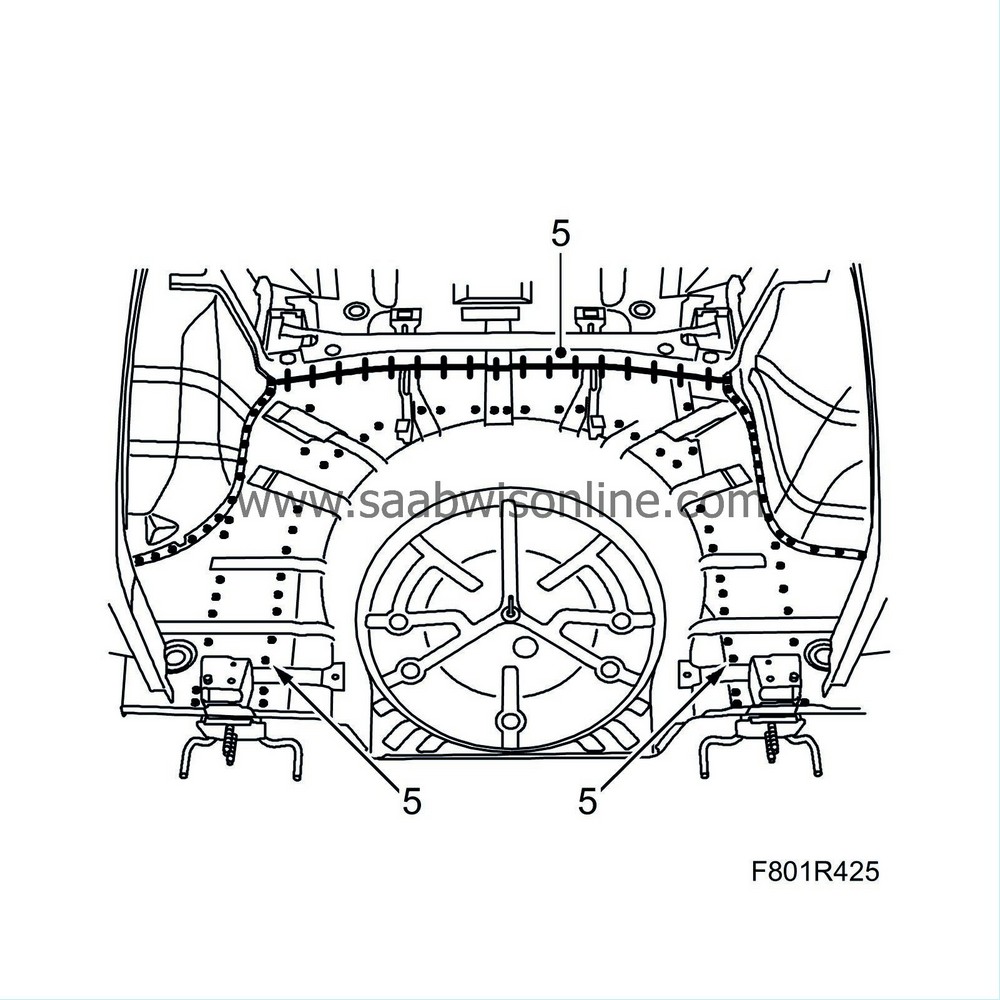
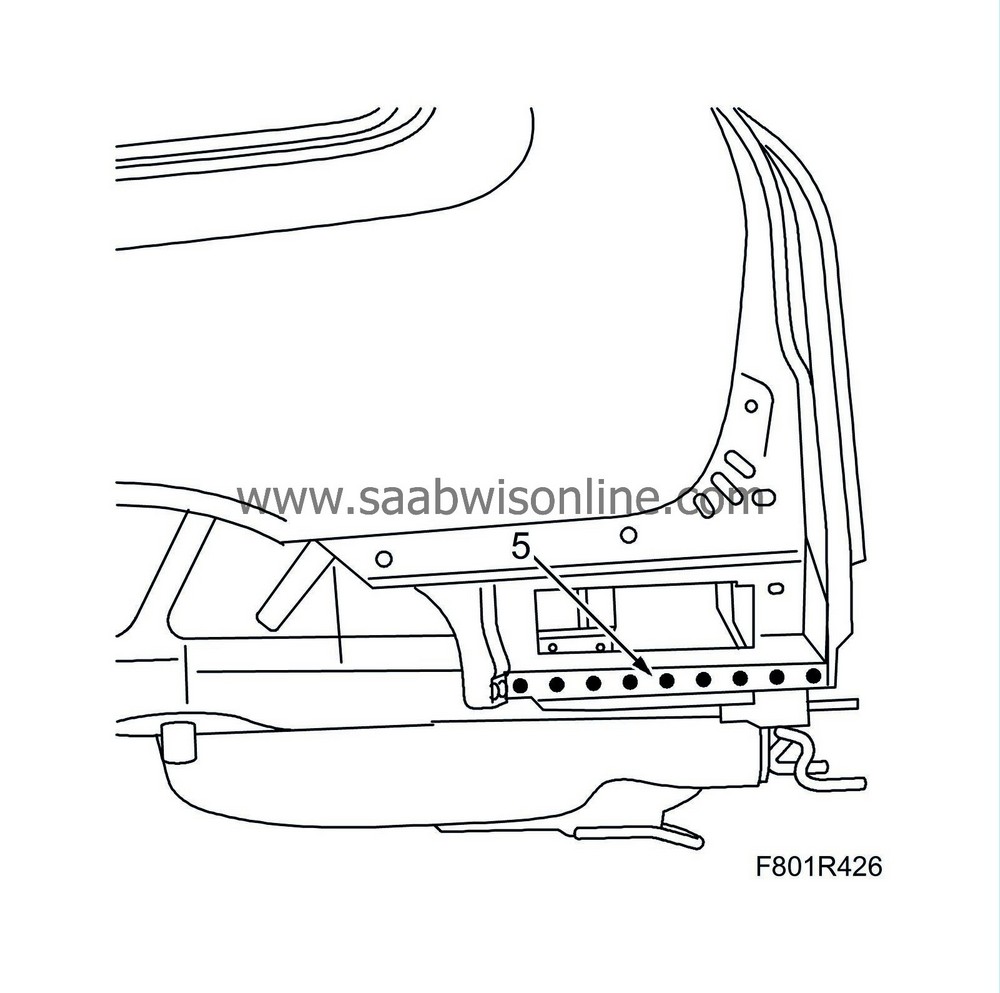
| 5. |
Weld on the floor.
|
|
| 6. |
Grind the welds.
|
|
| 7. |
Wash away surplus welding primer. Welding primer reduces the adhesion of paint, filler and sealant.
|
|
| 8. |
Apply primer to all bare metal surfaces.
|
|
| 9. |
Seal joints and seams with sealant.
|
|
| 10. |
Apply PVC substitute underneath the floor.
|
|
| 11. |
Apply a thin coat of anti-corrosion agent in members and cavities after painting.
|
|
| 12. |
Fit the
Rear bumper abutment, 5D
.
|
|


