Rear window, 4D
| Rear window, 4D |
| To remove |
| 1. |
Open the door windows to avert the risk of the rear window being forced out should a car door be closed creating overpressure in the cabin.
|
|
| 2. |
Lower the backrest.
|
|
| 3. |
Remove the clips securing the parcel shelf upholstery. Pull the parcel shelf upholstery straight forward.

|
|
| 4. |
Remove the C-pillar trim. Remove the cover plate using
82 93 474 Removal tool
. Remove the bolt from the C-pillar trim. Remove the C-pillar trim by carefully pulling the trim straight out.
|
|
| 5. |
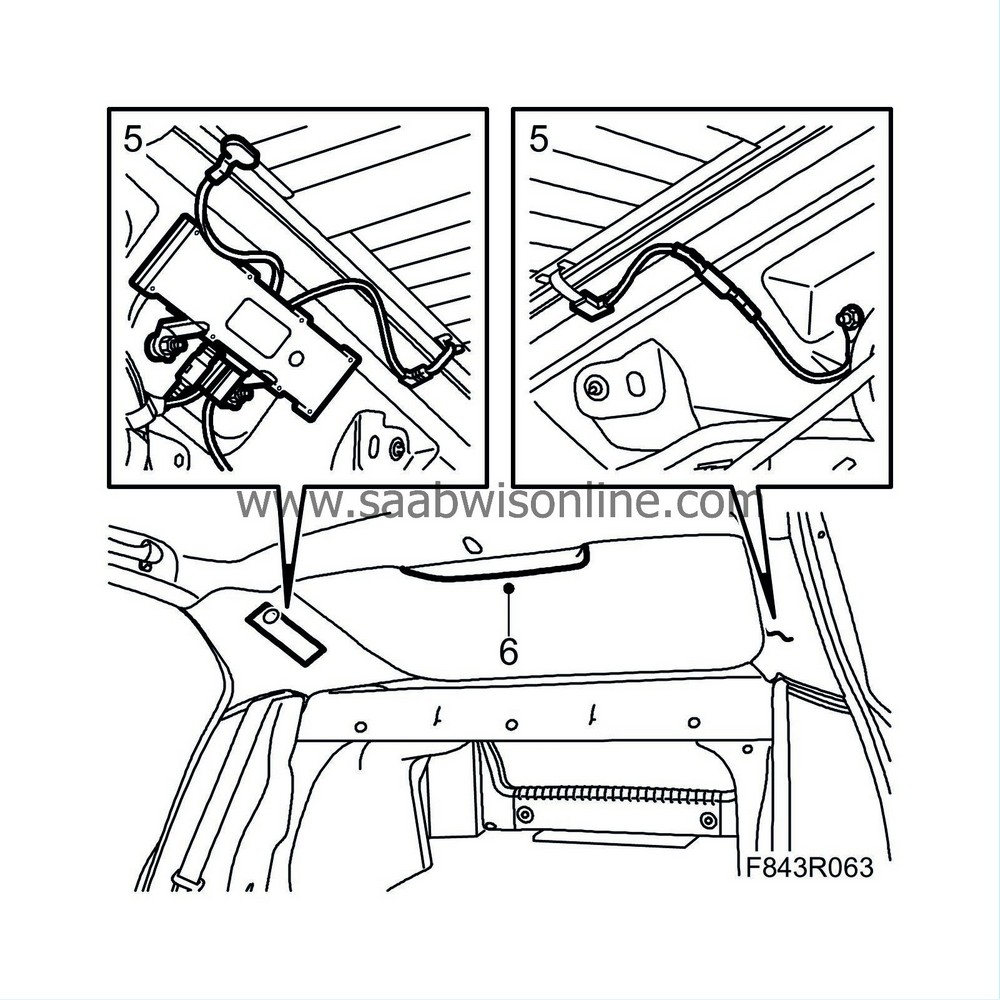
Unplug the connector for the antenna in the rear window. Bend the flat pin towards the window.
|
|
| 6. |
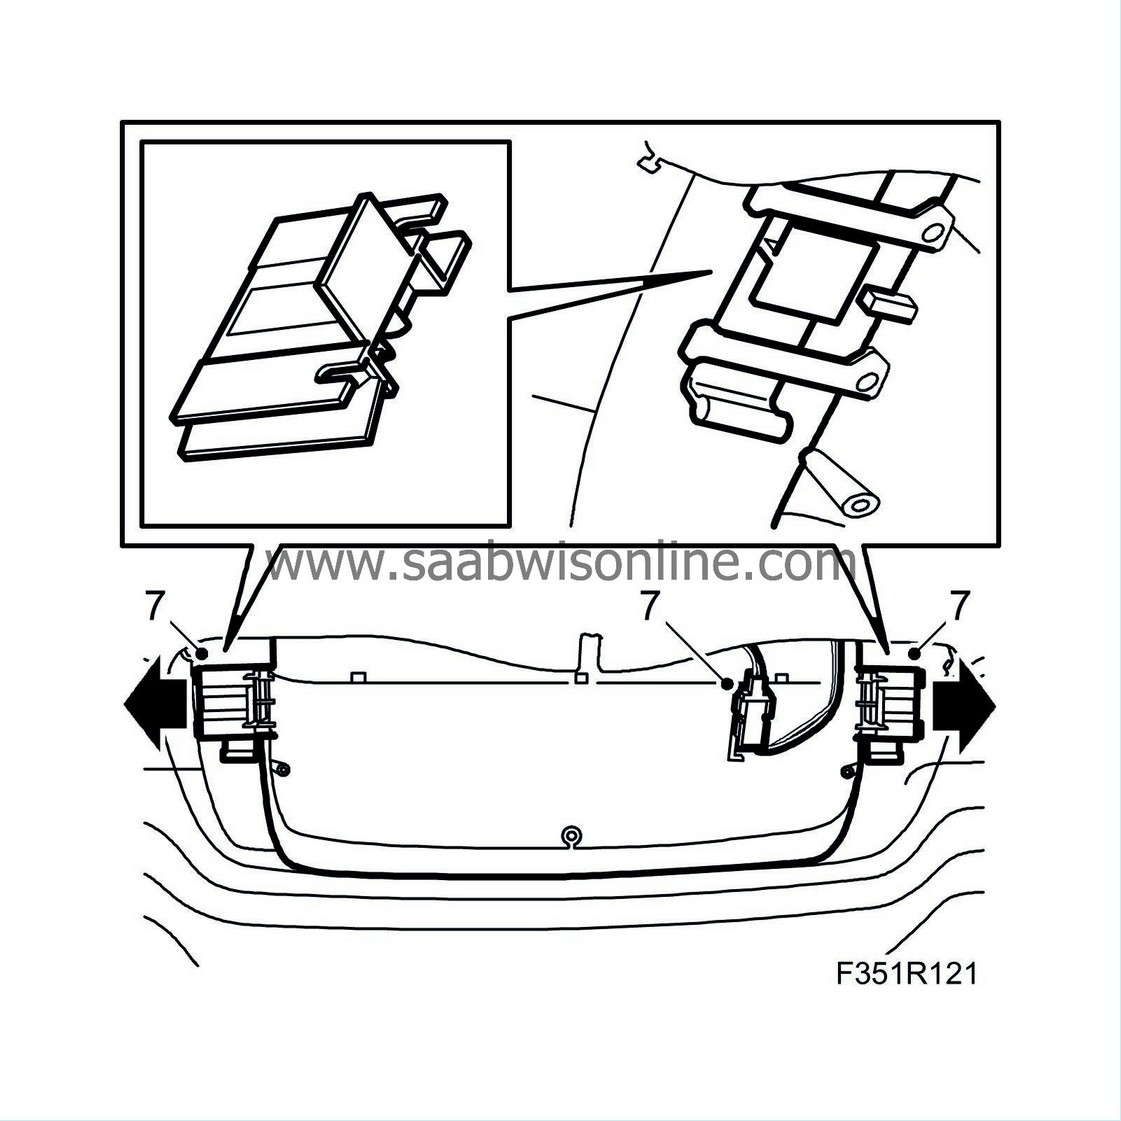
Remove the cover from the brake light and unplug the connector. Pull the catches straight out and lift down the bulb holder.
|
|
| 7. |
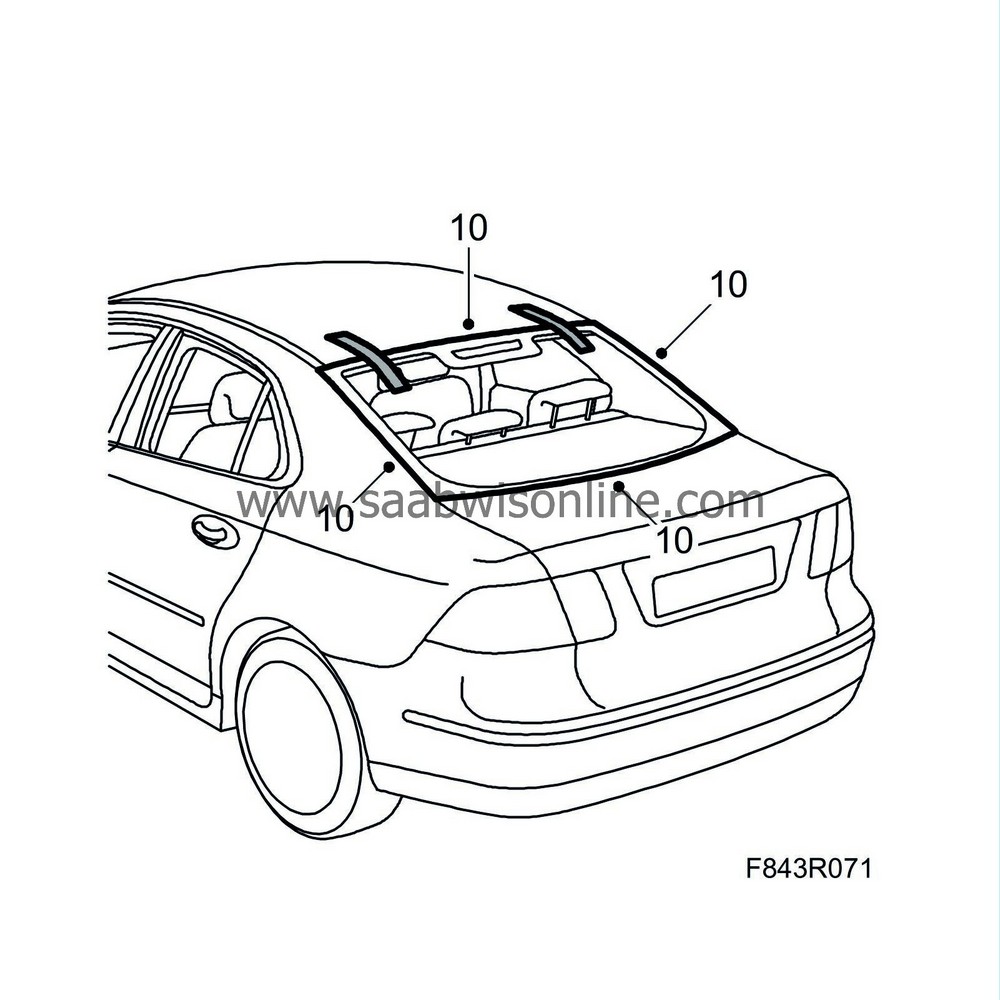
When changing a bonded window, use
82 93 714 Kit, window removal tool
. If the window is so damaged that it is not possible to affix the suction cups, use
30 14 099 Cutting wire handles
and cutting wire, and with the help of a colleague, saw out the window.
|
|||||||||
| 8. |
Measure out 6,0 m of cutting wire.
|
|
| 9. |
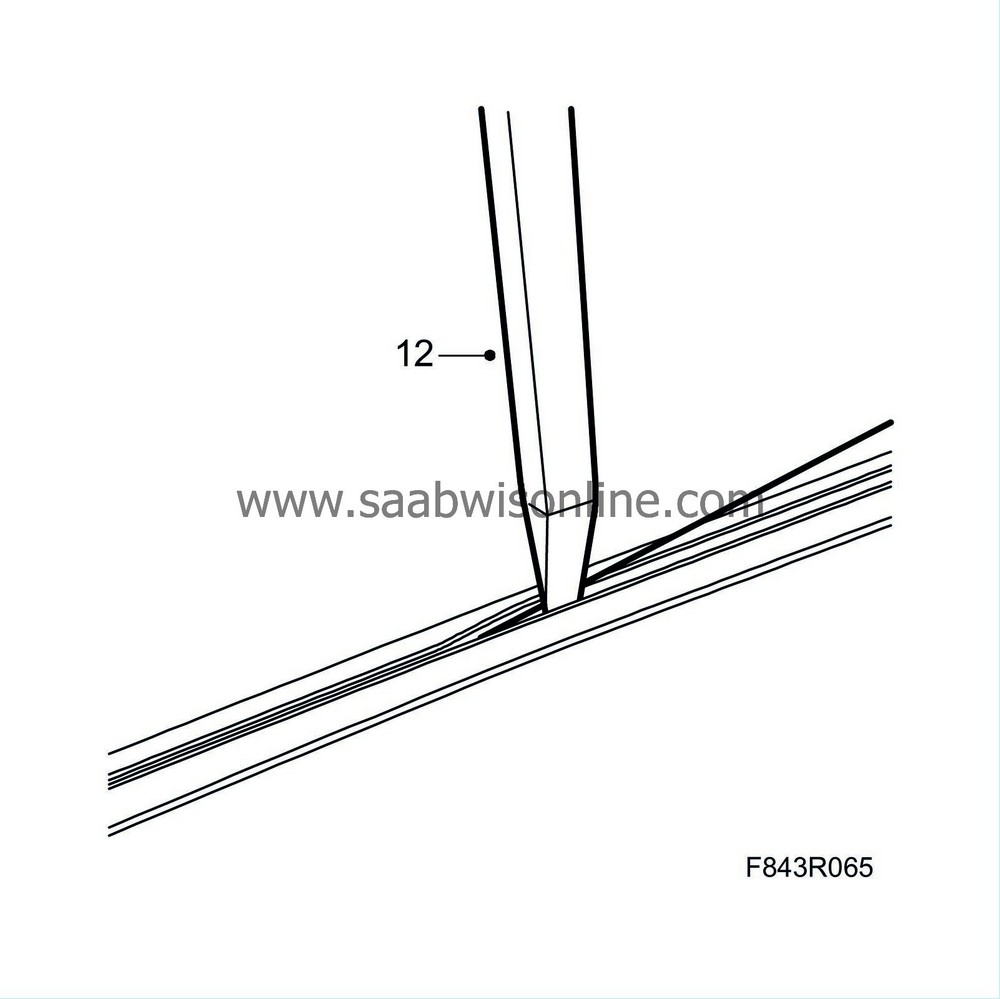
Drive the chisel through the adhesive joint from the inside of the bottom edge of the window. Hold the chisel as close to the window as possible in order to get past the metal rim.

|
|
| 10. |
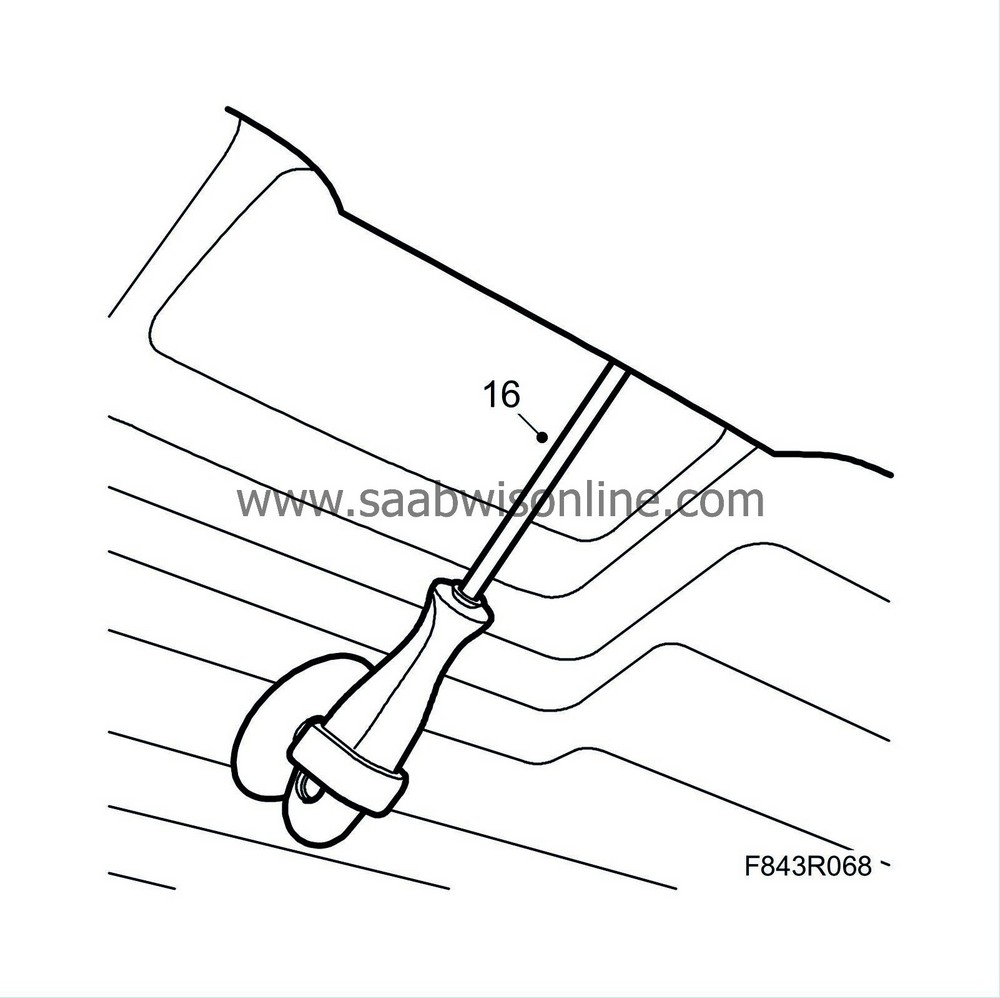
Thread the ends of the wire into the eye in the awl and bend the ends so that the wire do not slip out.
|
|
| 11. |
Pull the awl back through the adhesive into the cabin. Pull through roughly 0,7 m of wire.
|
|
| 13. |
Unhook the cutting wire from the awl. Straighten the ends. Remove the awl from the car.
|
|
| 14. |
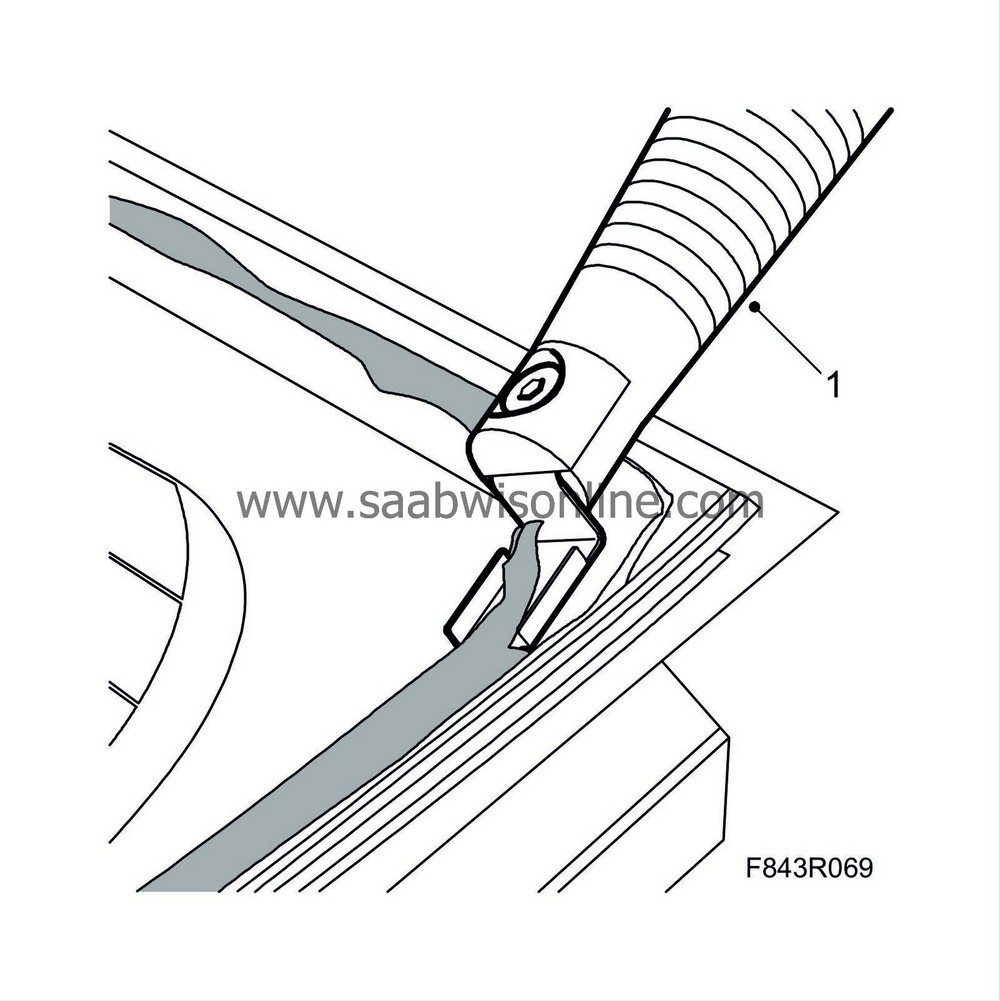
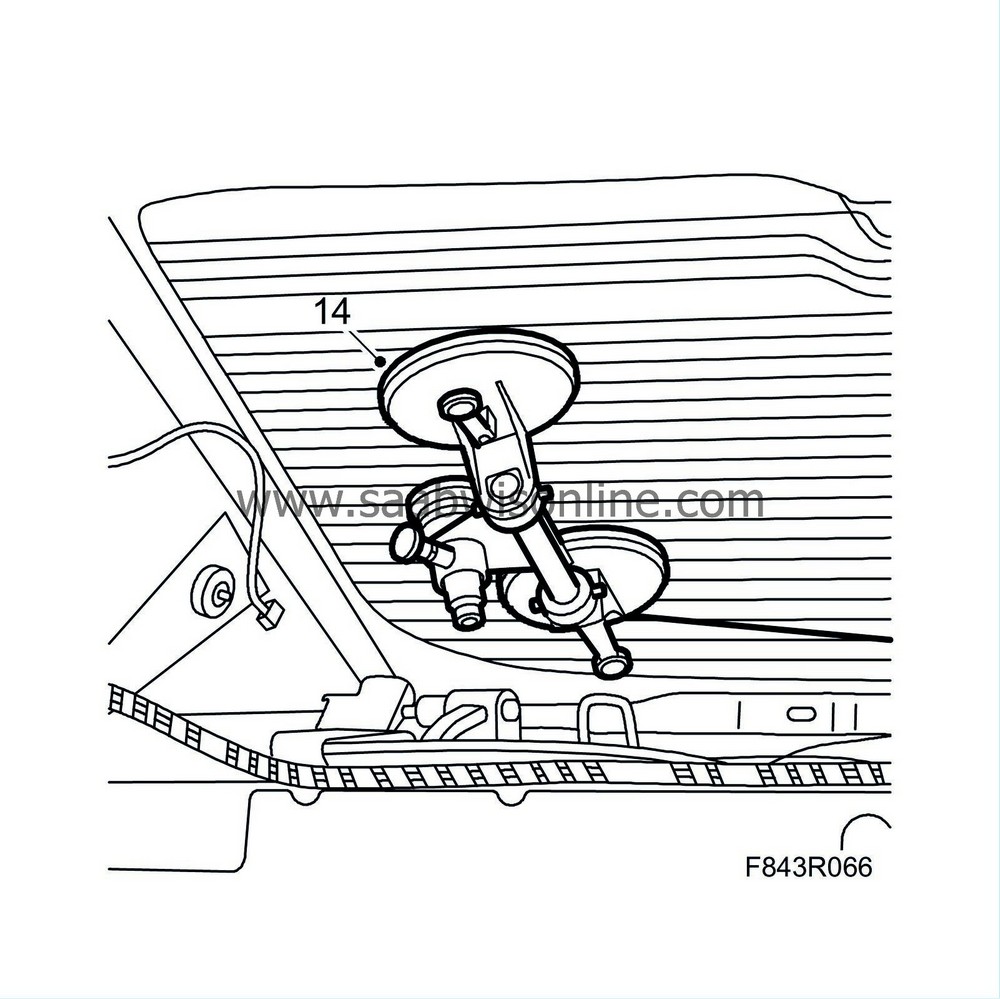
Fit the wire coilers in the corners on the inside of the window.
|
|
| 15. |
Attach the ends of the wire to the wire coilers. Make sure that the wires do not cross. Use the groove in the wire coiler's suction cups to achieve a suitable angle.

|
|
| 17. |
Lift out the window with the help of a colleague.
|
|
| To fit |
| Important | ||
|
Betaseal X 2500 cures in 1 hour at 23°C and 50% relative humidity. To avoid the glass from coming loose or its position changing during the curing time, the car must not be subjected to jolts or blows. The doors, tailgate and bonnet must not be shut. The car must not be rocked or rolled. Neither must the glass be pressed in while the adhesive is curing. |
||
Use 30 05 600 Adhesive kit, window glass for bonding windows. To avoid mixing up the cleaner and primer, the tubes are different colours:
| Betaclean 3300 (glass cleaner) | One wet and one dry cleaning cloth |
| Betawipe 4001 (for glass with plastic surround) | Blue |
| Betaprime 5061 (primer, glass and paintwork) | Green |
The car must be standing on all four wheels on a level surface when the window is fitted in place. To ensure the best possible results, it is extremely important for all surfaces that have been cleaned or primed to be kept free from dust and dirt while work is in progress. The same goes for the adhesive when it has been applied. Once work has been started it should therefore be continued without interruption until the window has been fitted and the adhesive hardened. The adhesive begins to harden as soon as the contents of both tubes are mixed. The window must therefore be fitted into place within 5 minutes from the time that application of the bead of adhesive was first begun. Note that points 6-10 must without exception be carried out in the given order to ensure satisfactory results with maximum adhesion.
| 2. |
Remove loose particles and dirt from the metal flange with a vacuum cleaner.
|
|
| 3. |
Repair any paintwork damage:
|
|
| • |
Scrape off any loose flakes of paint with a knife.
|
| • |
Wash clean with Terosans Rengörare FL (Cleaner).
|
| • |
Apply primer. Use Standox 1K Primer Filler.
|
| • |
Apply the finish coat.
|
||||||||||
| 4. |
If there is no old adhesive, or if the adhesive is not intact, primer must be applied to the surfaces with which the adhesive will be in contact. Use Betaprime 5061
(Green)
. Make sure the spacers are in position at the bottom edge.
|
||||||||||
| 5. |
Fit the lifting handles to the outside of the window and place the window inside up on a workstand at a suitable height.
|
|
| 6. |
Carefully wash the edges of the window with Betawipe 3300. Carefully wipe the edges using the wet cleaning cloth. Dry with the dry cleaning cloth provided in the adhesive kit. Avoid touching the cleaned surface.
|
||||||||||
| 7. |
Apply Betaprime 5061
(green)
to the cleaned surface. Allow the primer to dry for 10 minutes. Do not apply glass primer closer than 2 mm to the antenna connection.
|
|
| 8. |
If necessary, press on the moulding at the top and sides of the rear window. Avoid touching the primed surface.
|
|||||||
| 9. |
Apply the adhesive as follows:
|
|
| • |
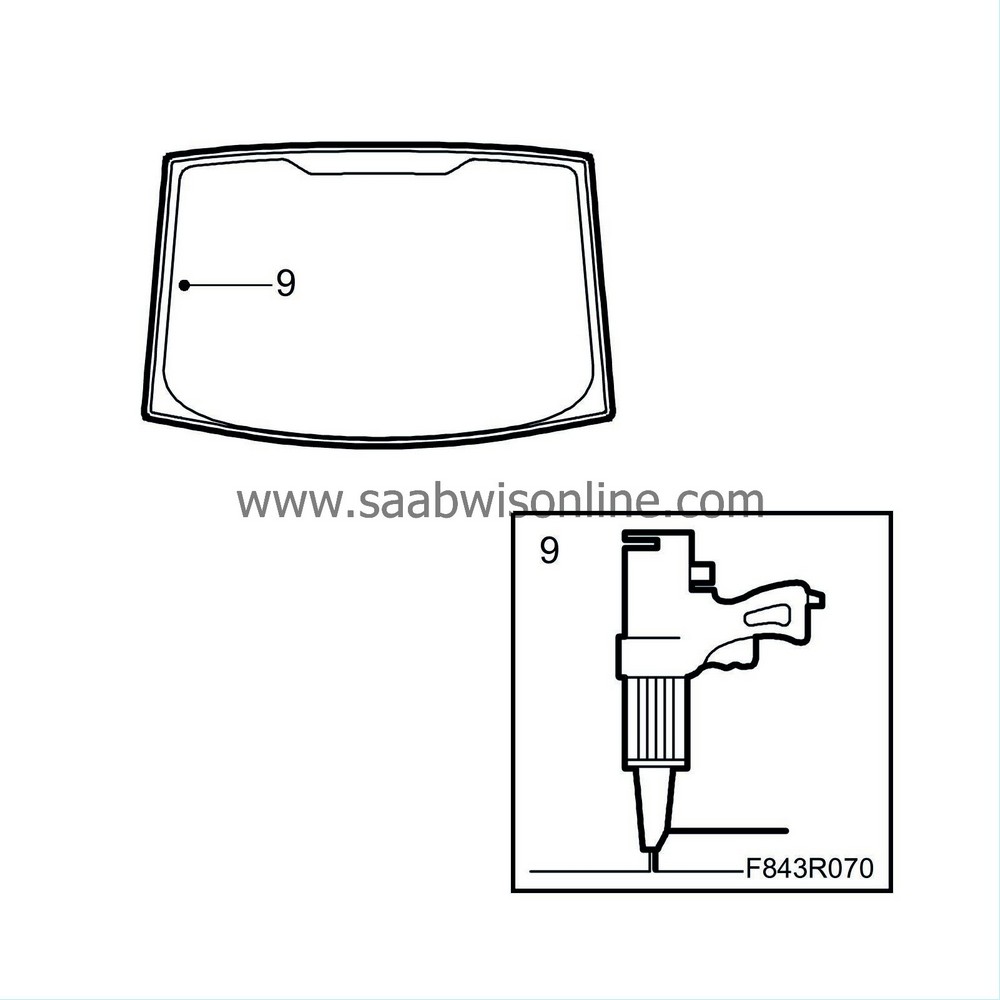
Cut off the tip of the adhesive cartridge nozzle to provide a suitable bead of adhesive.
|
| • |
Hold the gun at right-angles to the window and apply a bead of adhesive to the primed surface. Start along the lower edge of the window. Make sure that there are no breaks in the adhesive bead.
|
| 11. |
Secure the window with tape or straps so that it is held against the edge of the roof.
|
|
| 12. |
Remove the adhesive cartridge from the glue gun.
|
|
| 13. |
Allow the adhesive to cure before continuing. Betaseal X2500 cures in 1 hour at 23°C and 50% relative humidity.
|
|
| 14. |
Fit the bulb holder and press in the catches. Plug in the connector. Fit the brake light cover.
|
|
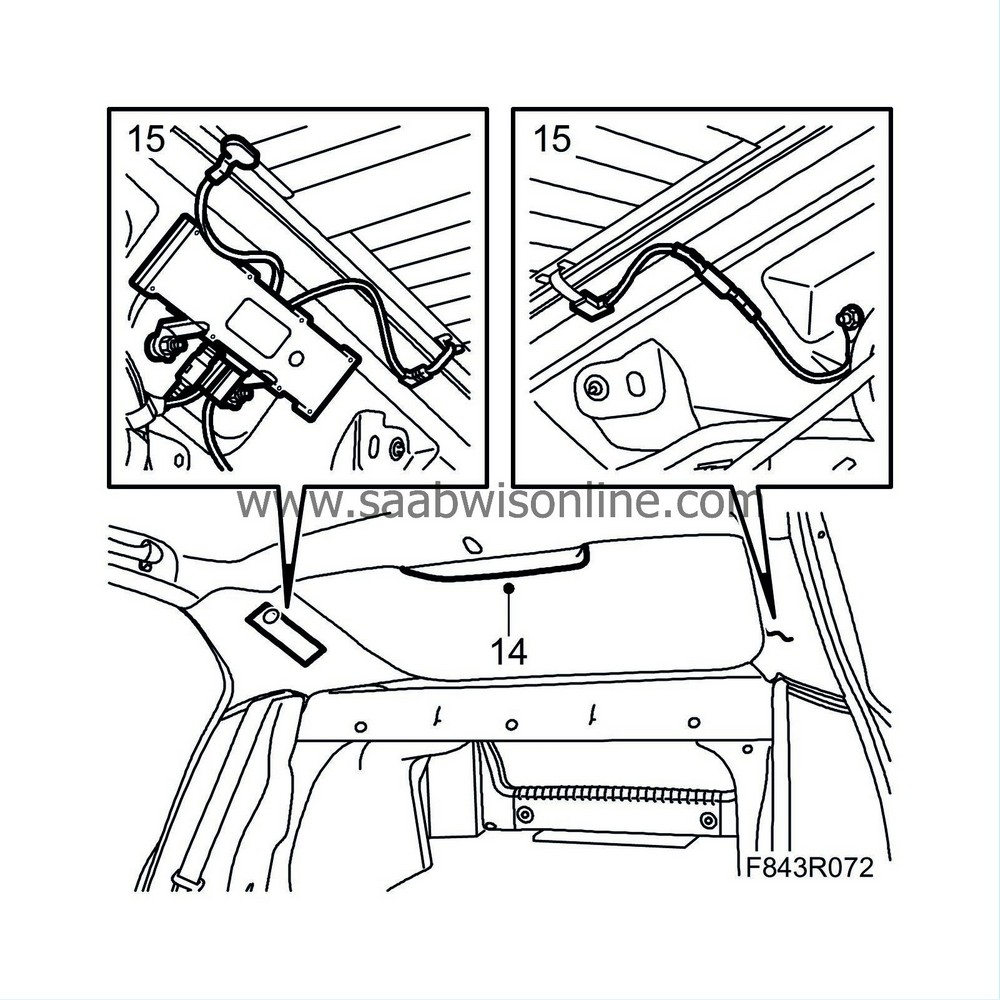
| 15. |
Plug in the connector for the heating element and antenna. Bend back the flat pin on the rear window.
|
|
| 16. |
Position the C-pillar trim and press home the clips. Make sure the expander screw is positioned correctly. Tighten the screw.
Fit the cover plate to the C-pillar trim. 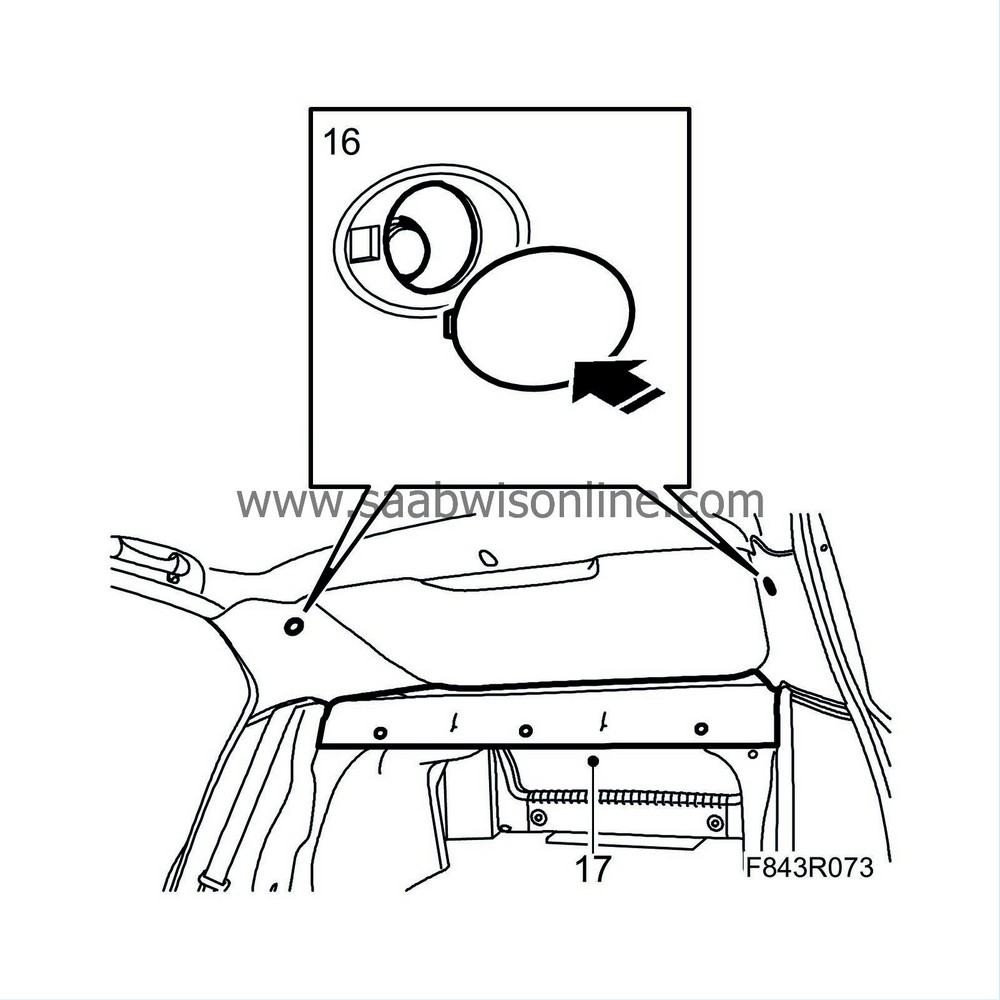
|
|
| 17. |
Slide in the parcel shelf upholstery. Make sure the lugs fully engage the mountings. Fit the clips to the parcel shelf trim. Raise the backrest. Check that the backrest is locked.
|
|
| 18. |
Clean the inside and outside of the rear window.
|
|

 Warning
