Camshaft chain guide, lower, B207
| Camshaft chain guide, lower, B207 |
| To remove |
| 1. |
Remove the
Camshaft cover with gasket
|
|
| 2. |
Remove
Timing cover
|
|
| 3. |
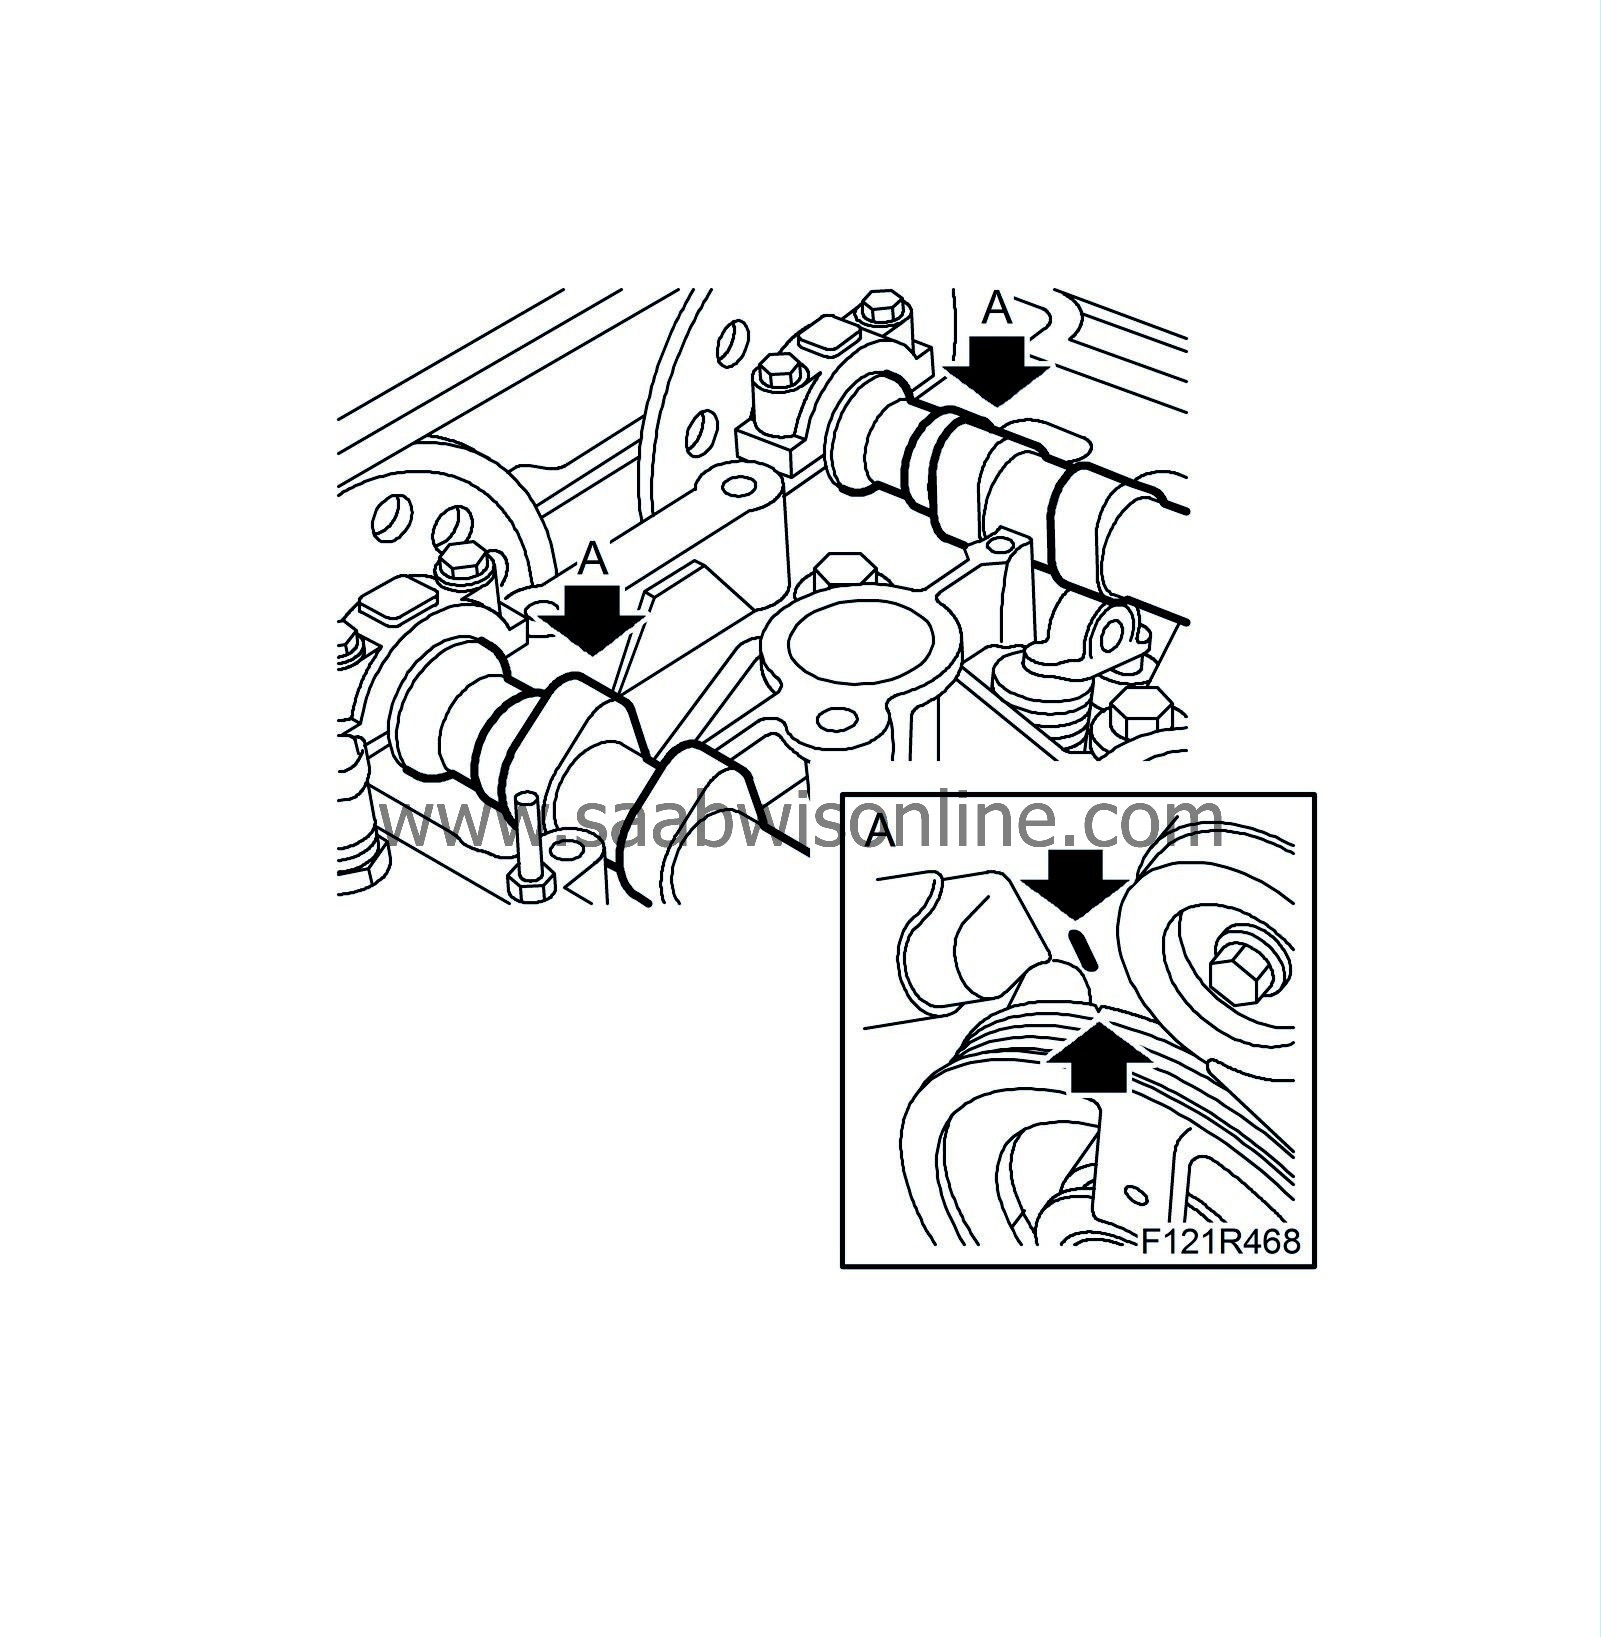
Fit the crankshaft pulley.
|
|
| 5. |
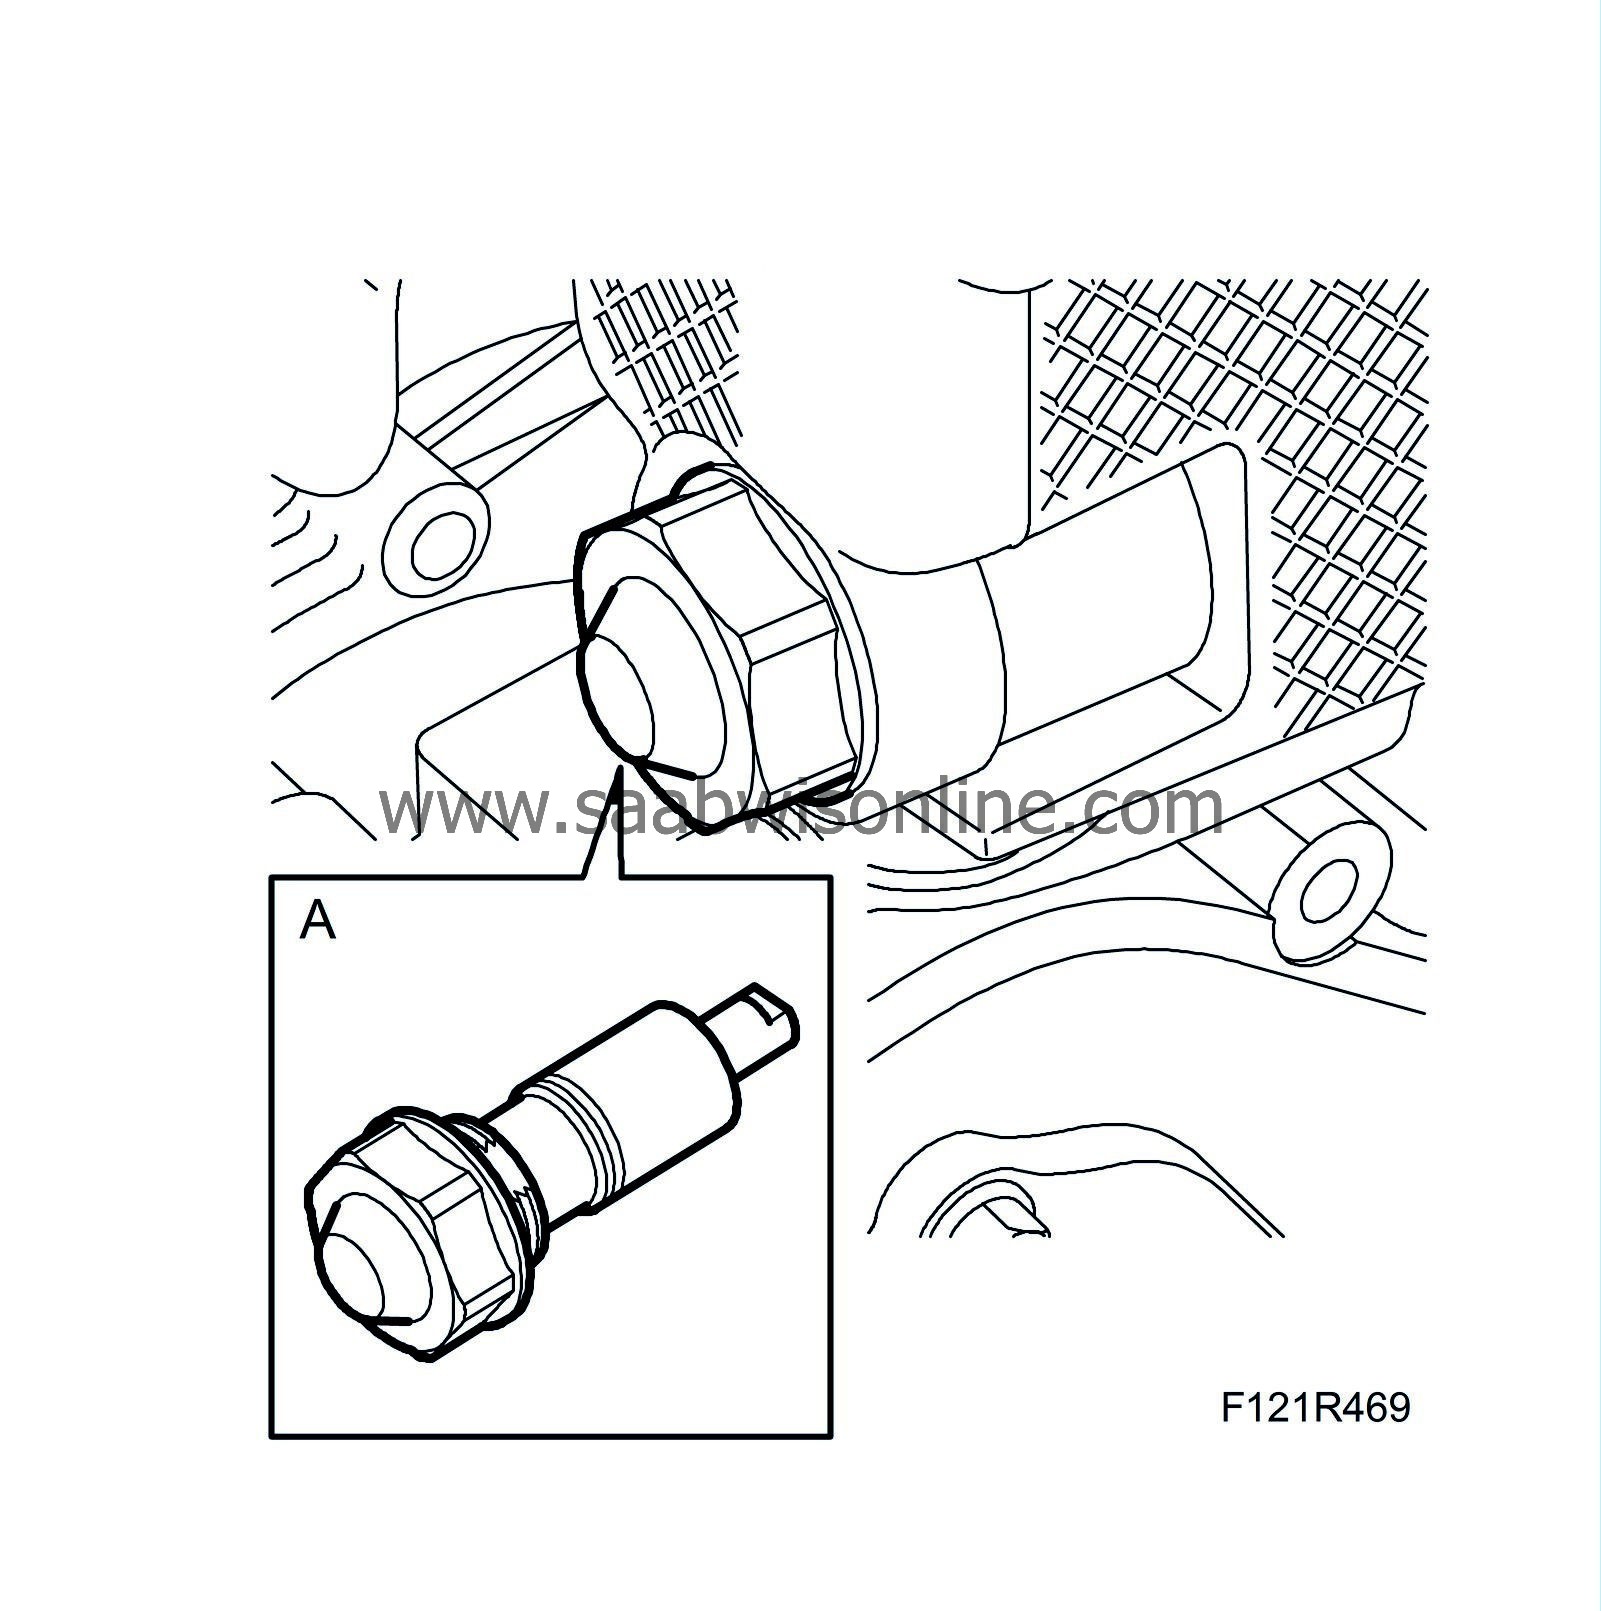
Remove the chain tensioner (A). Use
83 96 129 Oil filter tool, B207, and camshaft drive chain tensioner
|
|
| 6. |
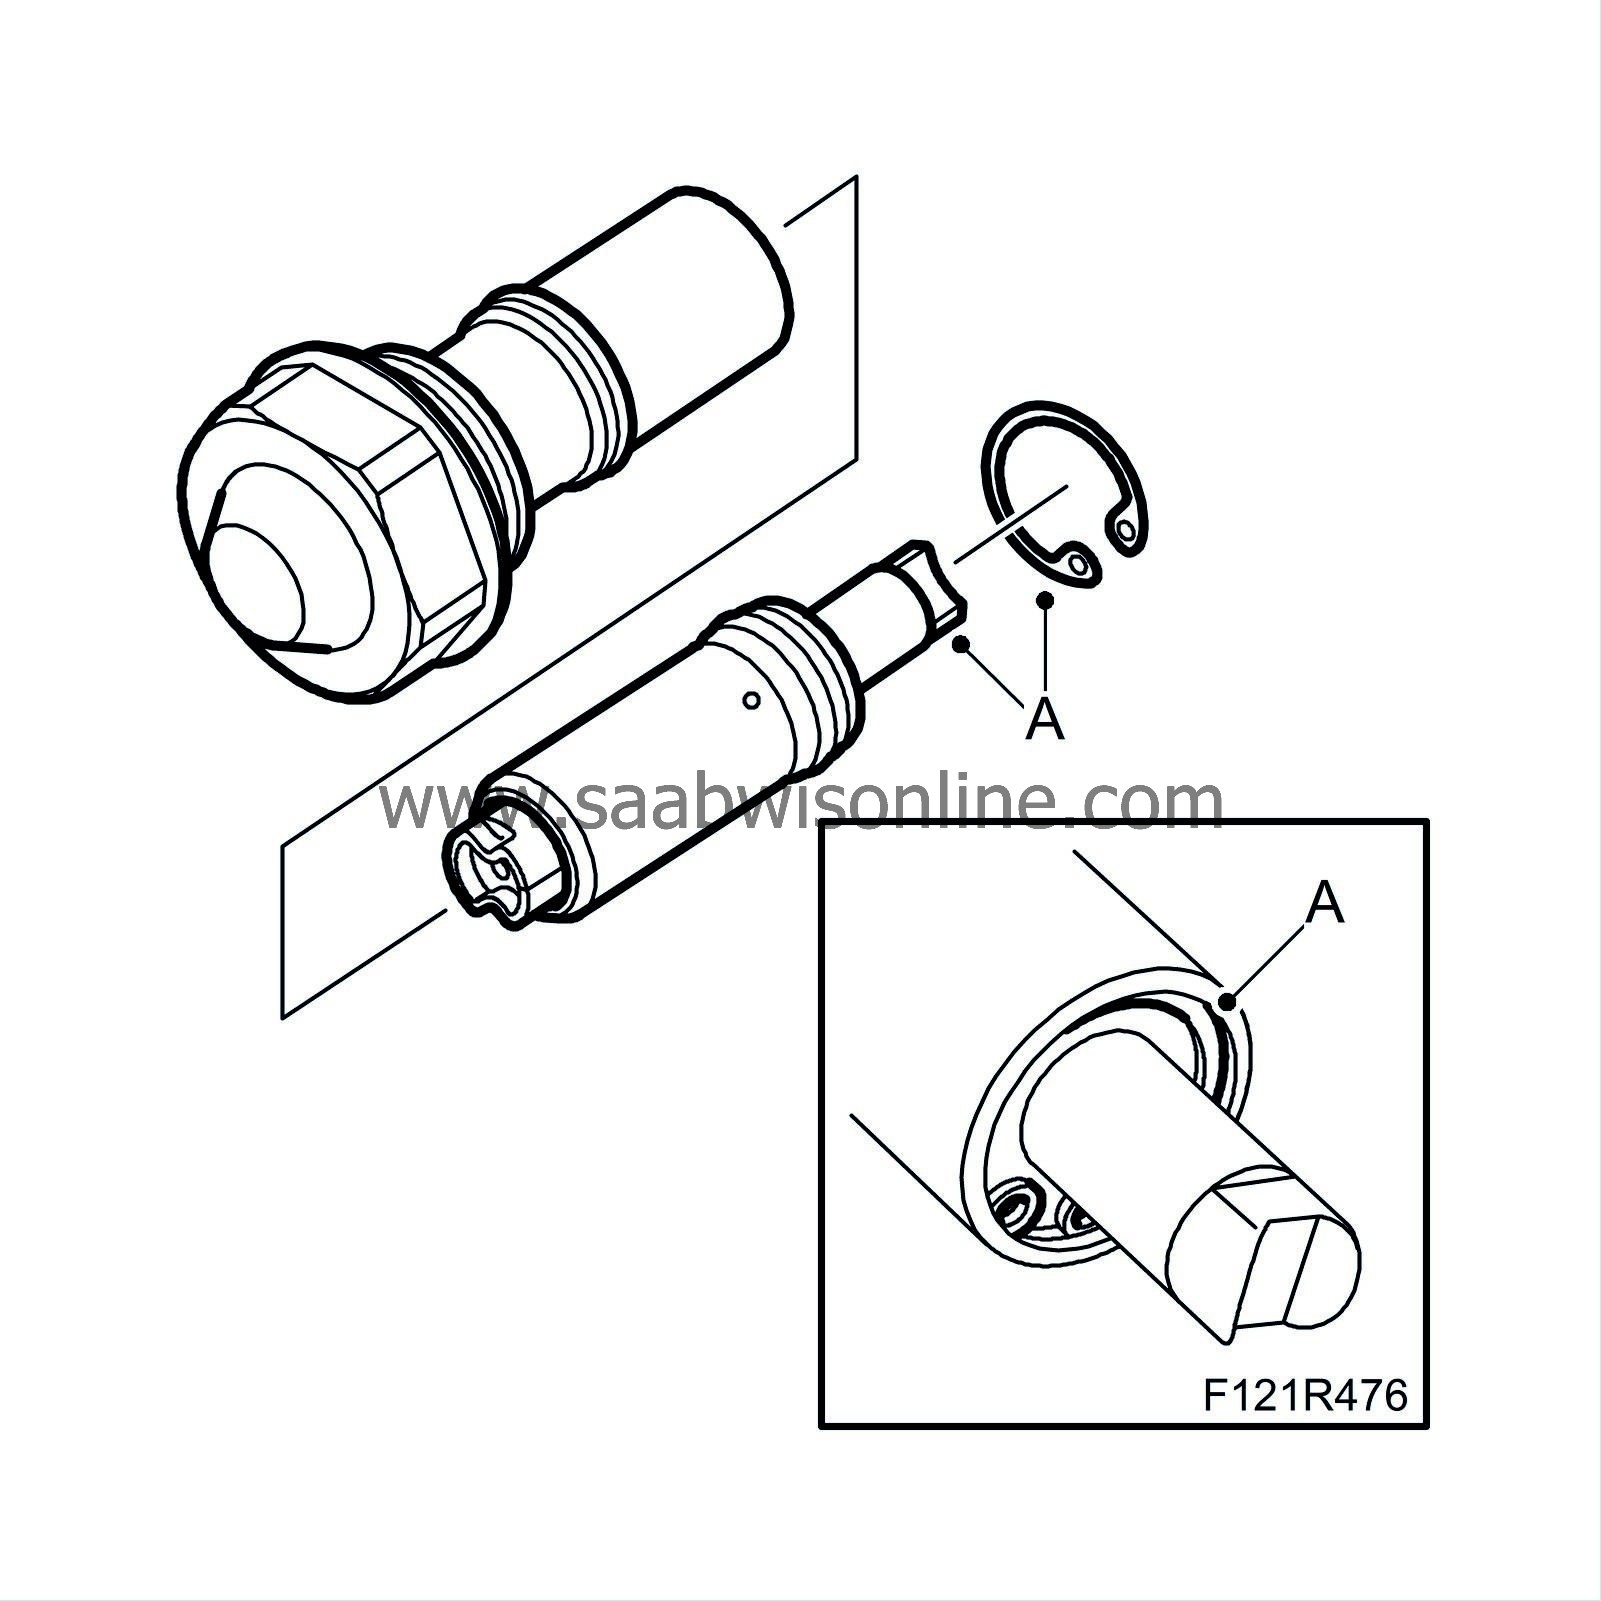
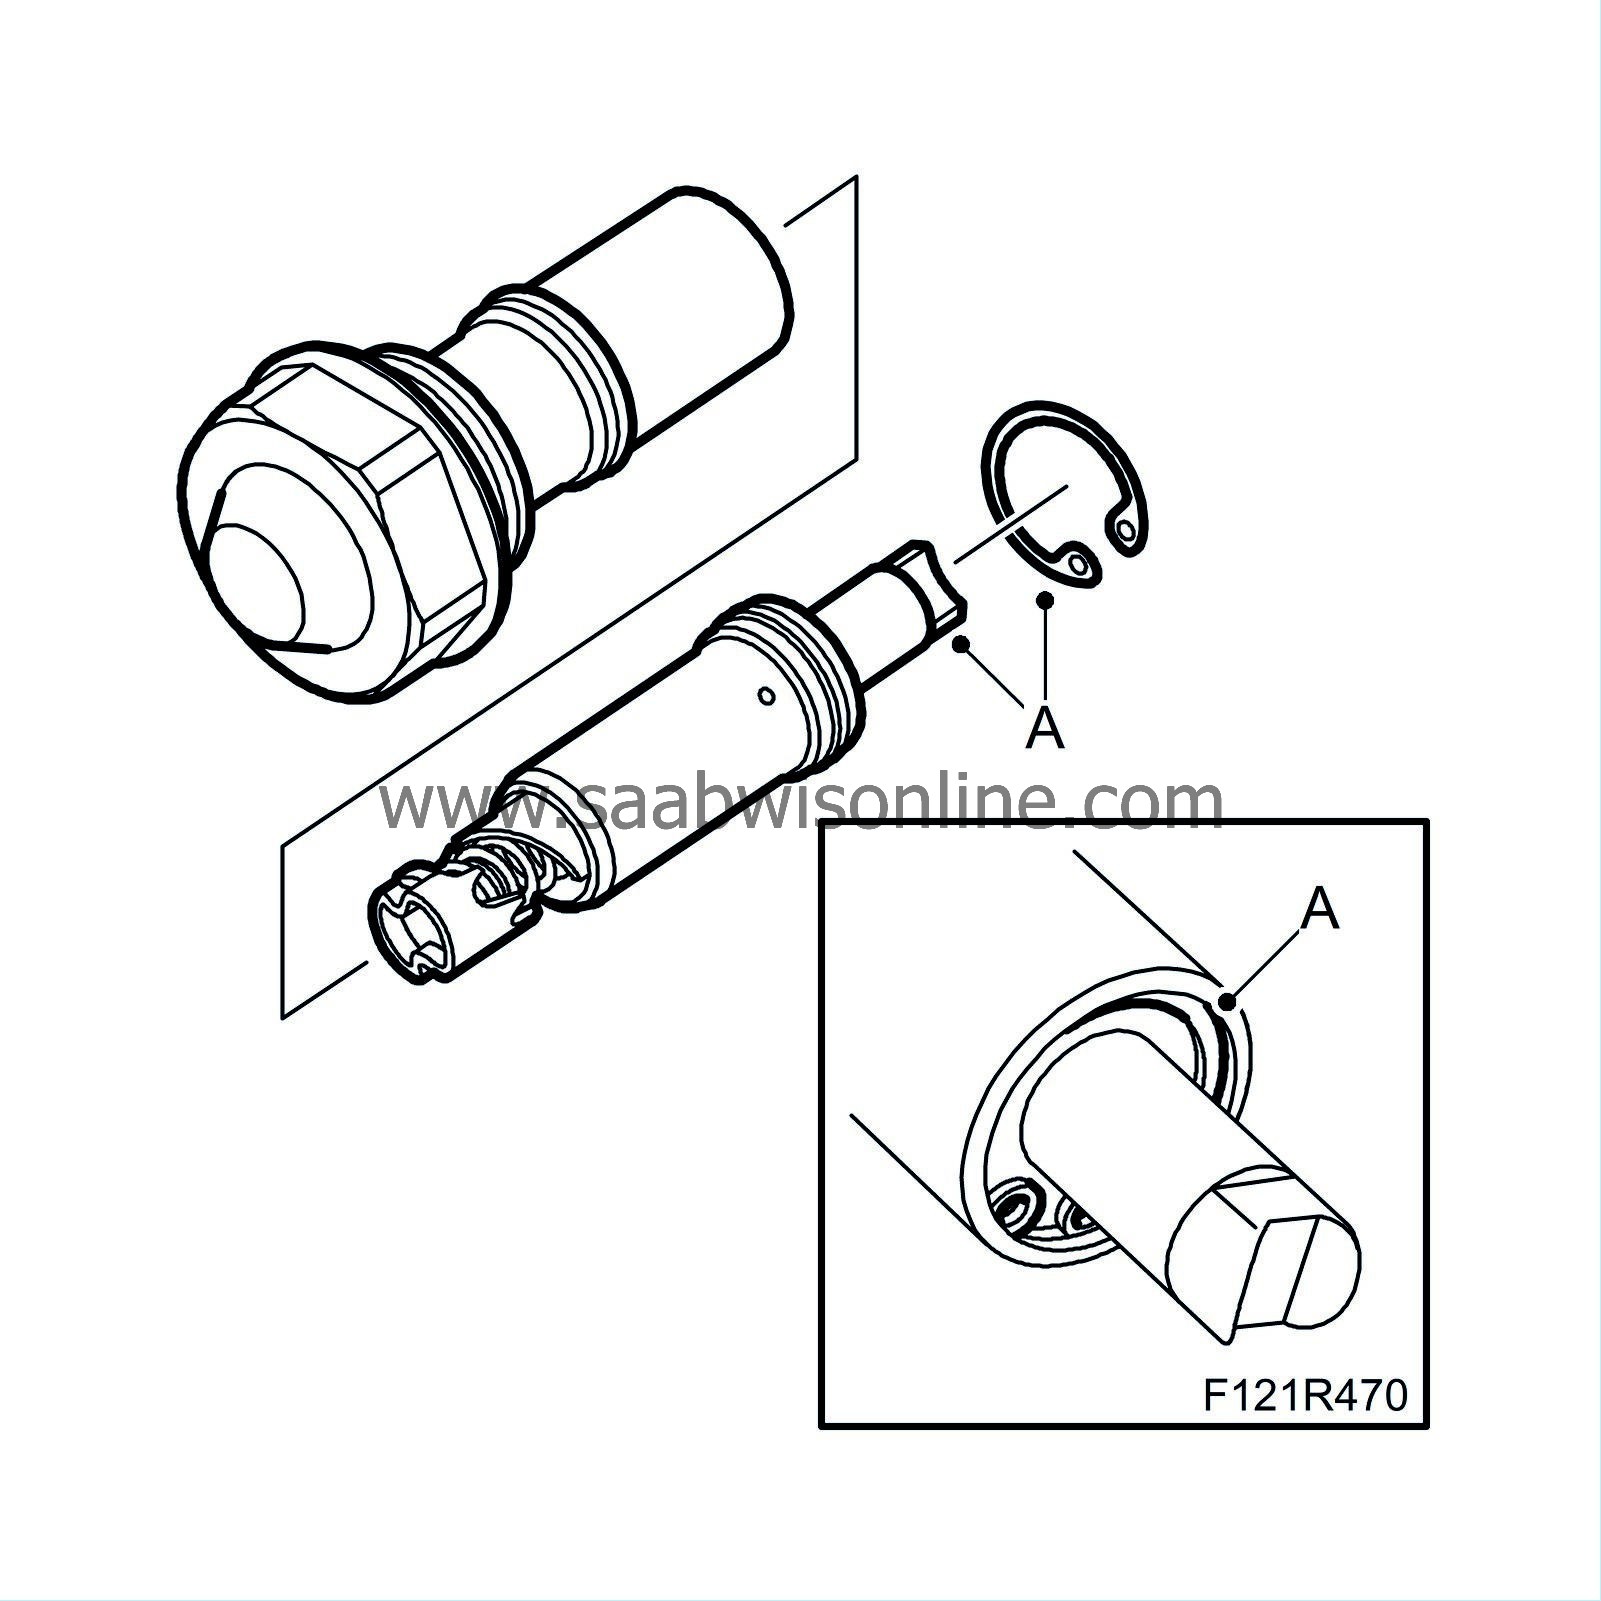
Remove the lock ring (A) from the chain tensioner and remove the piston.
|
|
| 7. |
Remove the plug (A) from the cylinder housing.

|
|
| 8. |
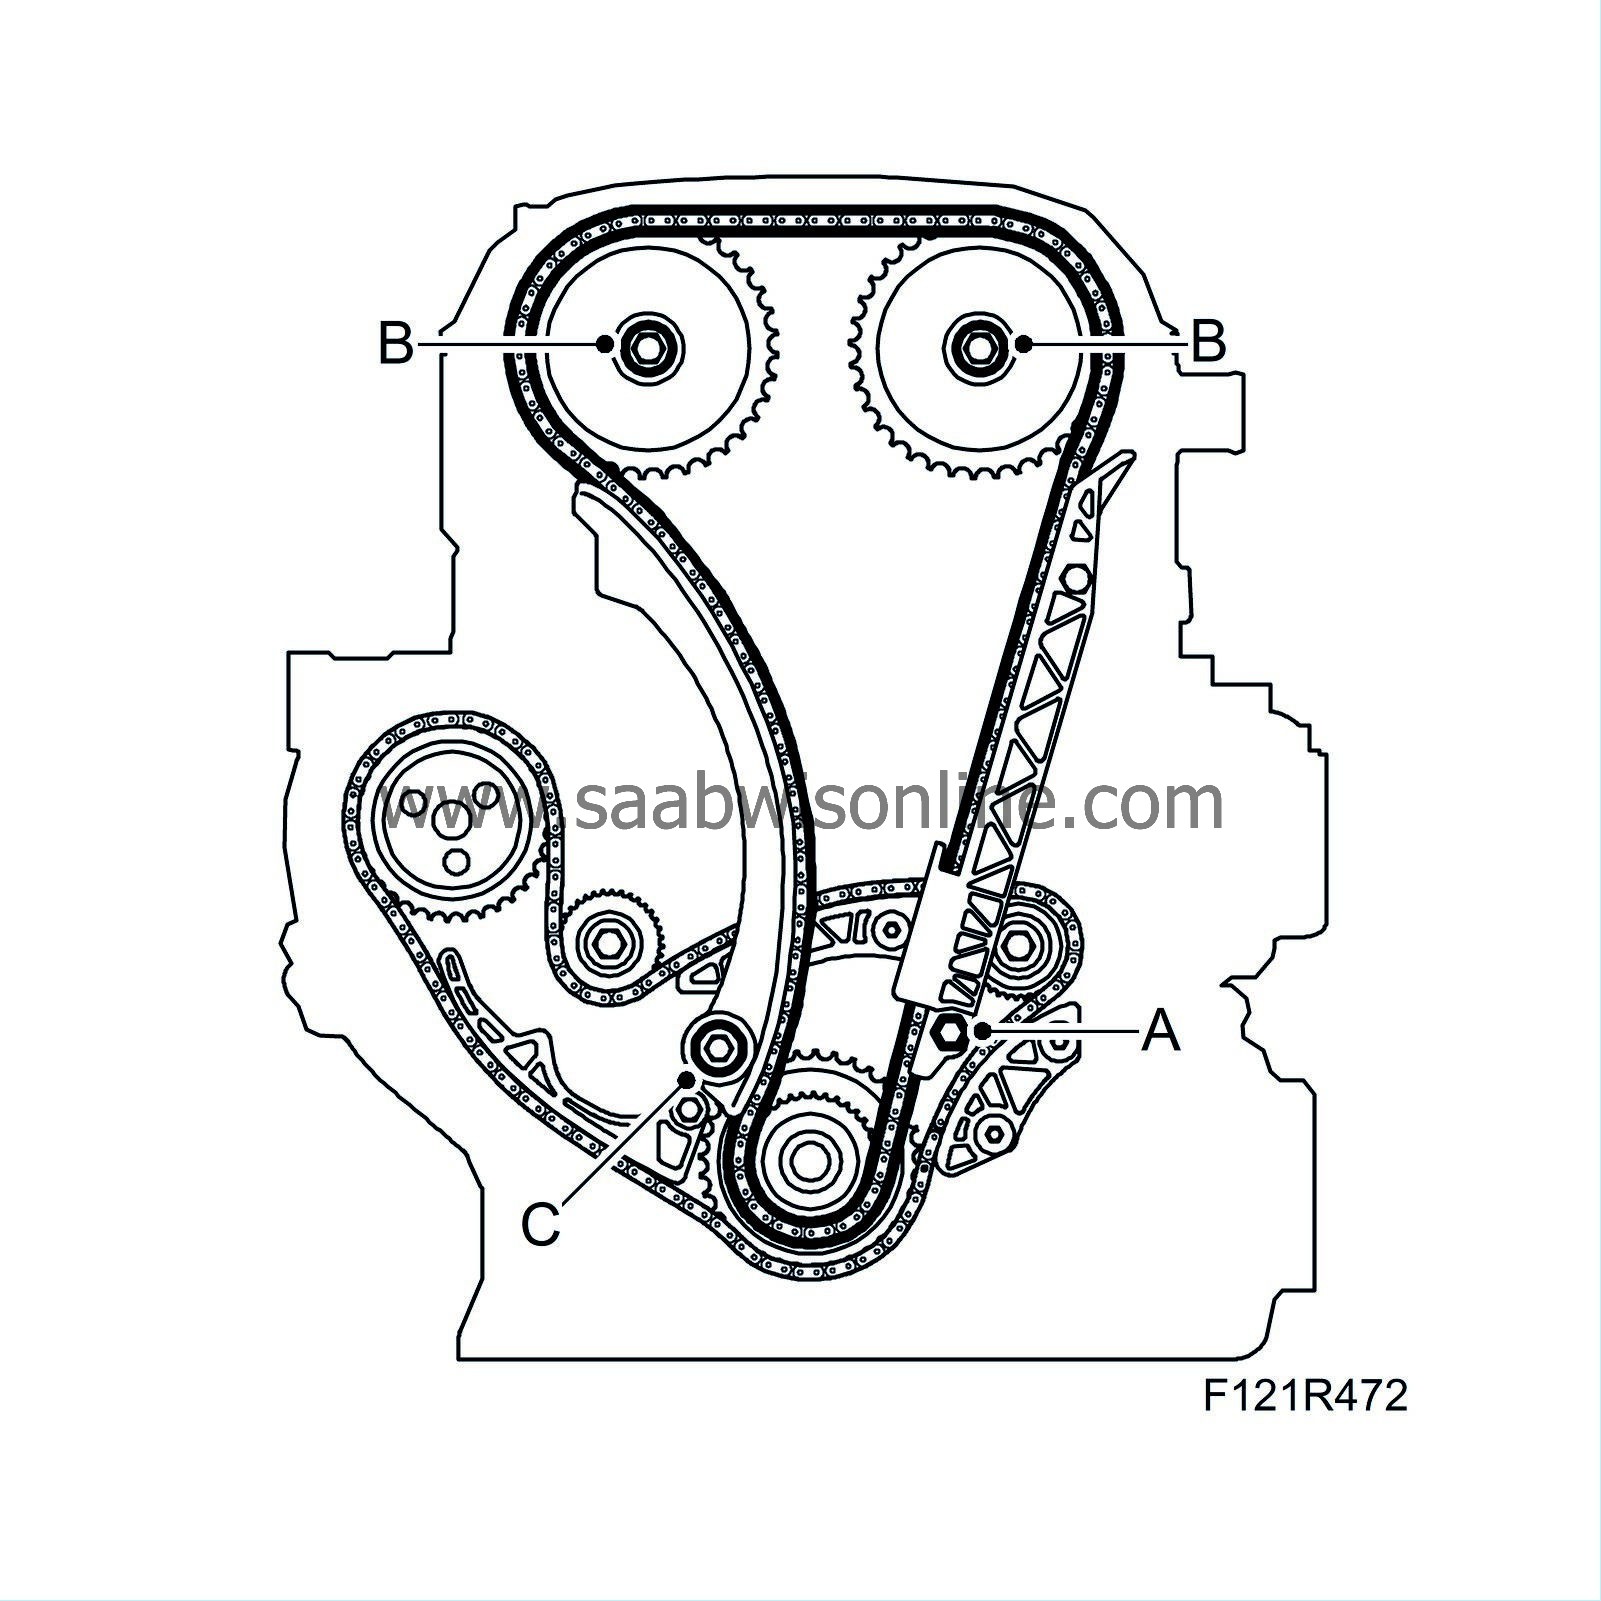
Remove the upper bolt to the timing chain guide at the inlet side (B).
|
|
| 9. |
Remove the upper timing chain guide rail (C).
|
|
| 10. |
Remove the lower bolt to the chain guide (A). Detach the lower section of the chain.
|
|
| 11. |
Remove the camshaft pinions (B). Use a wrench to grip the camshaft flats when the bolts are loosened. Lift up the chain.
|
|
| 12. |
Remove the tensioner guide (C) by lifting it up. Inspect the condition of the guide. Replace if necessary.
|
|
| To fit |
| 1. |
Clean all sealing surfaces.
|
|
| 2. |
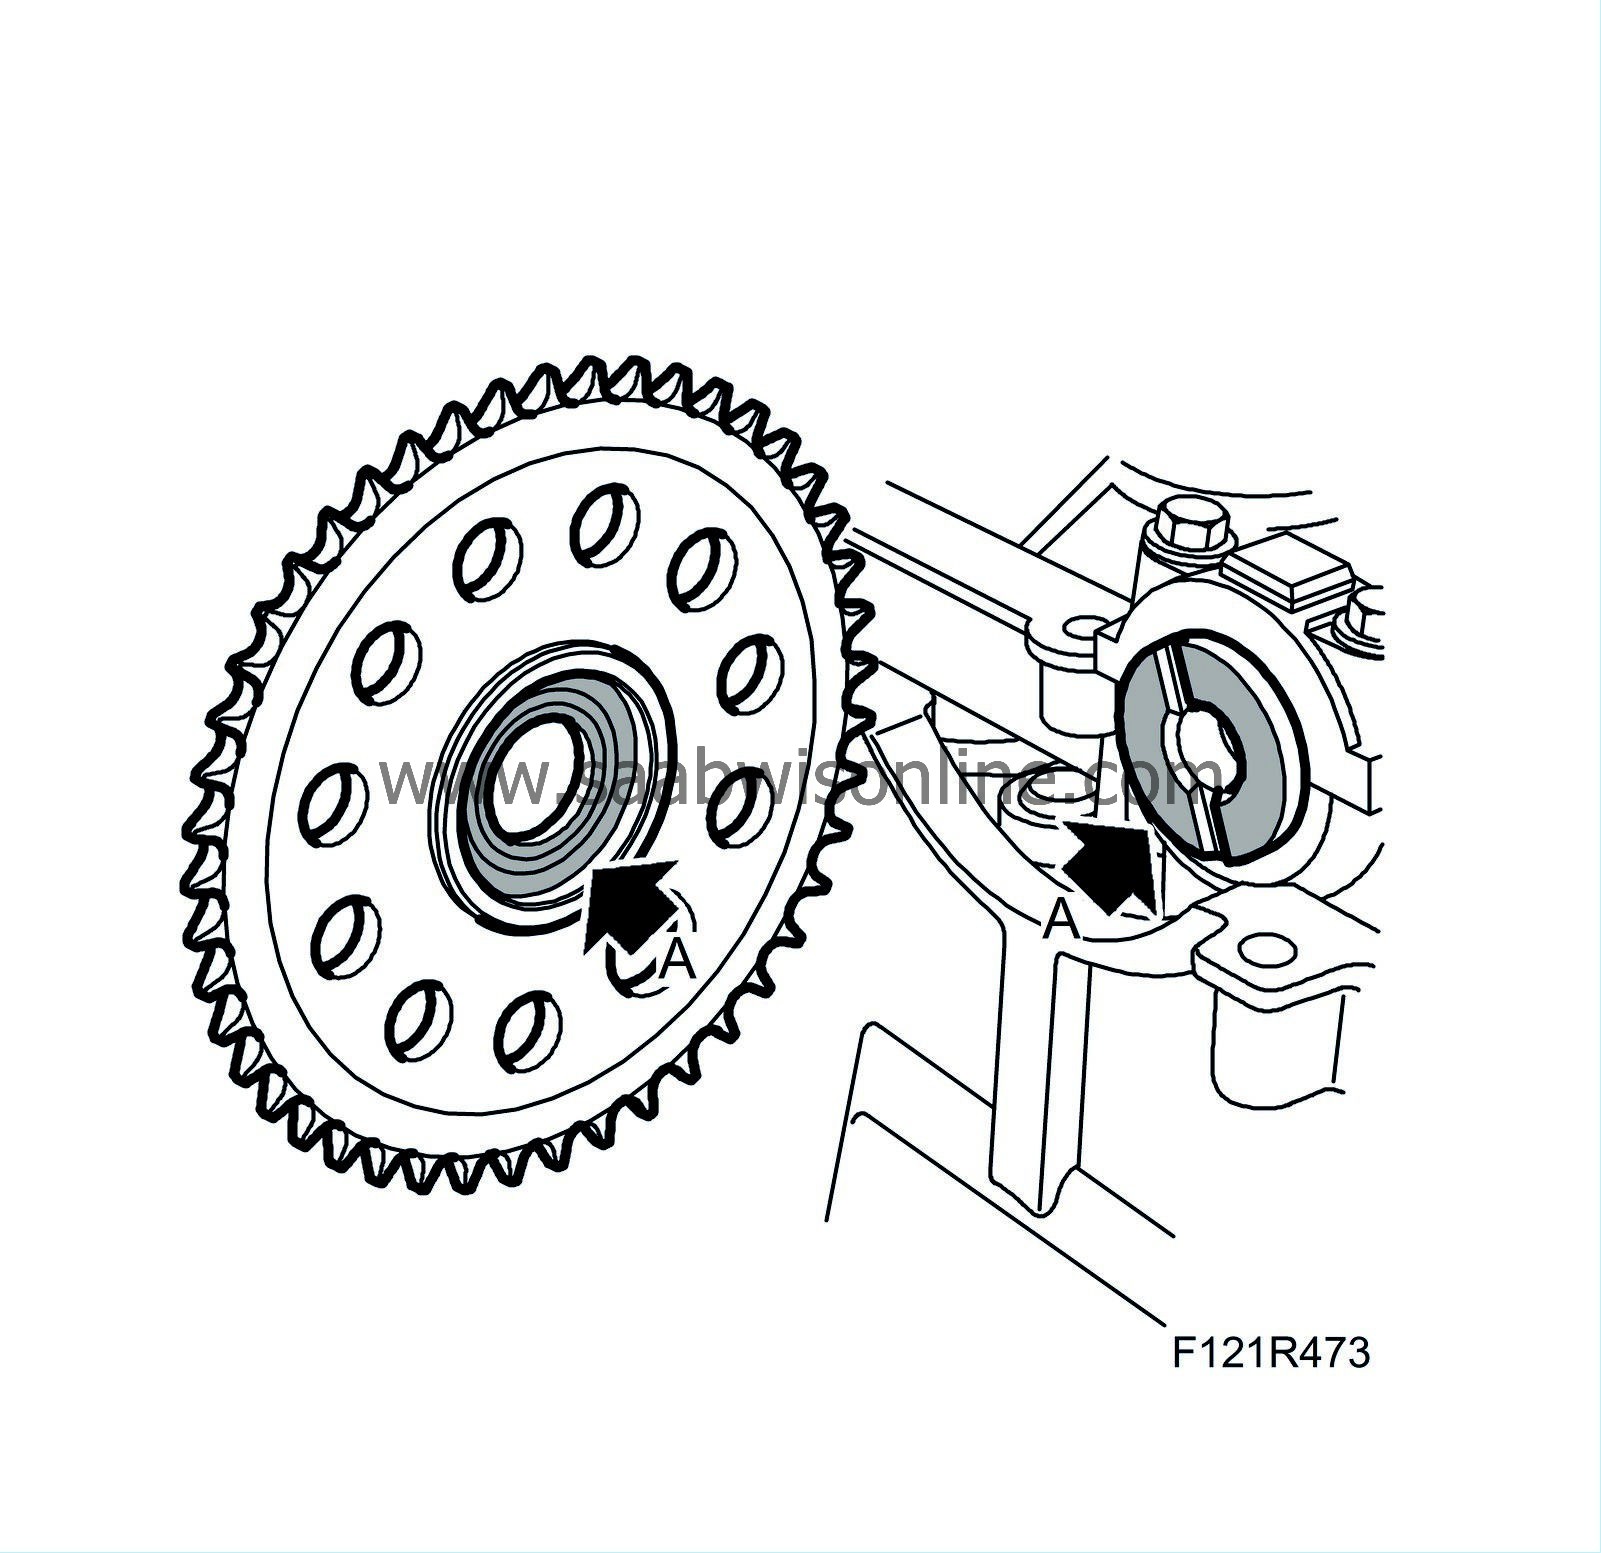
Clean the camshaft and pinion contact surfaces (A) from oil and grease.
|
|
| 3. |
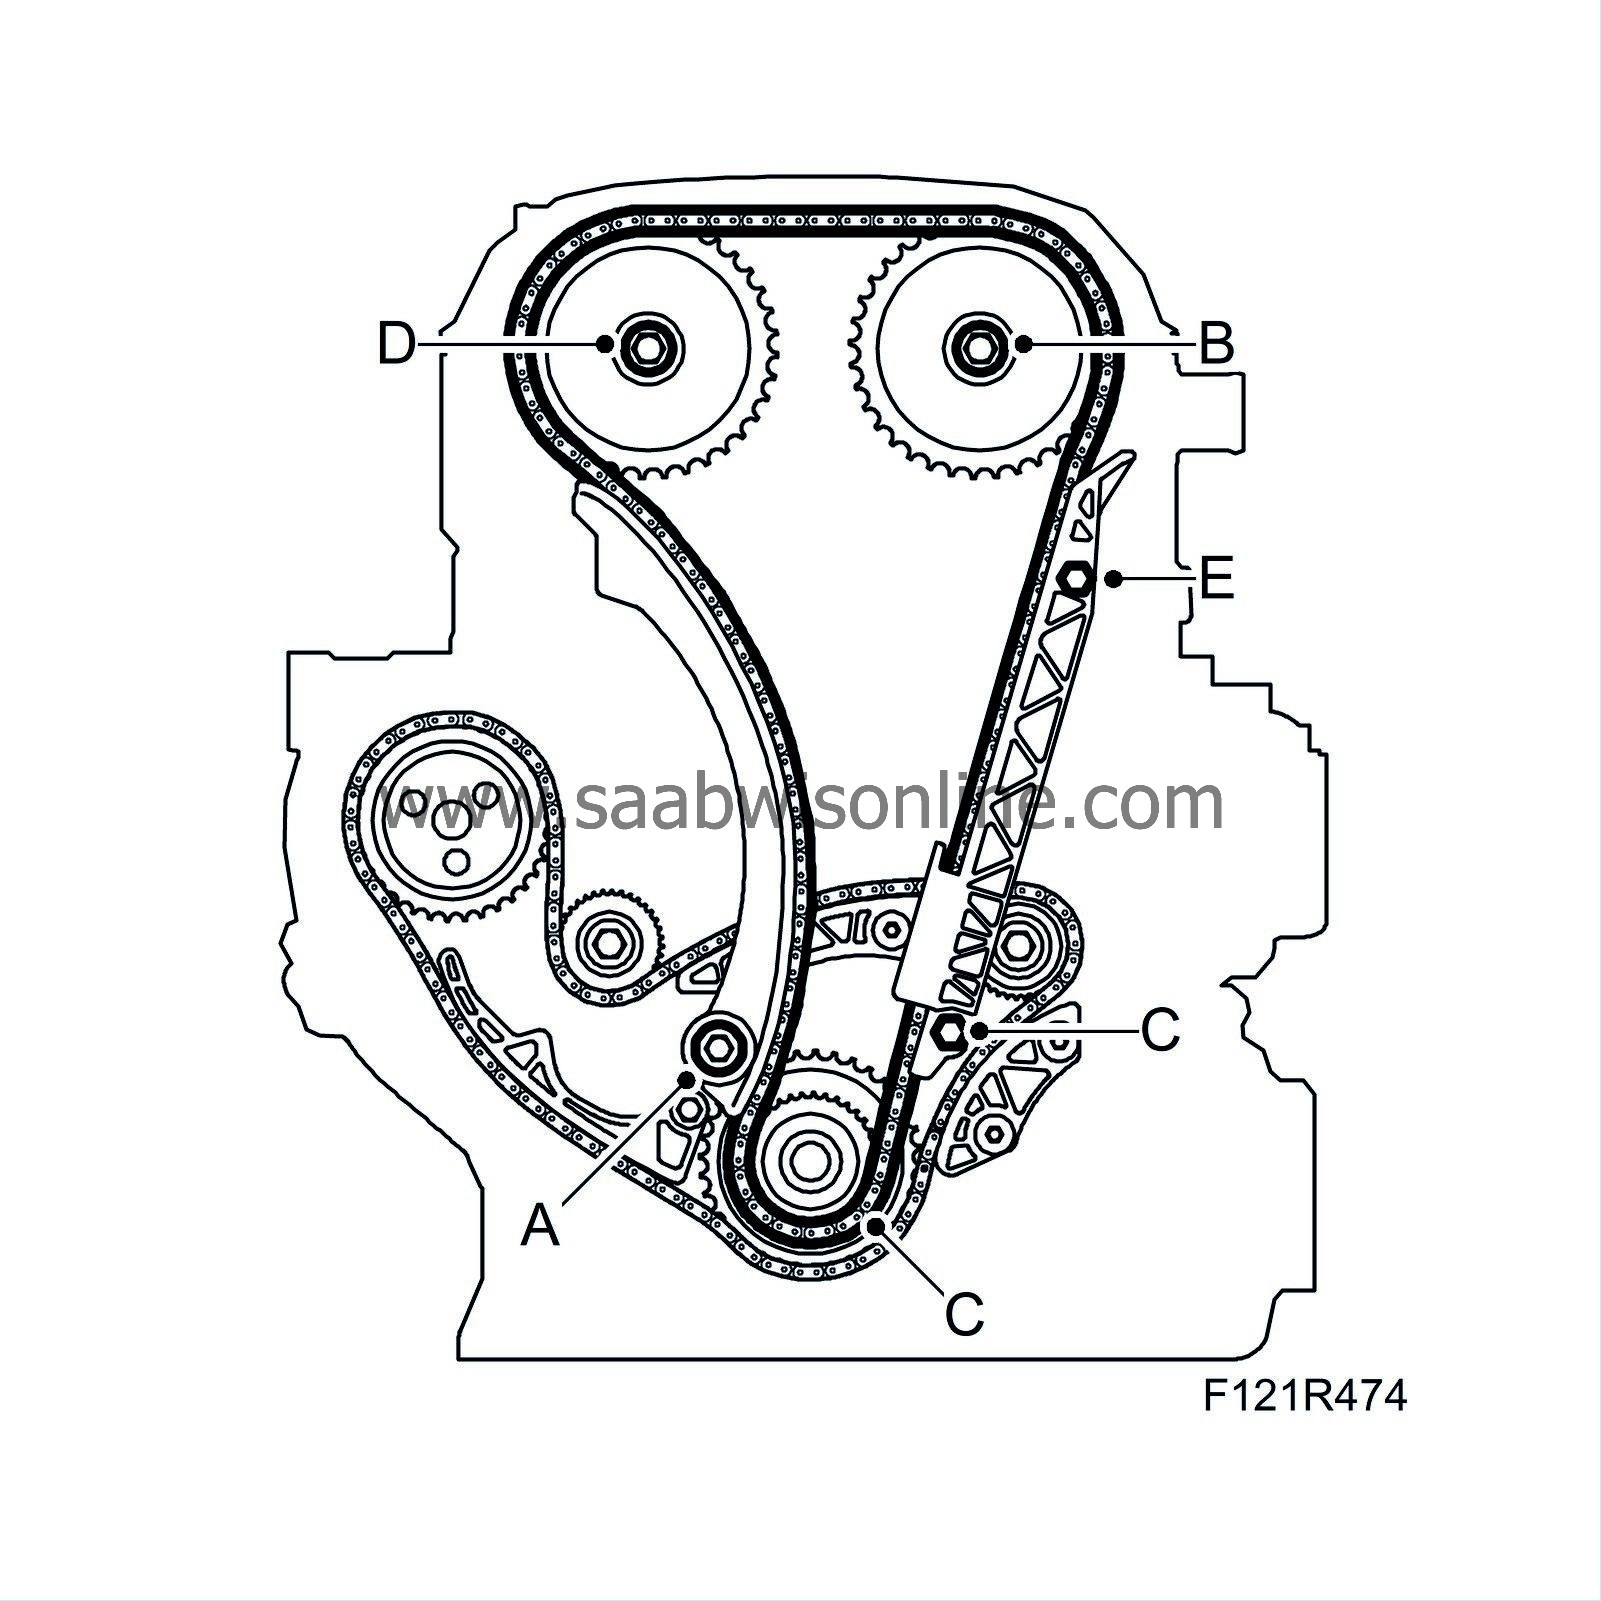
Fit the tensioner guide (A).
|
|
| 4. |
Lay the chain on the intake sprocket and lower the chain. Fit the sprocket on the camshaft and tighten the bolt (B).
|
|
| 5. |
Raise the car.
|
|
| 6. |
Fit the chain on the crankshaft sprocket and fit the chain guide. Fit the lower bolt (C).
Tightening torque 10 Nm (7 lbf ft) |
|
| 7. |
Lower the car.
|
|
| 8. |
Fit the exhaust sprocket and tighten the bolt (D).
|
|
| 9. |
Fit the upper bolt. Fit the plug on the cylinder head (E).
|
|
| 10. |
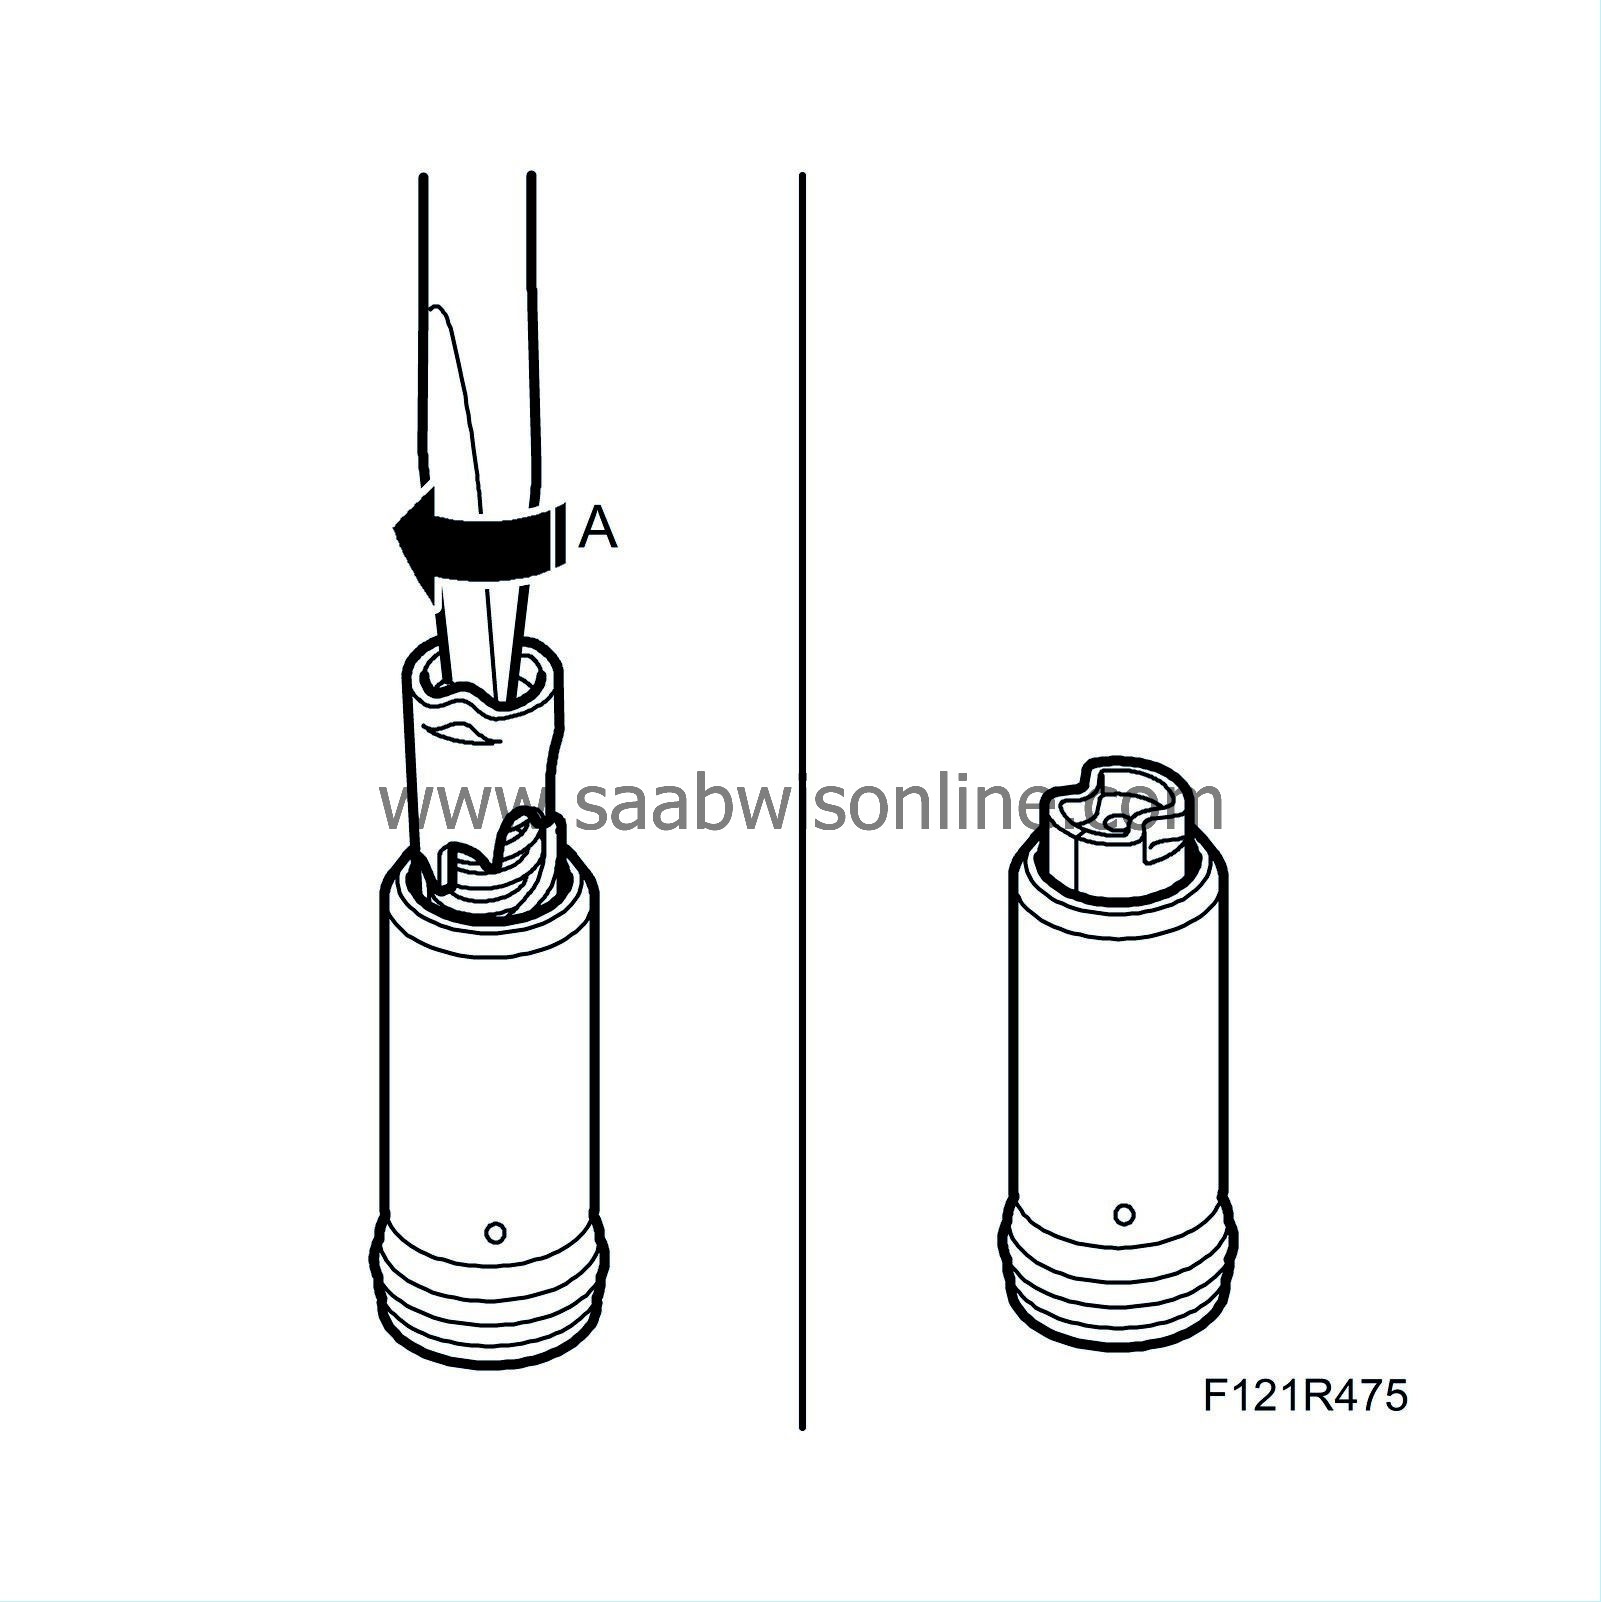
Turn the camshaft drive tensioner clockwise with a screwdriver until it engages in the tensioned position (A).
|
|
| 12. |
Fit the chain tensioner.
Tightening torque 75 Nm (55 lbf ft) 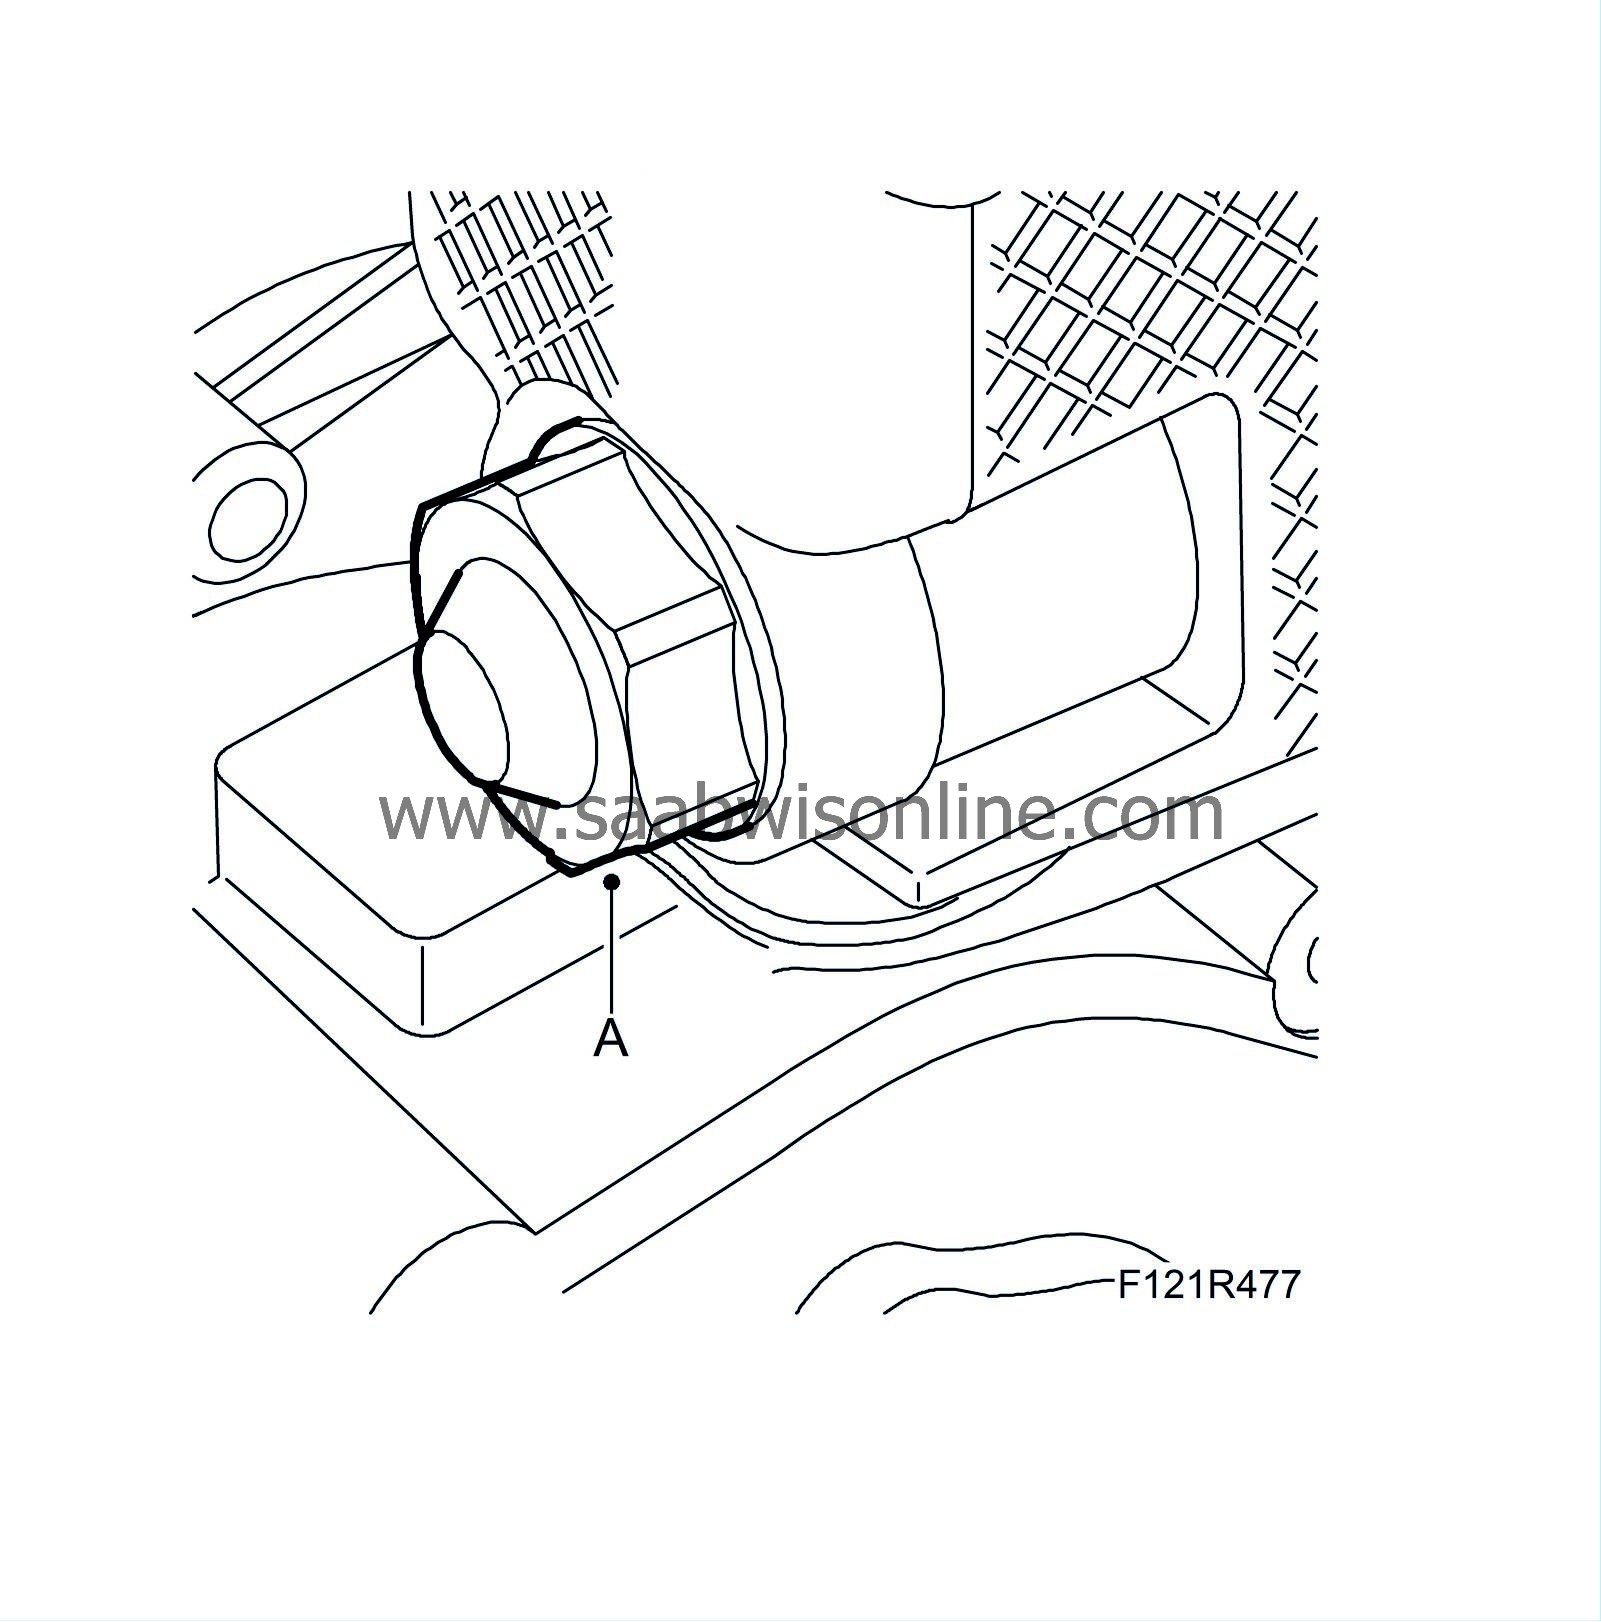
|
|
| 13. |
Release/activate the chain tensioner by carefully pressing on the timing chain or chain guide (as shown in the illustration). Use a screwdriver (A). Check that the tensioner has released.
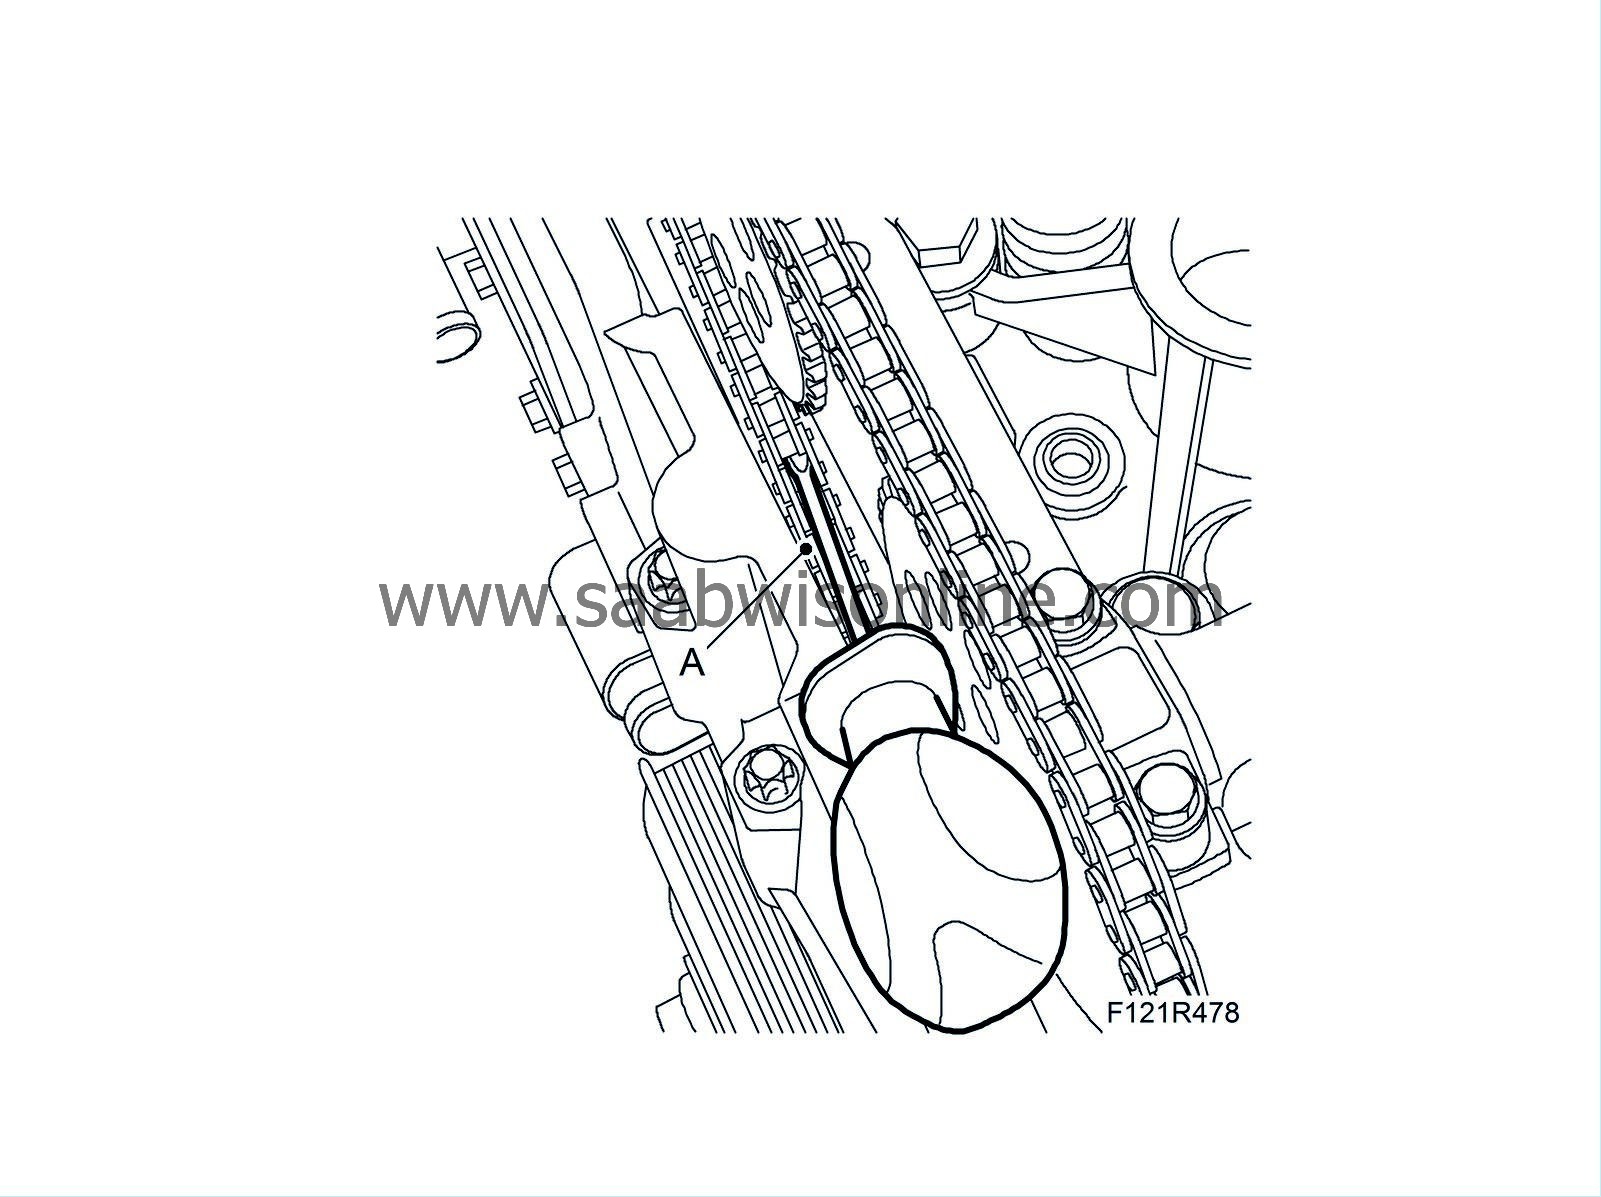
|
|
| 14. |
Fit
Timing cover
.
|
|
| 15. |
Remove the exhaust camshaft and intake camshaft bearing caps no. 2 and no. 7. Position
EN-48368 Adjustment tool, camshaft (B207 210 hp)
and
EN-48366 Adjustment tool, camshaft (B207 150 - 175 hp)
by manually pressing the tools down onto the camshafts without tightening the bolts. Rotate the camshaft until the tool aligns with the spanner on the camshaft flats. Tighten the adjustment tools' bolts (A).
Tightening torque 10 Nm (7 lbf ft) 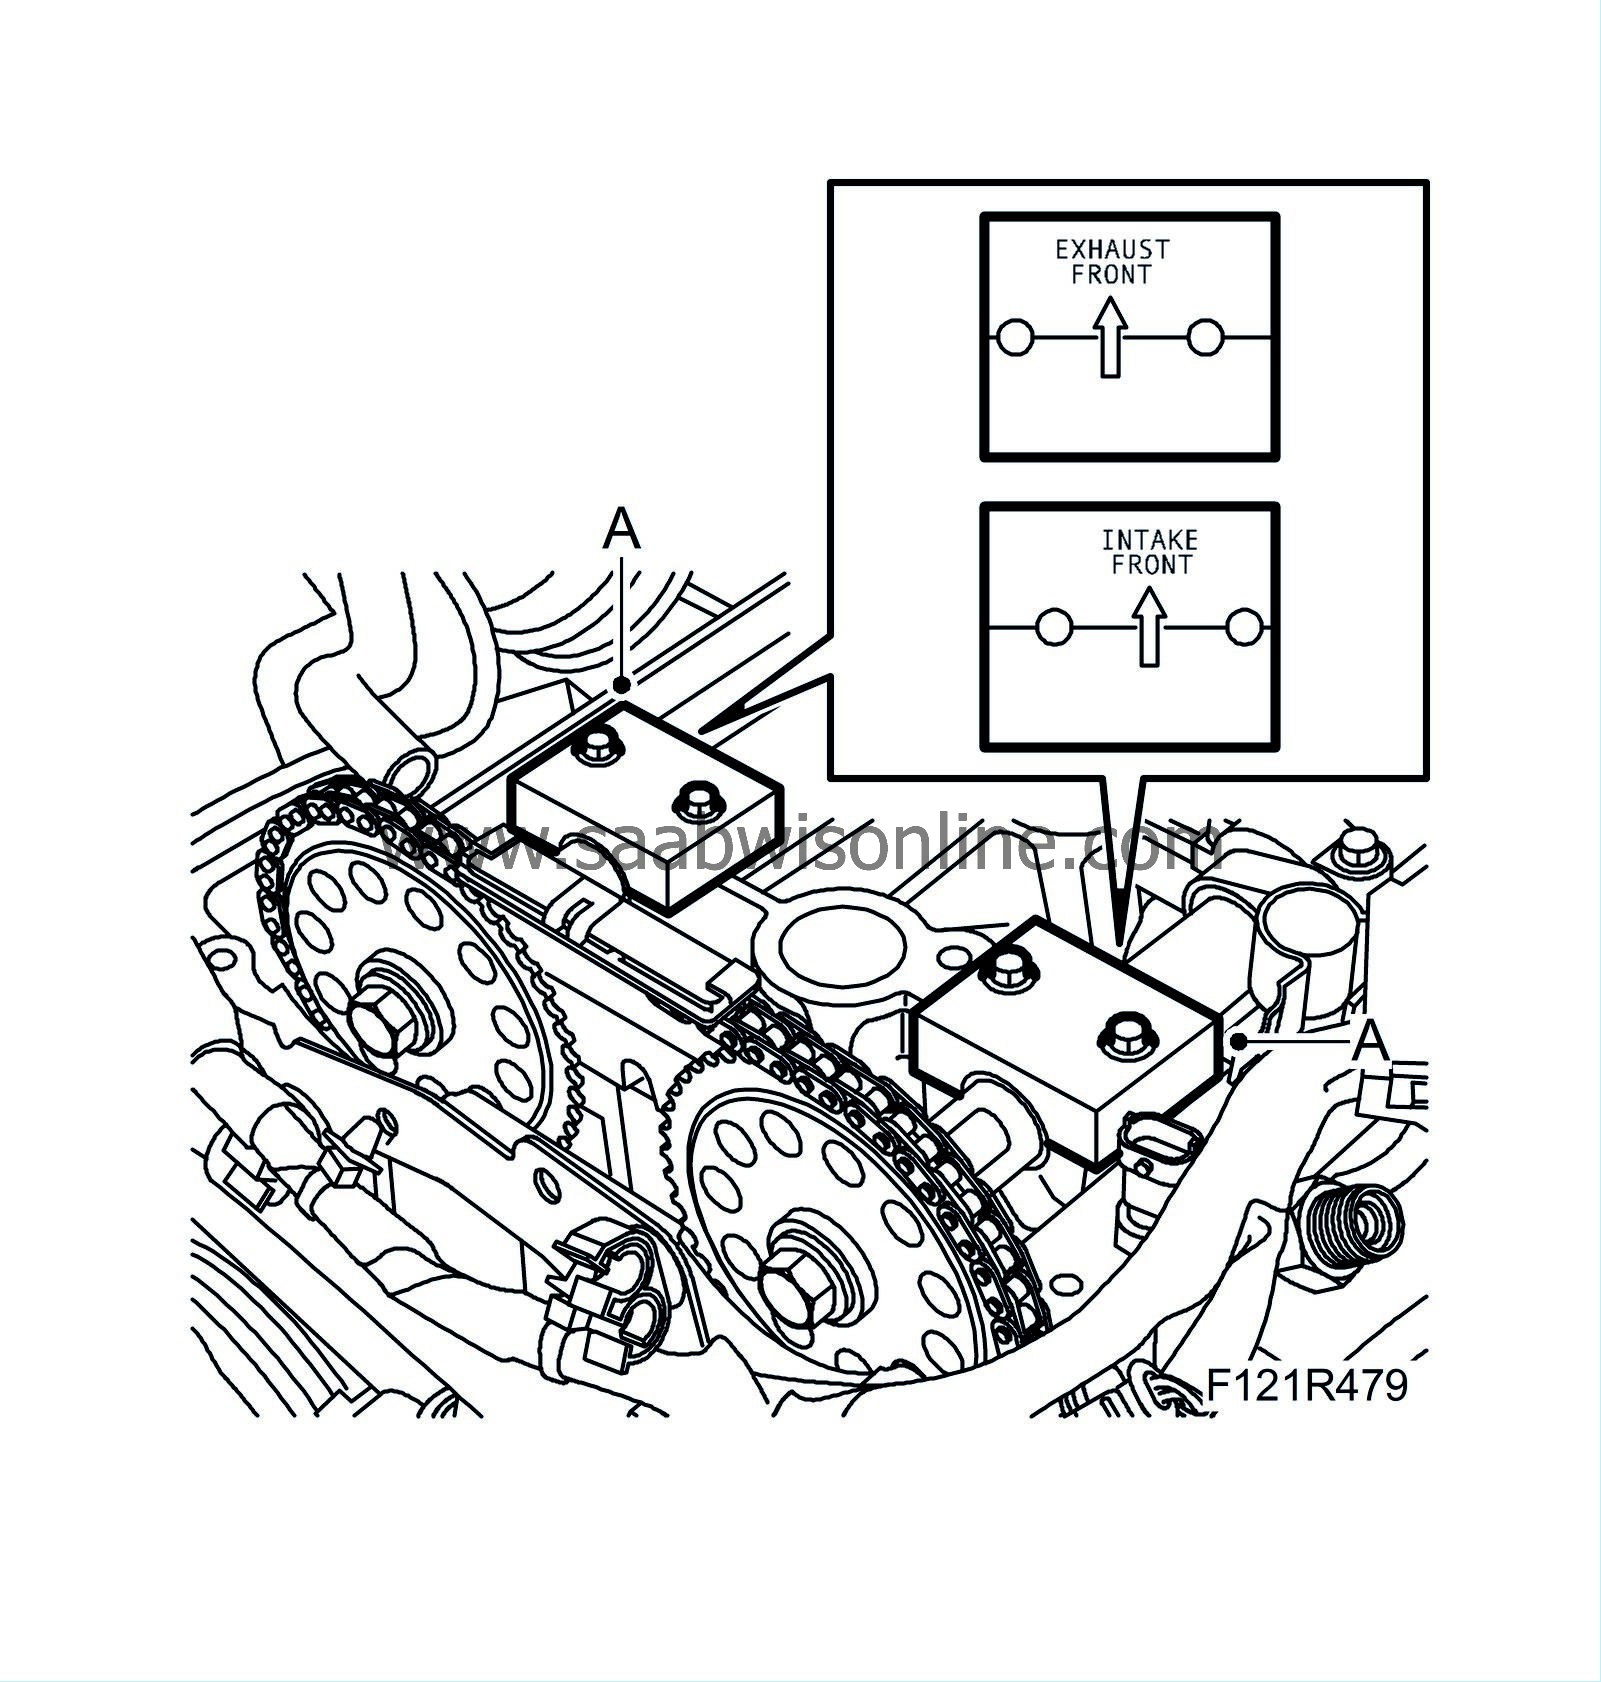
|
|
| 16. |
Check that the markings on the crankshaft pulley and the timing cover are aligned. Tighten the camshaft gears a first time. Use a wrench to grip the camshaft flats (A).
Tightening torque 30 Nm (22 lbf ft) 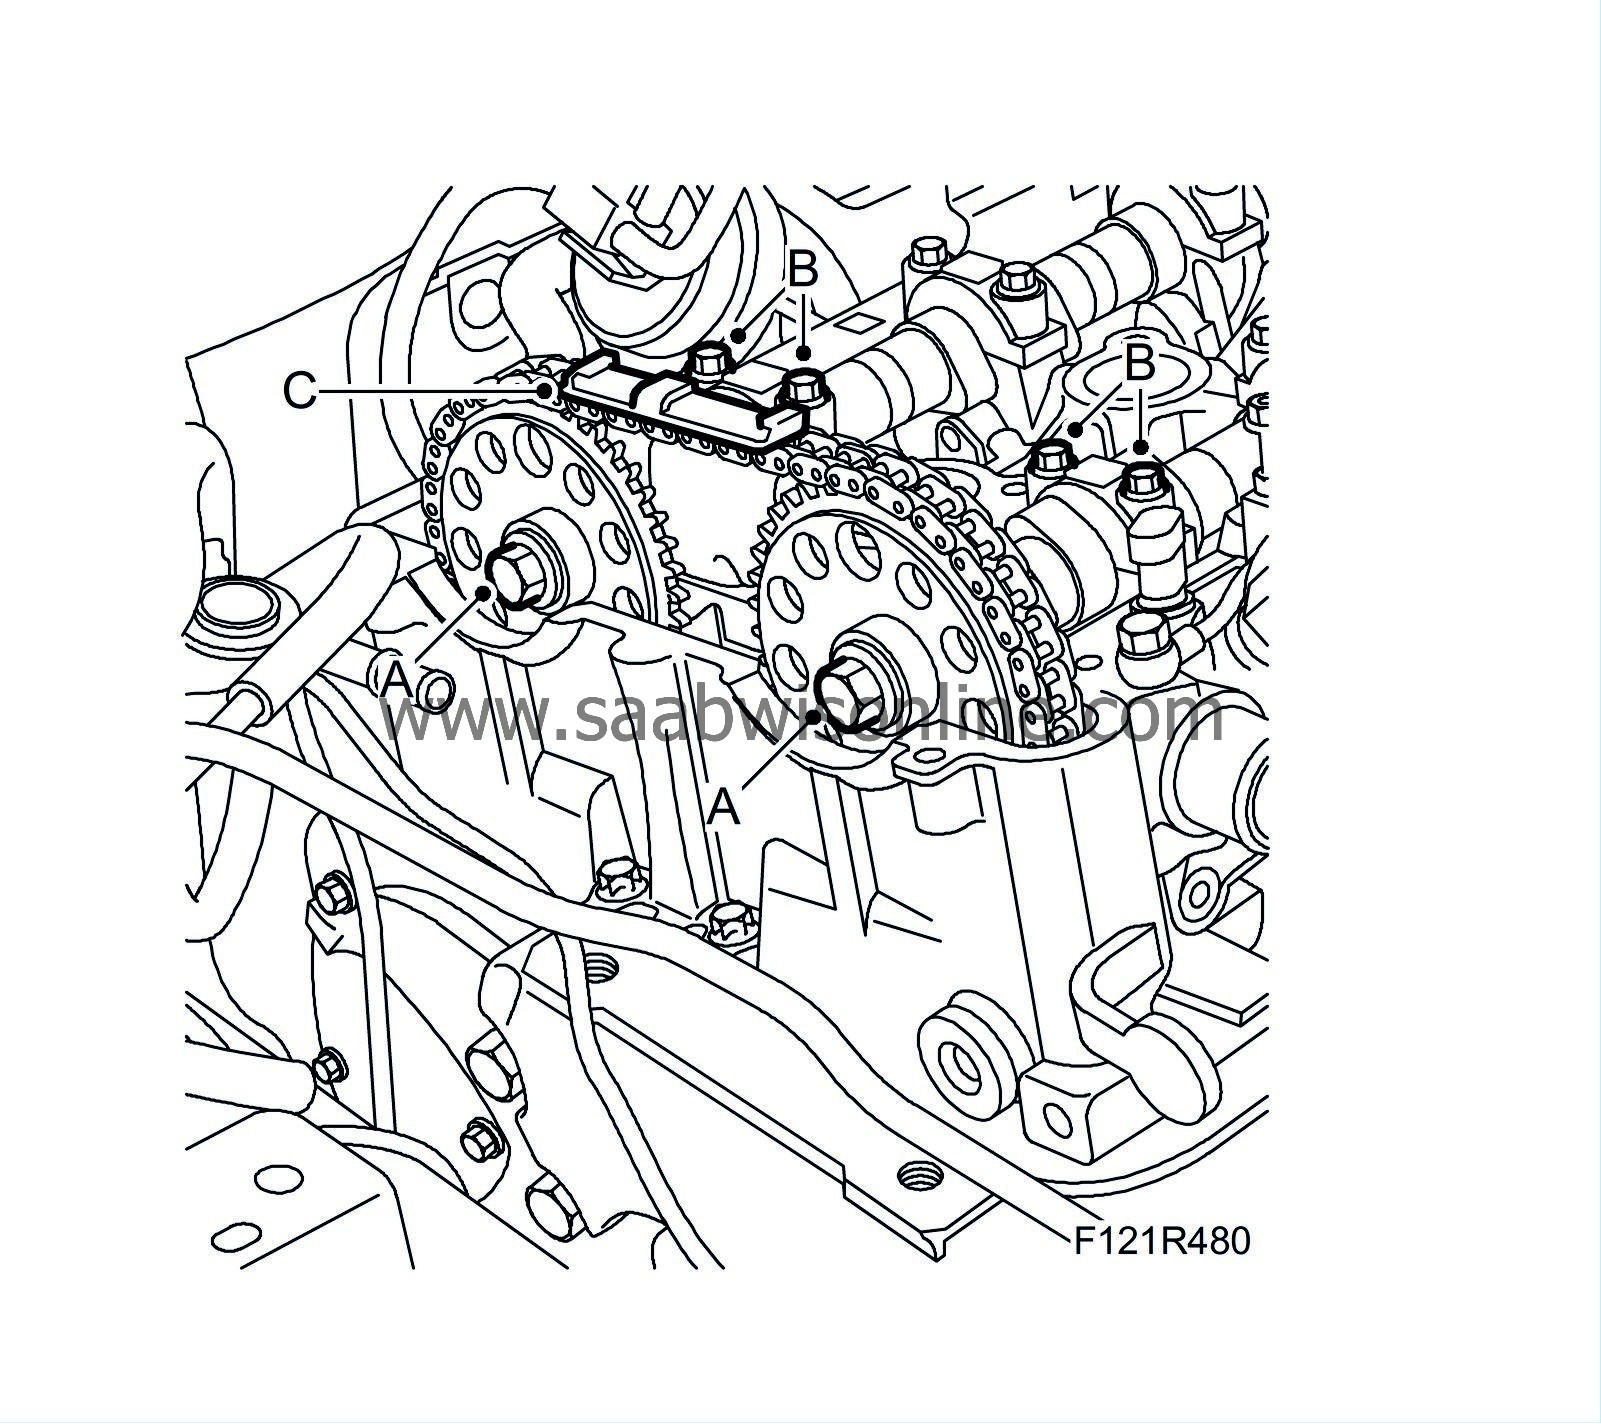
|
|
| 17. |
Remove the adjustment tools and fit the bearing caps (B).
Tightening torque 8 Nm (6 lbf ft) |
|
| 18. |
Continue to tighten the camshaft gears to the final torque. Use a wrench to grip the camshaft flats (A).
Tightening torque 85 Nm + 30° (63 lbf ft +30°) |
|
| 19. |
Rotate the crankshaft 2 turns in the direction of engine rotation until the mark on the crankshaft pulley agrees with the mark on the timing cover. Remove the bearing caps and fit EN-48368 Adjustment tool, camshaft (B207 210 hp) and EN-48366 Adjustment tool, camshaft (B207, 150 - 175 hp) again to check that the camshaft setting is correct. Remove the adjustment tools and refit the bearing caps.
Tightening torque 8 Nm (6 lbf ft) |
|
| 20. |
Fit the upper timing chain guide rail (C).
|
|
| 21. |
Fit the
Camshaft cover with gasket
|
|
| 22. |
Lower the car completely.
|
|
| 23. |
Check engine oil level. Top up as necessary.
|
|

