Fuel pump
| Fuel pump |
|
||||||||||||||||||||||
| Important | ||
|
Be particulary observant regardning cleanliness when working on the fuel system. Loss of function may occur due to very small particles. Prevent dirt and grime from entering the fuel system by cleaning the connections and plugging pipes and lines during disassembly. Use 82 92 948 Plugs, A/C system assembly. Keep components free from contaminants during storage. |
||
| To remove |
| 1. |
Remove the fuel tank. Refer to
Fuel tank, To remove
.
|
|
| 2. |
To prevent dirt entering the fuel system, clean the outside of the tank if necessary before removing the fuel pump.
|
|
| 3. |
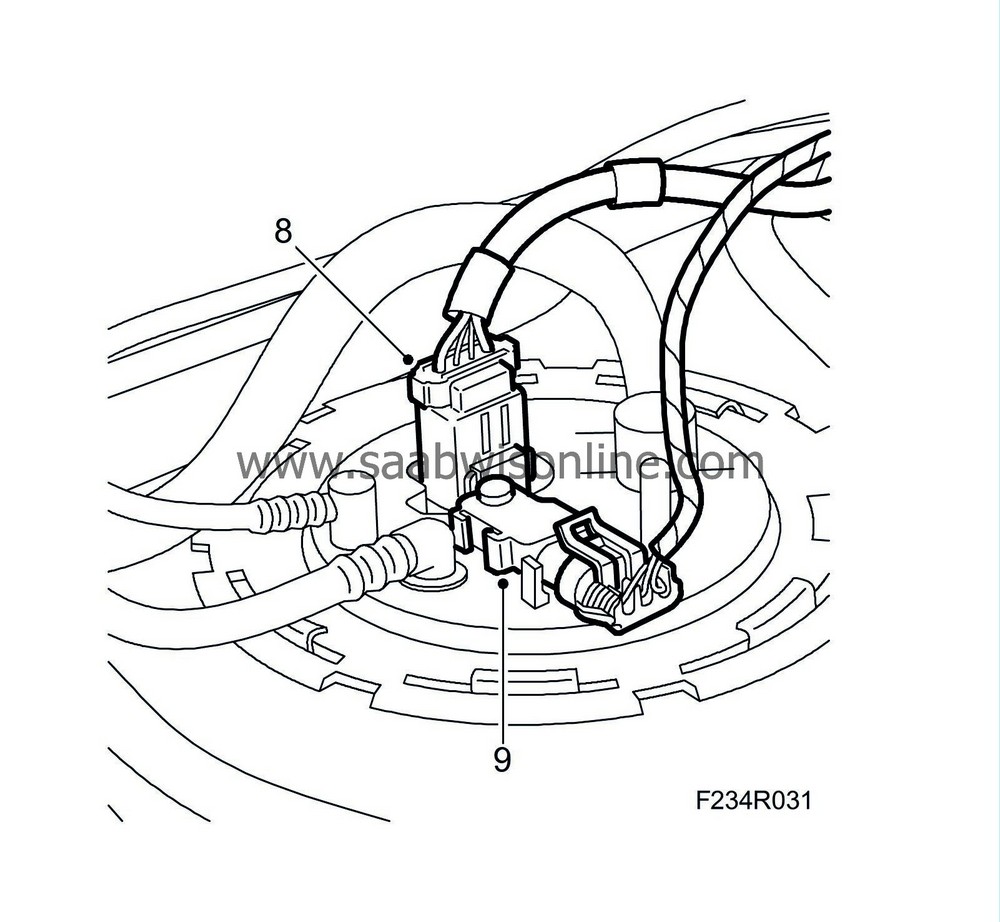
Unplug the fuel pump connector.

|
|
| 4. |
On cars with ORVR, unplug the connector for the pressure sensor.
|
|
| 5. |
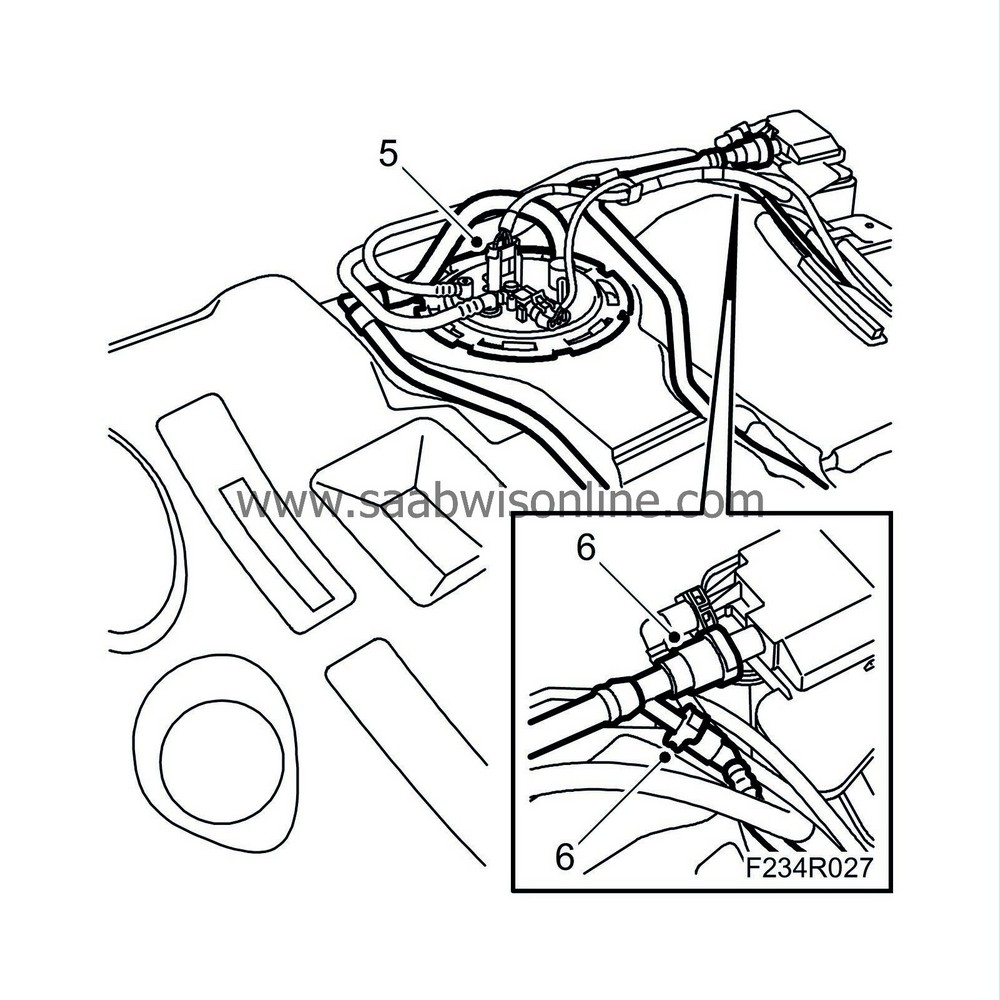
Remove the fuel pump. Use tool
83 96 194 Fitting tool, fuel armature
to undo the fuel pump lock ring.

|
|
| 6. |
Disconnect the quick-release couplings on the EVAP emission canister.
|
|
| 7. |
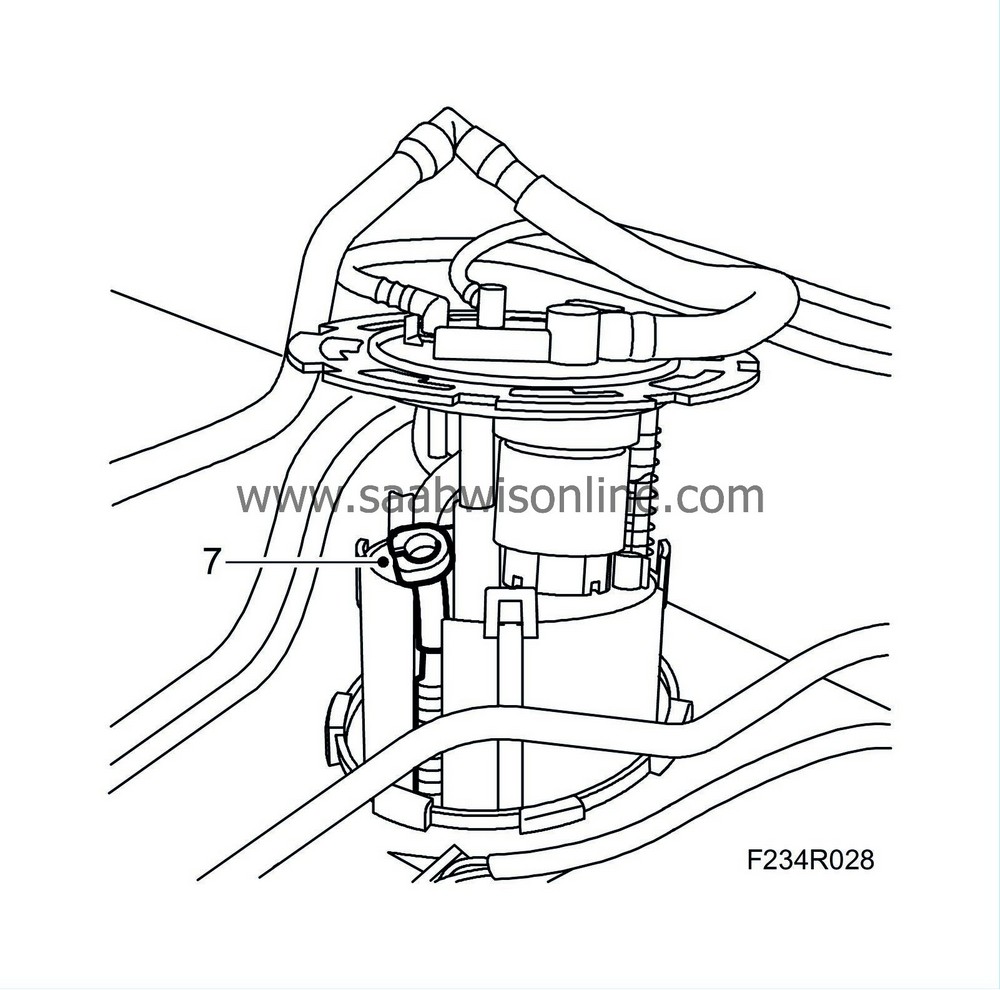
Lift up the fuel pump slightly and disconnect the quick-release coupling for the tank ventilation from the fuel pump.
|
|
| 8. |
Carefully lift up the fuel pump and place it in a receptacle.

|
||||||||||
| To fit |
| 1. |
Fit a new seal.

|
|
| 2. |
Lift up the ventilation hose and lower the fuel pump slightly. Secure the ventilation hose to the pump housing and connect it to the pump cover. Lower the fuel pump carefully into the tank.
|
|
| 3. |
Make sure the recesses in the tank connection are in line with the corresponding heels on the pump cover.
|
|
| 4. |
Make sure the seal is located correctly. Tighten the fuel pump using
83 96 194 Fitting tool, fuel armature
.
|
|
| 5. |
Connect the quick-release couplings to the EVAP emission canister.

|
|
| 6. |
Attach the fuel lines to the fasteners on the fuel tank.
|
|
| 7. |
Secure the ventilation line to the outlet in the tank.
|
|
| 8. |
Plug in the fuel pump connector.

|
|
| 9. |
On cars with ORVR, plug in the connector to the pressure sensor.
|
|
| 10. |
Fit the fuel tank. Refer to
Fuel tank, To fit
.
|
|

 Warning

