Turbo, B207, 4WD
| Turbo, B207, 4WD |
| To remove |
|
|||||||
|
|||||||||||||
| 1. |
Carefully undo the cap on the expansion tank to release the pressure.
|
|
| 2. |
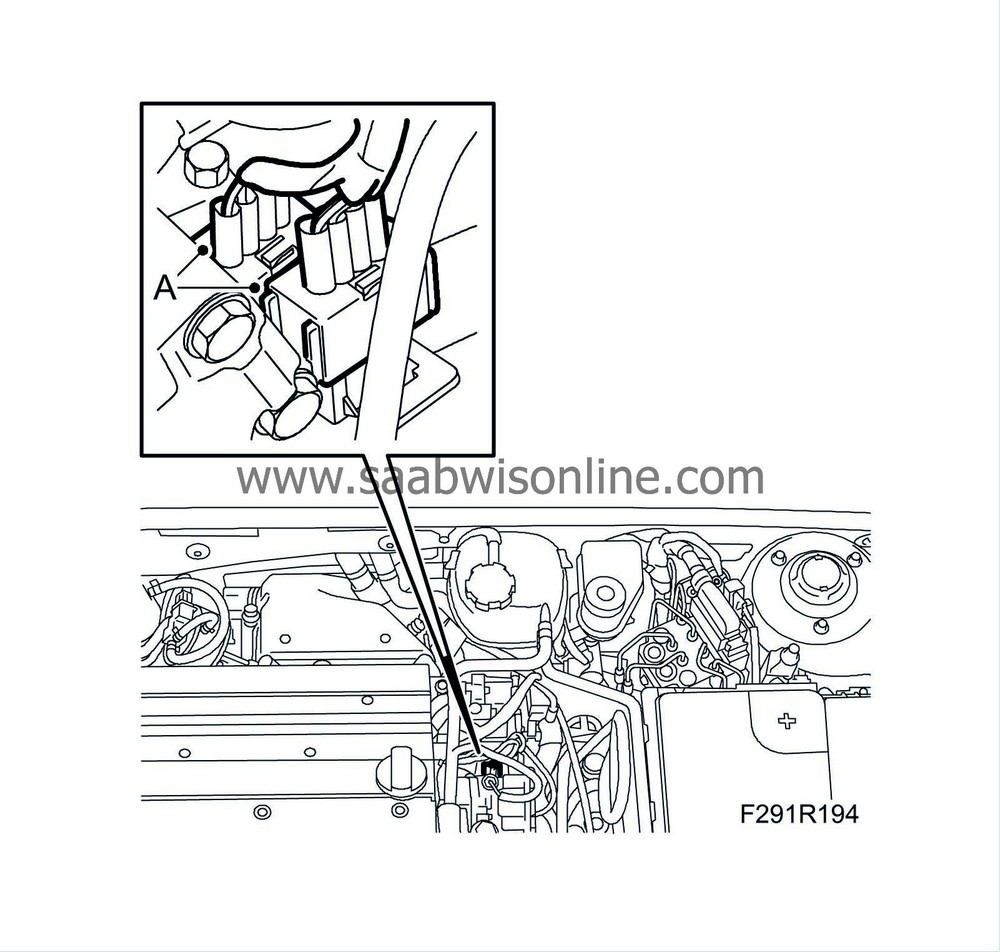
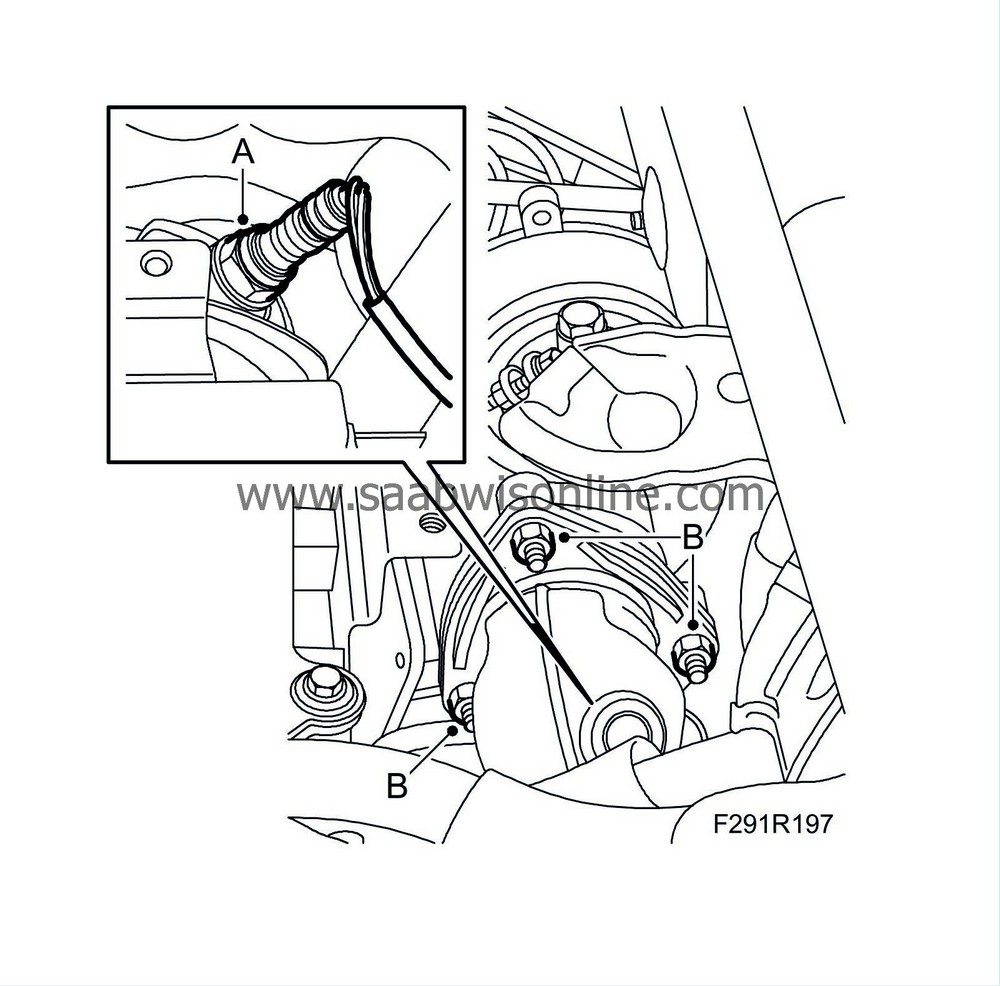
Unplug the connectors for the oxygen sensors (A) and carefully lower the cables.
|
|
| 3. |
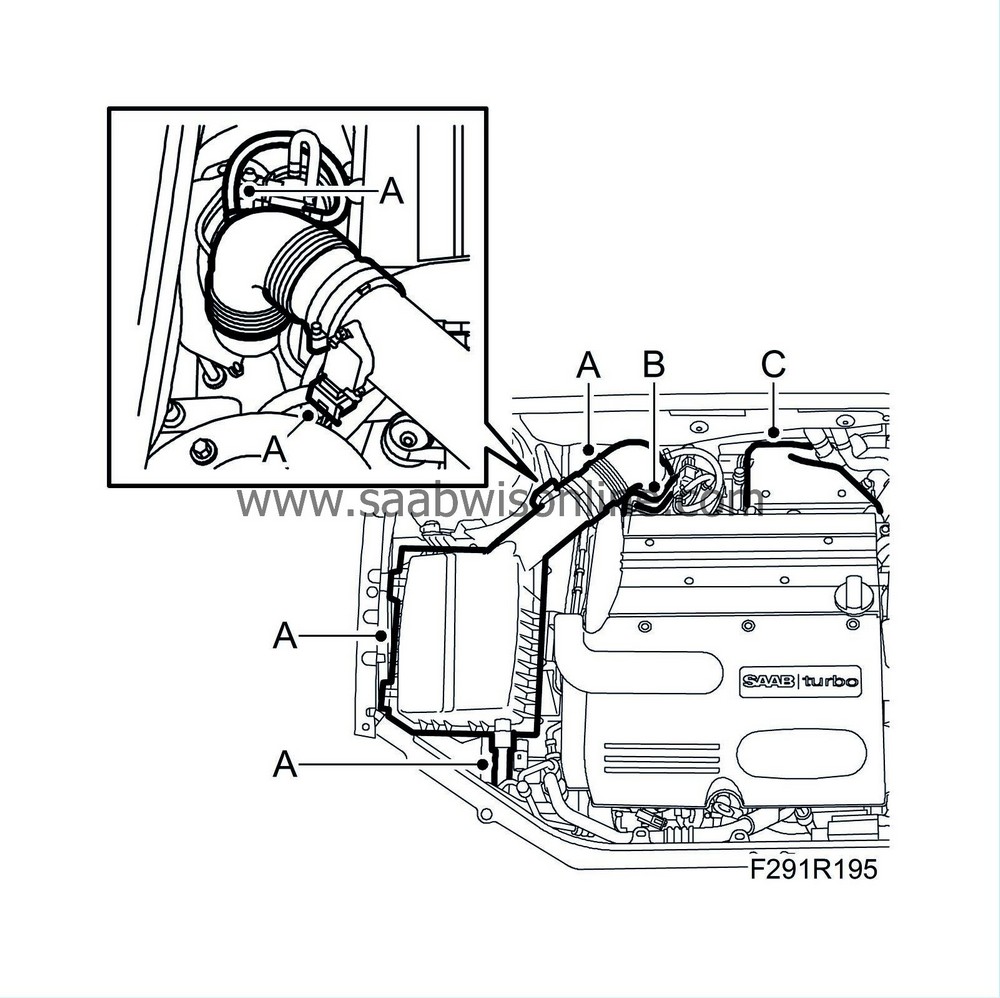
Remove the air cleaner casing and intake hose to the turbo. Separate the casing first. Remove the hose to the crankcase ventilation. (A)
|
|
| 4. |
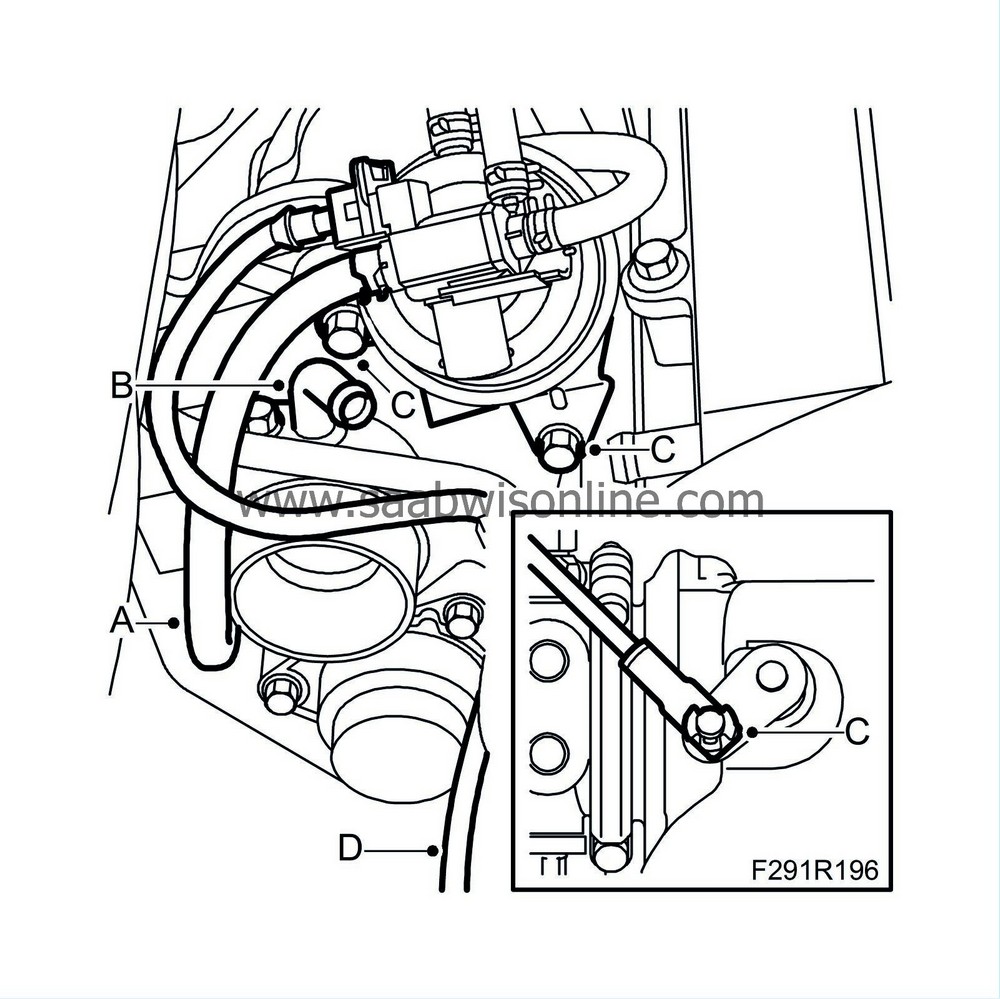
Remove the crankcase ventilation hose (B) from the camshaft cover and the turbo inlet.
|
|
| 5. |
Remove the heat shield (C) over the turbo.
|
|
| 6. |
Detach the solenoid valve hoses from the turbo (A).
|
|
| 7. |
Remove the pipe connection for the crankcase ventilation (B).
|
|
| 8. |
Remove the retaining clip from the turbo control arm using a pair of flat nose pliers and a screwdriver. Remove the vacuum box from the turbo. (C)
|
|
| 9. |
Remove the hose (D) from the turbo's bypass valve.
|
|
| 10. |
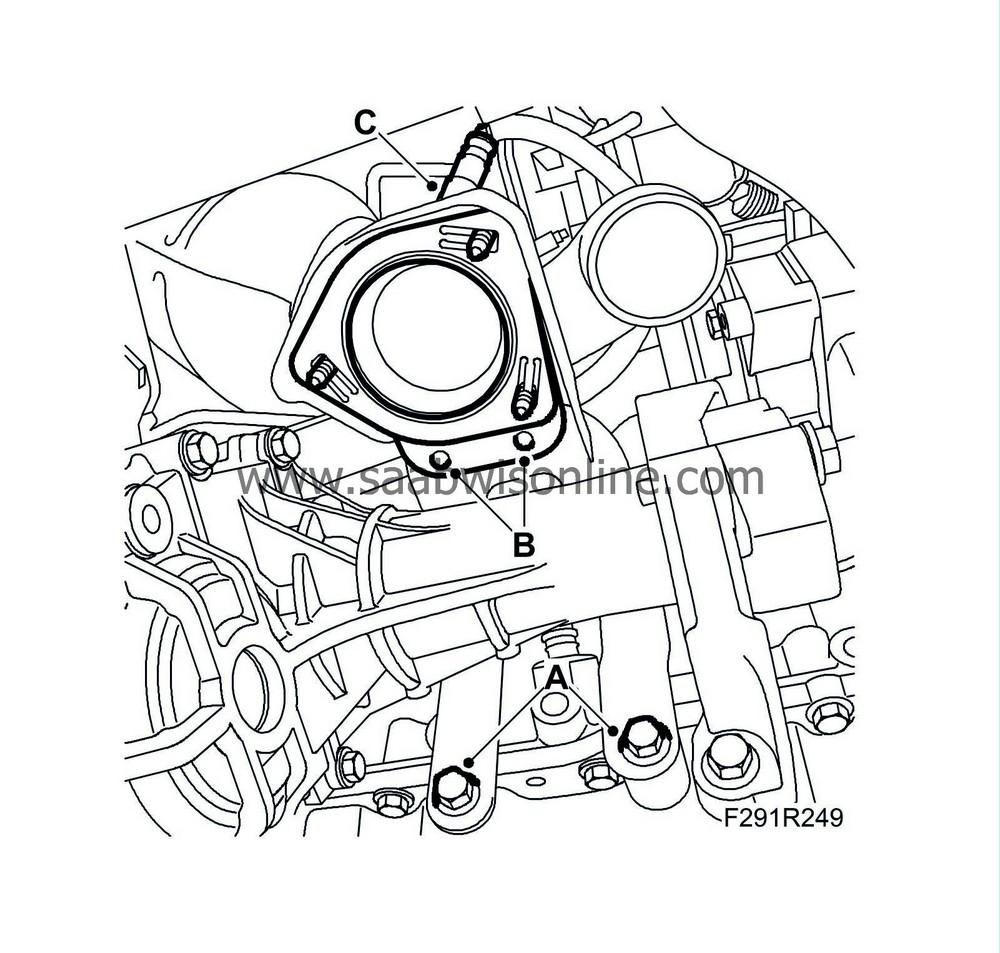
Remove the upper oxygen sensor (A). Move away the coolant reservoir for better access to the nuts.
|
|
| 11. |
Remove the nuts (B) for the catalytic converter connection to the turbocharger.
|
||||||||||
| 12. |
Raise the car.
|
|
| 13. |
Remove the
Spoiler shield, front.
|
|
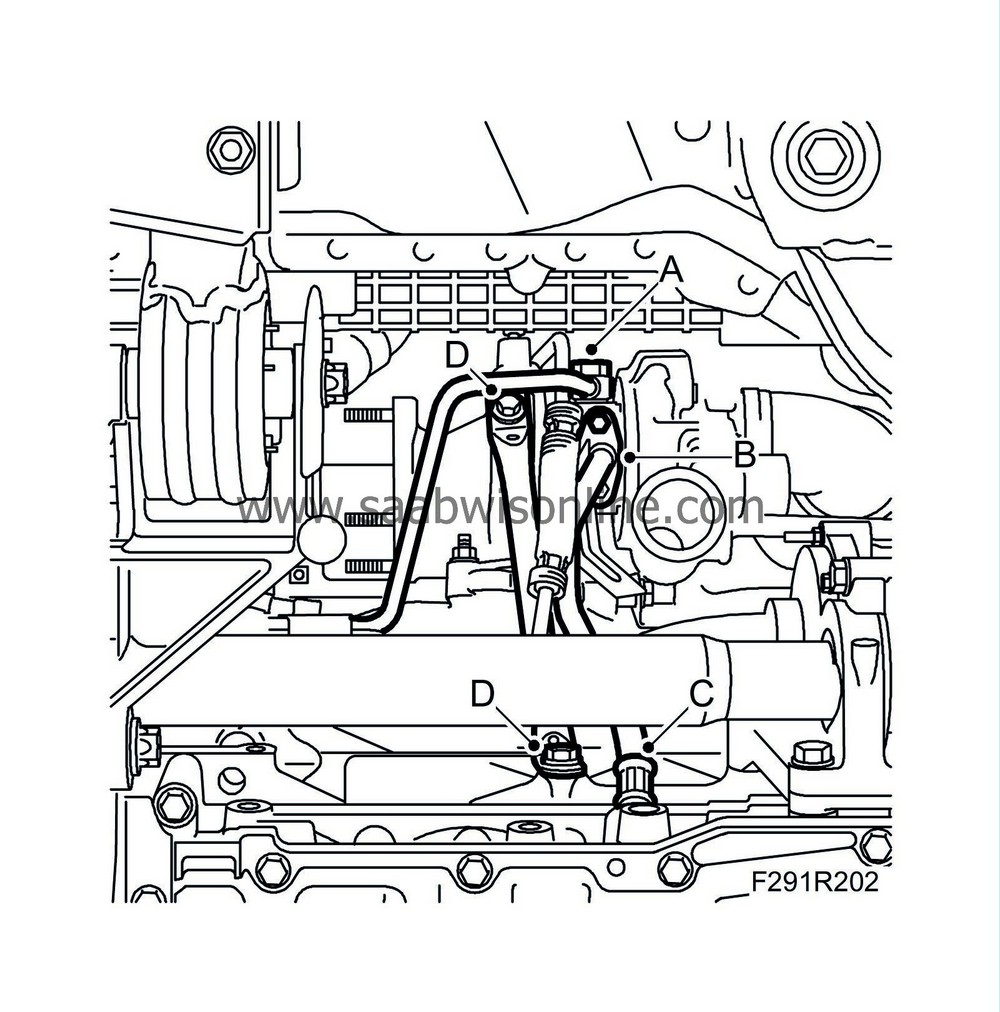
| 14. |
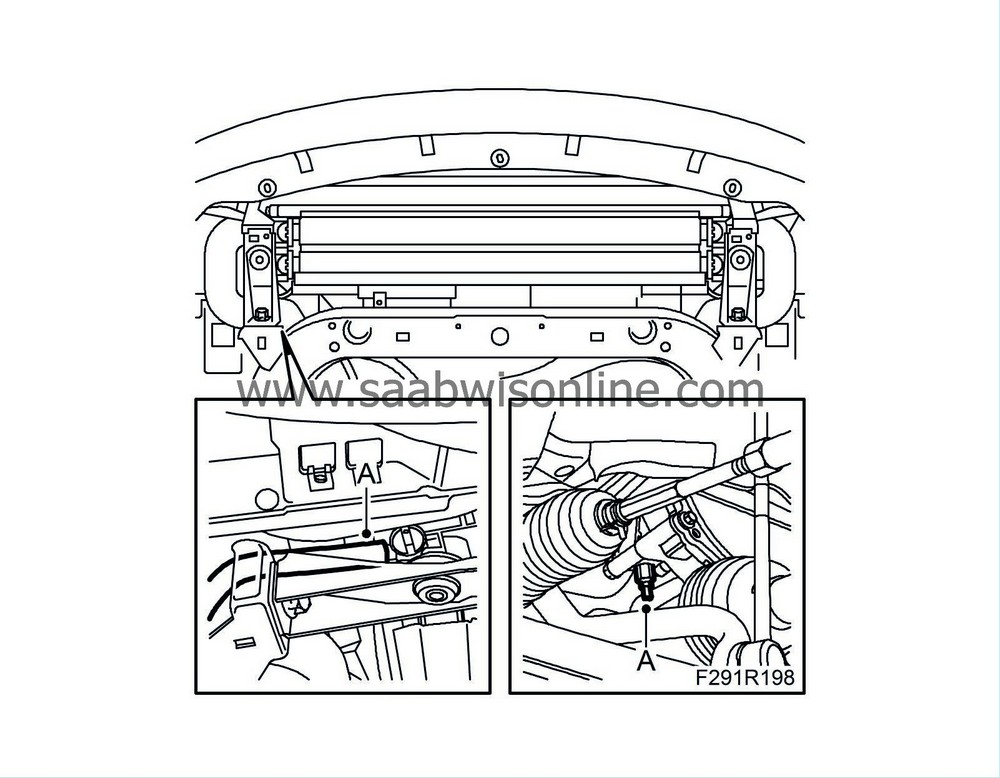
Place a receptacle under the car, connect a hose to the radiator and drain it. Move the receptacle and drain the coolant pump. (A)
|
|
| 15. |
Close the cock on the radiator and fit the drain plug. Seal the threads with 74 96 284 Thread locking adhesive.
|
|
| 16. |
Lower the car.
|
|
| 17. |
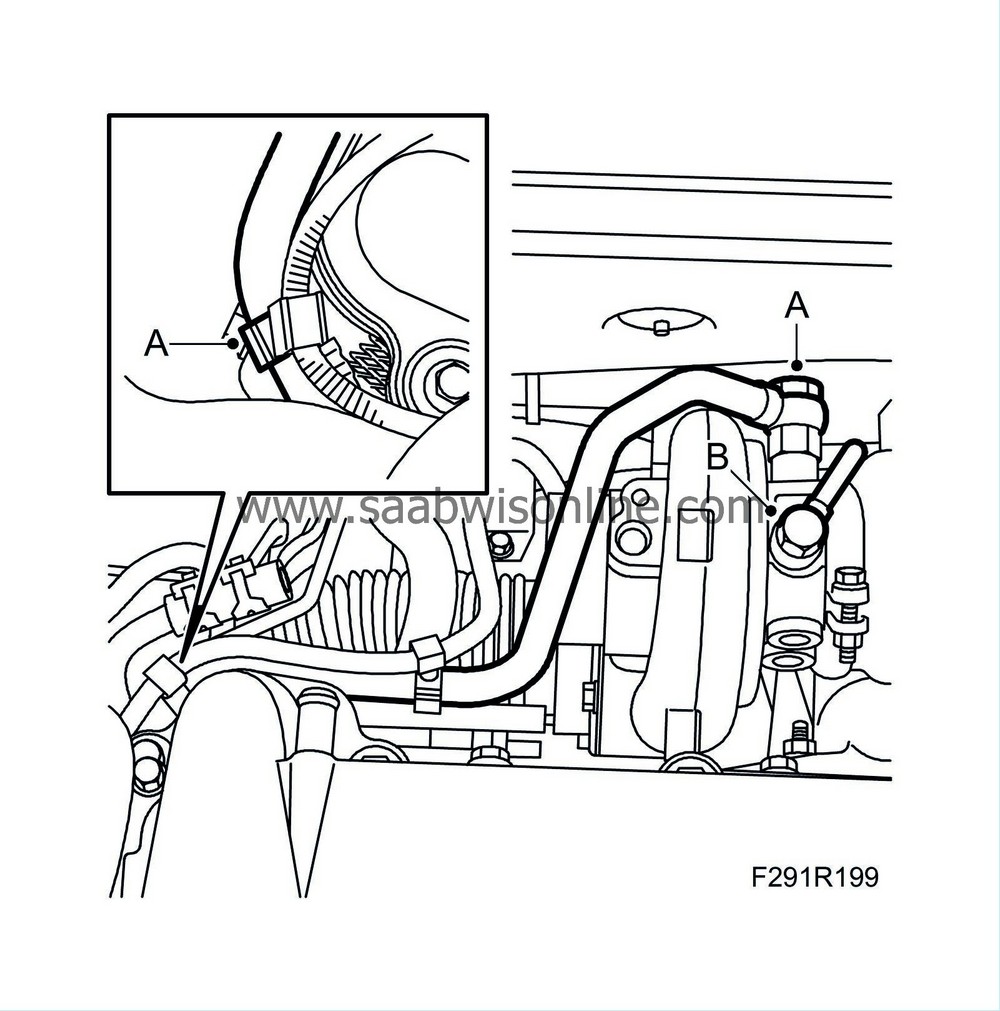
Remove the turbo coolant pipe from the turbo and undo the coolant pipes' mounting on the cylinder head (A).
|
|||||||
| 18. |
Remove the turbo oil pipe (B) from the turbo.
|
|
| 19. |
Raise the car.
|
|
| 20. |
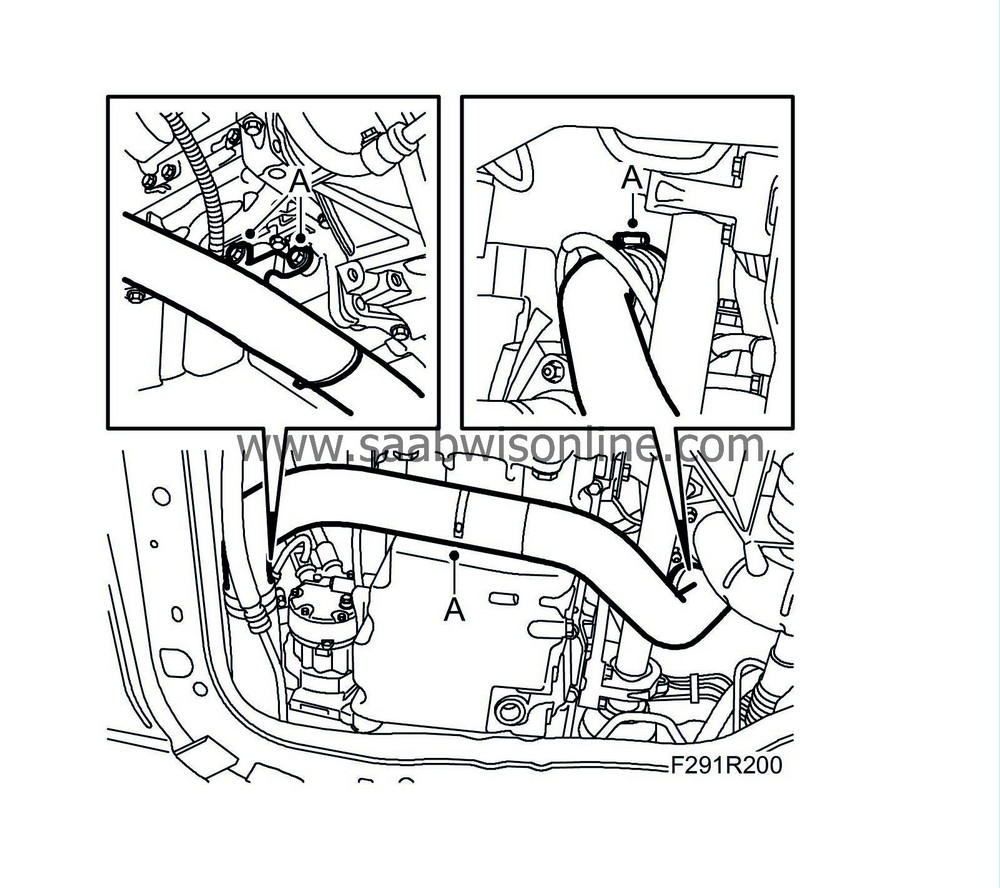
Remove the lower turbocharger pressure pipe (A).
|
|
| 21. |
Remove
Catalytic converter, rear, 4WD
.
|
|
| 22. |
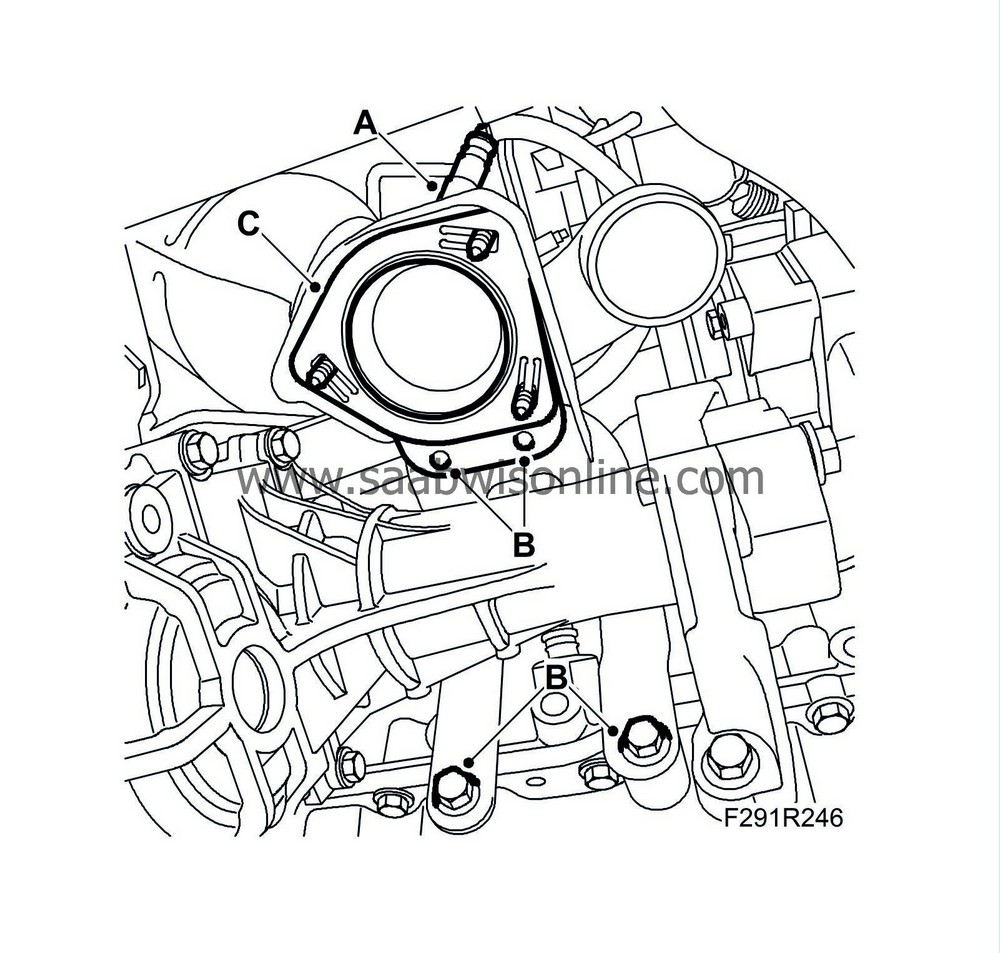
Remove the lower oxygen sensor (A).
|
|
| 23. |
Remove the catalytic converter mounting (B) from the engine block and the catalytic converter.
|
|
| 24. |
Remove the catalytic converter (C).
|
|
| 25. |
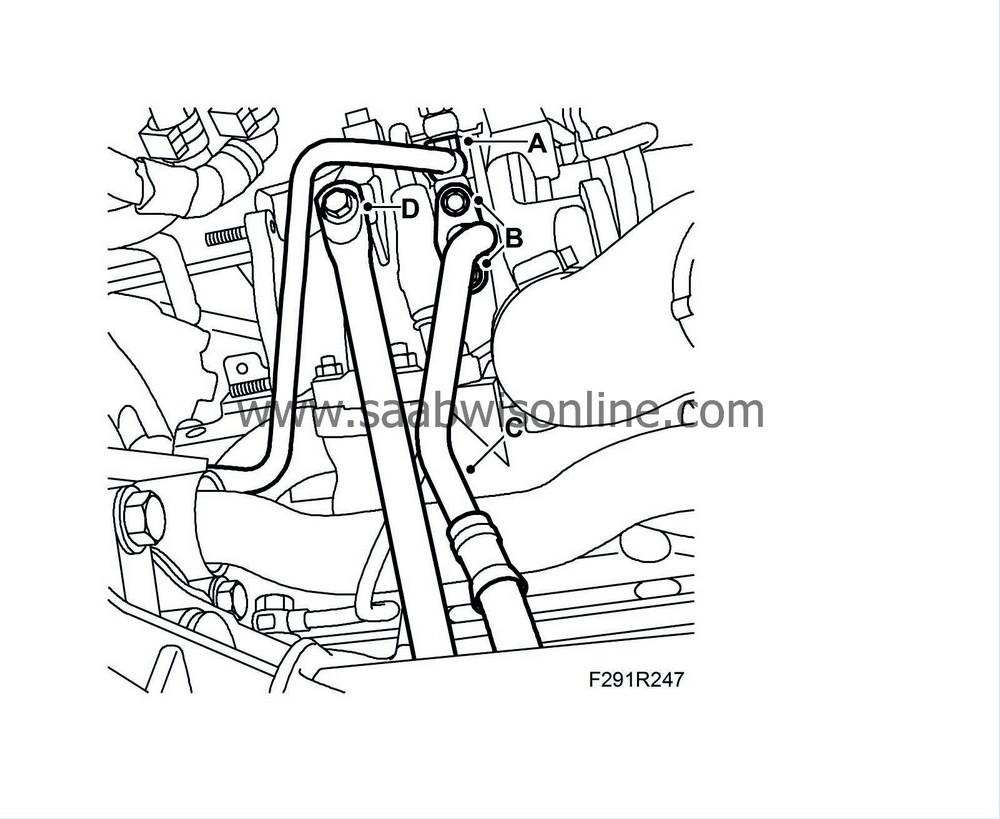
Remove the turbo coolant pipe (A) from the thermostat housing and turbo.
|
|
| 26. |
Remove the screws (B) to the turbo oil return pipe from the turbo.
|
||||||||||
| 27. |
Remove pipe and its O-ring (C) from the connection hole in the engine block.
|
|
| 28. |
Remove the stay (D) between the engine block and the turbo.
|
|
| 29. |
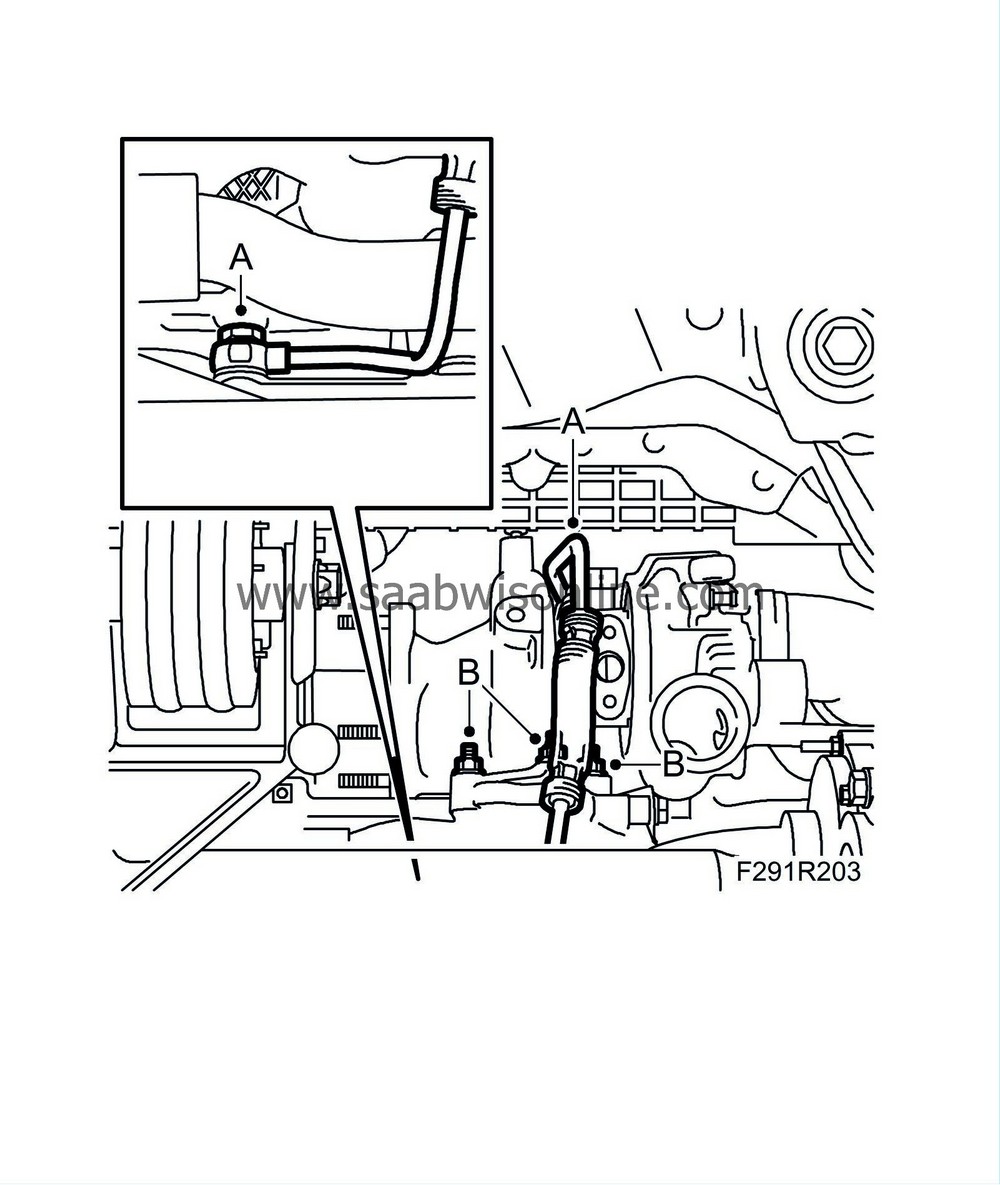
Detach the turbo oil delivery pipe (A) from the engine block and remove the pipe.
|
|
| 30. |
Remove and lift down the turbo (B).
|
|
| To fit |
| 1. |
Fit a new gasket.
|
|
| 2. |
Apply
90 513 210 Universal paste
to the studs for the turbo and exhaust manifold.
|
|
| 3. |
Lift up and fit the turbo (B).
Tightening torque 24 Nm (18 lbf ft). 
|
|
| 4. |
Fit new sealing washers, screw in the bolt for the turbo oil delivery pipe on the engine block (A) without tightening it.
|
|
| 6. |
Fit the coolant pipe between the turbo and the thermostat housing with new sealing washers (A).
Tightening torque 20 Nm (15 lbf ft) |
|
| 7. |
Fit the stay (D) between the turbo and engine block. Fit the bolts by hand, start by tightening the bolts in the turbo.
Tightening torque, bolt in turbo 32 Nm (24 lbf ft) Tightening torque, screw in block 48 Nm (35 lbf ft) |
|
| 8. |
Lower the car.
|
|
| 9. |
Fill with plenty of engine oil in the hole for the oil delivery connection on the turbo while turning the turbine wheel.
|
|
| 10. |
Fit the oil delivery pipe to the turbo and tighten the connection using new sealing washers. Grip the pipe so that it does not rotate (A).
Tightening torque 28 Nm (21 lbf ft) 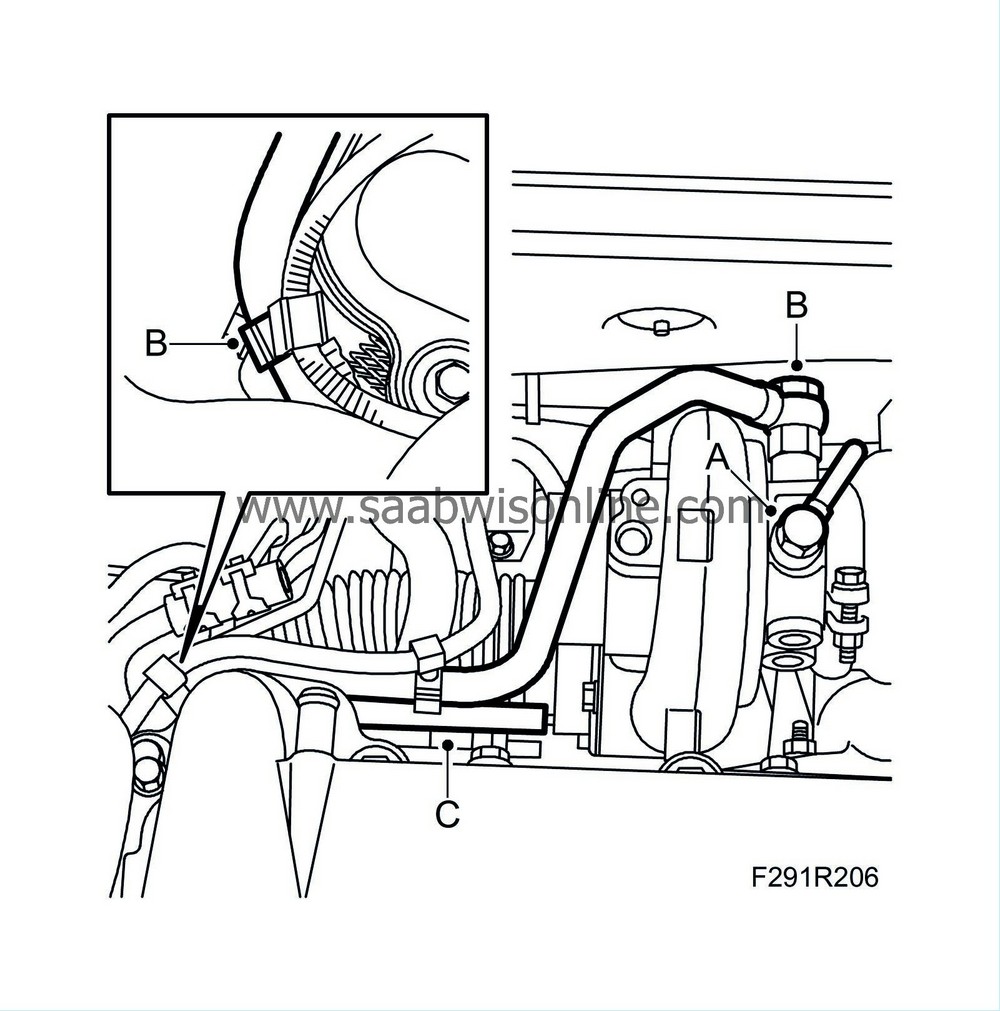
|
|
| 11. |
Position and fit the coolant pipe (B) to the turbo and tighten the pipe mounting on the cylinder head.
|
|
| 12. |
Connect the hose to the charge air bypass valve (C).
|
|
| 13. |
Raise the car.
|
|
| 14. |
Tighten the oil delivery pipe connection on the engine block.
Tightening torque 28 Nm (21 lbf ft) |
|
| 15. |
Align the catalytic converter (A) and fit the catalytic converter into the turbo's connection.
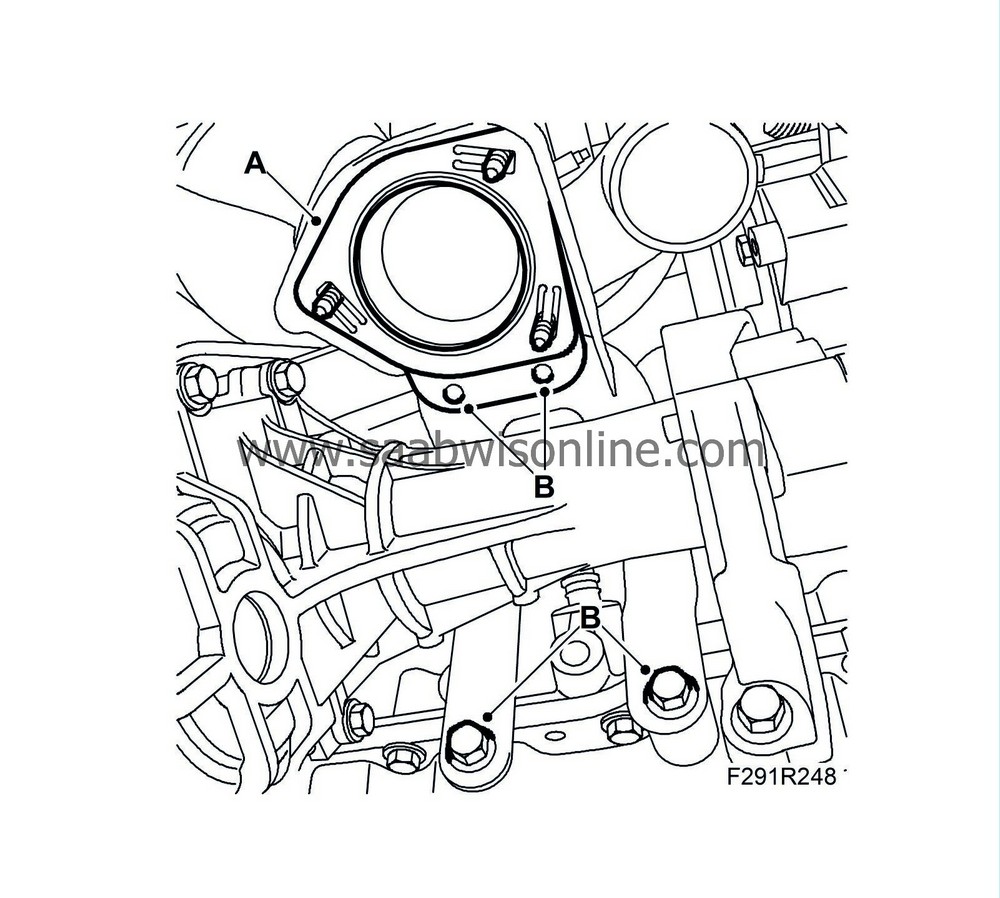
|
|
| 16. |
Insert the catalytic converter mounting's bolts for the engine block and catalytic converter (B).
|
|
| 17. |
Lower the car.
|
|
| 18. |
Lubricate the turbocharger studs with
90 513 210 Universal paste
.
|
|
| 19. |
Fit the catalytic converter with new nuts (A) so that it rests evenly against the turbo.
Tightening torque 25 Nm (18 lbf ft) 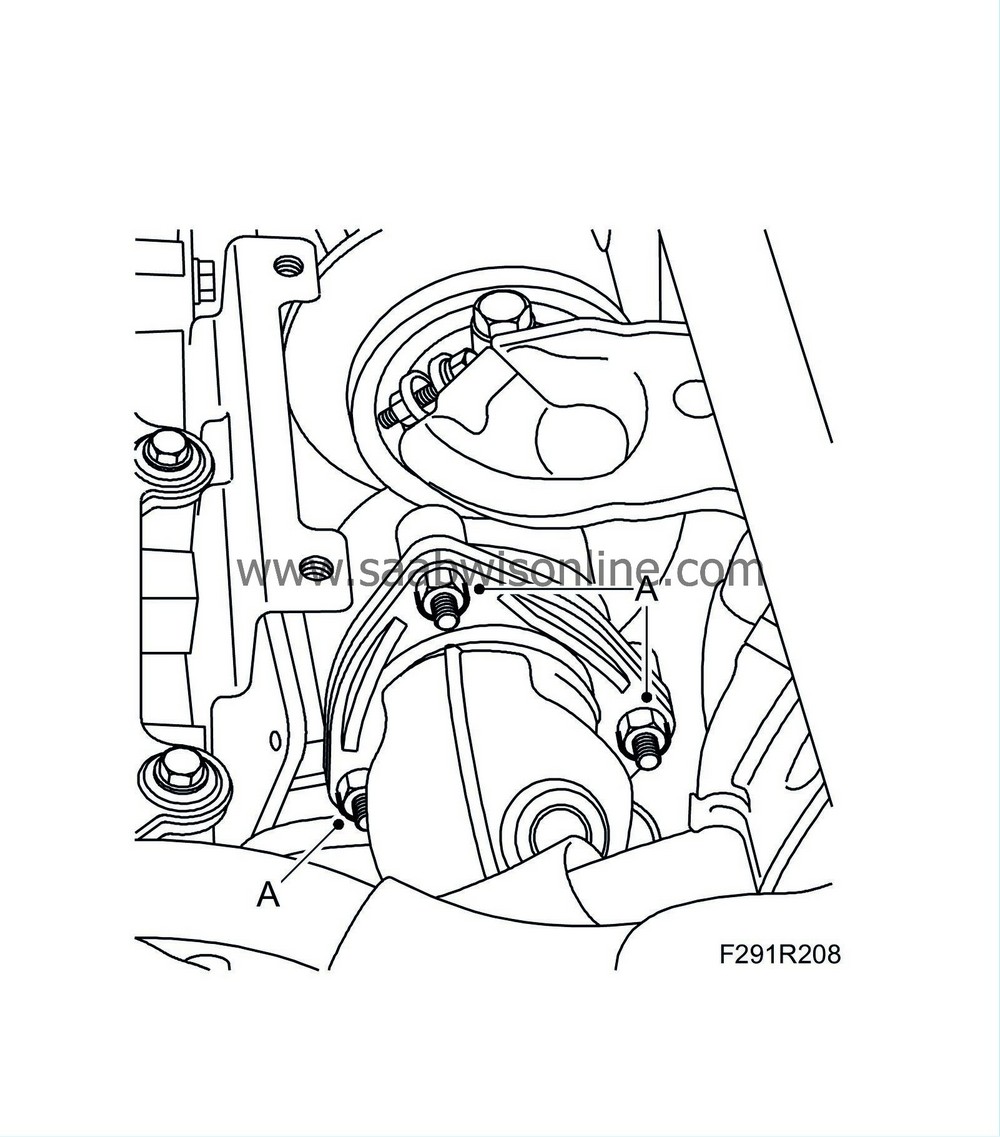
|
|
| 20. |
Raise the car.
|
|
| 22. |
Lubricate the threads sparingly with
90 513 210 Universal paste
and fit the lower oxygen sensor.
Tightening torque 40 Nm (30 lbf ft) (C)
|
||||||||||
| 23. |
Lift up the oxygen sensor cables.
|
|
| 24. |
Fit
Catalytic converter, rear, 4WD
.
|
|
| 25. |
Fit the turbocharger pressure pipe (A).
Tightening torque 25 Nm (18 lbf ft) 
|
|
| 26. |
Fit the
Spoiler shield, front
.
|
|
| 27. |
Lower the car.
|
|
| 28. |
Lubricate the threads sparingly with
90 513 210 Universal paste
and fit the upper oxygen sensor (A). Fit the coolant reservoir.
Tightening torque 40 Nm (30 lbf ft). 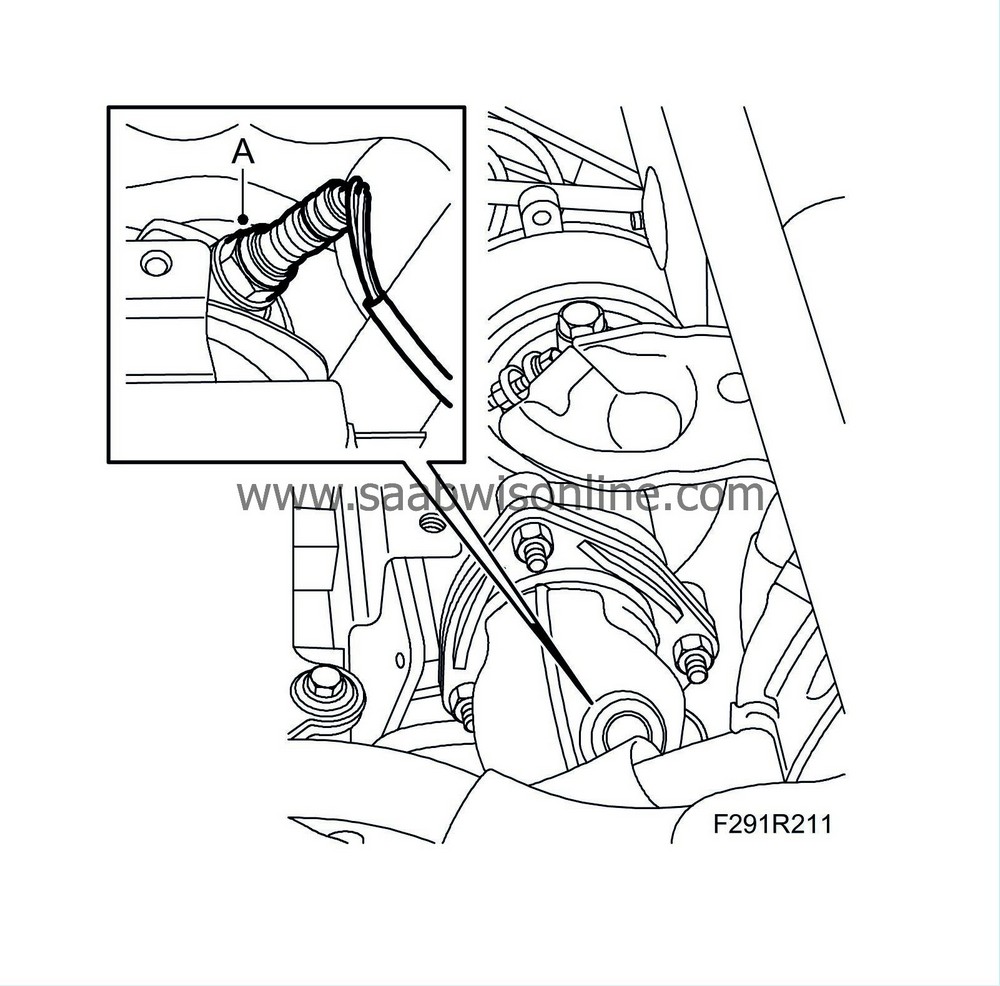
|
|
| 29. |
Plug in and secure the oxygen sensor connectors (A).

|
|
| 30. |
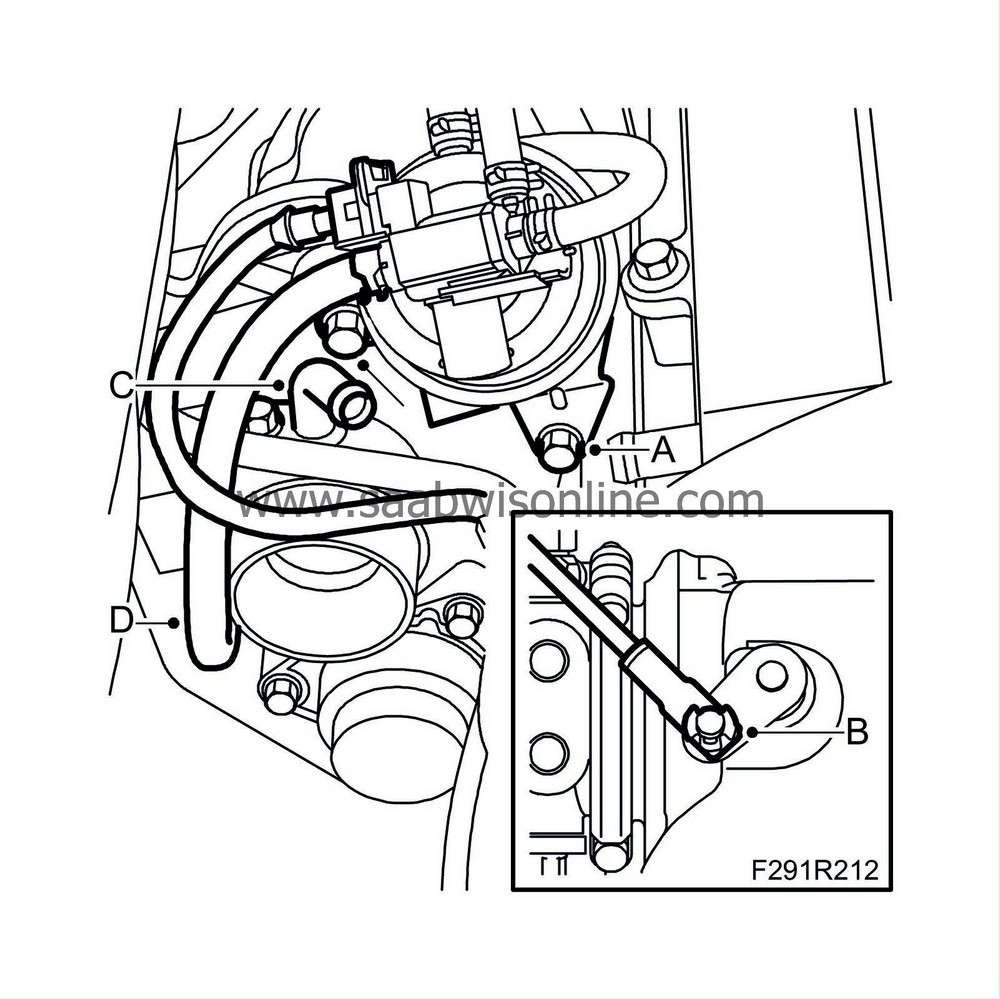
Fit the vacuum box (A) to the turbo.
|
|
| 31. |
Align the control rod (B) onto the control arm and fit the retaining clip.
|
|
| 32. |
Fit the pipe for the crankcase ventilation (C).
|
|
| 33. |
Fit the solenoid valve hoses (D) to the turbo.
|
|
| 34. |
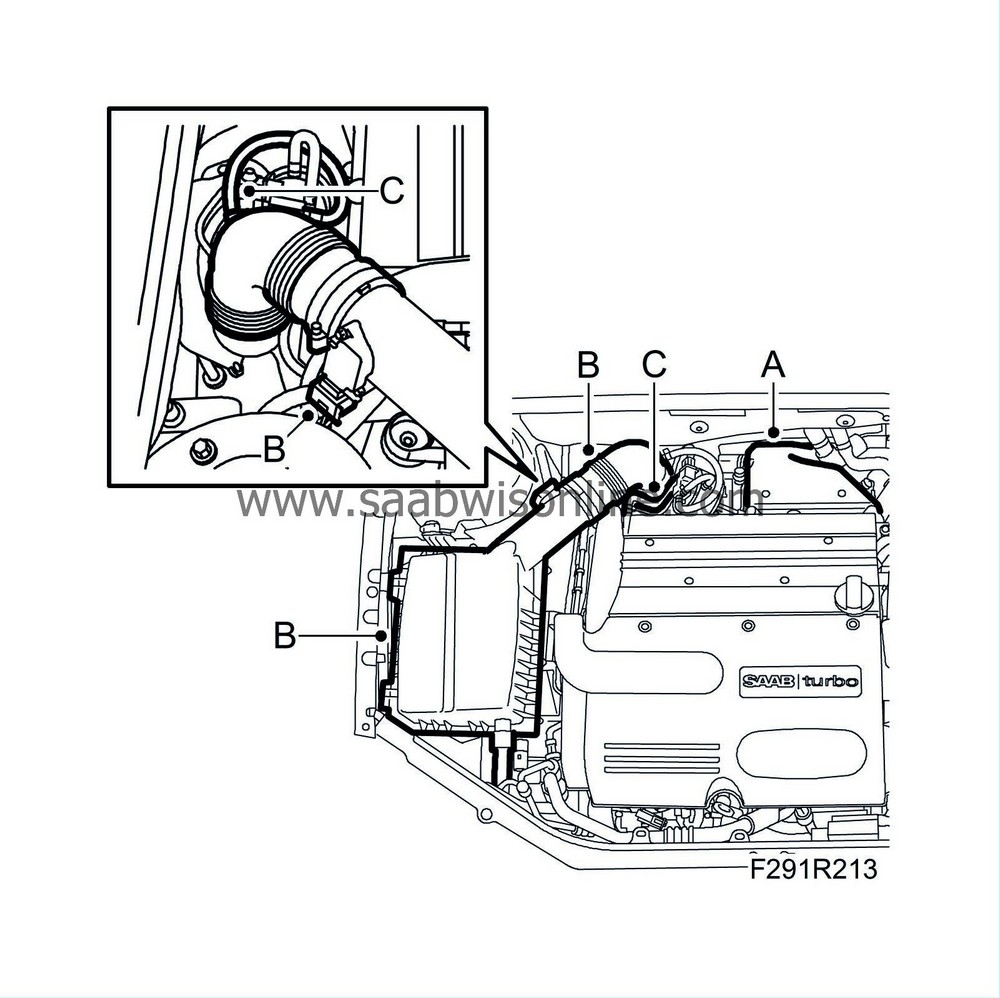
Fit the turbocharger heat shield (A).
|
||||||||||
| 35. |
Fit the air cleaner casing and connect the intake hose to the turbo. Fit the filter and the air cleaner casing cover (B).
|
|
| 36. |
Fit the crankcase ventilation hose to the camshaft cover and turbo as well as the hose from the solenoid valve (C).
|
|
| 37. |
Fill with coolant to approx. 20 mm above the mark on the expansion tank.
|
|
| 38. |
Check for coolant leaks.
|
|
| 39. |
Check the oil and coolant level and top up as necessary.
|
|

 Warning
