Delivery line for power steering, B207, 4WD, RHD
| Delivery line for power steering, B207, 4WD, RHD |
| Important | ||
|
Scrupulous cleanliness must always be observed during all work with hydraulic components. |
||
| Important | ||
|
Always use wing covers when working in the engine bay. |
||
| To remove |
| 1. |
Lift off the battery cover and disconnect the negative battery cable.
|
|
| 2. |
Clamp the return hose using 30 07 739 Hose pinch-off pliers.
|
|
| 3. |
Detach the power steering pipe (A) from the power steering pump.

|
|
| 4. |
Undo the delivery hose's clip (B).
|
|
| 5. |
Raise the car.
|
|
| 6. |
Remove the
Bumper shell, front
.
|
|
| 7. |
Suspend the radiator assembly from the radiator member with two
83 95 212 Straps
.

|
|
| 8. |
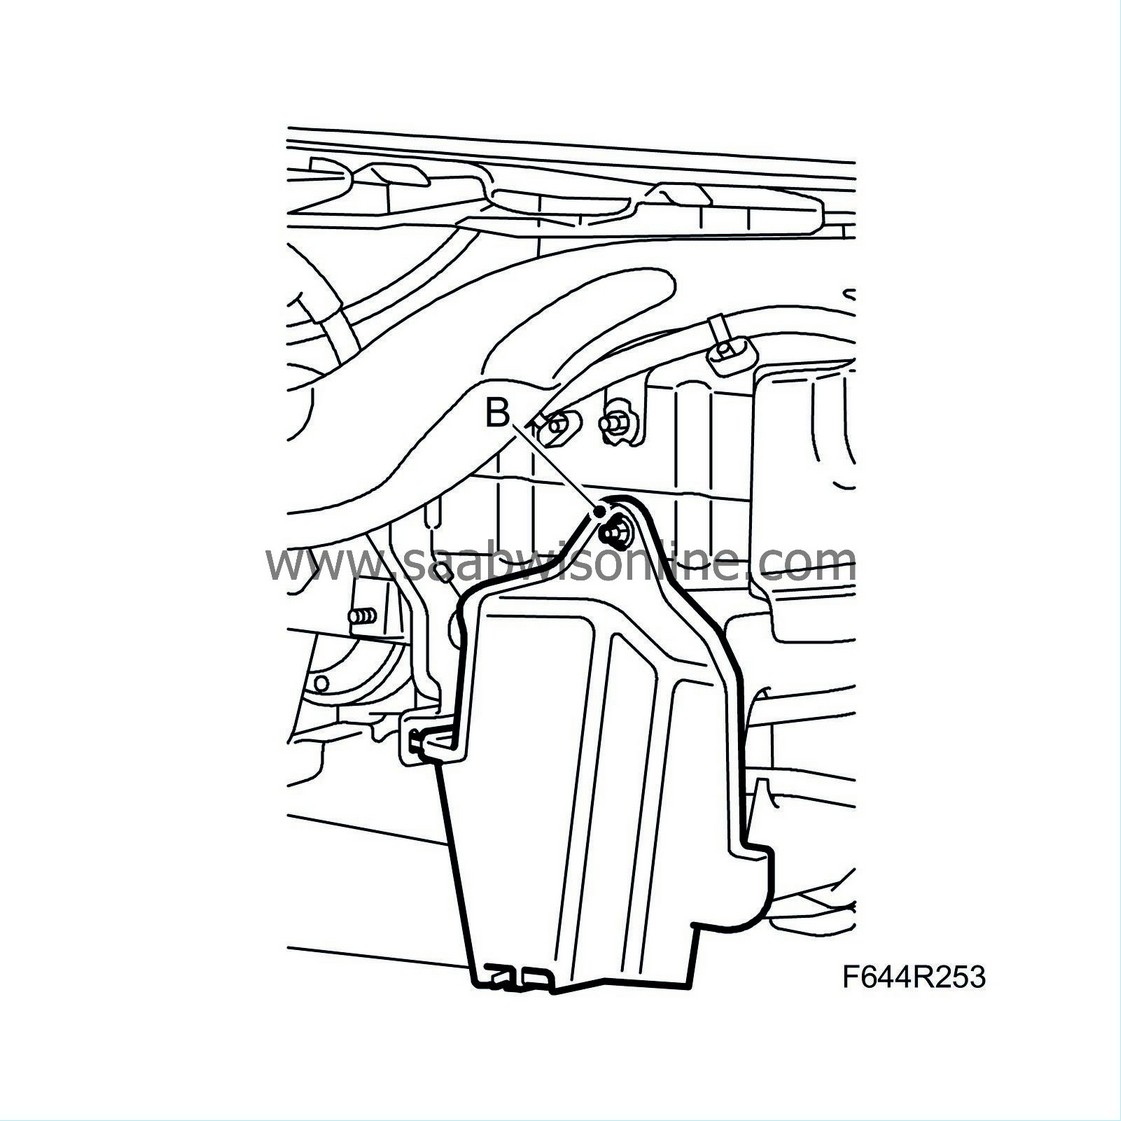
Remove the right-hand air shield (B).

|
|
| 9. |
Remove the
Propeller shaft
.
|
|
| 10. |
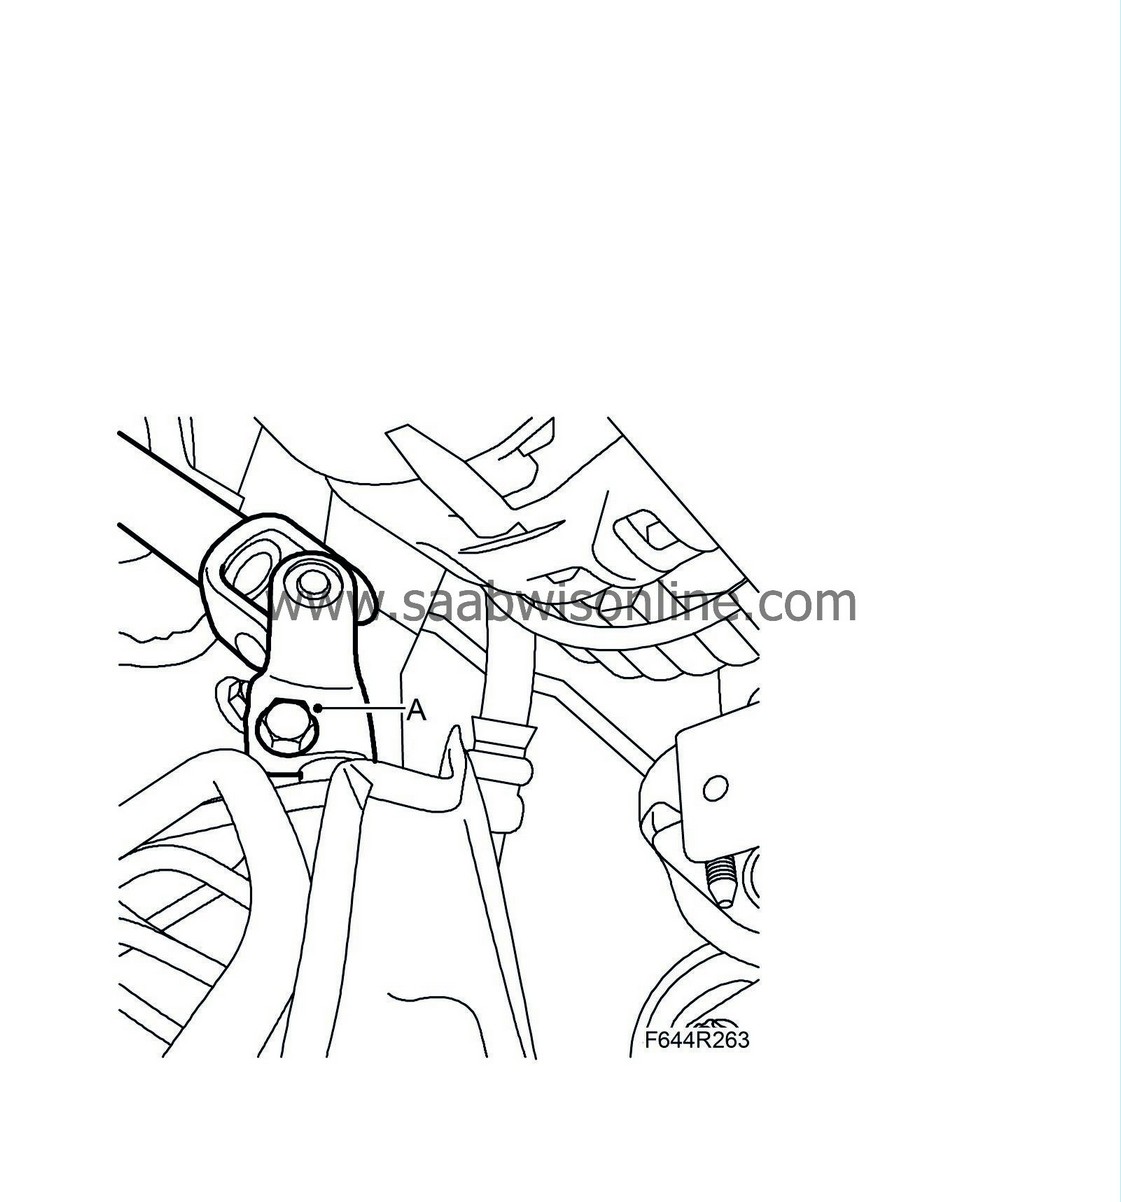
Remove the bolt (A) holding the front torque rod to the subframe.

|
|
| 11. |
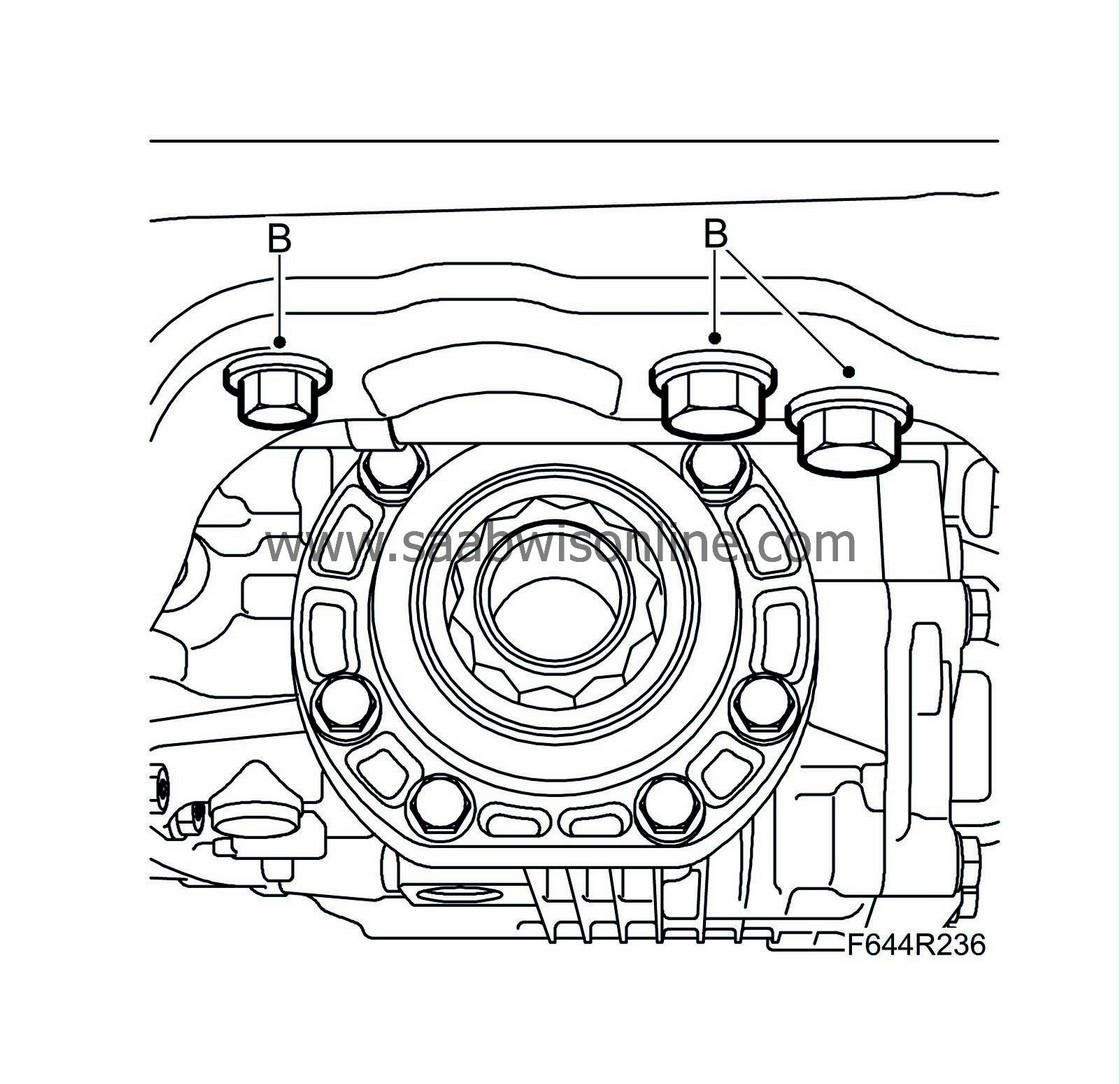
Remove the bolts (B) holding the rear torque rod bracket to the subframe.

|
|
| 12. |
Remove the steering shaft joint (A) from the steering gear.

|
|
| 13. |
Cars with Xenon lights: Remove the clip (A) for the level sensor's wiring harness.

|
|
| 14. |
Position
83 95 311 Trolley lift
with
83 94 801 Parent fixture
and
83 96 137 Centring tool, subframe - body
.

|
|
| 15. |
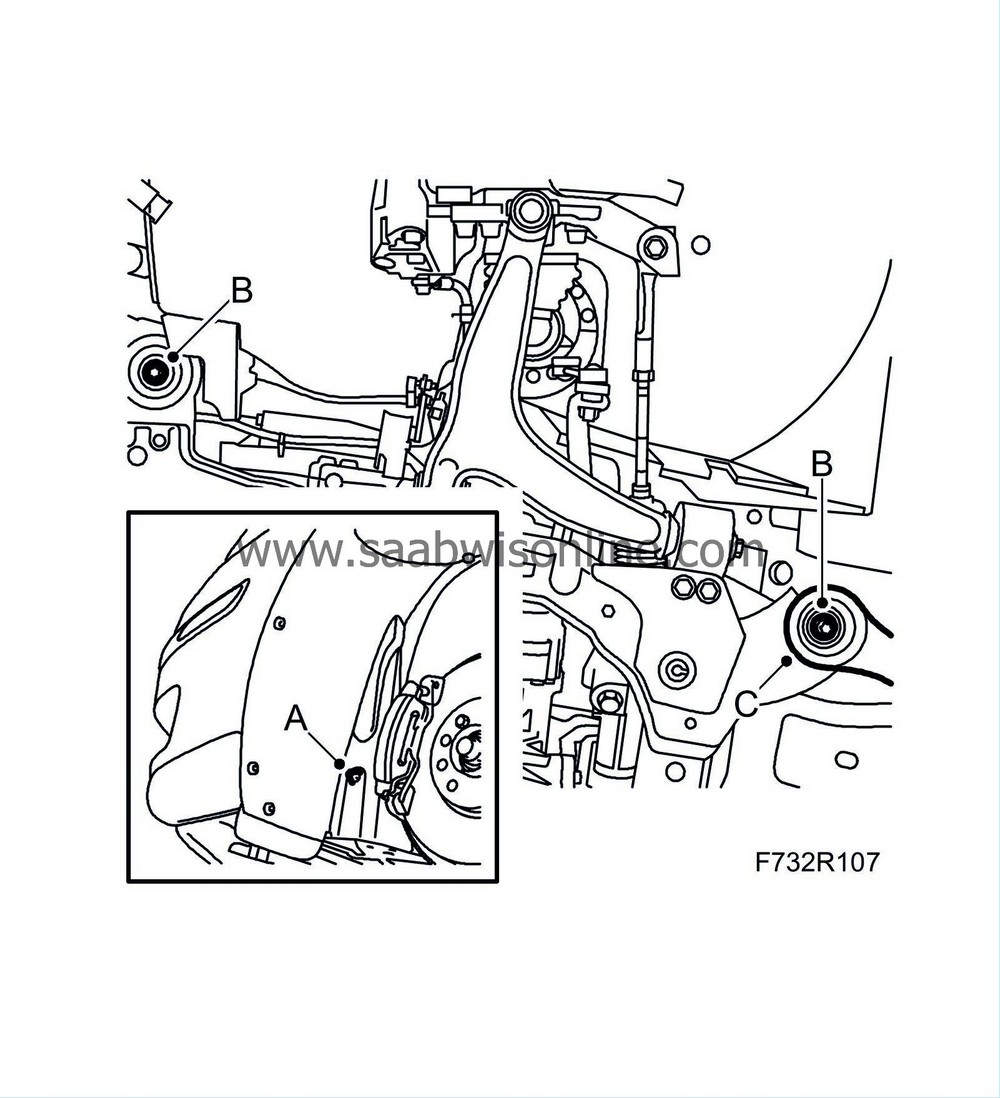
Remove the front parts (A) of the wheel arch liners and move them aside slightly.

|
|
| 16. |
Remove the subframe bolts (B) on both sides. Remove the rods (C) from the body.
|
|
| 17. |
Lower the subframe approx. 100 mm (4 in).
|
|
| 18. |
Position a receptacle under the car. Remove the heat shield (A) and delivery line (B) from the steering gear and plug the connection.

|
|
| 19. |
Remove the delivery line from the clips (A) on the subframe.

|
|
| 20. |
Remove the clamps (A).

|
|
| 21. |
Remove the delivery line (B).
|
|
| To fit |
| 1. |
Fit the power steering pipe (B) and cooling circuit clamps (A).

|
|
| 3. |
Fit the delivery line (A) to the steering gear. Use a new O-ring.
Tightening torque 32 Nm (24 lbf ft) 
|
|
| 4. |
Fit the heat shield (B).
|
|
| 5. |
Wipe clean the subframe from any oil spill.
|
|
| 6. |
Raise the subframe and fit
83 96 137 Centring tool, subframe - body
against the guide holes in the body. Fit the rods (C) and tighten the bolts (B).
Tightening torque, subframe: 75 Nm +135° (55 lbf ft + 135°) Tightening torque, rod: 90 Nm +45° (67 lbf ft + 45°) 
|
|
| 7. |
Lower and pull away the trolley lift. Fit the front parts (A) of the wheel arch liners.
|
|
| 8. |
Cars with Xenon lights: Fit the clip (A) for the level sensor's wiring harness.

|
|
| 9. |
Fit the steering shaft joint (A) to the steering gear. Clean the threads and apply
Threadlock, Loctite 242
to the threads.
Tightening torque 30 Nm (22 lbf ft) 
|
|
| 10. |
Remove the straps.
|
|
| 11. |
Fit the front torque rod bolt (A).
Tightening torque: 60 Nm + 90° (50 lbf ft + 90°) 
|
|
| 12. |
Fit the bolts (B) to the rear torque rod bracket.
Tightening torque M10: 65 Nm (48 lbf ft) Tightening torque M12: 120 Nm (88 lbf ft) 
|
|
| 13. |
Fit the
Propeller shaft
.
|
|
| 14. |
Fit the right-hand air shield (B).

|
|
| 15. |
Fit the
Bumper shell, front
.
|
|
| 16. |
Lower the car to the floor.
|
|
| 17. |
Fit the power steering pipe (A) to the power steering pump using a new washer and the hose's clip (B).
Tightening torque 32 Nm (24 lbf ft) 
|
|
| 18. |
Remove the hose pinch-off pliers.
|
|
| 19. |
Connect the negative battery cable and fit the battery cover.
|
|
| 20. |
Top up with power steering fluid and bleed the power steering system, see
Bleeding the power steering system
. Check the sealing integrity.
|
|
| 21. |
Carry out
Procedures after disconnecting the battery
.
|
|


