Delivery line for power steering, B207 RHD
| Delivery line for power steering, B207 RHD |
| Important | ||
|
Scrupulous cleanliness must always be observed during all work with hydraulic components. |
||
| Important | ||
|
Always use wing covers when working in the engine bay. |
||
| To remove |
| 1. |
Lock the steering wheel in the straight ahead position. Secure the steering wheel to the dashboard with woven tape or lock it with the steering wheel lock.
|
|
| 2. |
Lift off the battery cover and disconnect the negative battery cable.
|
|
| 3. |
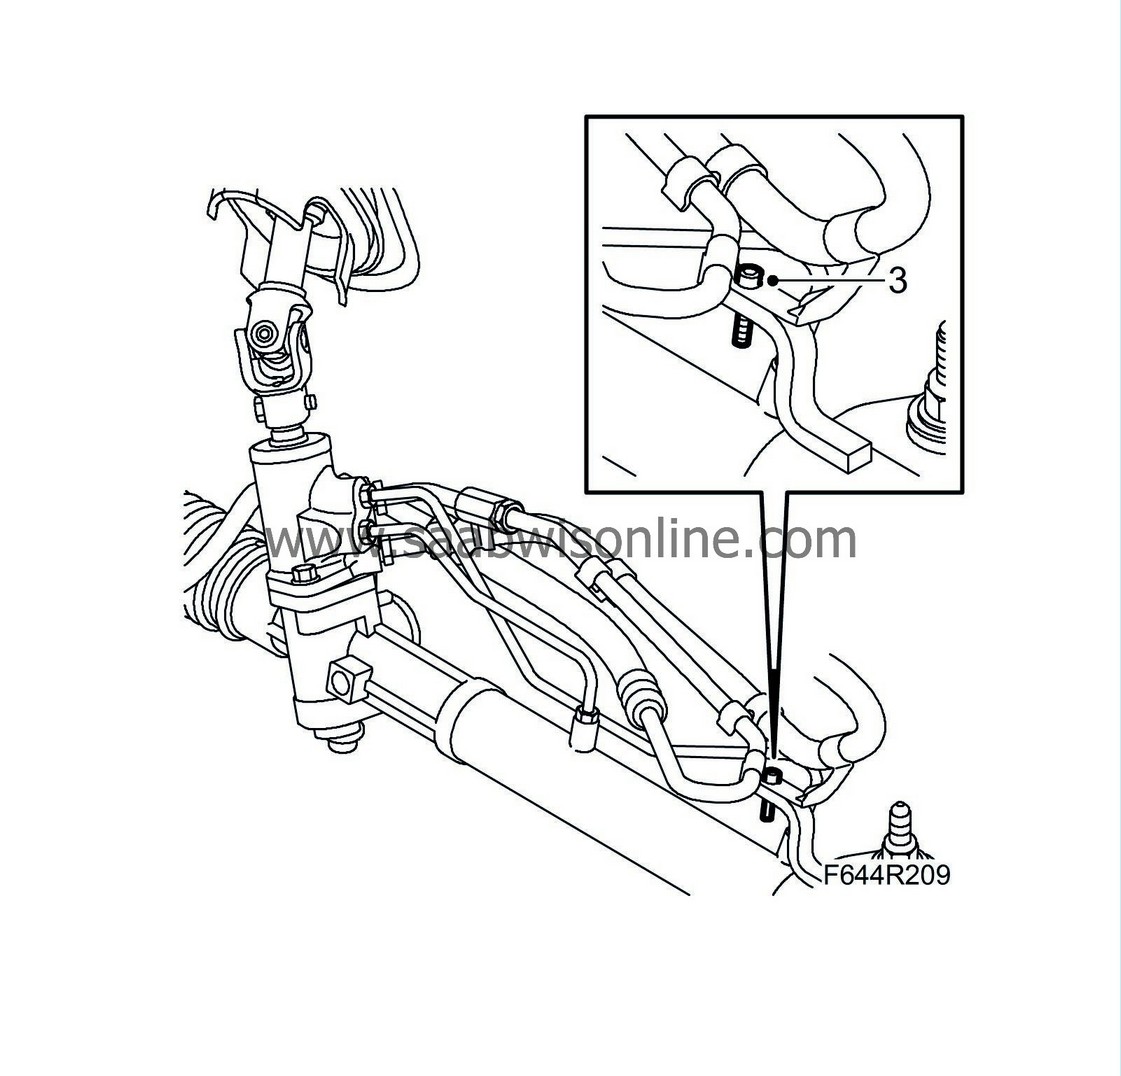
Remove the pipes from the bracket on top of the steering gear. Leave the screw and clamp in place.
|
|
| 4. |
Clamp the return hose using
30 07 739 Hose pinch-off pliers
.
|
|
| 5. |
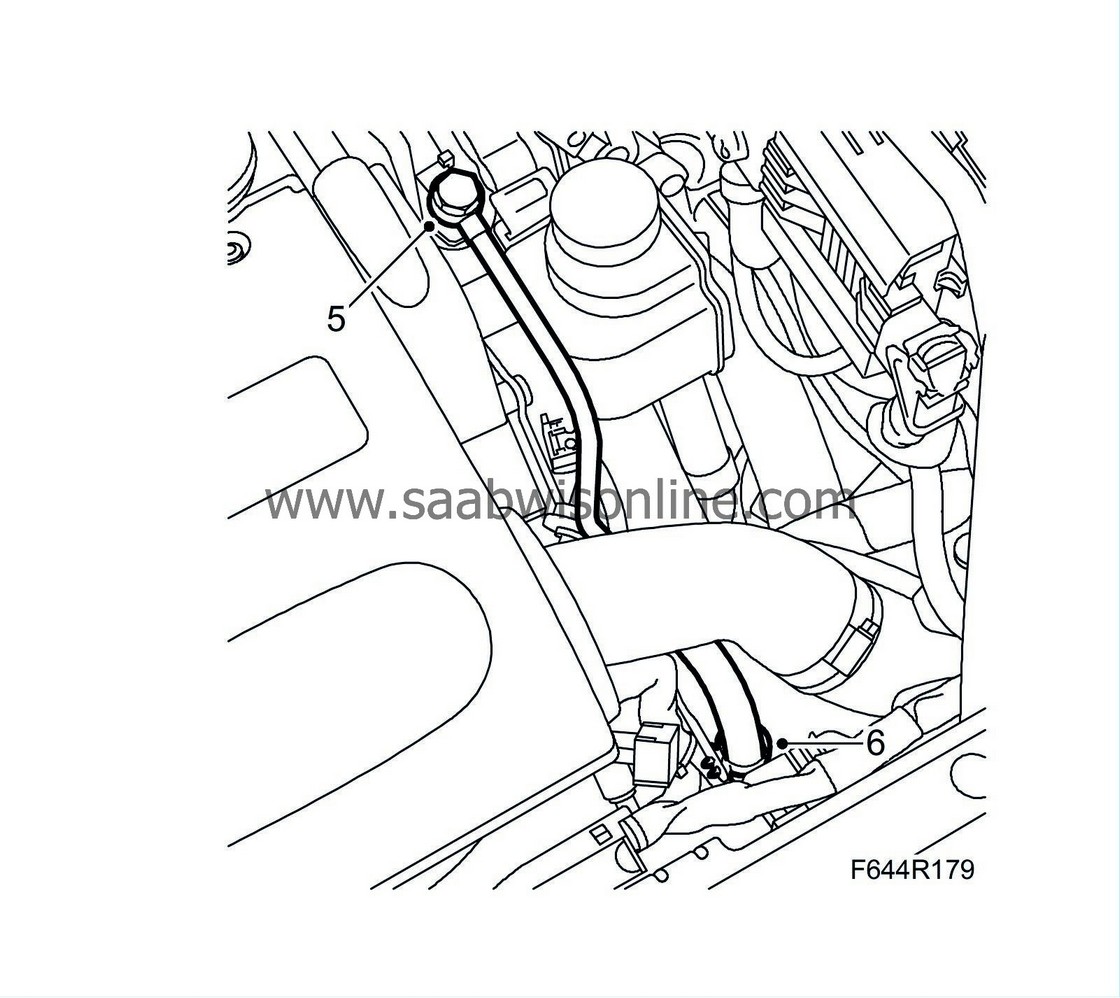
Detach the power steering pipe from the power steering pump.
|
|
| 6. |
Undo the plastic clips on the delivery line.
|
|
| 7. |
Raise the car.
|
|
| 8. |
Remove the front right wheel.
|
|
| 9. |
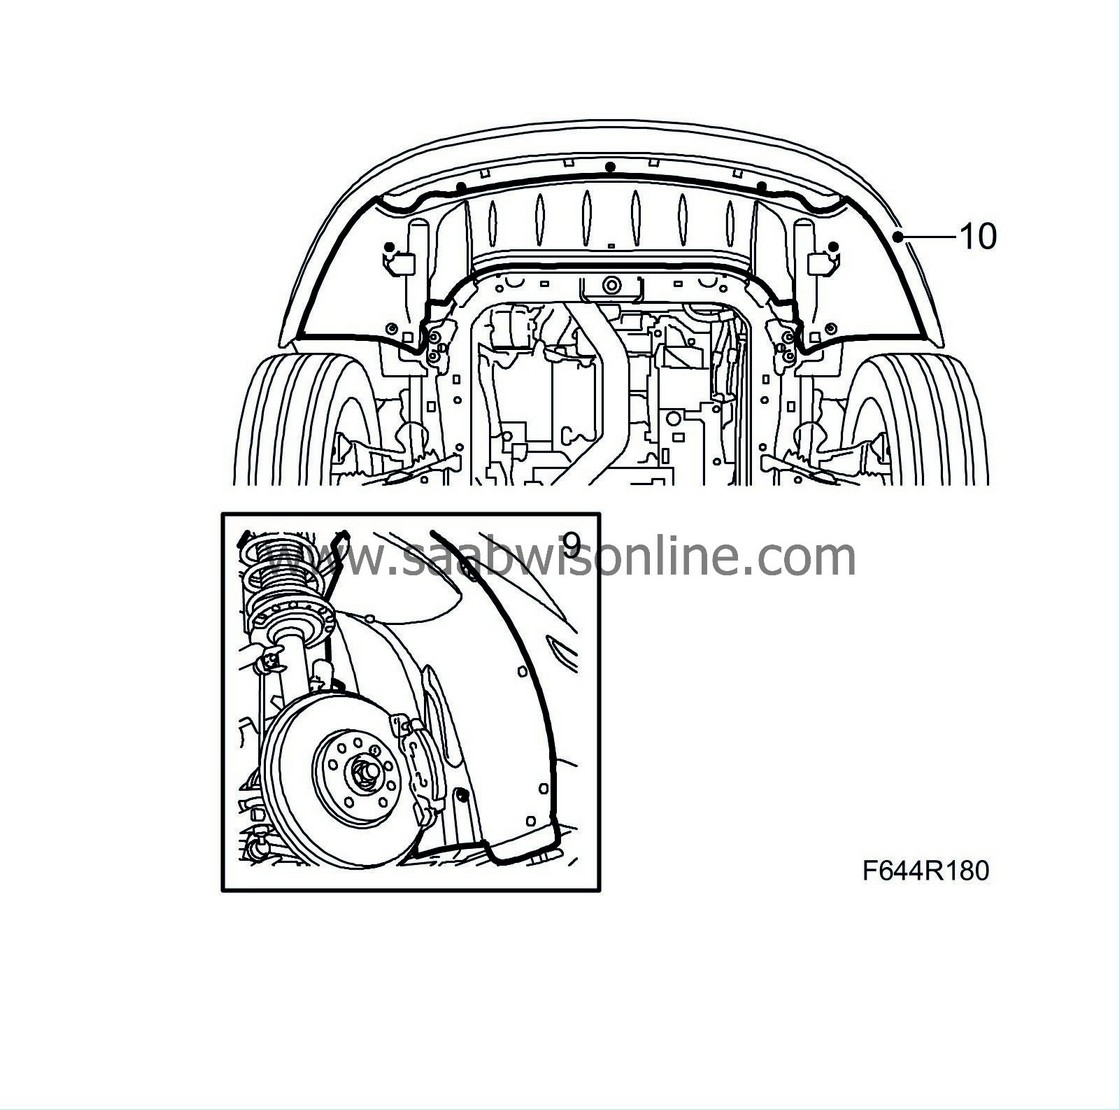
Remove the right-hand wheel arch liner.
|
|
| 10. |
Remove the front lower cover.
|
|
| 11. |
Remove the front bumper shell.
CV: Remove Chassis reinforcement, front subframe . |
|
| 12. |
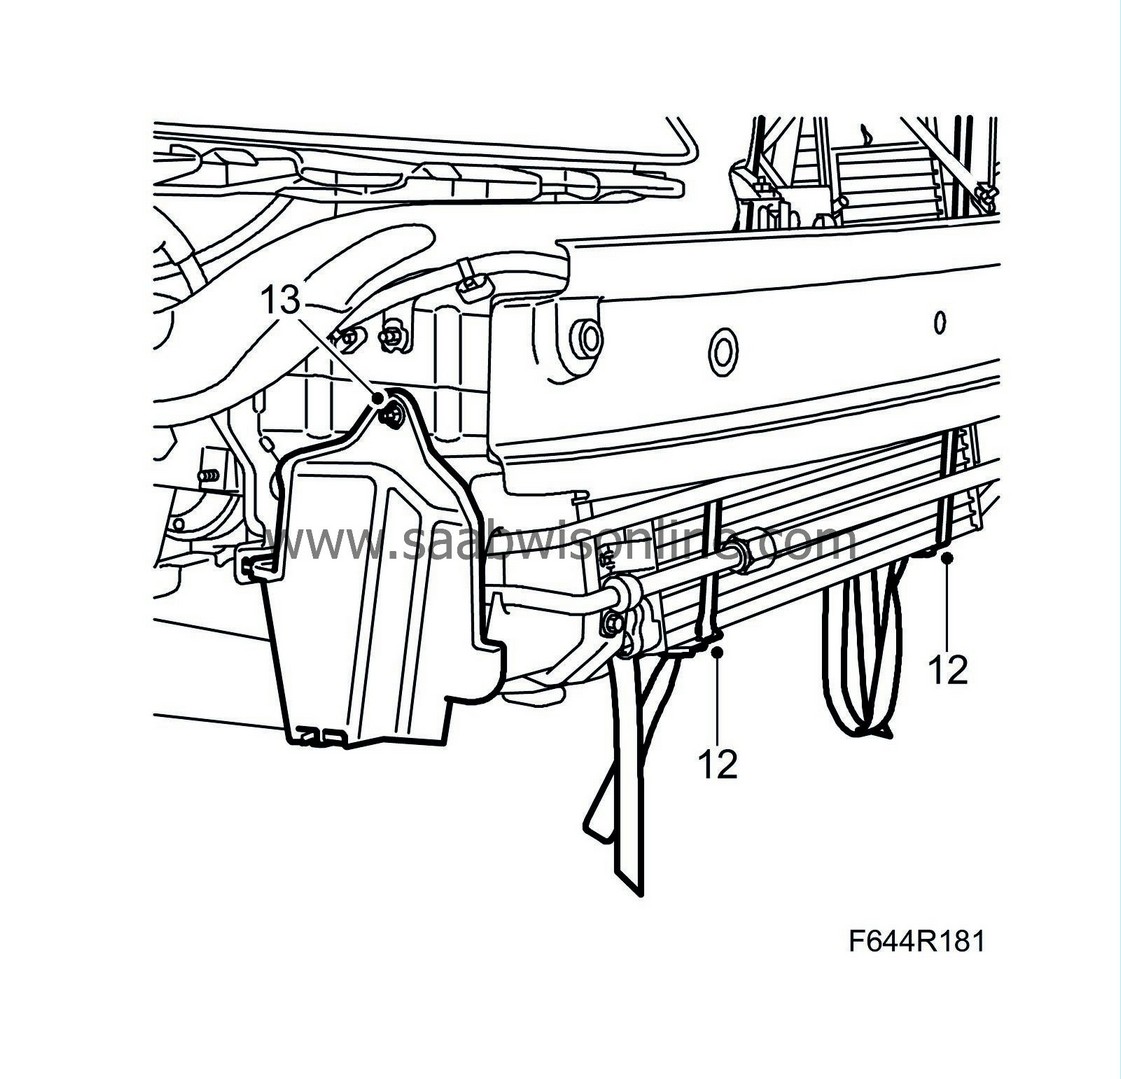
Suspend the radiator assembly from the radiator member with two
83 95 212 Straps
.
|
|
| 13. |
Remove the right-hand air shield.
|
|
| 14. |
Cars with Xenon lights:
Remove the cable clip from the subframe.
|
|
| 15. |
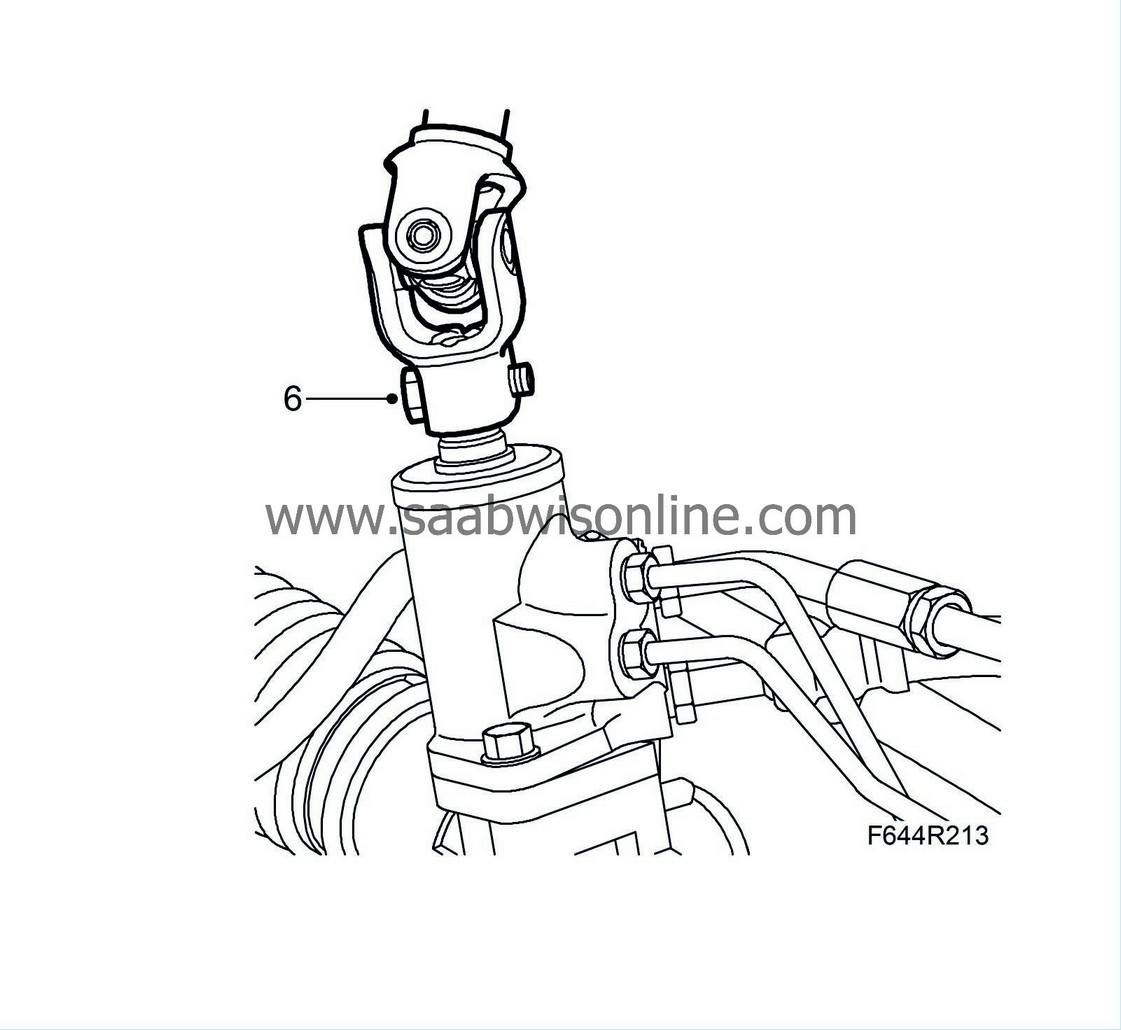
Remove the steering shaft joint.
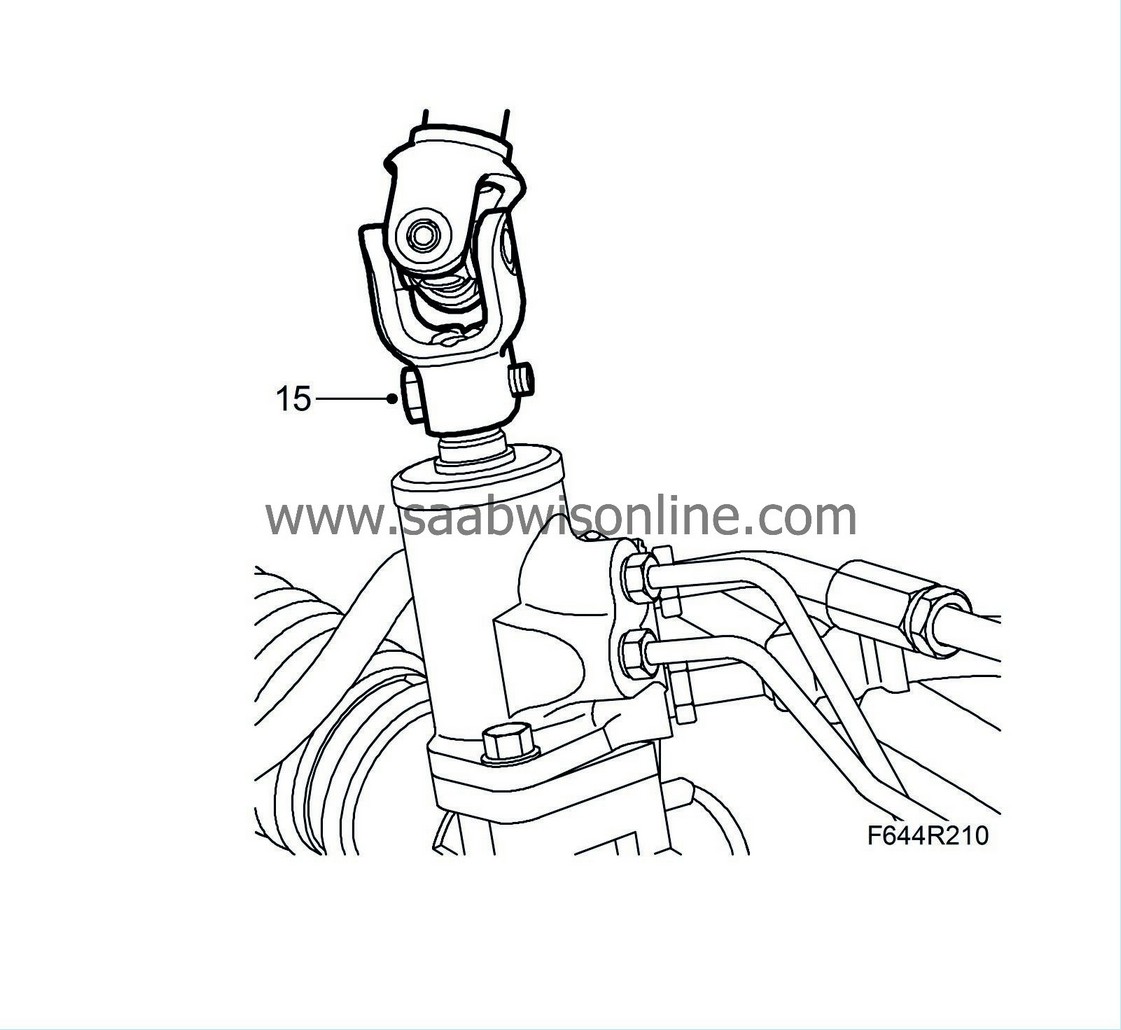
|
|
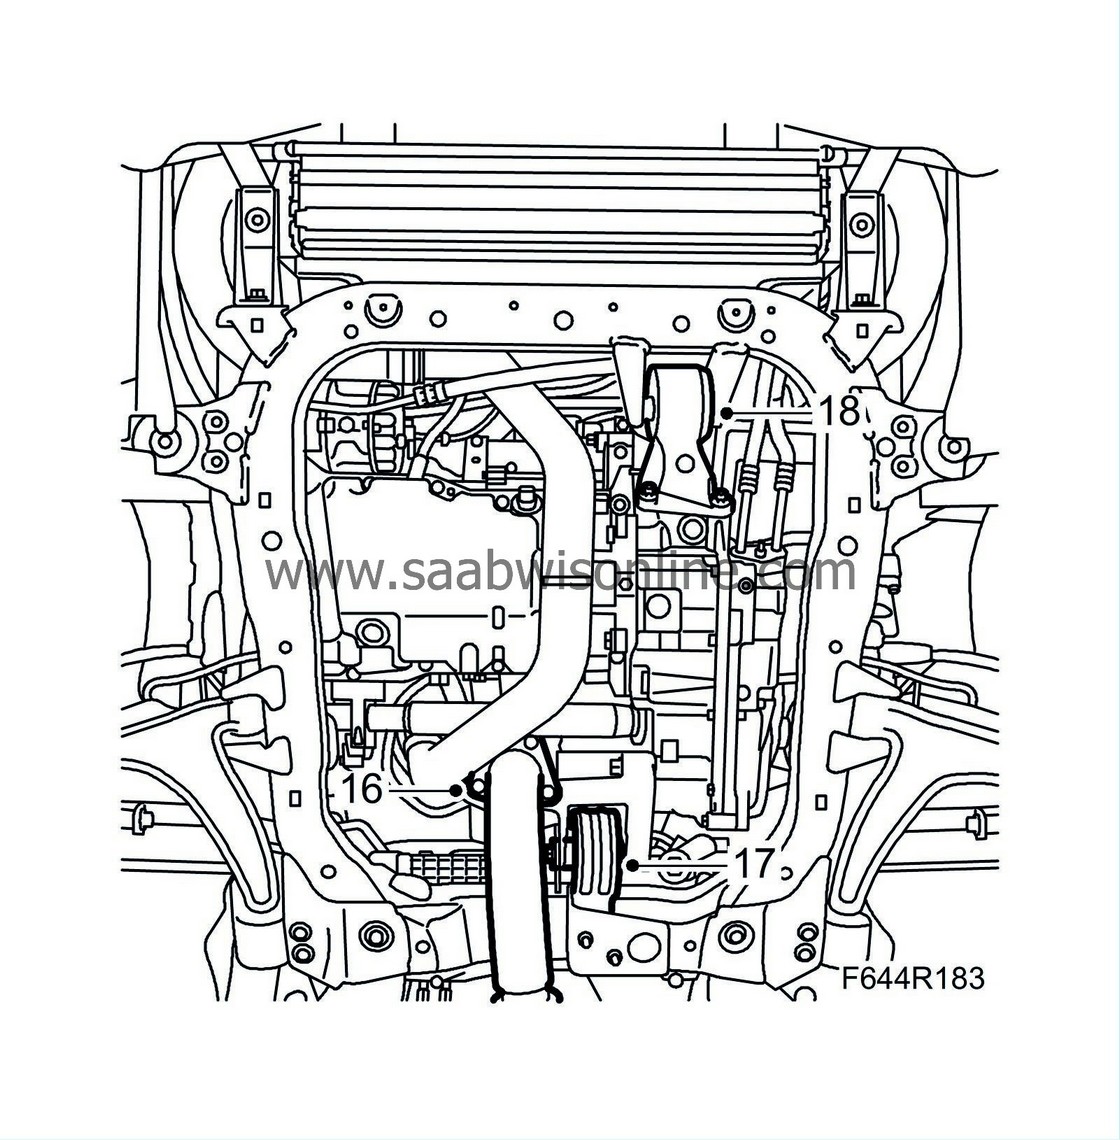
| 16. |
Remove the exhaust pipe flange and front exhaust pipe mountings. Relieve the load on the flex membrane using
83 95 212 Strap
.
|
|
| 17. |
Remove the rear torque rod bolt.
|
|
| 18. |
Remove the screw holding the front torque arm to the subframe.
|
|
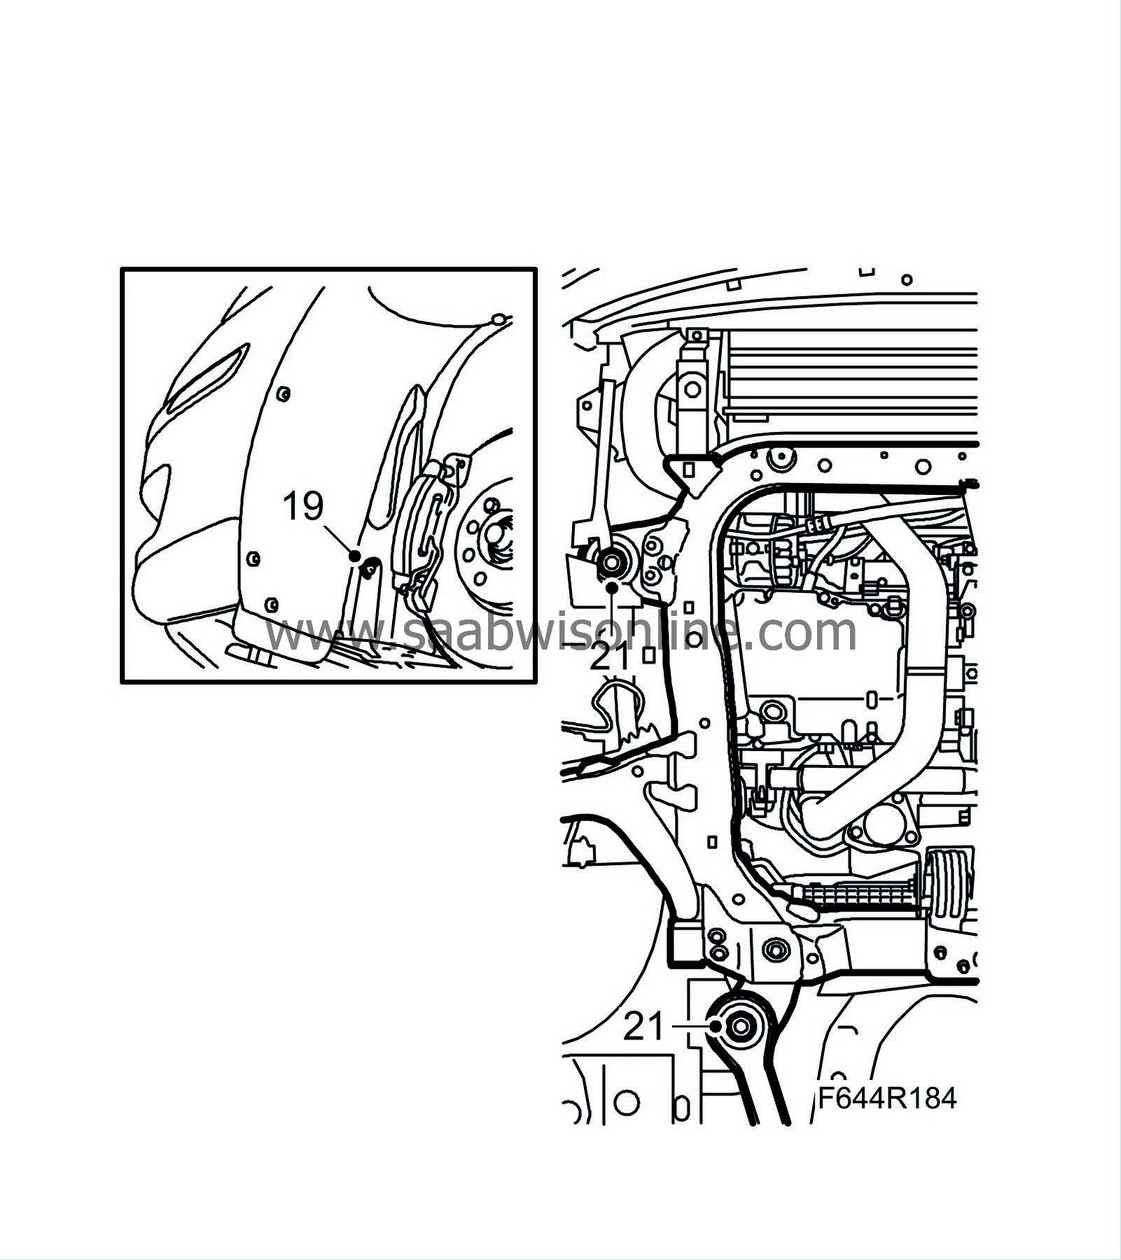
| 19. |
Remove the front part of the wheel arch liner and move it aside slightly.
|
|
| 20. |
Position
83 95 311 Trolley lift
with
83 94 801 Parent fixture
and
83 96 137 Centring tool, subframe - body
.
|
|
| 21. |
Remove the subframe bolts on both sides and detach the stay from the body.
|
|
| 22. |
Lower the subframe slightly (about 100 mm).
|
|
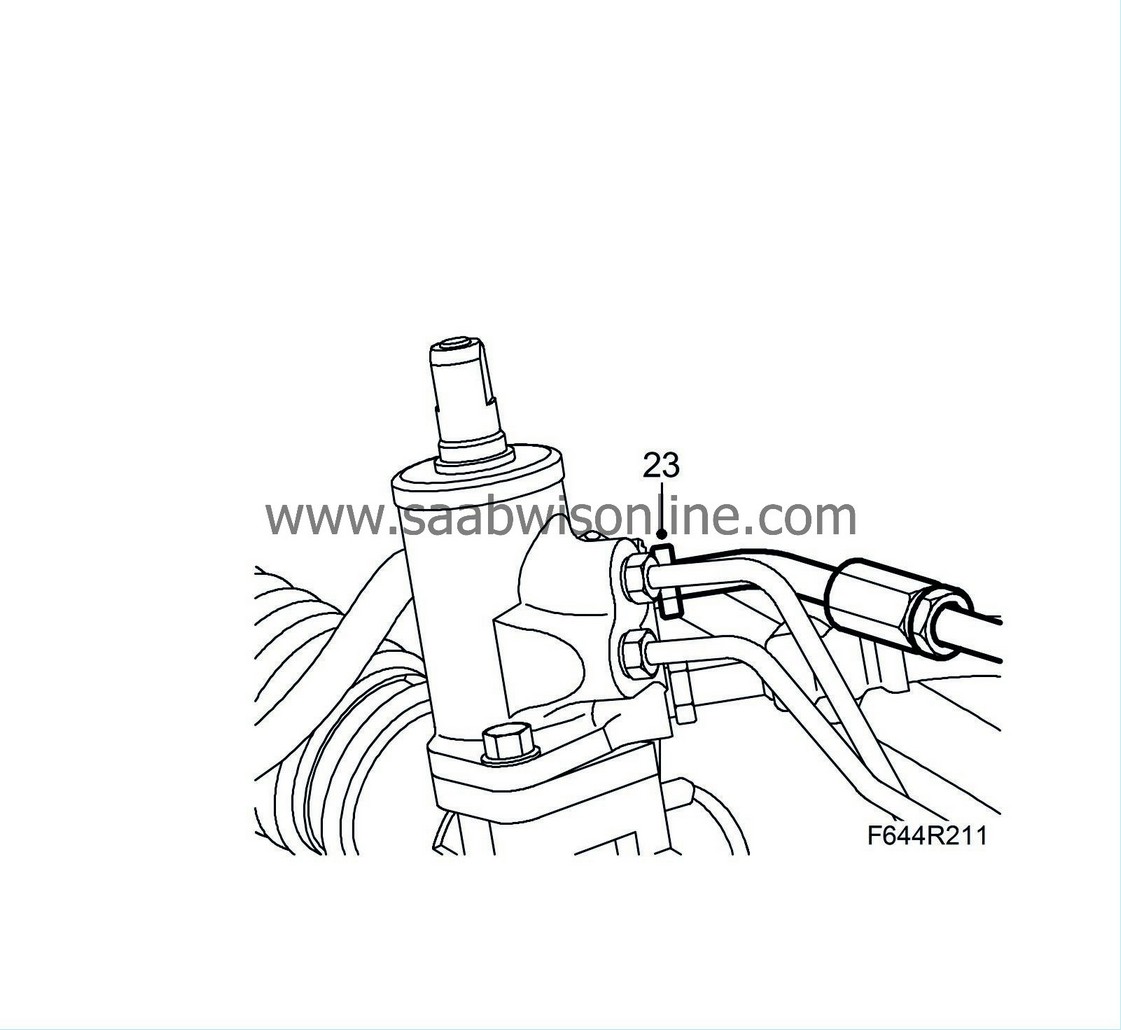
| 23. |
Remove the delivery line from the steering gear.
|
|
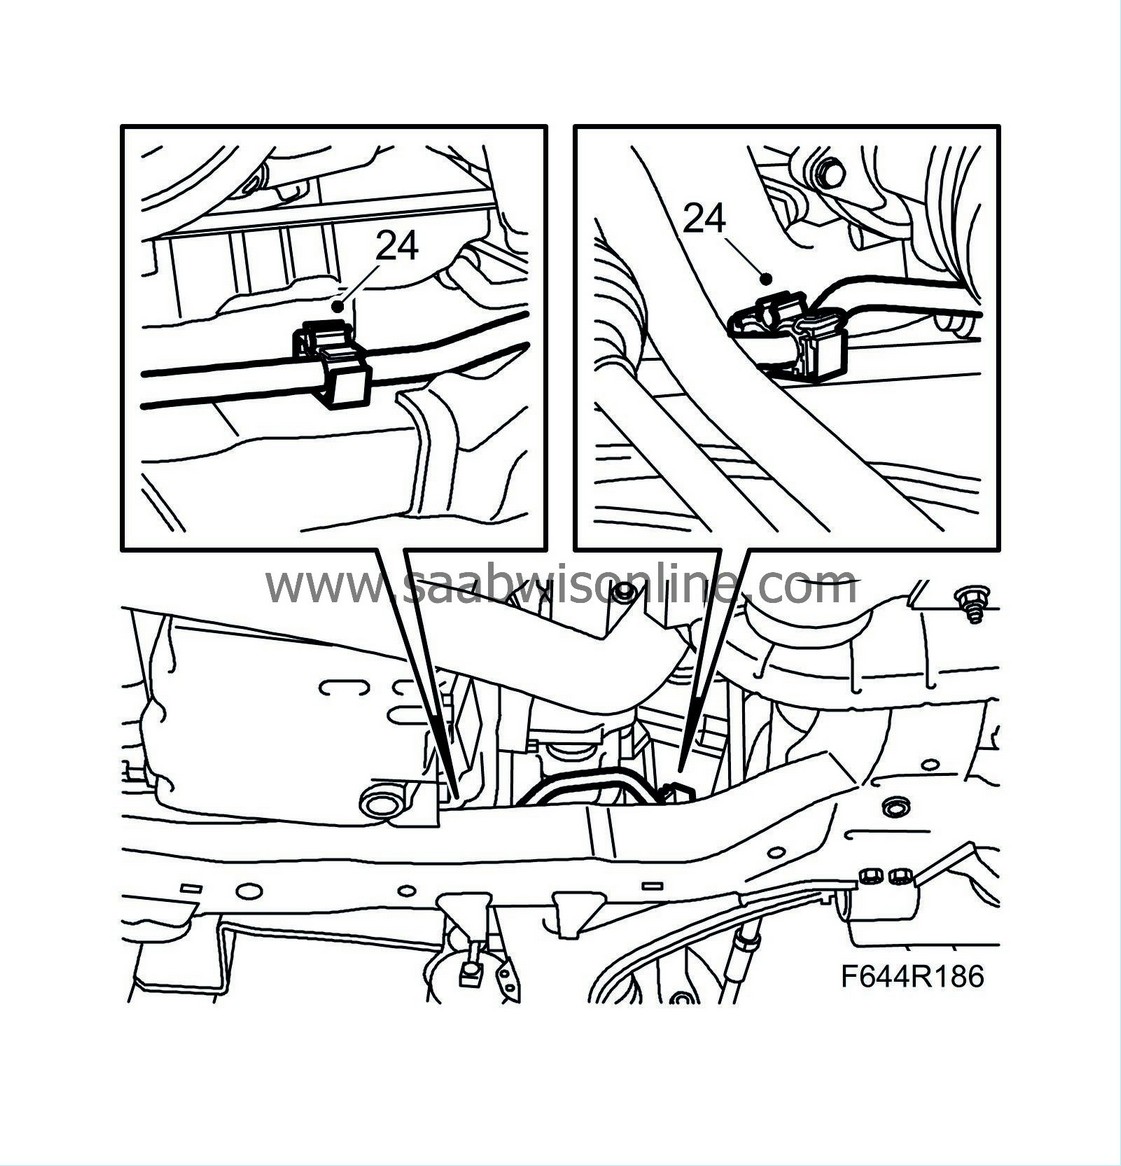
| 24. |
OPen the plastic clips on the subframe.
|
|
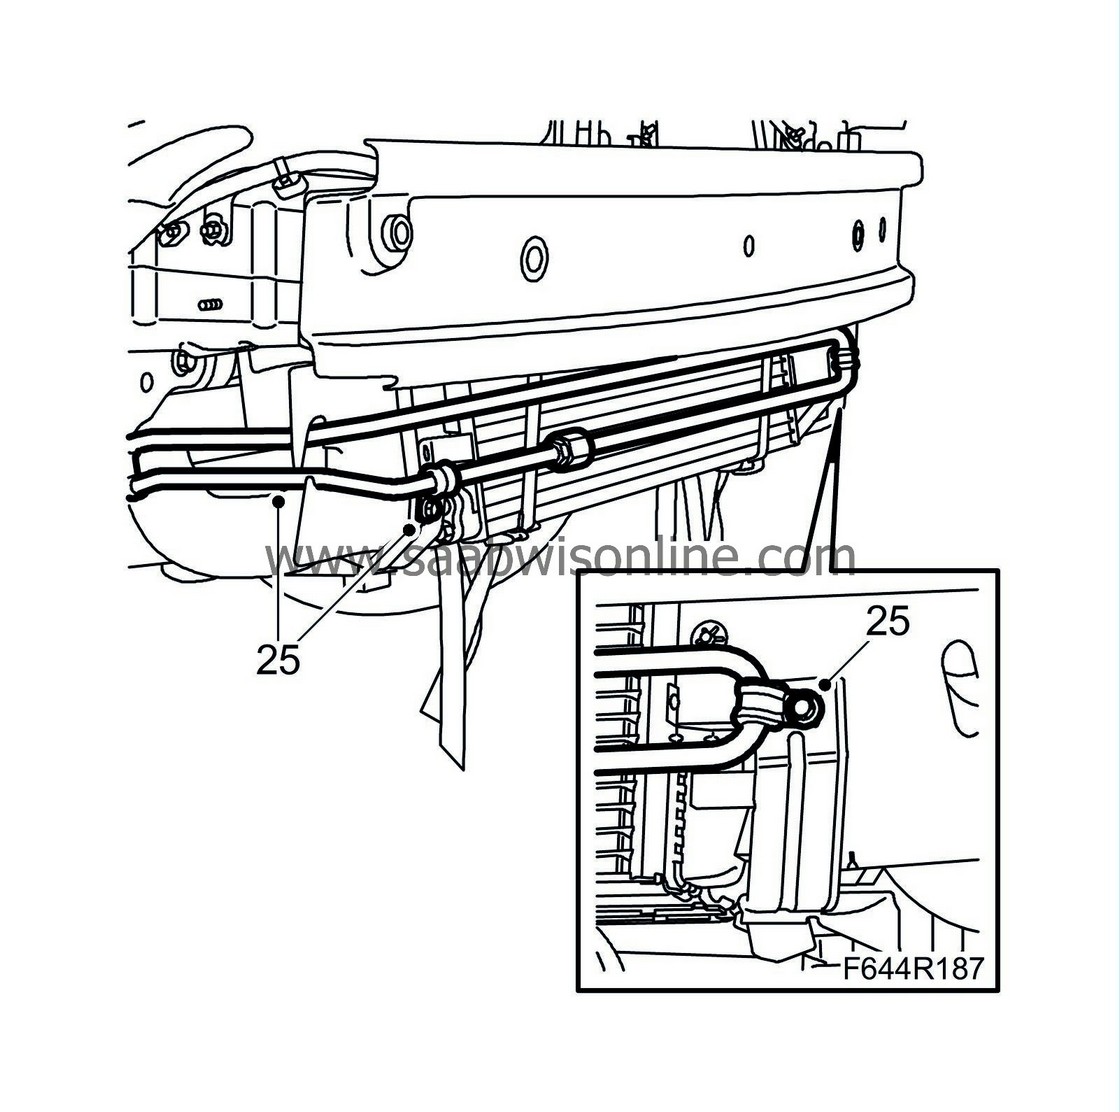
| 25. |
Remove the cooling circuit clamps and the power steering pipe.
|
|
| To fit |
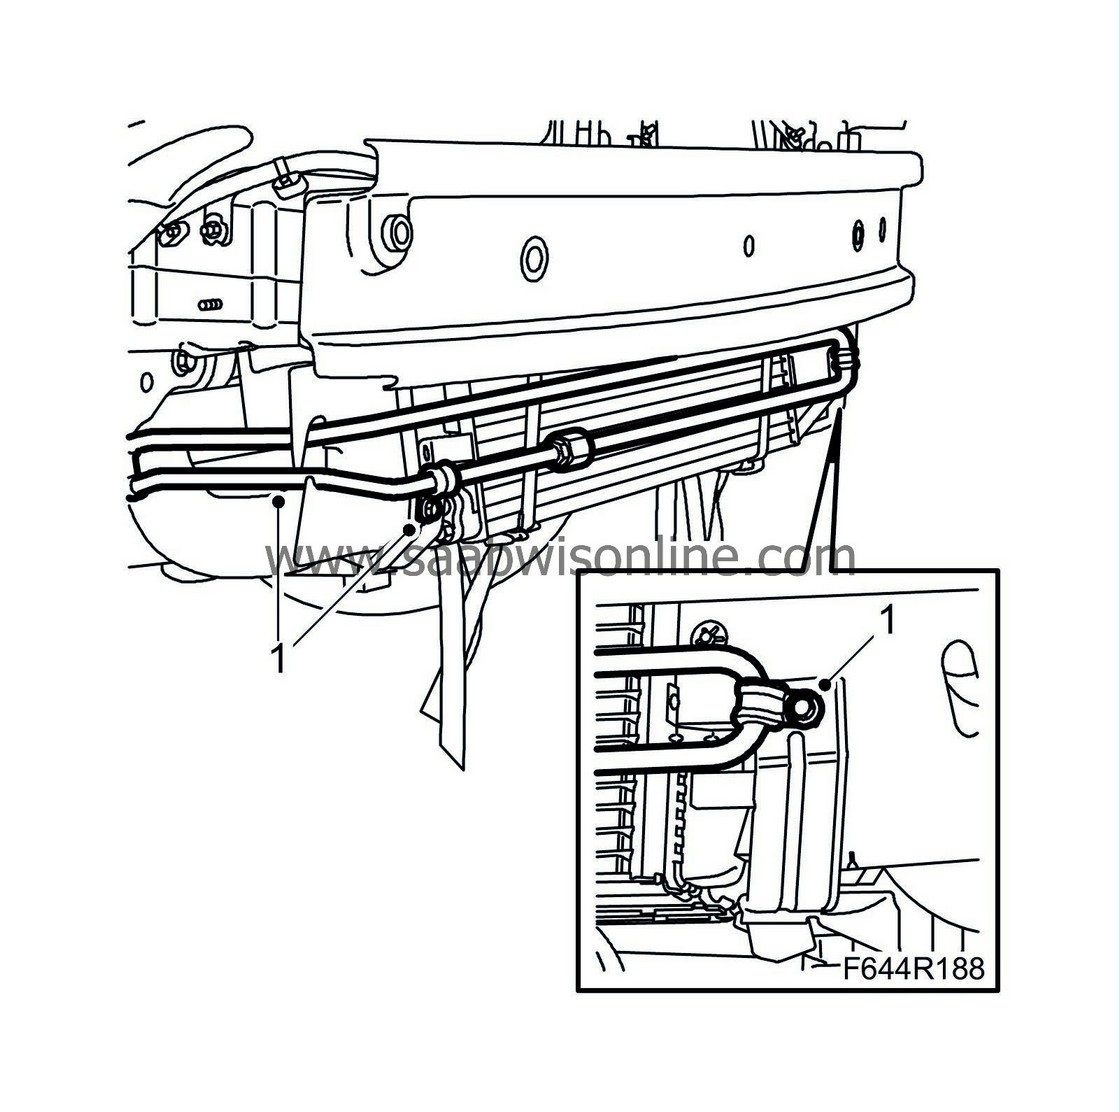
| 1. |
Fit the power steering pipe and cooling coil clamps.
|
|
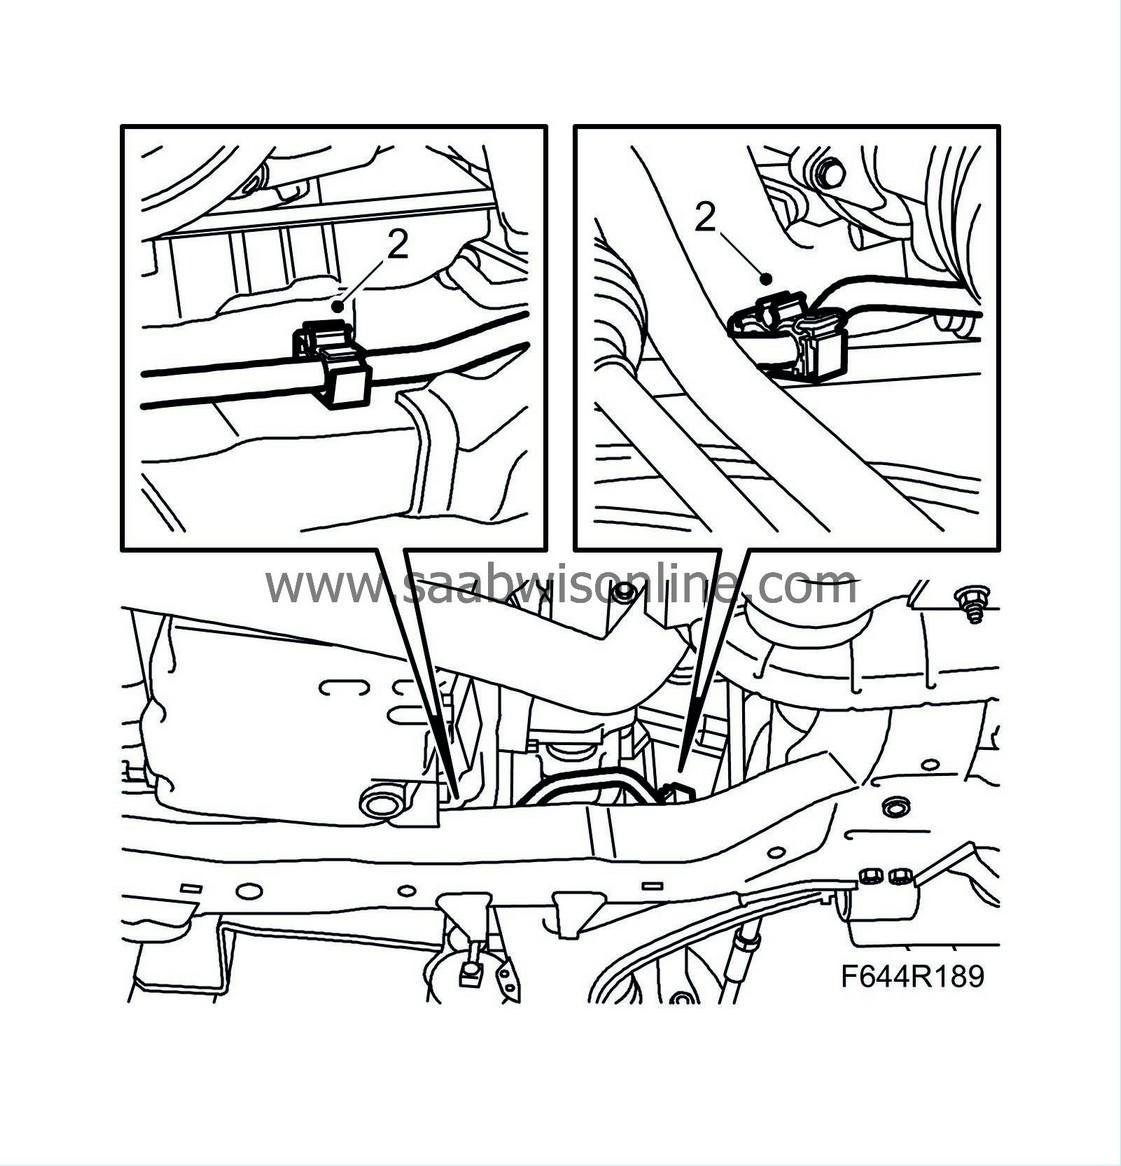
| 2. |
Fit the pipe in the plastic clips.
|
|
| 3. |
Replace the O-ring and fit the delivery pipe to the steering gear. Check that the pipe is positioned in the mounting on the left side of the steering gear.
Tightening torque 30 Nm (22 lbf ft) 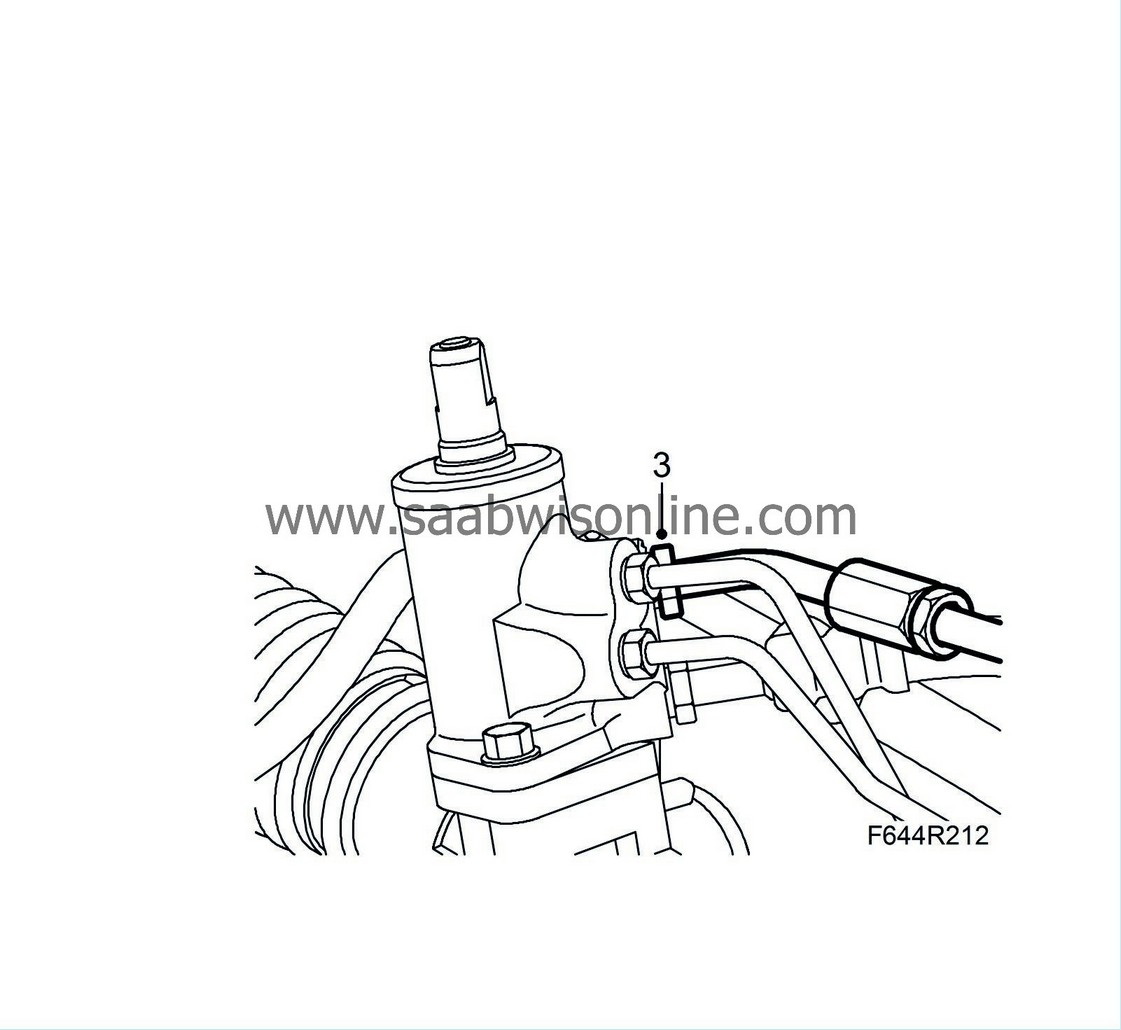
|
|
| 4. |
Raise the subframe using
83 95 311 Trolley lift
and fit
83 96 137 Centring tool, subframe - body
to the guide holes in the body. Fit the stays and bolts. Remove the trolley lift.
Tightening torque 75 Nm +135° (55 lbf ft +135°) Tightening torque, rear stays: 90 Nm +45° (66 lbf ft +45°) 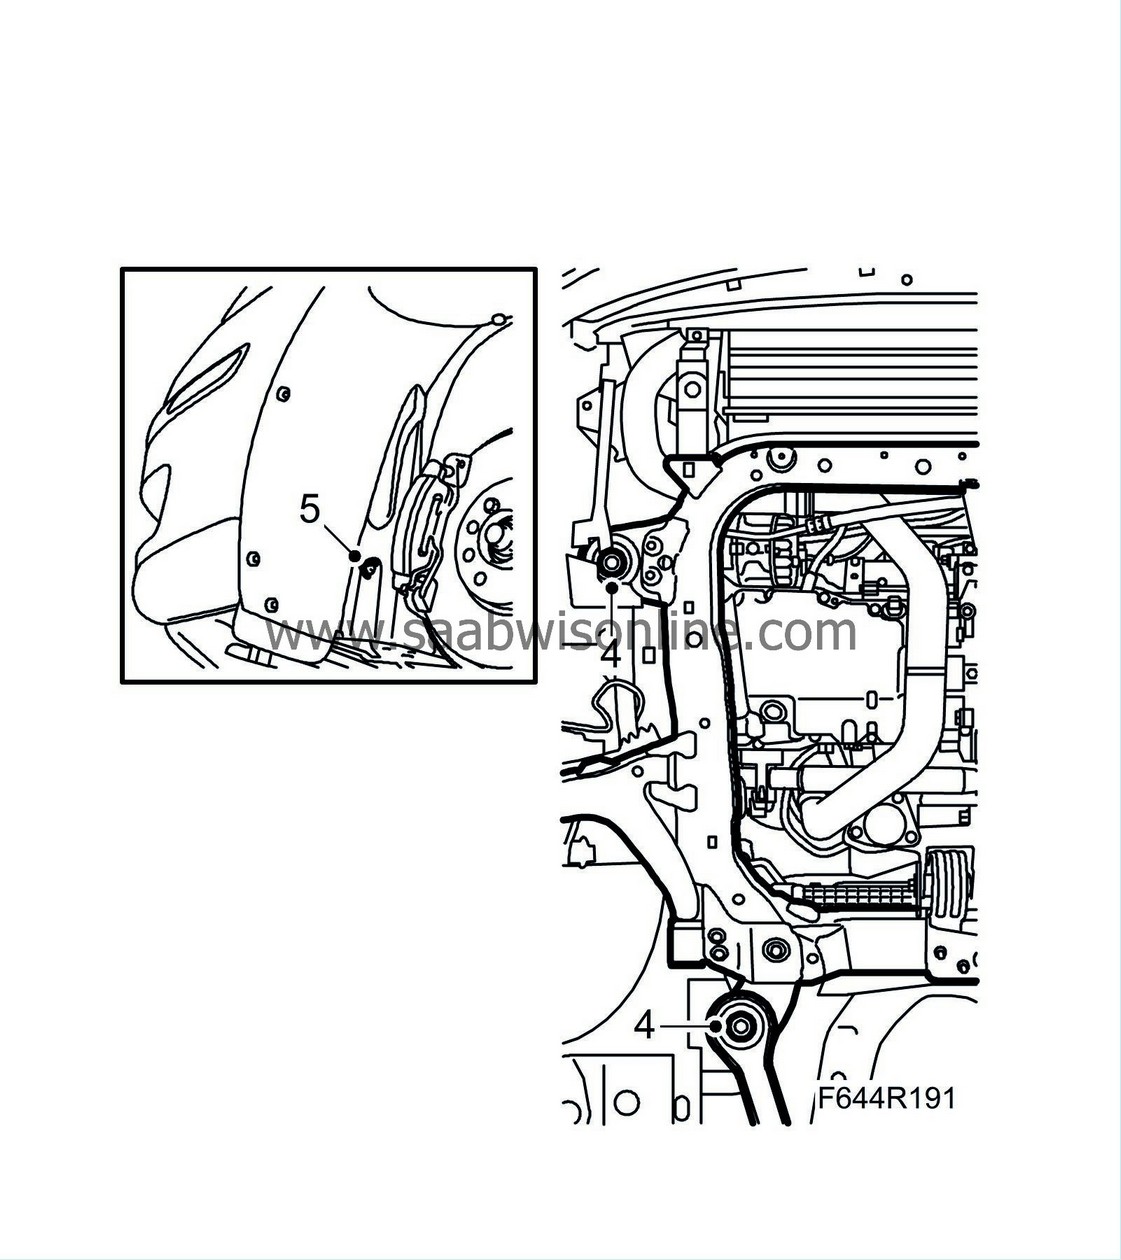
|
|
| 5. |
Fit the font part of the wheel arch liner.
|
|
| 6. |
Put the wheels in the straight ahead position and fit the steering shaft joint to the steering gear. Clean the threads and apply
Thread locking adhesive, Loctite 242
to the threads.
Tightening torque 30 Nm (22 lbf ft)
|
|||||||||
| 7. |
Fit the screw holding the front torque arm to the subframe.
Tightening torque 60 Nm +90° (44 lbf ft +90°) 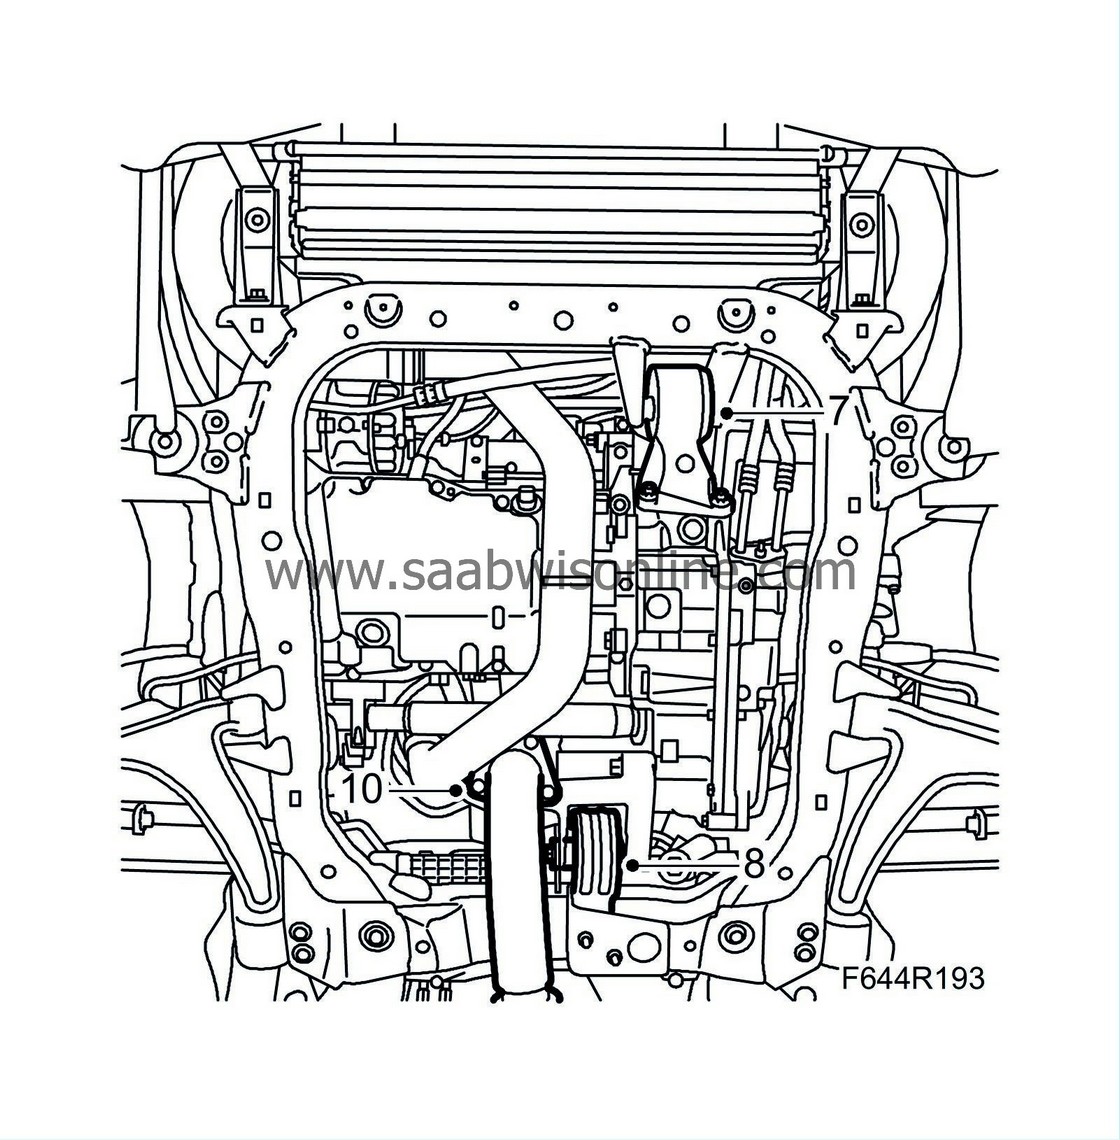
|
|
| 8. |
Fit the rear torque rod.
Tightening torque: 80 Nm (59 lbf ft) |
|
| 9. |
Remove the straps.
|
|
| 10. |
Fit the exhaust pipe flange and exhaust pipe mountings.
Tightening torque 30 Nm (22 lbf ft) |
|
| 11. |
Cars with Xenon lights:
Fit the cable clip to the subframe.
|
|
| 12. |
Fit the right-hand air shield.
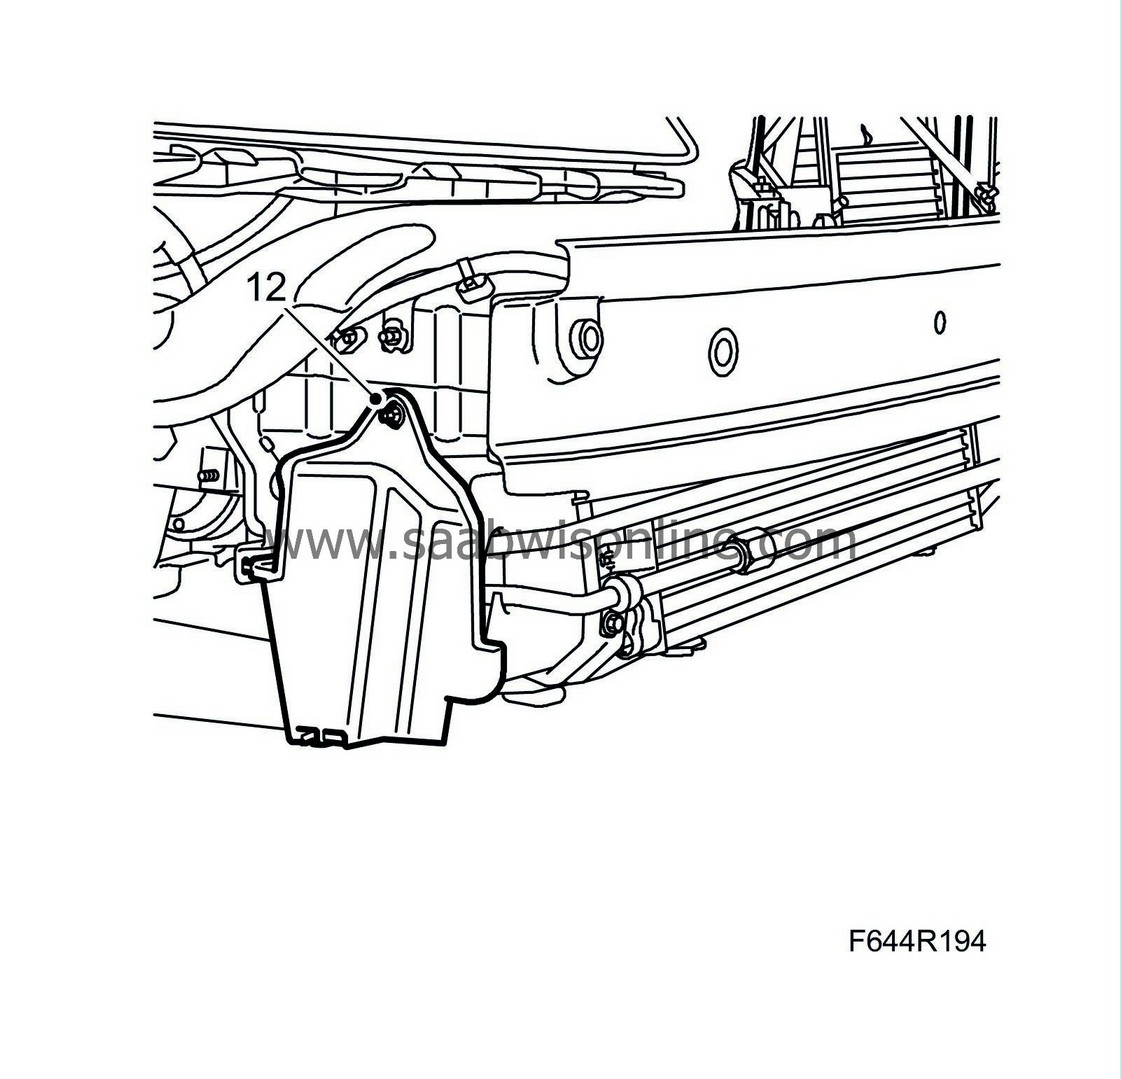
|
|
| 13. |
Fit the wheel arch liner.
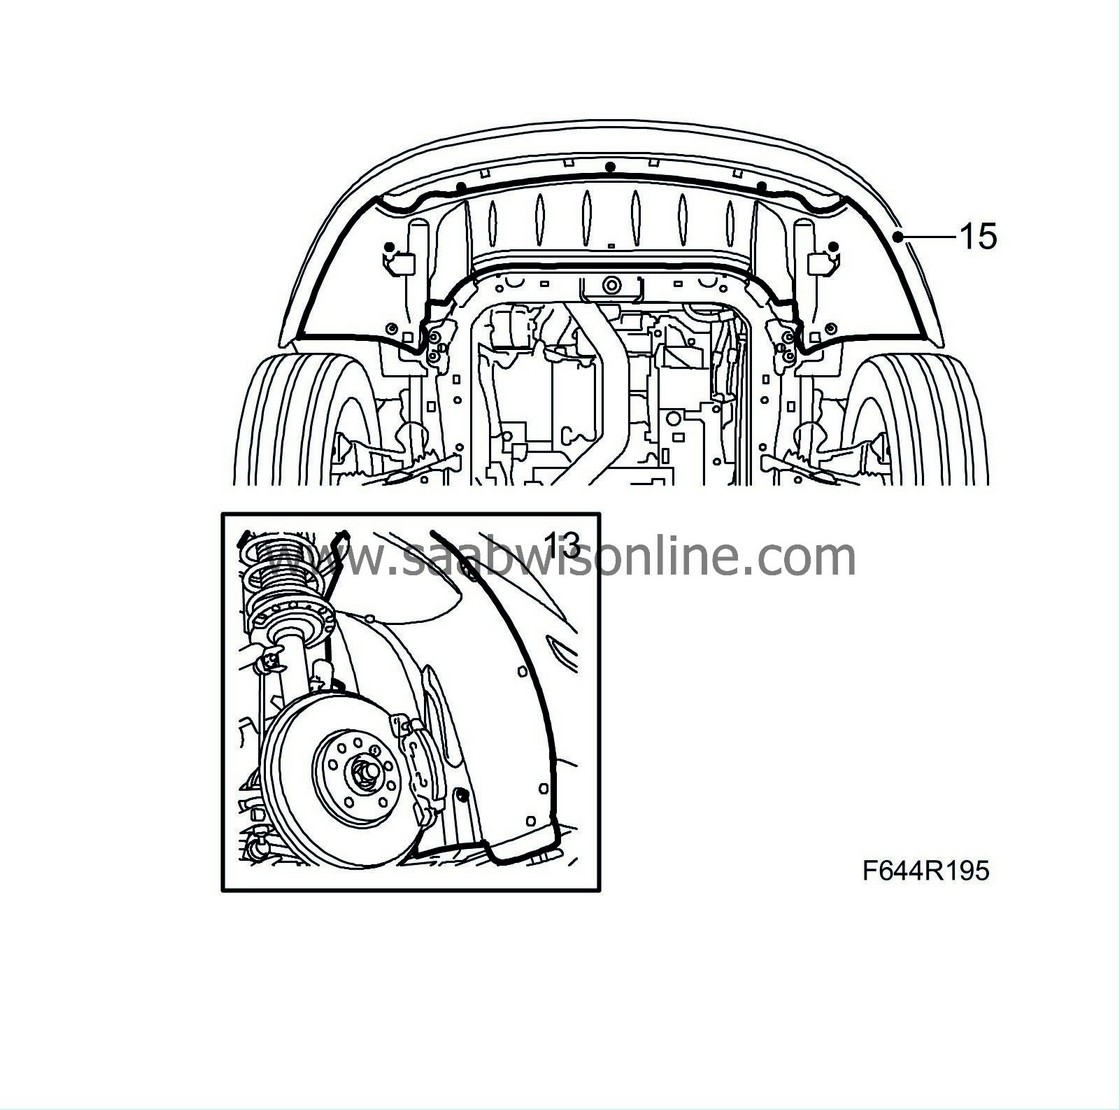
|
|
| 14. |
Fit the front bumper shell.
CV: Fit Chassis reinforcement, front subframe . |
|
| 15. |
Fit the front, lower engine cover.
|
|
| 16. |
Fit the wheel.
|
|
| 17. |
Lower the car to the floor.
|
|
| 18. |
Fit the power steering hose to the power steering pump using a new seal, and to the hose clip.
Tightening torque 32 Nm (24 lbf ft) 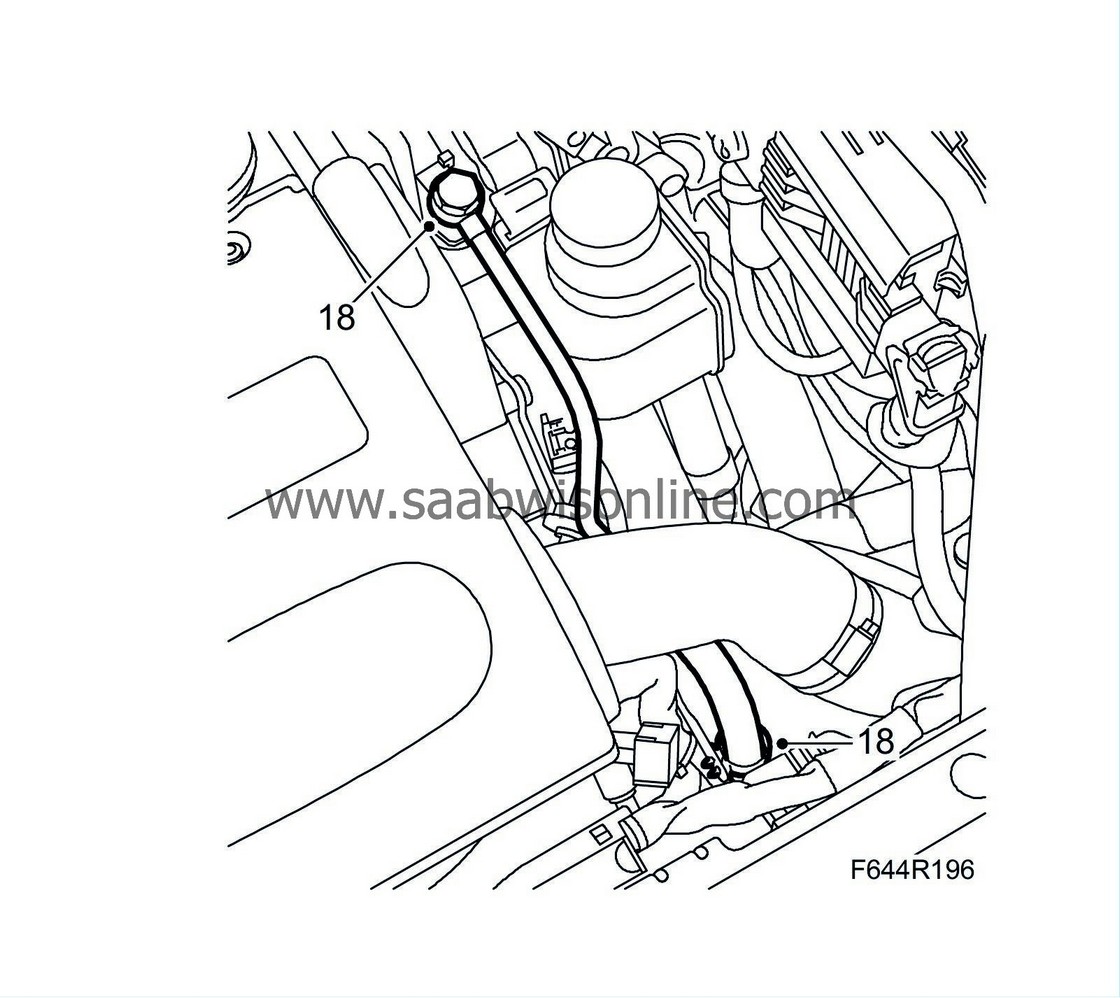
|
|
| 19. |
Remove the hose pinch-off pliers.
|
|
| 20. |
Connect the negative battery cable and fit the battery cover.
|
|
| 21. |
Tighten the steering gear clamp.
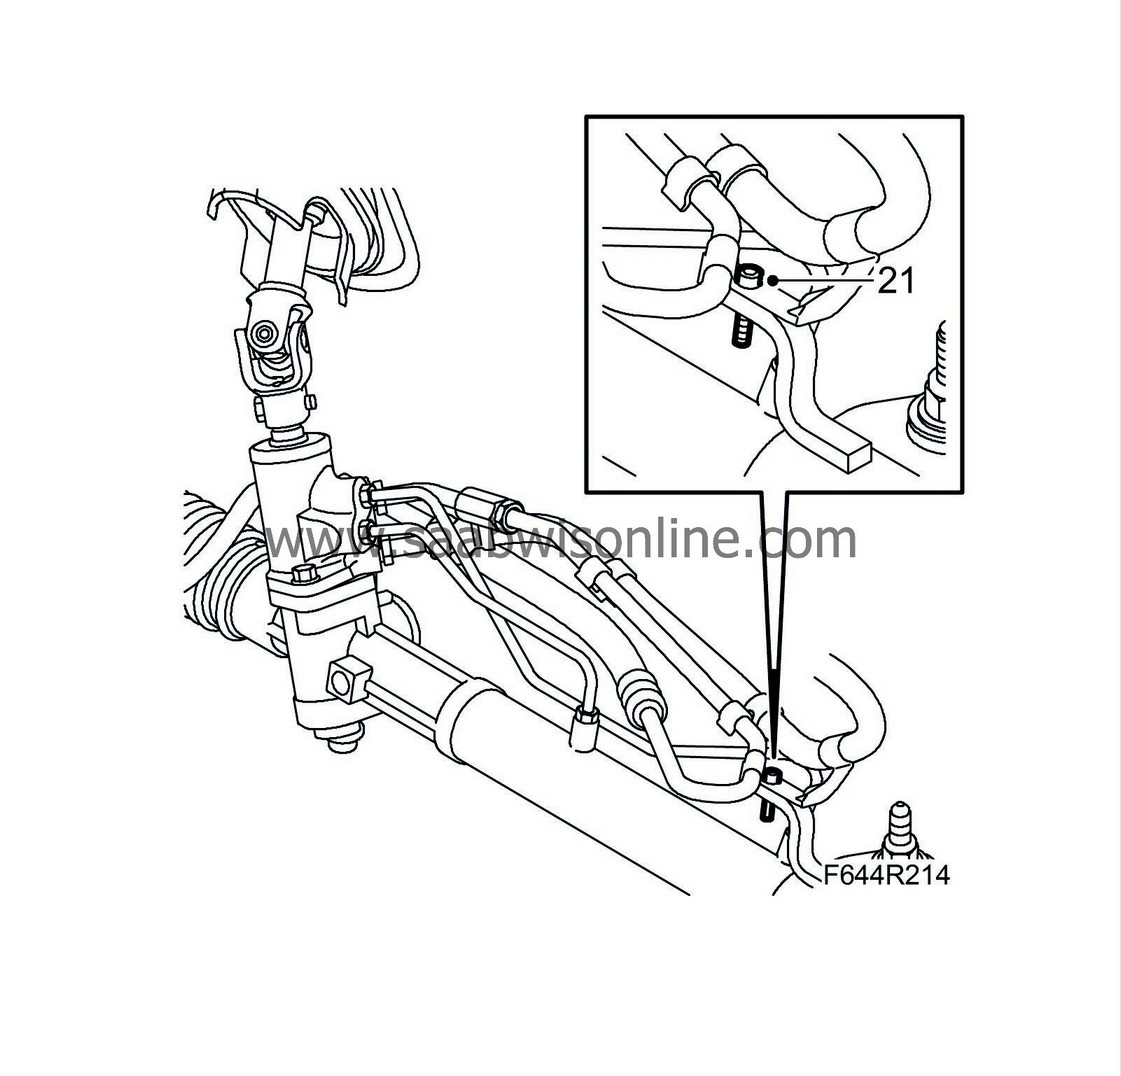
|
|
| 22. |
Fill with
power steering fluid
.
|
|
| 23. |
Bleed the power steering system
and check for leaks.
|
|
| 24. |
Perform the measures necessary for after disconnecting the battery.
|
|
| 25. |
Check the position of the steering wheel when driving straight ahead on a level road. Adjust as necessary.
|
|

 Warning

