Toe-in link
| Toe-in link |
| To remove |
| 1. |
Raise the car.
|
|
| 2. |
Remove the rear wheel.
|
|
| 3. |
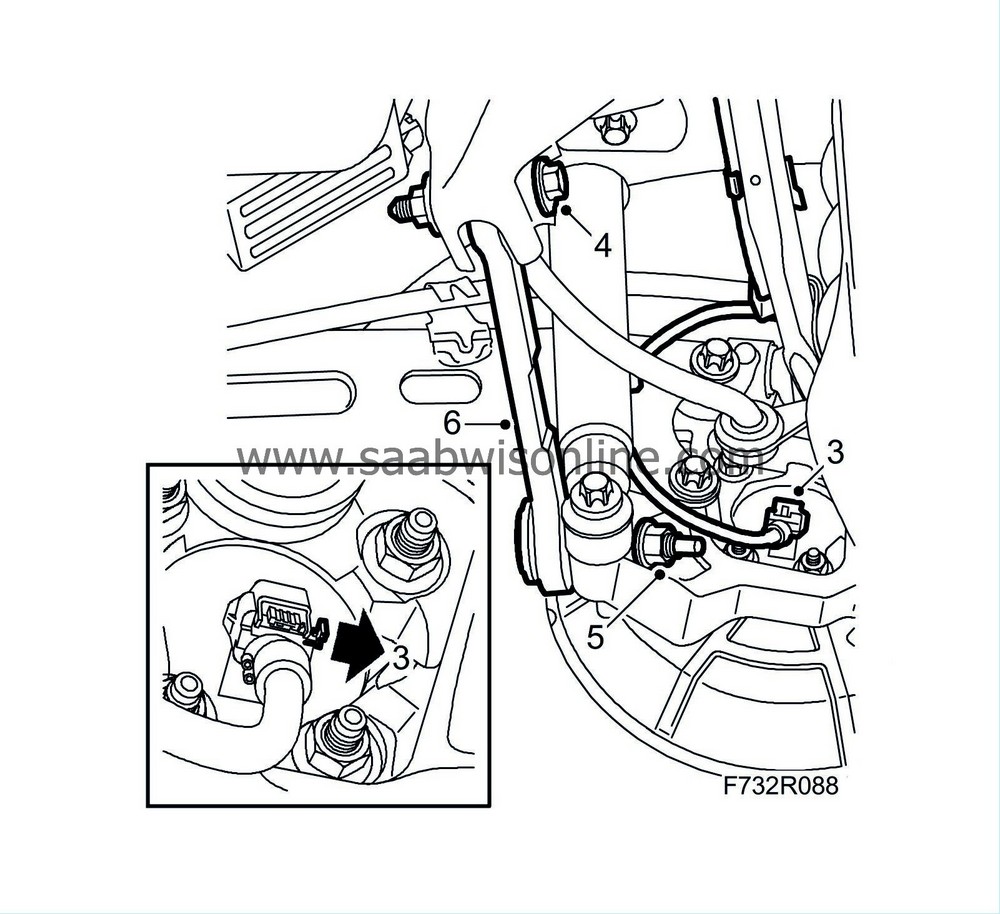
Remove the wheel sensor connection to avoid damage to the wheel sensor.

|
|
| 4. |
Mark and remove the toe-in link adjusting screw.
|
|
| 5. |
Clean and lubricate the threads in the outer toe-in link retaining bolts.
Remove the nut holding the toe-in link to the steering swivel member. Hold with a 10 mm sleeve in the outer mounting. |
|
| 6. |
Remove the toe-in link.
|
|
| To fit |
| 1. |
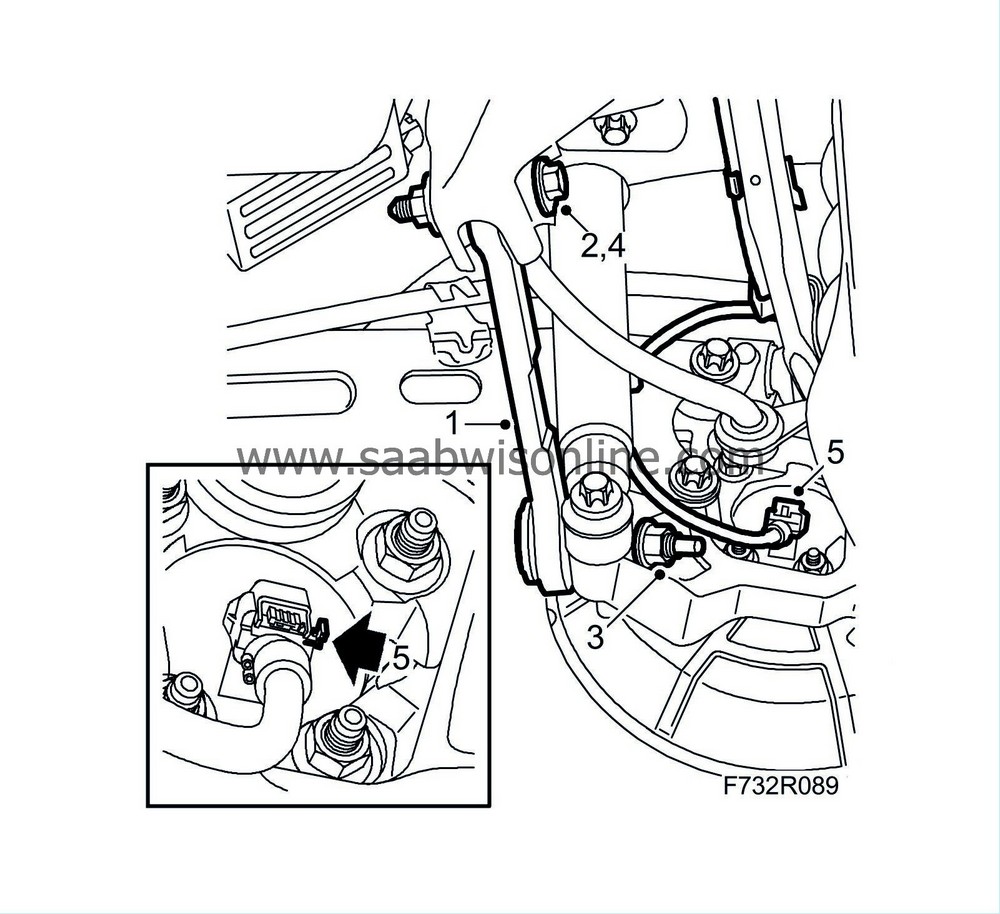
Put the toe-in link into place.

|
|
| 2. |
Fit the adjusting screw and washer to the toe-in link. Fit the nut loosely.
|
|
| 3. |
Fit the nut which holds the toe-in link to the steering swivel member. Hold with a 10 mm wrench. Tighten the toe-in link nut with the correct torque, use
89 96 613 Sleeve, MacPherson strut.
Tightening torque 75 Nm +60° (55 lbf ft +60°) |
|
| 4. |
Lift the lower link arm to normal position and tighten the nut of the adjustment bolt. Make sure that the adjustment bolt marking is set correctly.
Tightening torque 75 Nm +60° (55 lbf ft +60°) |
|
| 5. |
Connect the connector to the wheel sensor.
|
|
| 6. |
Fit the
rear wheel
.
|
|
| 7. |
Lower the car to the floor.
|
|
| 8. |
Carry out four wheel checking and alignment, see
Four wheel alignment
.
|
|


