Crossmember, CV
| Crossmember, CV |
| 1. |
Position the car in an aligning bench and cross-measure if necessary.
|
|
| 2. |
Remove the
Bootlid
and
Soft top cover
.
|
|
| 3. |
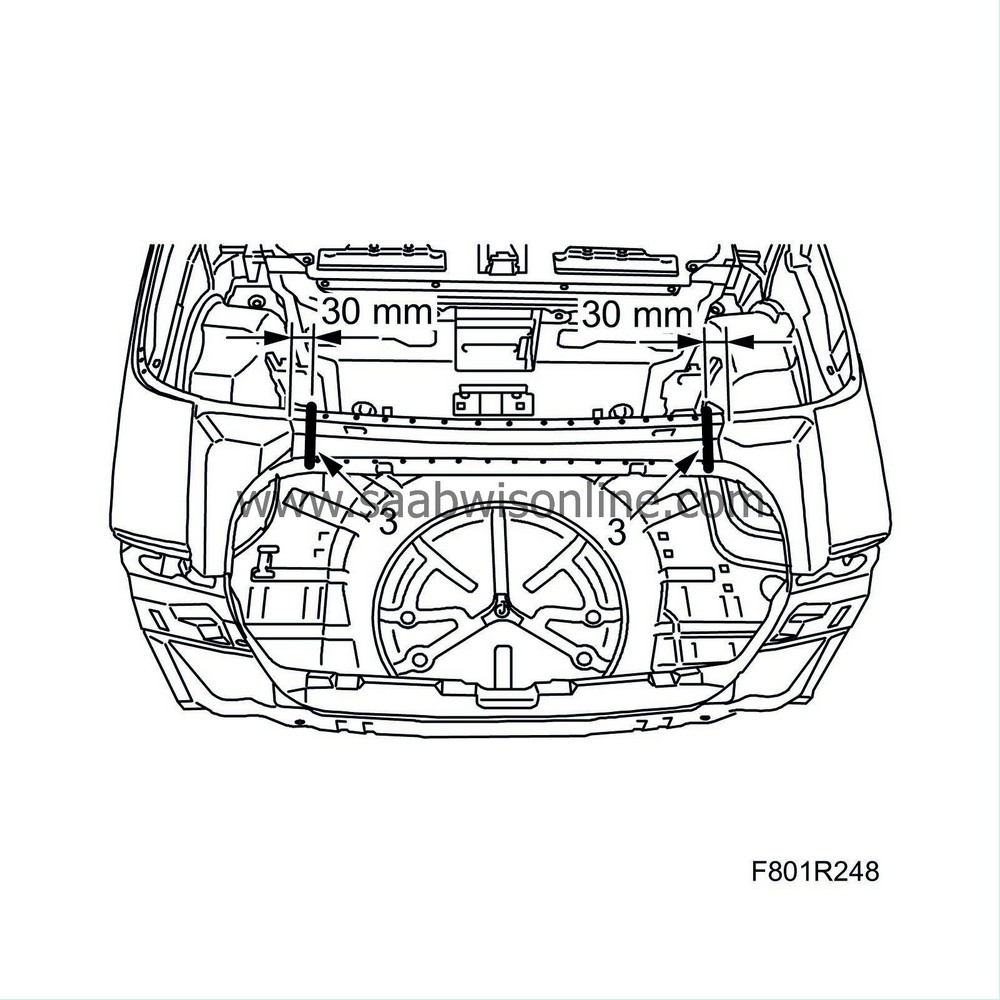
Cut the crossmember 30 mm from the outer edge of the upper panel on both sides. Lift aside the crossmember.
|
|
| 4. |
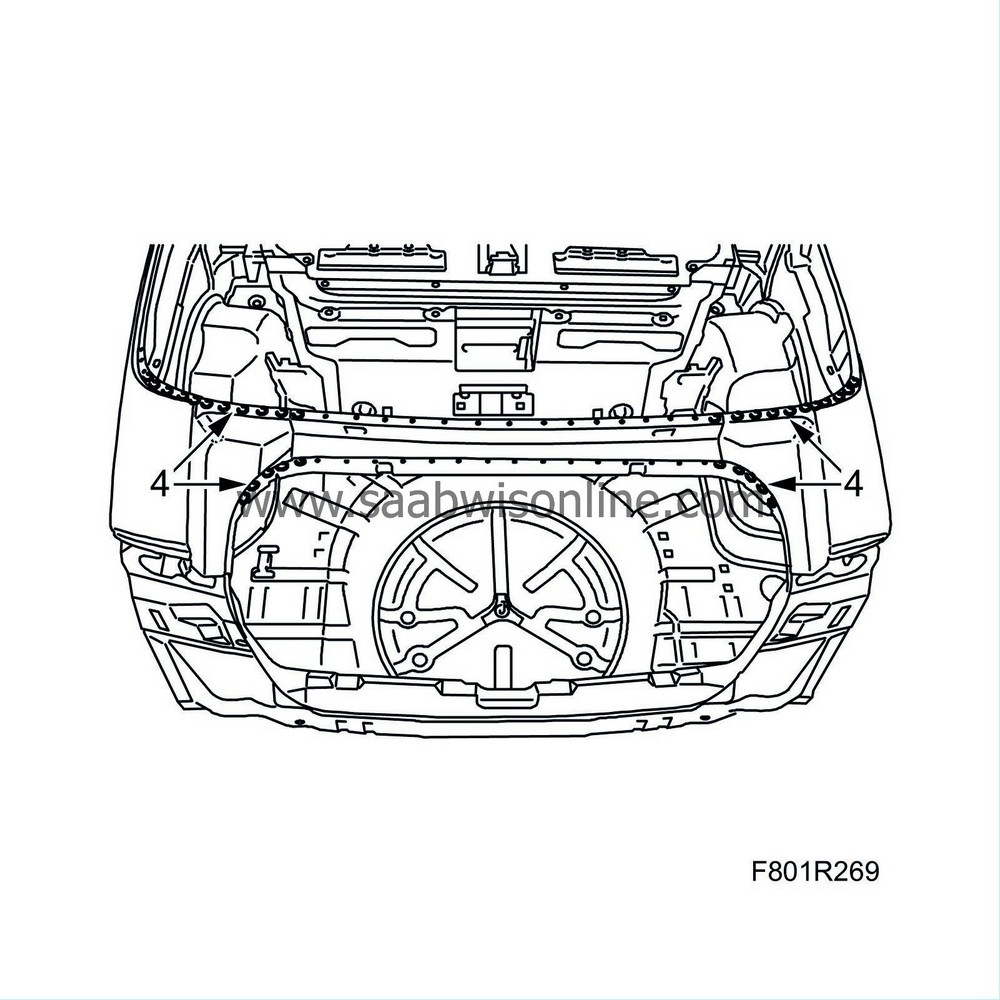
Drill out the upper spot welds to the lower crossmember panel on the relevant side.
|
|
| 5. |
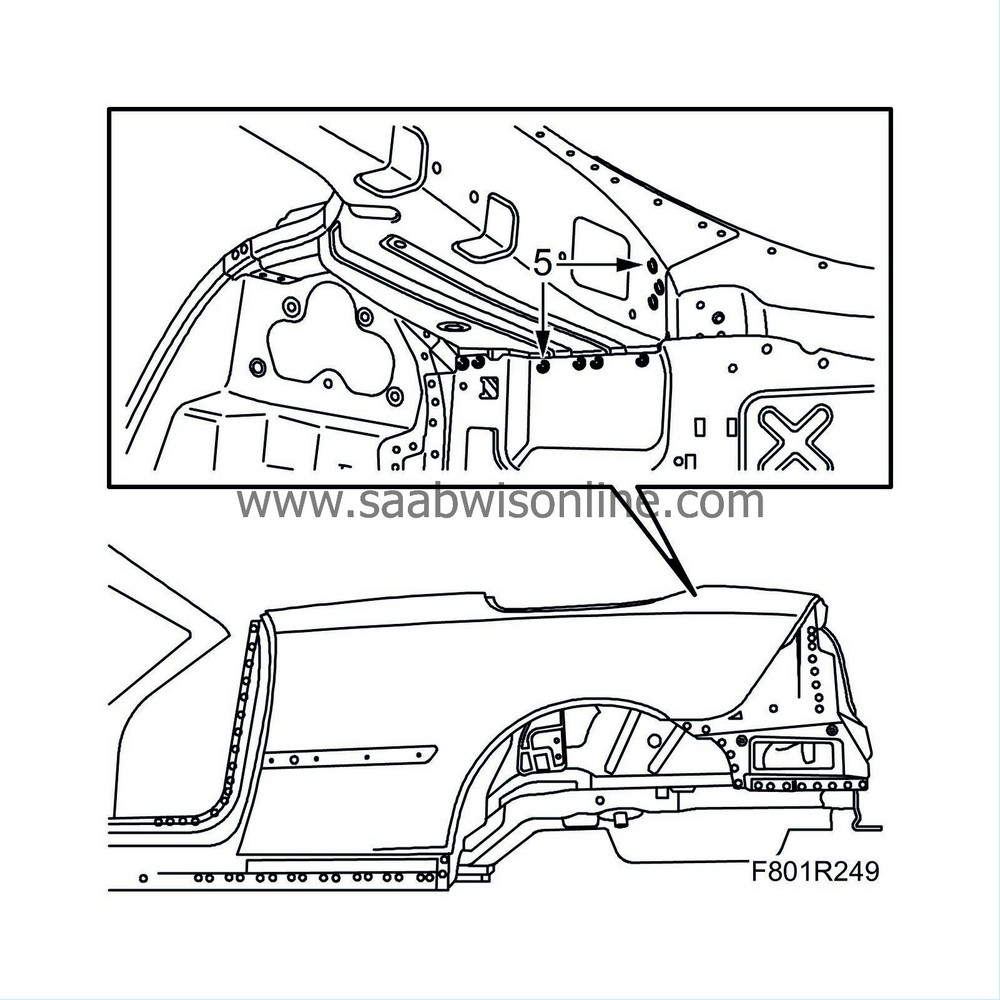
Drill out the lower spot welds to the lower crossmember panel on the relevant side.
|
|
| 6. |
Tap the lower crossmember panel loose. Align any damaged sheet metal or panels.
|
|
| 7. |
Tap both remaining sections of the upper crossmember panel loose. Align any damaged sheet metal or panels.
|
|
| 8. |
Cut the replacement panel so that it fits against the cuts previously made.
|
|
| 9. |
Apply welding primer to the surfaces to be spot and plug welded. Use Teroson Zink Spray.
|
|
| 10. |
Place the lower crossmember panel in fitting position on the body and secure it with welding clamps.
|
|
| 11. |
Position the upper section without applying adhesive. Secure with welding clamps.
|
|
| 12. |
Place some welds in the lower section to secure it. Do not weld the upper section.
|
|
| 13. |
Lift off the upper section.
|
|
| 14. |
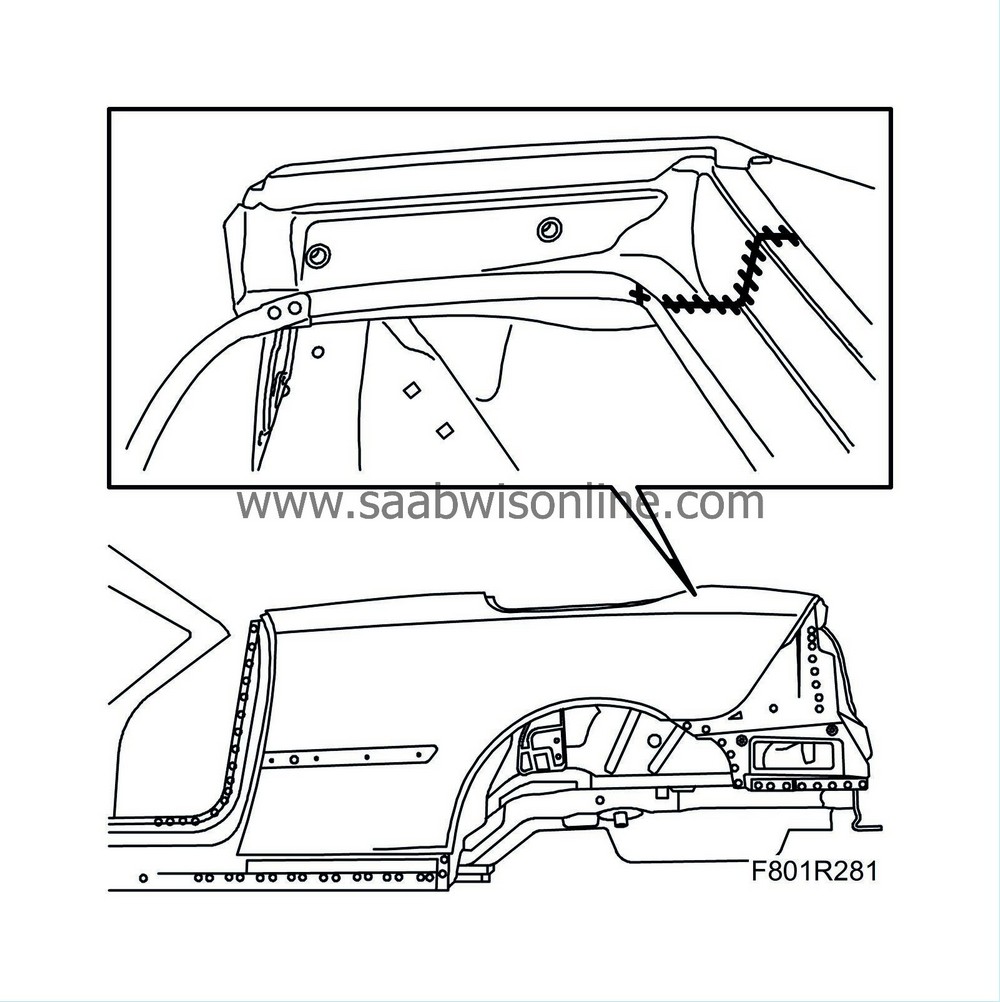
All-weld the lower section's joint.
|
|
| 15. |
Apply welding primer to the surfaces to be spot and plug welded. Use Teroson Zink Spray.
|
|
| 16. |
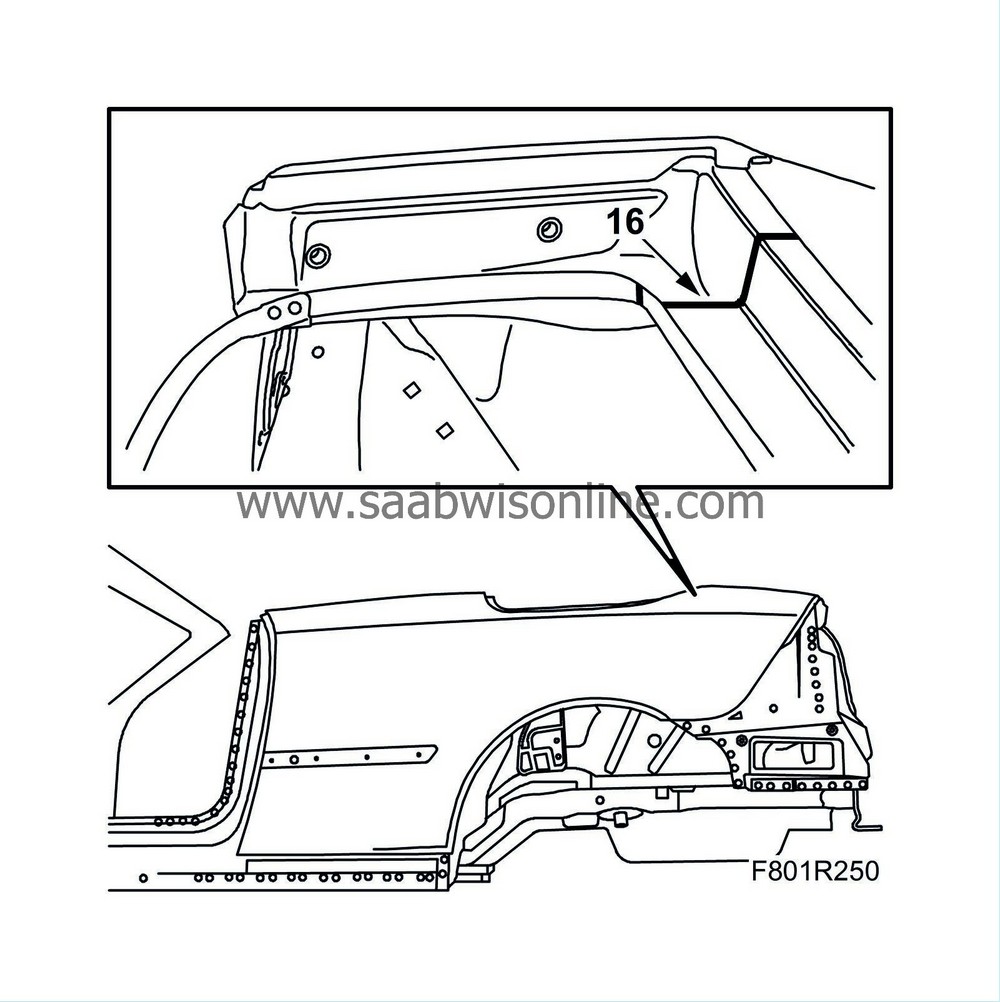
Apply body adhesive to the water ducts on both side panels. Use Teromix 6700.
|
|
| 17. |
Place the upper section in fitting position and secure it with welding clamps.
|
|
| 18. |
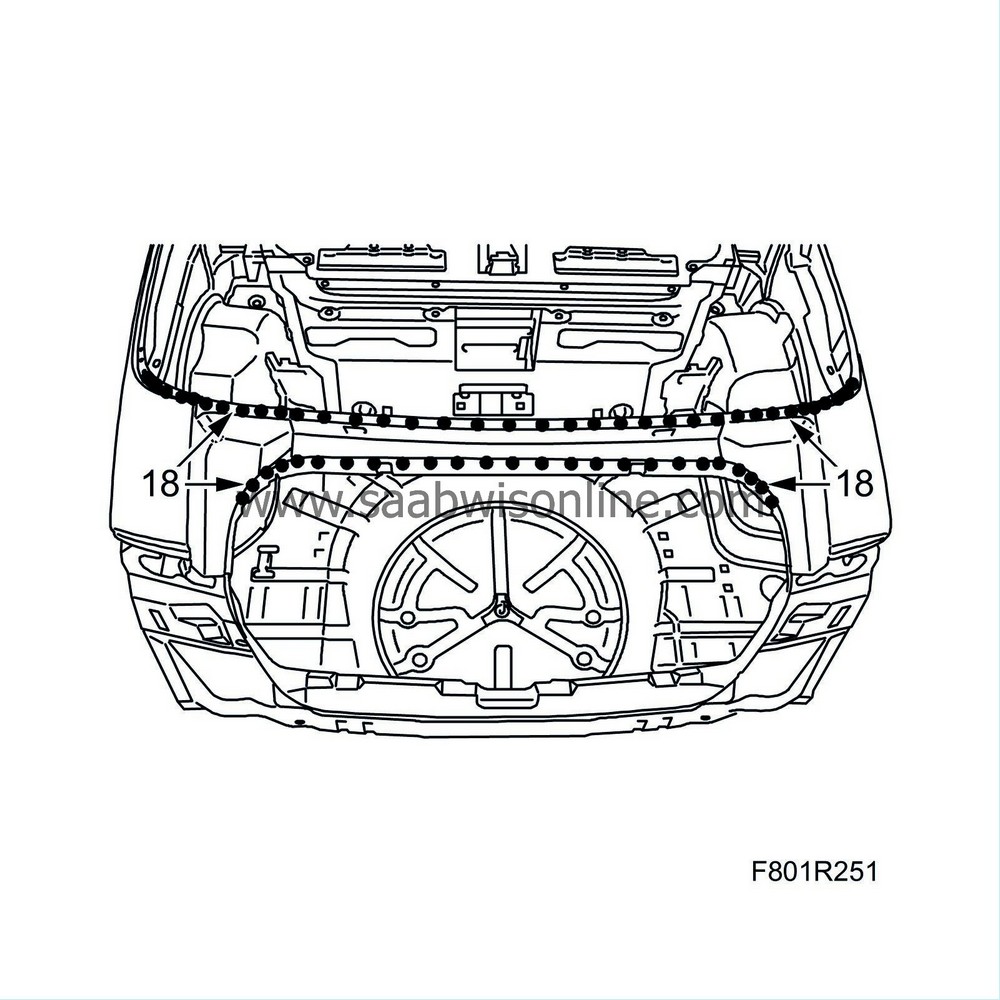
Spot and plug weld the upper and lower crossmember panel from the top side.
|
|
| 19. |
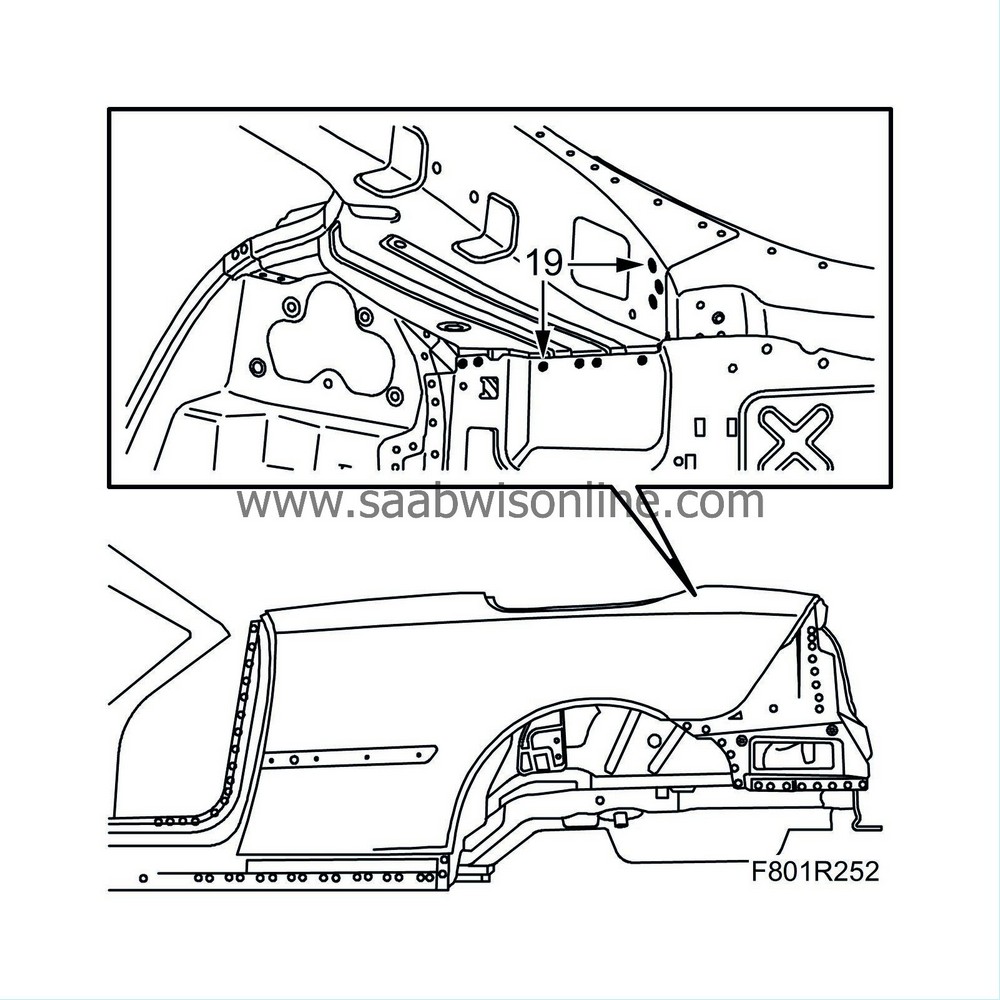
Spot and plug weld the lower crossmember panel on the relevant side.
|
|
| 20. |
Wash away surplus welding primer. Welding primer reduces the adhesion of paint, filler and sealant.
|
|
| 21. |
Apply primer to all bare metal surfaces. Use Standox 1K.
|
|
| 22. |
Seal joints and seams with sealant. Use 1K-PUR.
|
|
| 23. |
Apply anti-corrosion agent to internal surfaces after painting. Use Terotex HV 400.
|
|
| 24. |
Fit the
Bootlid
and
Soft top cover
.
|
|


