Inner, lower A-pillar with sill, 4D
| Inner, lower A-pillar with sill, 4D |
| Replacement |
Certain welded joints on the car may be MIG brazed with bronze as the filling material. A MIG brazed seam may be recognized from the gold colour of the joint. A MIG brazing must always be replaced by a new MIG brazing.
|
|||||||
| 1. |
Remove
Outer A-pillar with reinforcement, 4D
.
|
|
| 2. |
Drill out the spot welds on the front transverse reinforcement.


|
|
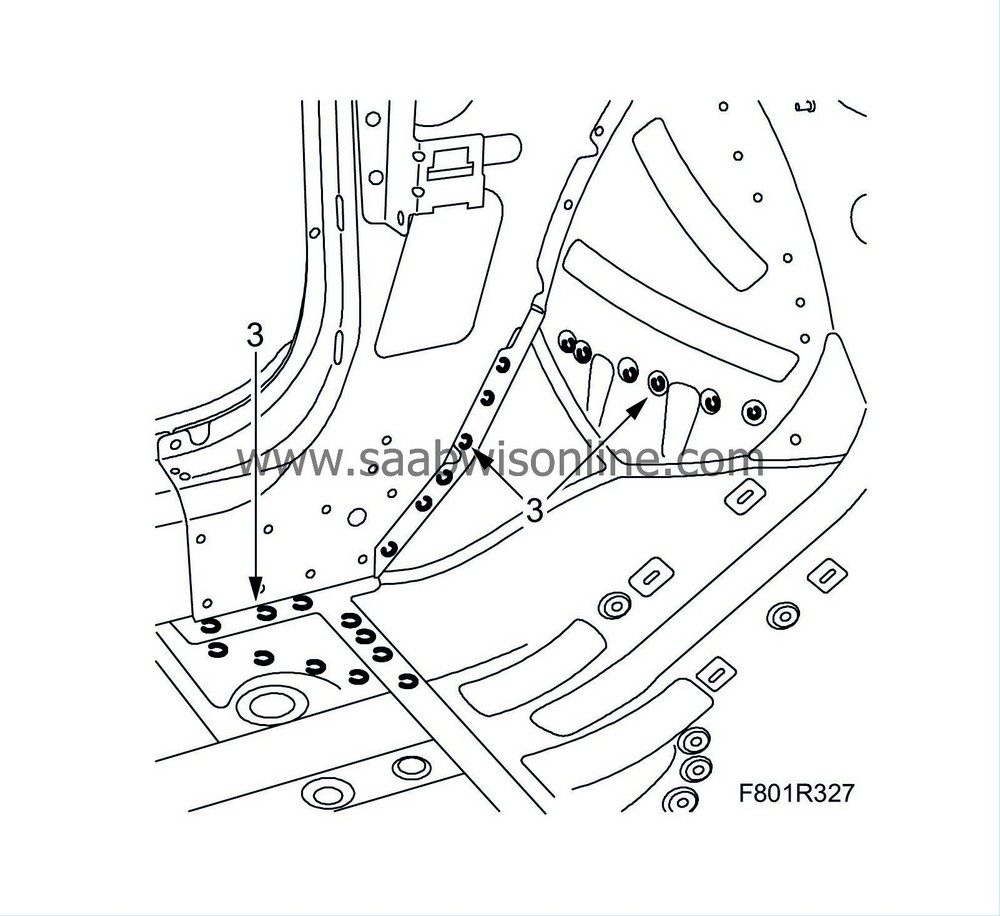
| 3. |
Drill out the spot welds from the inside as illustrated. Drill straight through the panels. The drill holes are useful for fitting.
|
|
| 4. |
Tap loose the front transverse reinforcement.
|
|
| 5. |
Cut the centre sill as illustrated.

|
|
| 6. |
Drill out the spot welds.
|
|
| 7. |
Tap loose the centre sill.
|
|
| 8. |
Cut the inner sill as illustrated.

|
|
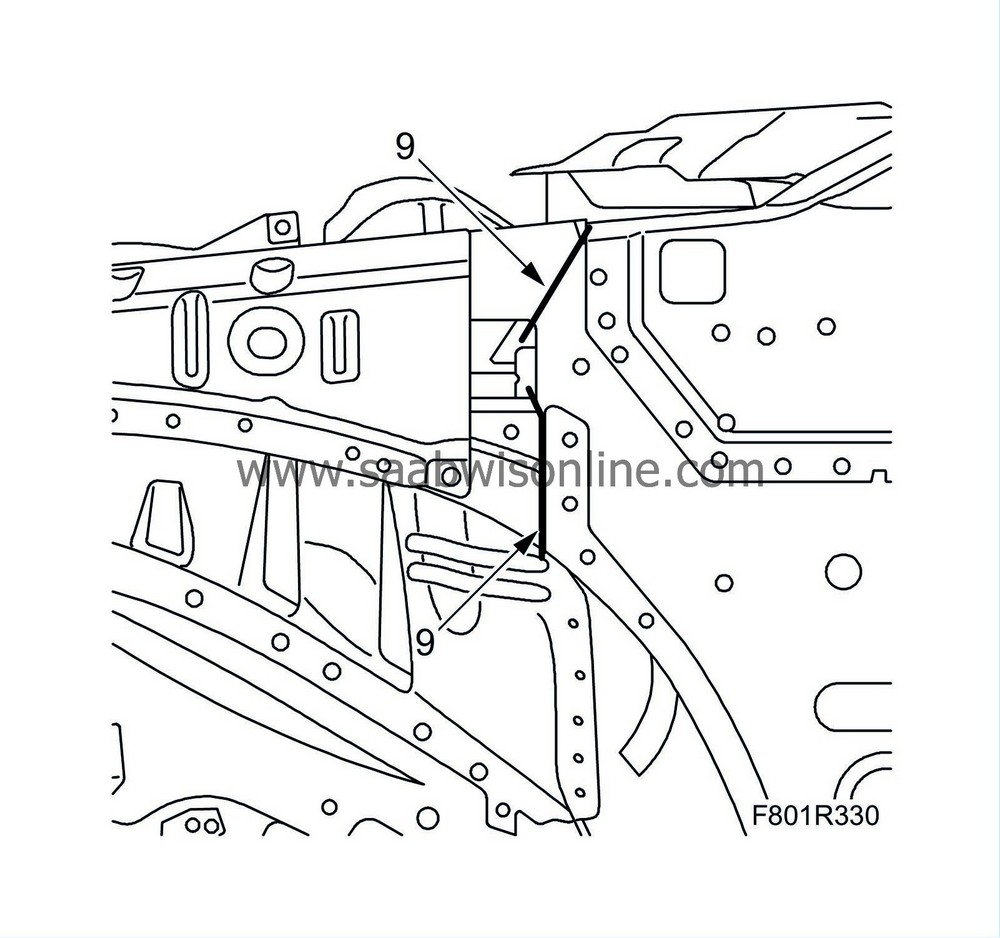
| 9. |
Cut the inner, lower A-pillar as illustrated.
|
|
| 10. |
Drill out the spot welds and grind down the MIG brazing.

If necessary, drill out the spot welds on the dashboard reinforcement. 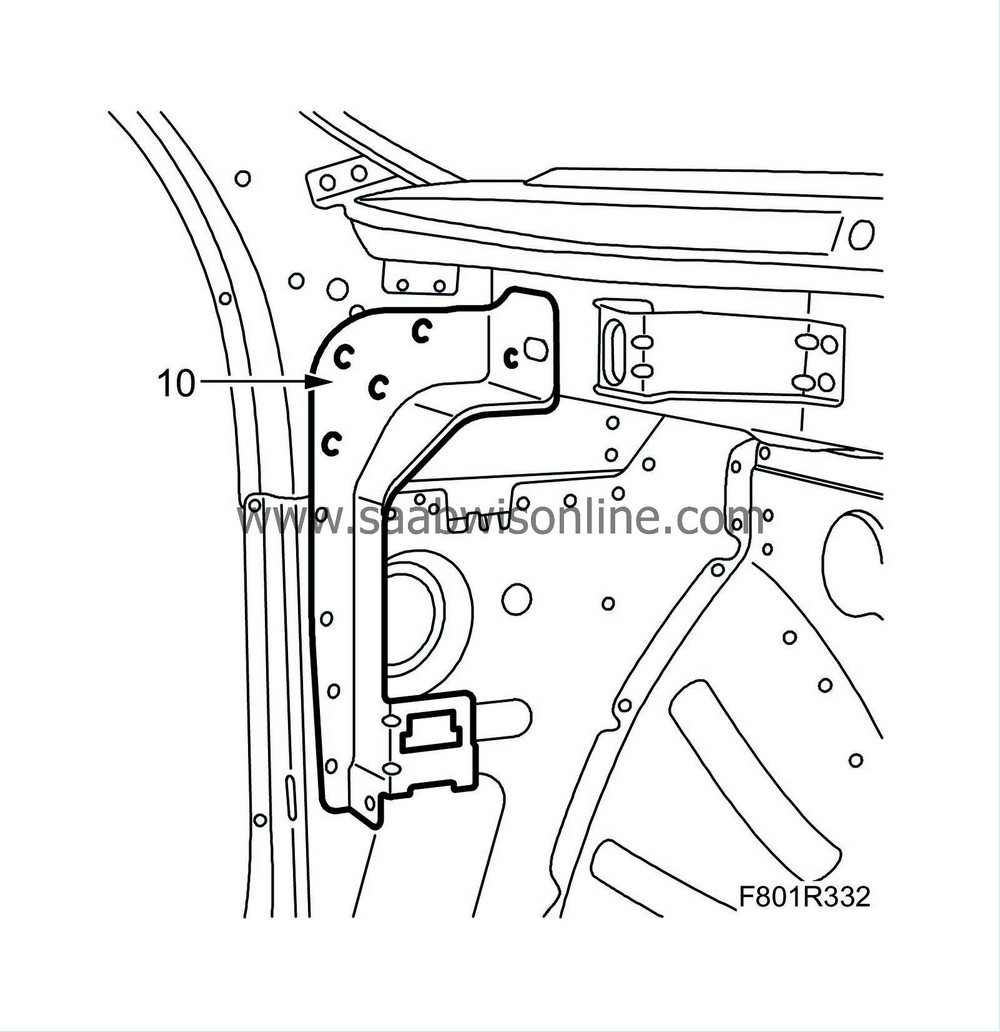
|
|
| 11. |
Tap loose the inner, lower A-pillar.
|
|
| 12. |
Align any deformed plates.
|
|
| 13. |
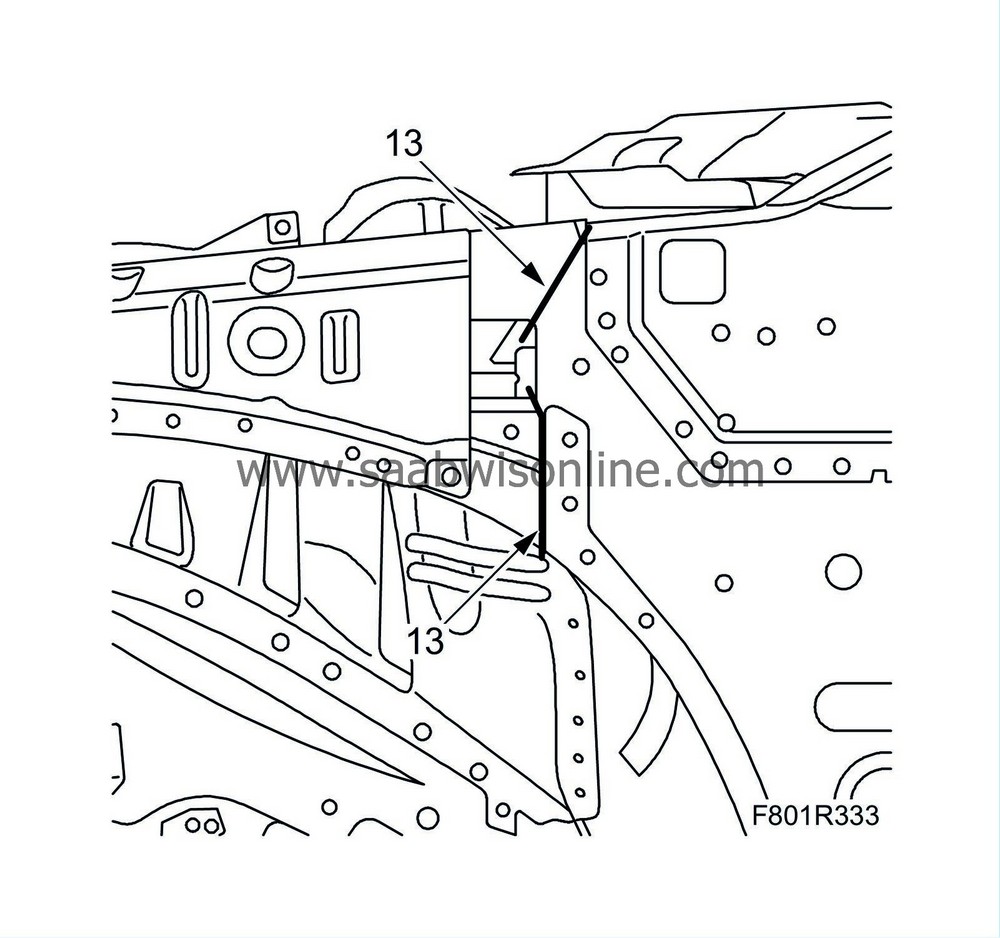
Cut the front edge of the spare part inner, lower A-pillar to roughly the right size. Cut so that it overlaps the previous cut.
|
|
| 14. |
Position the inner, lower A-pillar roughly and secure with welding clamps.
|
|
| 15. |
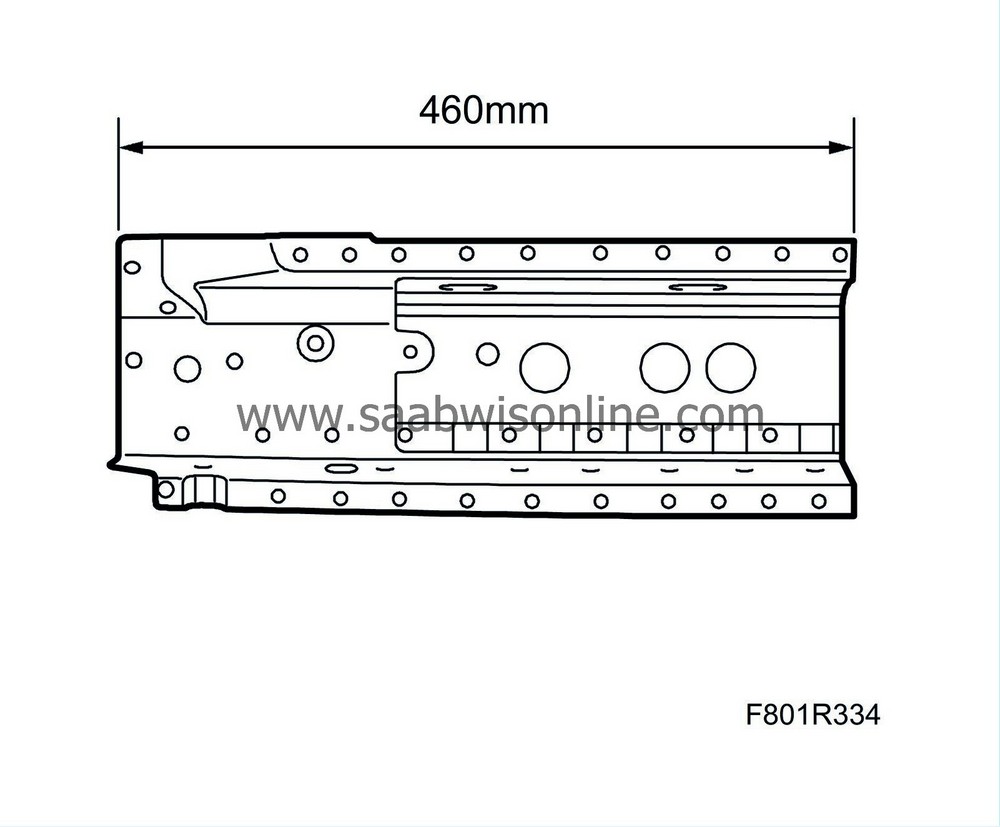
Cut the inner sill (spare part) so that it measures 460 mm.
|
|
| 16. |
Position the inner sill and secure with welding clamps.
|
|
| 17. |
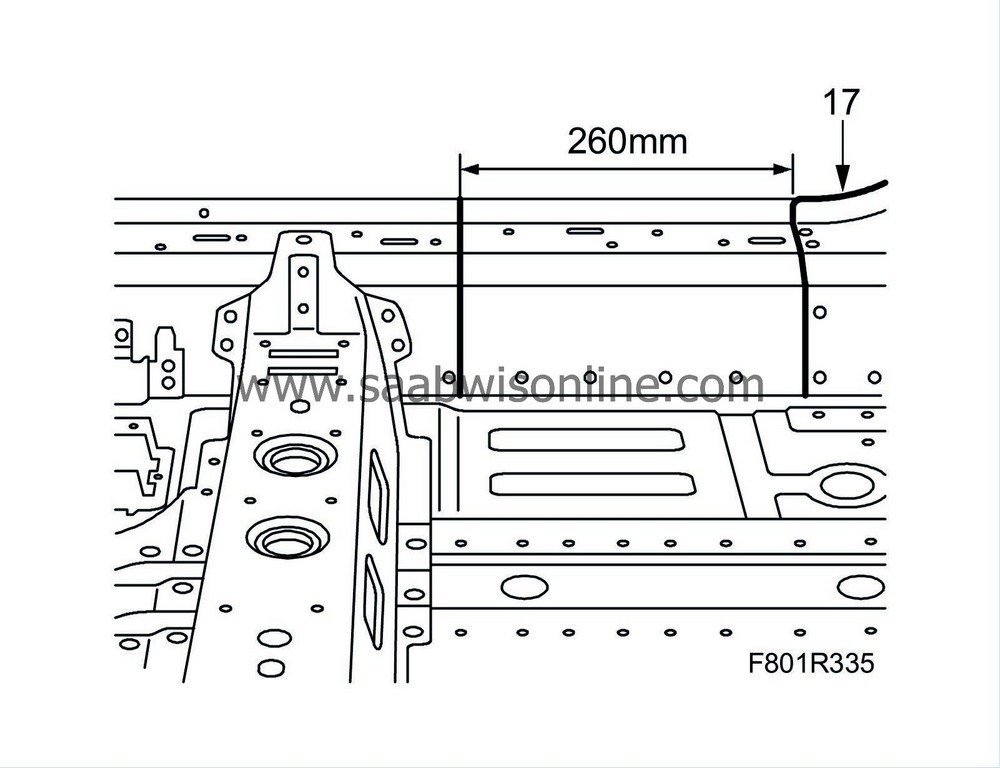
Position the inner, lower A-pillar. It must be 260 mm from the previous cut.
|
|
| 18. |
Now cut the front edge of the inner, lower A-pillar so it is edge-to-edge with the previous cut.

|
|
| 19. |
Grind the surfaces which are to be welded.
|
|
| 20. |
Apply welding primer to the surfaces to be spot and plug welded. Use Teroson Zink Spray.
|
|||||||||
| 21. |
Secure the spare part with spot and plug welds. Replace the MIG brazing.


|
|
| 22. |
Seam weld as illustrated. Weld the inside and outside of the inner sill.
|
|
| 23. |
Apply primer to the internal seam welds. Use Standox 1k.
|
|
| 24. |
Cut the centre sill so that it matches the previous cut.

|
|
| 25. |
Grind the surfaces which are to be welded.
|
|
| 26. |
Apply welding primer to the surfaces to be spot and plug welded. Use Teroson Zink Spray.
|
|
| 27. |
Position the centre sill and secure it with welding clamps.
|
|
| 28. |
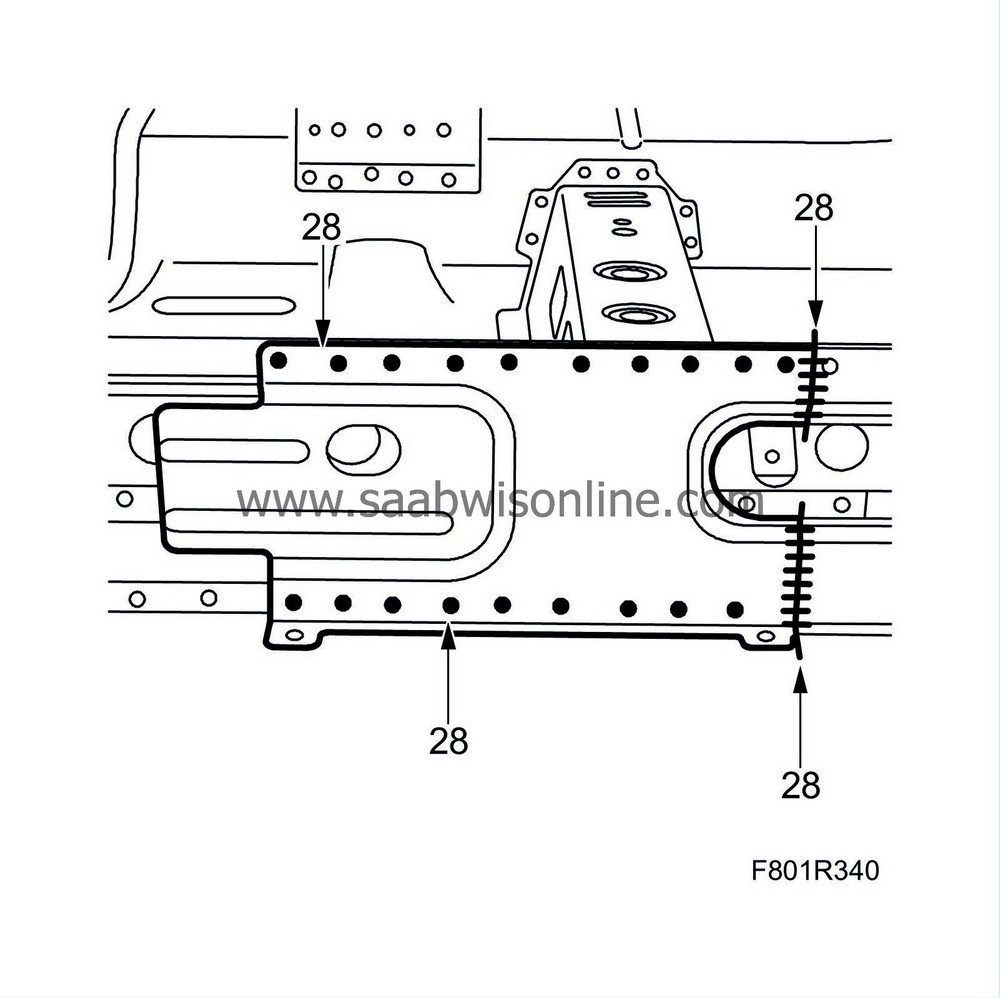
Weld the centre sill in place.
|
|
| 29. |
Smooth off the welds.
|
|
| 30. |
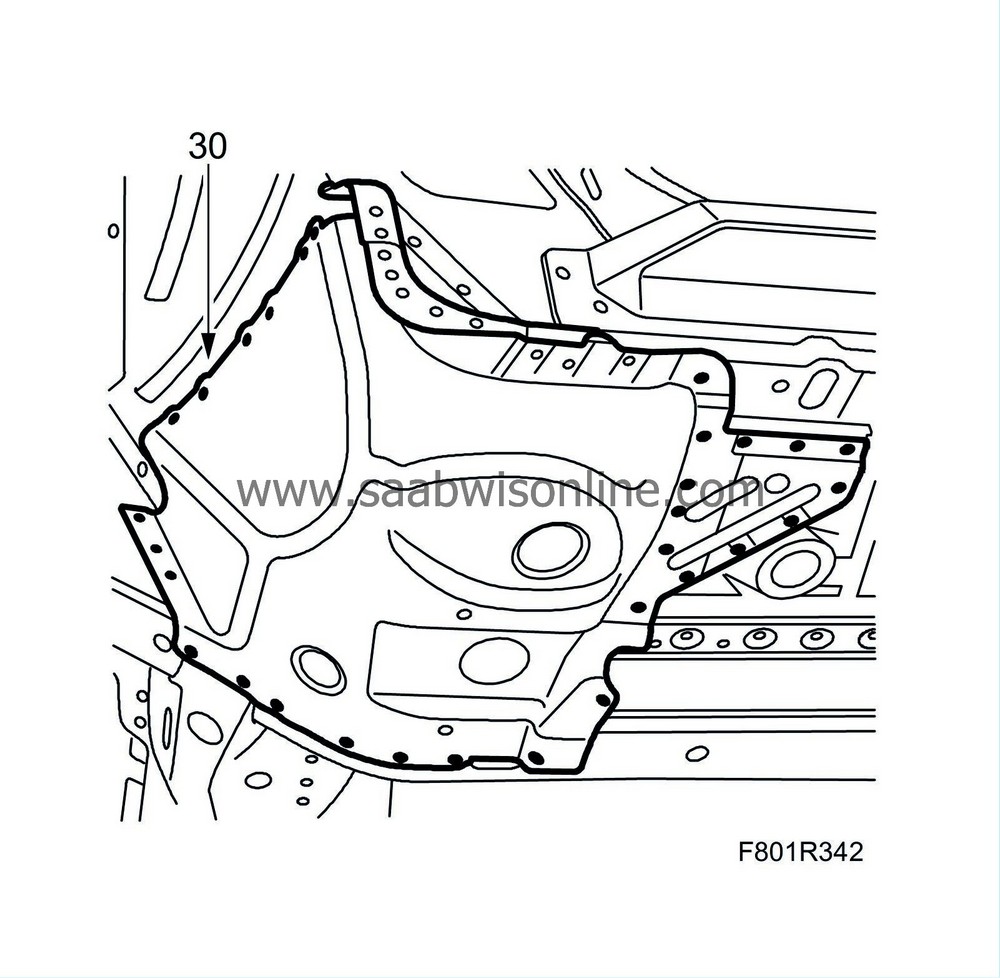
Fit the front transverse reinforcement and support. Use the dill holes from the spot welds.


|
|
| 31. |
Grind the welds and apply rustproofing. Use Terotex HV 400.
|
|
| 32. |
Fit
Outer A-pillar with reinforcement, 4D
|
|
| 33. |
Wash away surplus welding primer. Welding primer reduces the adhesion of paint, filler and sealant.
|
|
| 34. |
Apply primer to all bare metal surfaces. Use Standox 1K.
|
|
| 35. |
Use Terostat 1K-PUR to seal joints and metal folds.
|
|
| 36. |
Apply anti-corrosion agent to internal surfaces after painting. Use Terotex HV 400.
|
|

 Warning

