Part of rear floor
| Part of rear floor |
| To remove |
This method refers to the right-hand side but the left-hand side can be dealt with in a similar manner.
| 1. |
Remove the
Rear bumper abutment
.
|
|
| 2. |
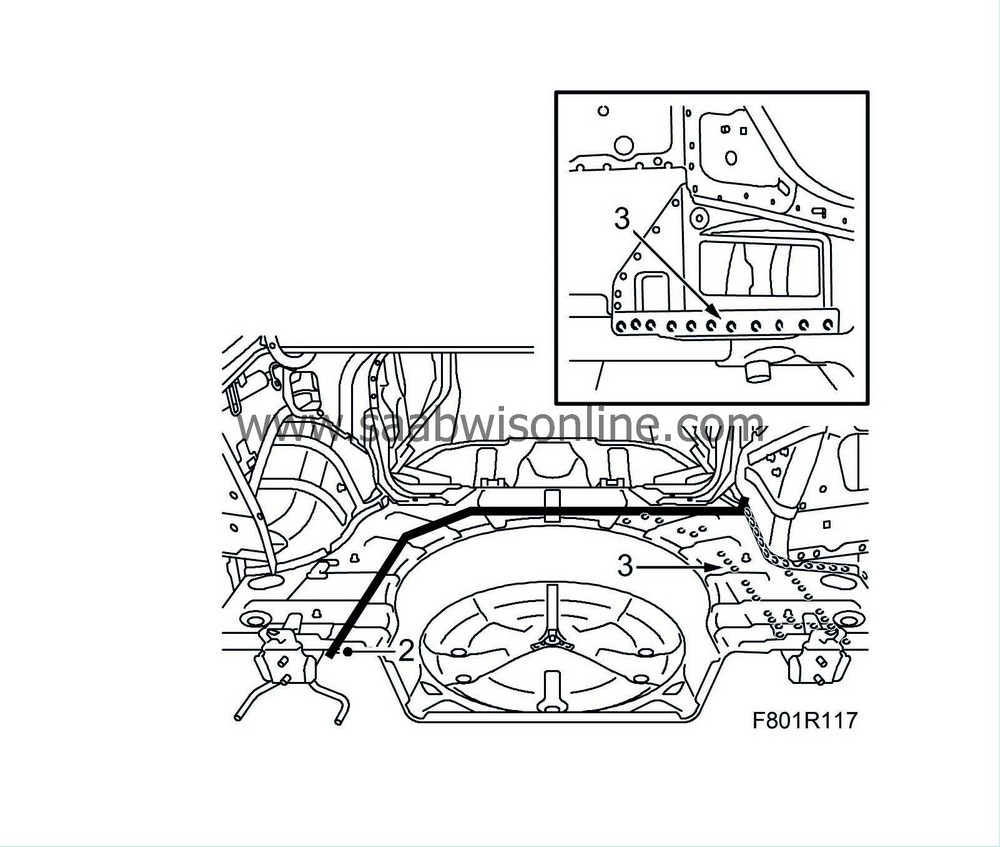
Cut the floor as indicated by the marks.

|
|
| 3. |
Drill out the spot welds.
|
|
| 4. |
Tap out the rear floor and straighten any deformed metal.
|
|
| To fit |
| 1. |
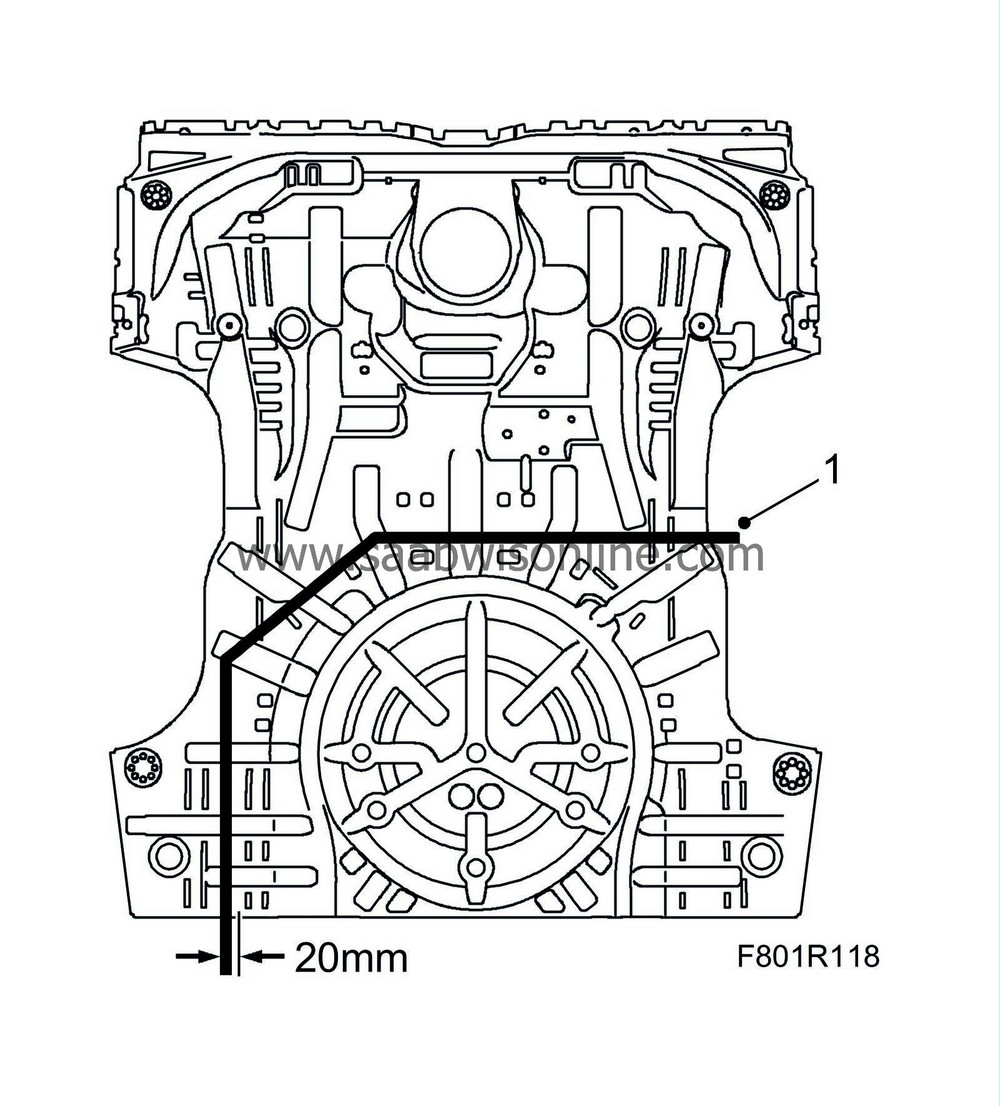
Cut the replacement panel as illustrated. The cut should be made so that the replacement panel overlaps by about 20 mm.

|
|
| 2. |
Drill holes for plug welding in the replacement panel.
|
|
| 3. |
Grind all surfaces that are to be welded.
|
|
| 4. |
Apply welding primer to all surfaces that are to be plug or spot welded.
|
|
| 5. |
Put the floor in place and align it.
|
|
| 6. |
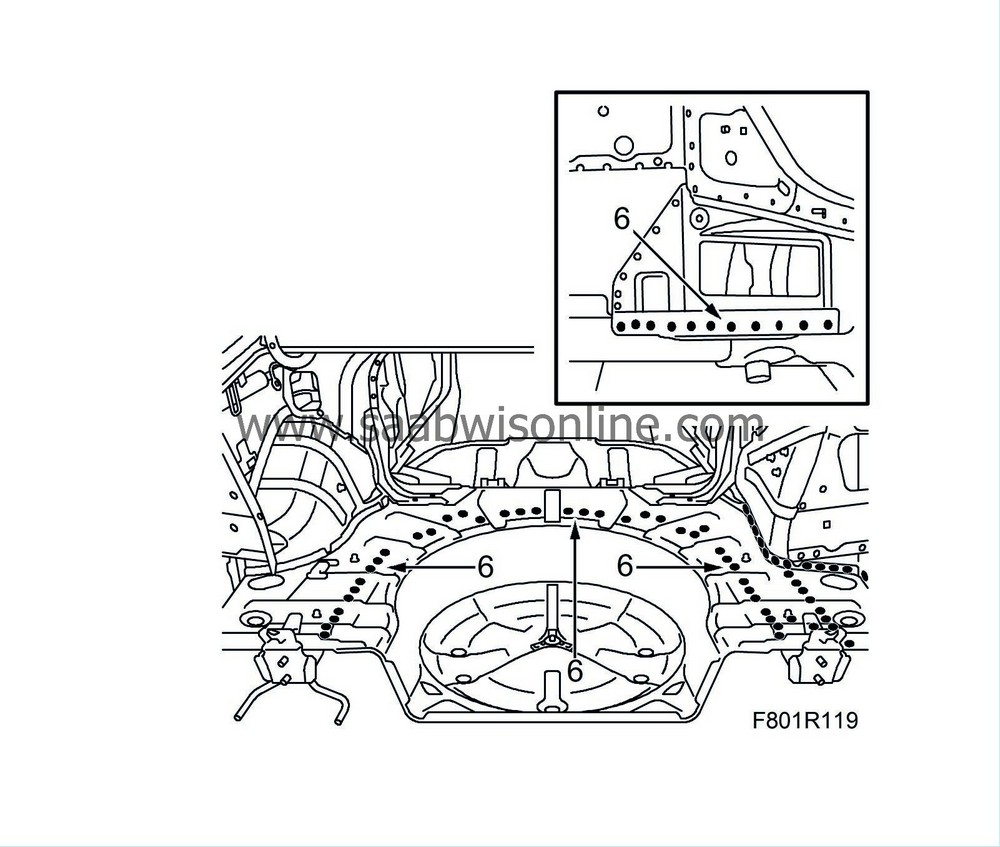
Weld the floor in place.

|
|
| 7. |
Grind the welds.
|
|
| 8. |
Wash away surplus welding primer. Welding primer reduces the adhesion of paint, filler and sealant.
|
|
| 9. |
Apply primer to all bare metal surfaces.
|
|
| 10. |
Fit the rear bumper abutment
.
|
|
| 11. |
Seal joints and seams with sealant.
|
|
| 12. |
Apply PVC replacement to the underside of the floor.
|
|
| 13. |
Apply a thin film of corrosion inhibitor inside frame members and cavities after painting.
|
|


