Engine Front Cover Installation (LF1, LFW or LFX)
| Engine Front Cover Installation (LF1, LFW or LFX) |
Special Tools
EN 46109 Guide PinsFor equivalent regional tools, refer to Special Tools .
| 1. |
Install the 8 mm (0.315 in) guide from the
EN 46109
pins into the cylinder block positions as shown.

|
|
| 2. |
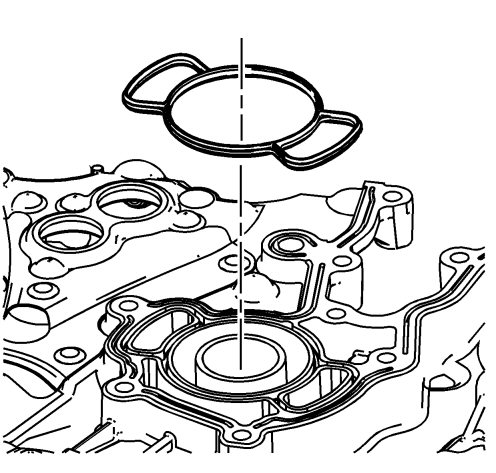
Install the NEW engine front cover to cylinder block seal.

|
|
| 3. |
Place a 3 mm (0.118 in) bead of RTV sealant on the engine front cover as shown (1). Refer to
Adhesives, Fluids, Lubricants, and Sealers
for recommended sealant.

|
|
| 4. |
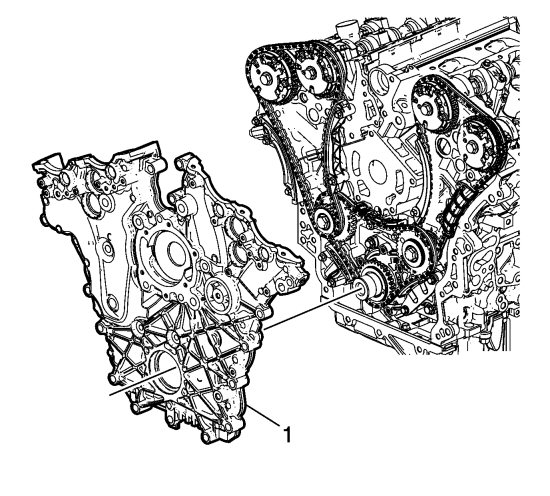
Place the engine front cover (1) onto the
EN 46109
pins and slide into position.

|
|
| 5. |
Remove the
EN-46109
pins from the cylinder block.
|
|
| 6. |
Hand start all the engine front cover bolts.
|
|
| 7. |
Refer to
Fastener Caution
.
Tighten the engine front cover bolts (1-23) in the sequence shown to 20 Nm (14 lb ft) . 
|
|||||||
| 7.1. |
Tighten the engine front cover bolts (1-23) a second time in sequence to
20 Nm (14 lb ft)
.
|
| 7.2. |
Tighten the engine front cover bolts (1-23) a third pass in sequence an additional
60 degrees
.
|
| 8. |
Tighten the engine front cover bolts (24) to
65 Nm (48 lb ft)
.
|
|
| 9. |
Tighten the engine front cover bolts (25) to
65 Nm (48 lb ft)
.
|
|
| 10. |
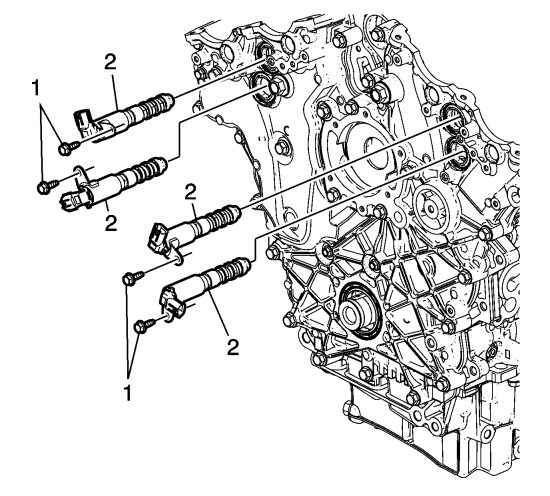
Place the camshaft position actuator valves (2) in position on the front cover.

|
|
| 11. |
Install the bolts (1) for the setting valve for camshaft position and tighten to
10 Nm (89 lb in)
.
|
|
| 12. |
Install NEW O-rings on the camshaft position sensor.

|
|
| 13. |
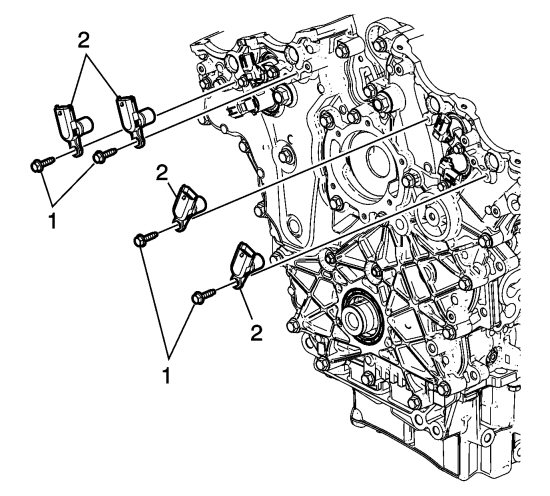
Place the camshaft position sensors (2) in position on the front cover.
|
|
| 14. |
Install the camshaft's position sensor bolts (1) and tighten to
10 Nm (89 lb in)
.
|
|


