Transfer Case Disassemble
|
|
Transfer Case Disassemble
|
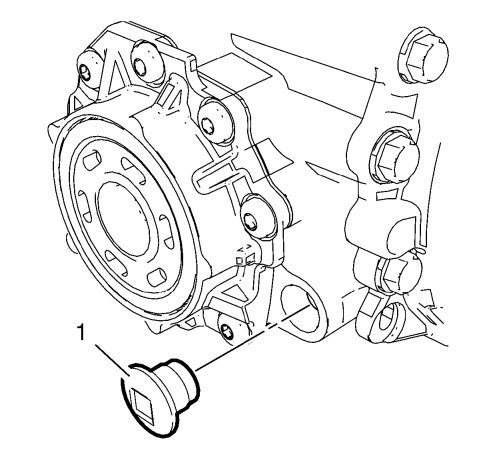
Remove and discard the oil drain plug (1) and seal.
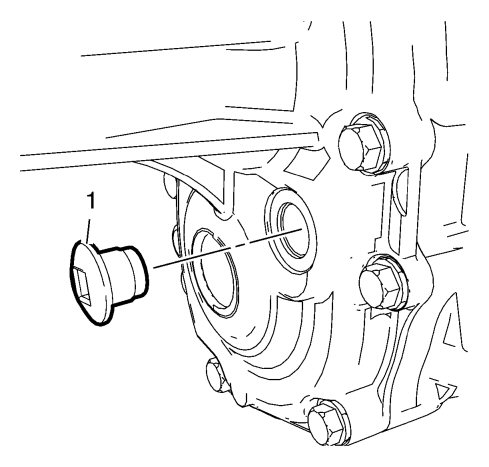
Remove and discard the oil fill plug (1) and seal.
|
Transfer Case Vent Removal
|

Remove the transfer case vent hose connector (1), as required.
|
Transfer Case-to-Transmission Seal Removal
|
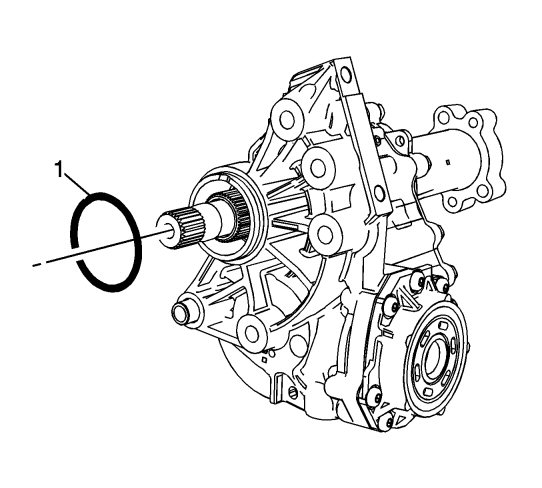
Remove and discard the transfer case-to-transmission seal (1).
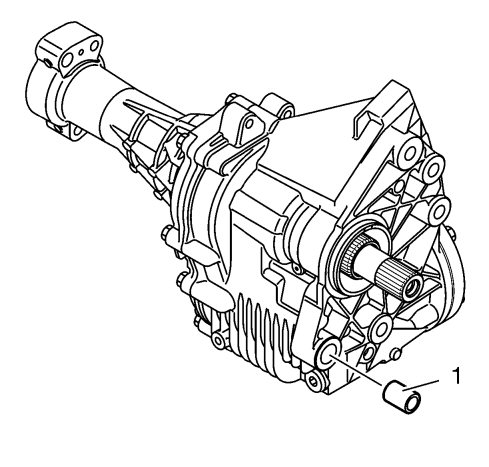
Remove the transfer case locating bushing (1), using multi-grip pliers as required-RPO MXE.
|
Front Wheel Drive Intermediate Shaft Removal
|
Special Tools
|
•
|
DT-622-A
Transmission Bracket
|
For equivalent regional tools, refer to
Special Tools
.
|
1.
|
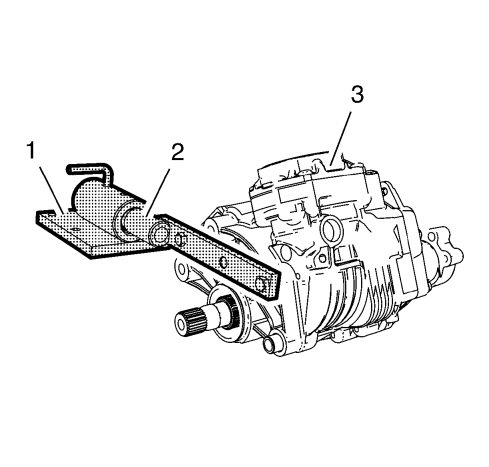
Secure the transfer case (3) in
DT-113-2-A
holder (1) , using the
DT-622-A
adapter (2).
|
|
2.
|
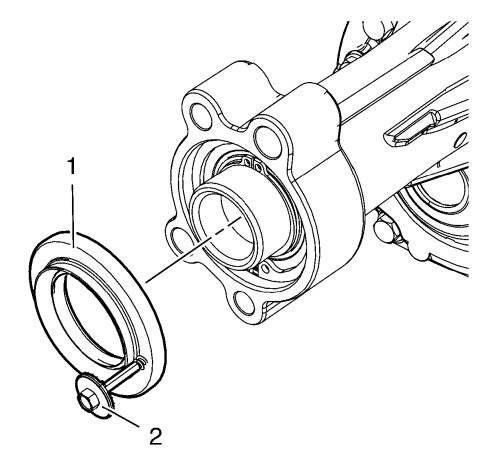
Install a sheet metal screw (2) into outer surface of the dirt deflector and grease seal assembly and remove with suitable pliers.
|
|
3.
|
Discard the dirt deflector and grease seal assembly (1).
|
|
4.
|
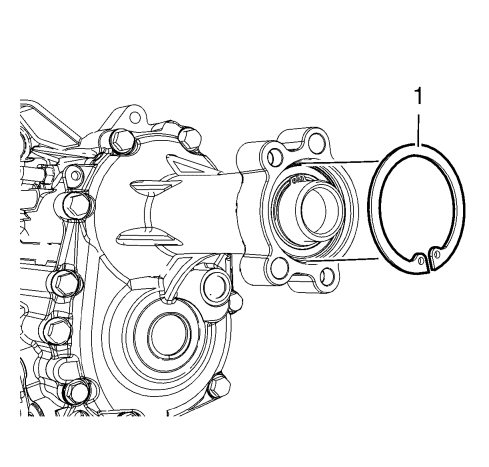
Remove the transfer case intermediate shaft retaining ring (1), using suitable snap ring pliers.
|
|
5.
|
Remove the transfer case intermediate shaft (1), with bearing, using a rubber mallet.

|
|
Front Wheel Drive Intermediate Shaft Bearing Removal
|
Special Tools
DT-307-B
Remover Plate
For equivalent regional tools, refer to
Special Tools
.
|
1.
|
Remove the transfer case intermediate shaft bearing retaining ring (2) from intermediate shaft (1), using suitable pliers.

|
|
2.
|
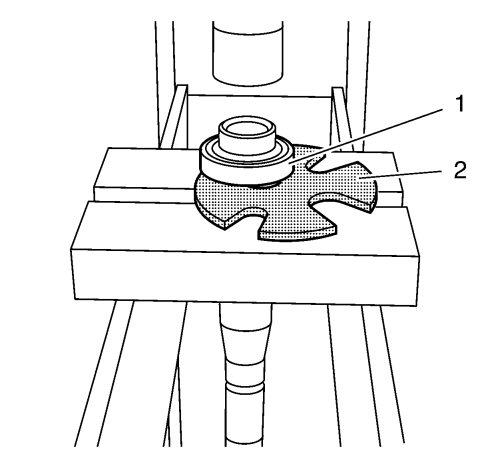
Remove the transfer case intermediate shaft bearing (1), using the
DT-307-B
remover plate and a hydraulic press.
|
|
Rear Output Shaft Seal Removal
|
|
1.
|
|
Note
|
|
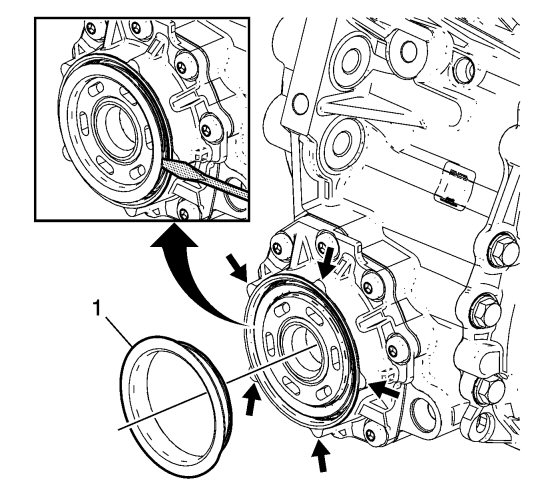
Be sure to only pry against the five flat bosses on the rear output shaft housing.
|
Remove the inner metal sleeve (1) from the seal by working a screwdriver around the perimeter of the sleeve, prying only against the flat bosses of the output shaft housing.
|
|
2.
|
|
Note
|
|
•
|
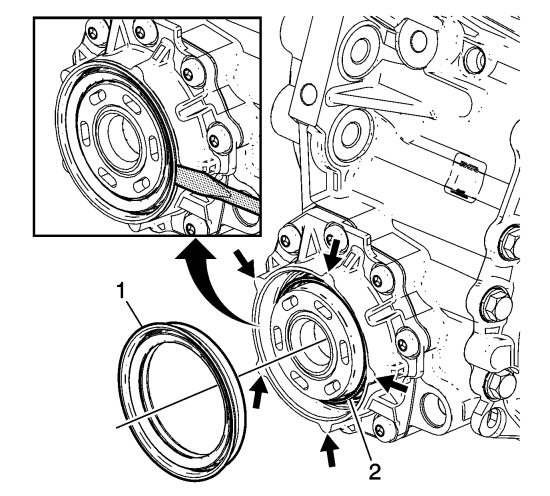
Be sure to only pry against the five flat bosses on the rear output shaft housing.
|
|
•
|
The seal tension spring (2) may fall off as the seal is removed.
|
Remove the rear output shaft seal (1) by working a sharpened chisel around the perimeter of the seal, prying only against the flat bosses of the output shaft housing.
|
|
3.
|
Ensure the seal tension spring (2) is removed from the bore.
|
|
Rear Output Shaft Housing Removal
|
|
1.
|
|
Note
|
|
•
|
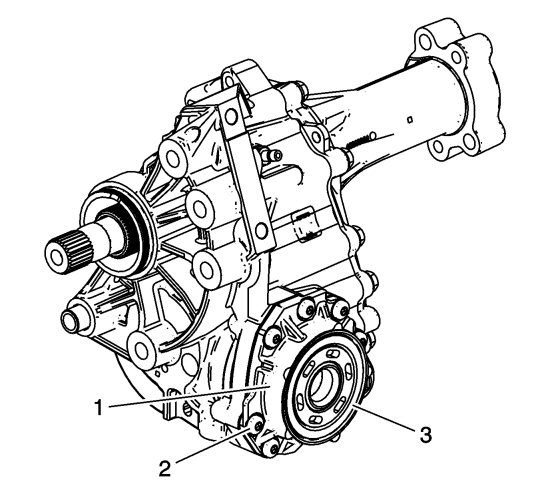
Do not attempt to remove the rear output shaft housing (1) or bolts (2) from the transfer case assembly.
|
|
•
|
The rear output shaft, shaft bearings, housing (1) and housing o-ring seal are not serviceable components.
|
|
•
|
The rear output shaft seal (3) is a serviceable component. Refer to Rear Output Shaft Seal Removal and Rear Output Shaft Seal Installation.
|
|
|
Rear Extension Housing Removal
|
|
1.
|
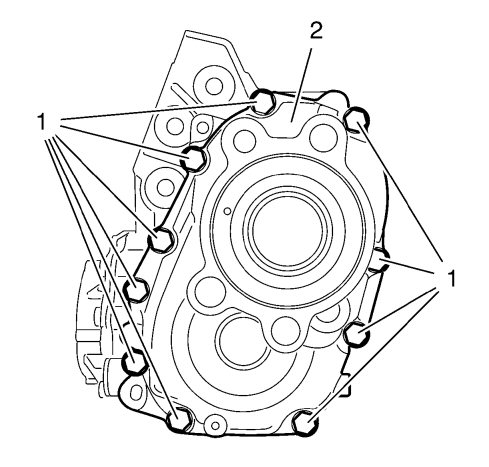
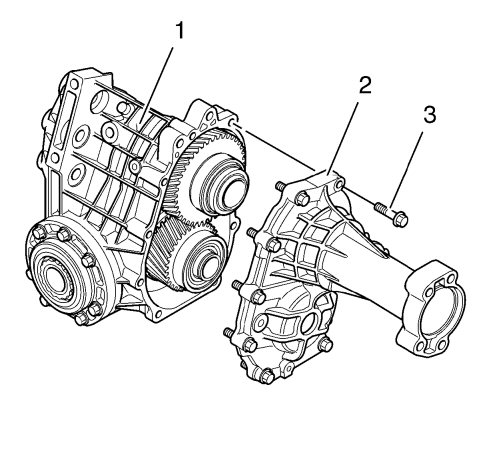
Remove the transfer case rear extension housing bolts (1) from the rear extension housing (2).
|
|
2.
|
Remove the rear extension housing (2) and bolts (3).
|
|
3.
|
Dismantle and discard the rear extension housing gasket on the transfer case

|
|
Input Shaft and Idler Shaft Removal
|
|
1.
|
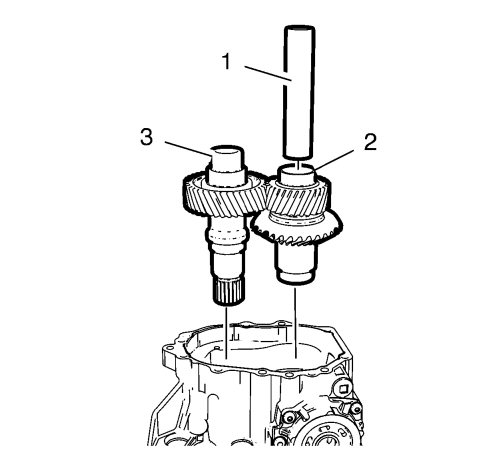
Remove the input shaft (3)
|
|
2.
|
Remove the idler gear (2).
|
|
3.
|
Remove the idler gear shaft (1)-RPO MXE.
|
|
Input Shaft Bearing Retainer Front Seals Removal
|
|
1.
|
|
Note
|
|
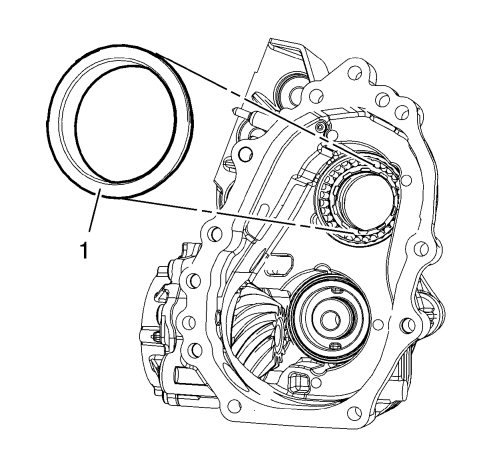
There are two input shaft front seals located in the transfer case housing.
|
Remove the transfer case input shaft front (inner) seal (1) using a suitable screw driver.
|
|
2.
|
|
Note
|
|
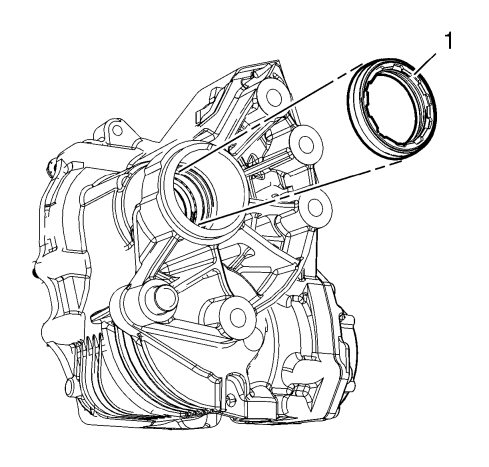
There are two input shaft front seals located in the transfer case housing.
|
Remove the transfer case input shaft front (outer) seal (1) using a suitable screw driver.
|
|
Idler Gear Shaft Front Seal Removal
|
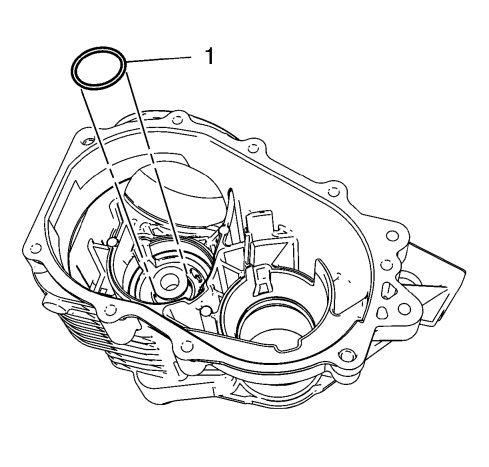
Remove the transfer case idler gear shaft front seal (1) from transfer case. - RPO MXE
|
Idler Gear Shaft Rear Seal Removal
|

Remove the transfer case idler gear shaft rear seal (1) from the rear extension housing. - RPO MXE
|
Input Shaft Bearing Retainer Rear Seal Removal
|
|
Note
|
|
To avoid damage to the housing, use a brass punch to remove the seal.
|
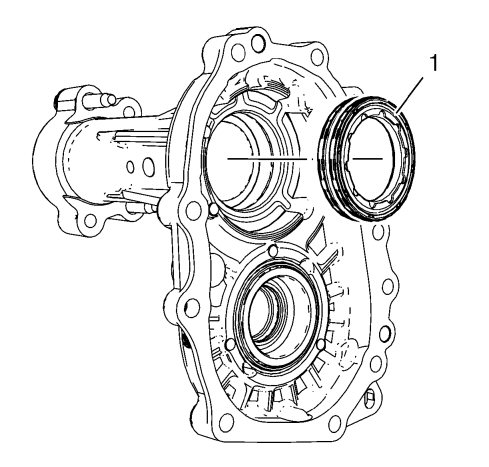
Remove the transfer case input shaft rear seal (1) from the rear extension housing.
|
Front Wheel Drive Intermediate Shaft Seal Removal
|

Remove the intermediate shaft seal (1) from the rear extension housing using a suitable screw driver.


