Master Cylinder Reservoir Replacement
| Master Cylinder Reservoir Replacement |
| Removal Procedure |
Refer to Brake Fluid Irritant Warning .
Refer to Brake Fluid Effects on Paint and Electrical Components Caution .
| 1. |
Using a suitable tool, remove and properly discard the brake fluid from the master cylinder reservoir.
|
|
| 2. |
Without draining the coolant or removing the hoses, remove and position aside the radiator surge tank. Refer to
Radiator Surge Tank Replacement (LAU)
Radiator Surge Tank Replacement (LF1)
.
|
|
| 3. |
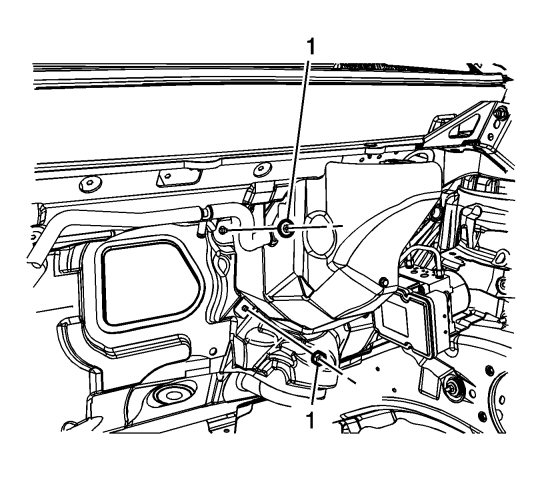
If equipped with the master cylinder heat shield, remove the master cylinder heat shield nuts (1). 
|
|||||||
| 4. |
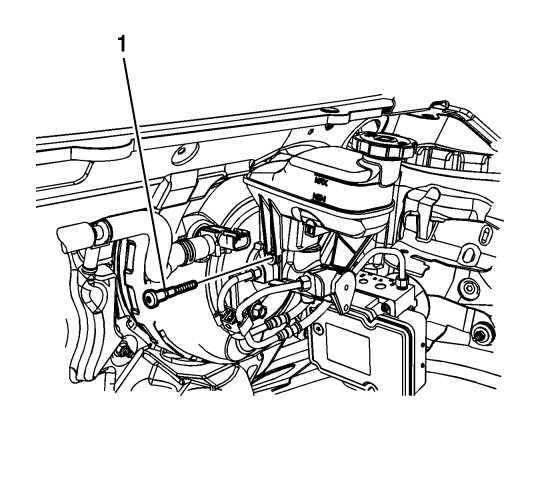
Remove the master cylinder heat shield bolt (1).

|
|
| 5. |
Remove the master cylinder heat shield.
|
|
| 6. |
Disconnect the brake fluid level indicator switch electrical connector.
|
|
| 7. |
Remove the master cylinder reservoir bolt (1).

|
|
| 8. |
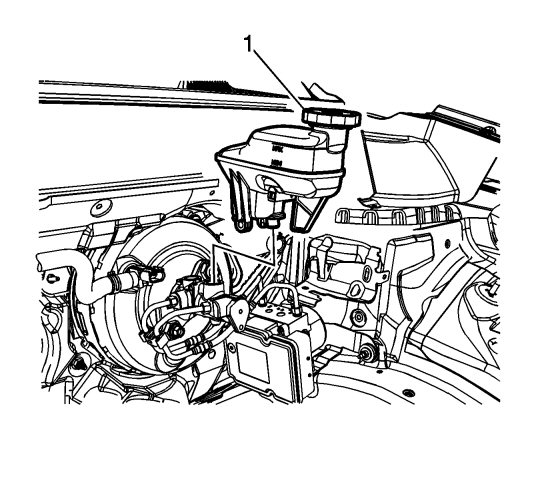
Lift the master cylinder reservoir (1) upward to release the reservoir from the reservoir seals and the master cylinder.

|
|
| 9. |
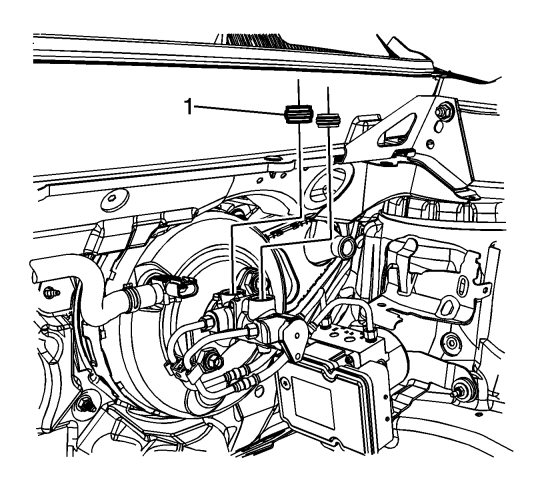
Remove the 2 master cylinder reservoir seals (1).

|
|
| Installation Procedure |
| 1. |
Lubricate the master cylinder reservoir seals with GM approved brake fluid from a clean, sealed, brake fluid container.
|
|
| 2. |
Install the 2 master cylinder reservoir seals (1). 
|
|||||||
| 3. |
Firmly and squarely press the master cylinder reservoir (1) into the master cylinder. 
|
|||||||
| 4. |
Refer to
Fastener Caution
.
Install the master cylinder reservoir bolts (1) and tighten to 6 Nm (53 lb in) . 
|
|
| 5. |
Connect the brake fluid level indicator switch electrical connector.
|
|
| 6. |
Install the master cylinder heat shield, if equipped.
|
|
| 7. |
Install the master cylinder heat shield bolt (1) and tighten to
10 Nm (89 lb in)
.

|
|
| 8. |
Install the master cylinder heat shield nuts (1) and tighten to 25 Nm (18 lb ft) . 
|
|||||||
| 9. |
Install the radiator surge tank. Refer to
Radiator Surge Tank Replacement (LAU)
Radiator Surge Tank Replacement (LF1)
.
|
|
| 10. |
Fill the master cylinder reservoir. Refer to
Master Cylinder Reservoir Filling
.
|
|


