Lower Control Arm Replacement
| Lower Control Arm Replacement |
Special Tools
CH 47975-A Ball Joint RemoverFor equivalent regional tools, refer to Special Tools .
| Removal Procedure |
| 1. |
Raise and support the vehicle. Refer to
Lifting and Jacking the Vehicle
.
|
|
| 2. |
Remove the tire and wheel assembly. Refer to
Tire and Wheel Removal and Installation
.
|
|
| 3. |
Support the steering knuckle with a suitable stand.
|
|
| 4. |
Disconnect the electric front suspension accelerometer link from the lower control arm, if equipped.
|
|
| 5. |
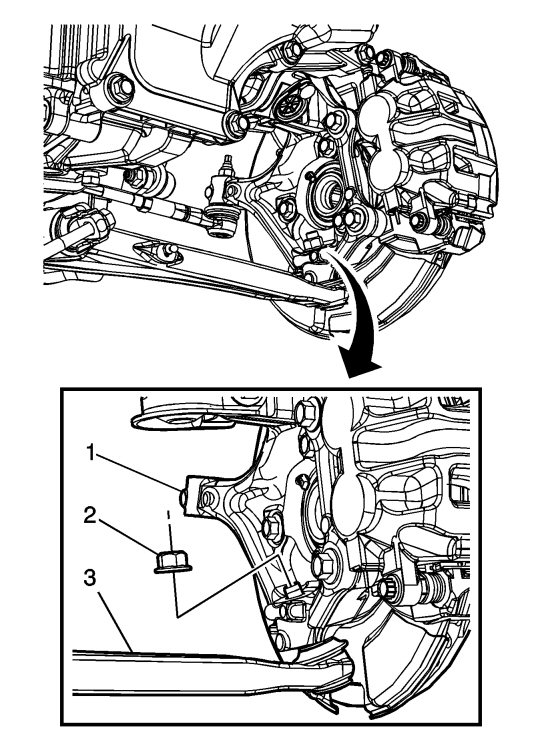
Loosen the front lower control arm ball stud nut (2) from the ball joint.

|
|
| 6. |
Using the
CH 47975-A remover
, separate the front lower control arm (3) from the steering knuckle (1).
|
|
| 7. |
Remove the
CH 47975-A remover
|
|
| 8. |
Remove the front lower control arm rear nuts (1) and the front lower control arm rear bolts (2).

|
|
| 9. |
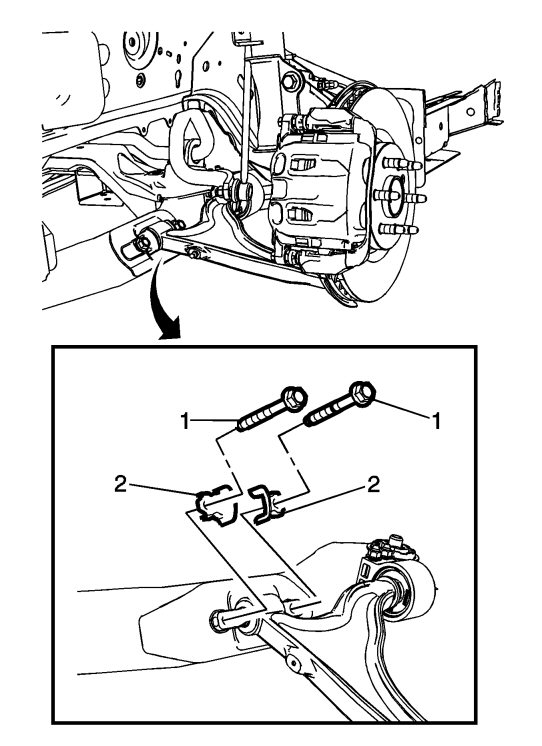
Remove front lower control arm front bolts (1) and the brackets (2). 
|
|||||||
| 10. |
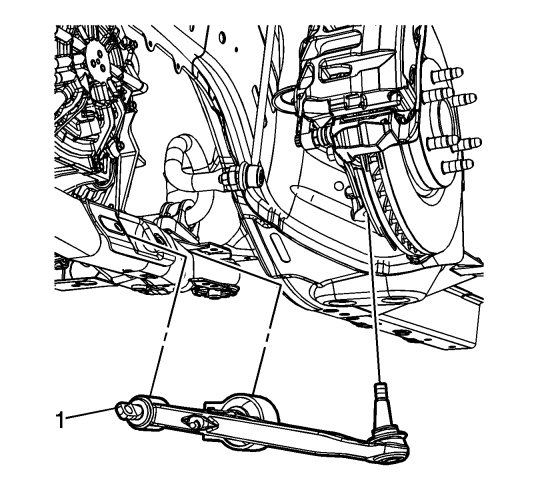
Remove the front lower control arm (1) from the vehicle.

|
|
| Installation Procedure |
| 1. |
Position the front lower control arm (1) in the frame.

|
|
| 2. |
Refer to Fastener Caution . Install the front lower control arm front mounting brackets (2) bolts (1) and tighten to 100 Nm (74 lb ft) plus an additional 90 degrees. 
|
|||||||||
| 3. |
Install the front lower control arm rear bolts (2) and the front lower control arm rear nuts (1).

|
|
| 4. |
Tighten the front lower control arm rear bolts (2) to
110 Nm (81 lb ft).
|
|
| 5. |
Install the front lower control arm ball stud nut (2) to the ball joint and tighten to
30 Nm (22 lb ft) plus an additional 120 degrees.

|
|
| 6. |
Reconnect the electric front suspension accelerometer link to the lower control arm, if equipped.
|
|
| 7. |
Remove the support from the steering knuckle.
|
|
| 8. |
Install the tire and wheel assembly. Refer to
Tire and Wheel Removal and Installation
.
|
|
| 9. |
Remove the support and lower the vehicle.
|
|

 Warning

