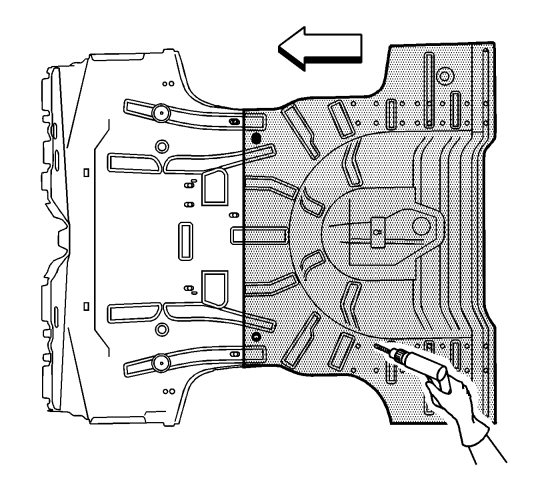
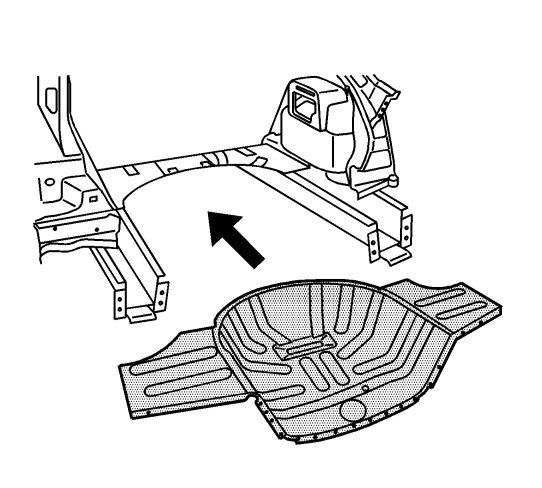
Rear Compartment Floor Panel Sectioning
| Rear Compartment Floor Panel Sectioning |
| Removal Procedure |
Refer to Approved Equipment for Collision Repair Warning .
Refer to Glass and Sheet Metal Handling Warning
See Warning during the repair of collision damage with repair sheet metal
|
|||||||
| 1. |
Disable the SIR system. Refer to
SIR Disabling and Enabling
.
|
|
| 2. |
Disconnect the negative battery cable. Refer to
Battery Negative Cable Disconnection and Connection
.
|
|
| 3. |
Remove all related panels and components. 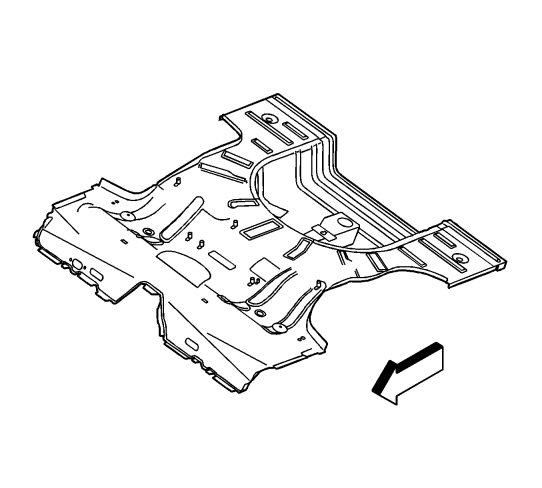
|
|||||||
| 4. |
Remove the sealers and anti-corrosion materials from the repair area, as necessary.
|
|
| 5. |
Repair as much of the damaged area as possible. Refer to
Dimensions - Body
.
|
|
| 6. |
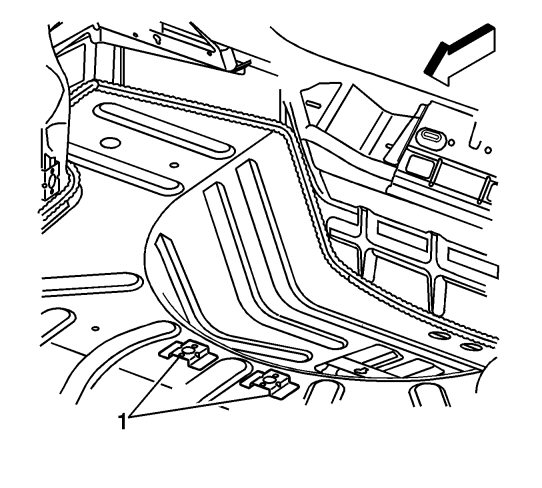
Remove the mounting plates (1) on top of the #5 bar floor panel.
|
|
| 7. |
Locate the rear edge of cross bar #5 from under the vehicle. 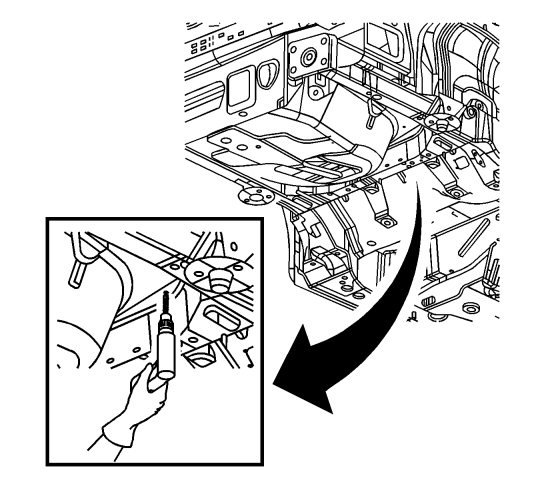
|
|||||||
| 8. |
Drill several 1/8 in holes in the floor pan only along the rear edge of the rear weld flange of cross bar #5. This will aid in identifying the location from the top side of the floor pan.
|
|
| 9. |
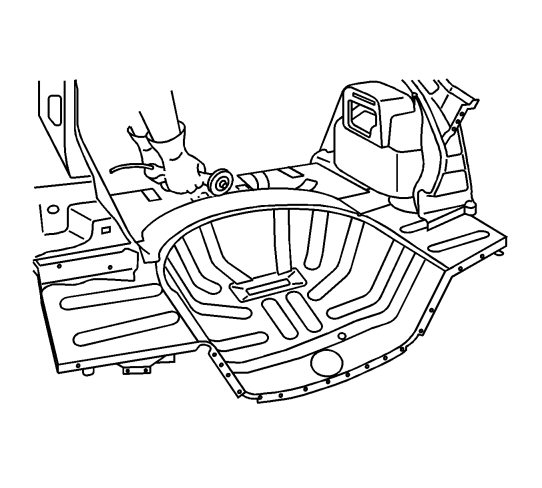
Cut the floor panel following the rear edge radius of the #5 bar. Where the #5 bar ends at the rails, cut the radius floor panel straight across.
|
|
| 12. |
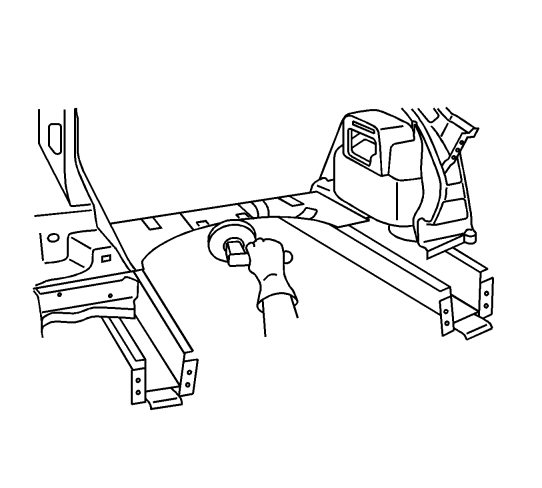
Cut and grind flush the original panel of the rear compartment panel at the rear edge of the #5 crossbar.
|
|
| Installation Procedure |
| 1. |
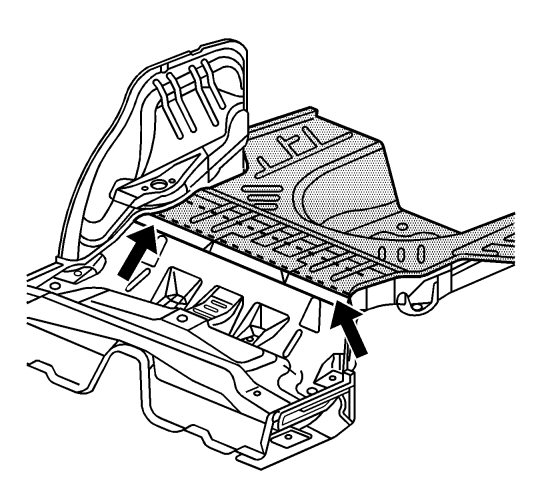
On the rear compartment floor panel service part, measure from the front edge of the tire tub 200 mm (8 in). Scribe a line across the rear compartment pan.
|
|
| 2. |
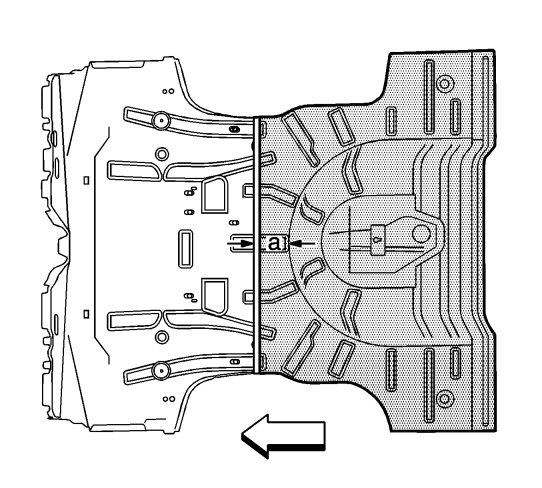
Place a piece of masking tape along the top side of the rear compartment floor pan (a).
|
|
| 3. |
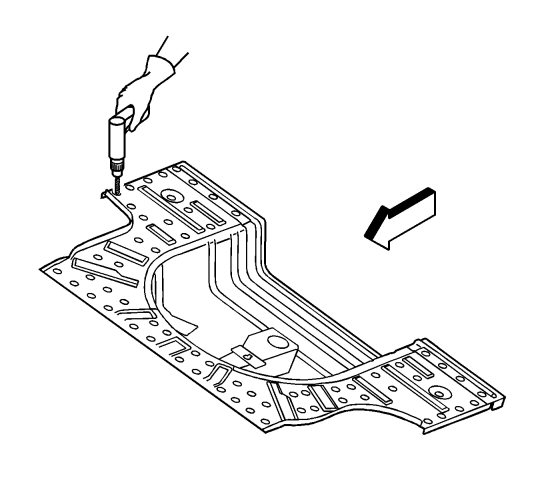
Cut along the forward edge of the tape, the edge that would be closest to the front of the #5 bar seat, and remove the rear portion of the panel.
|
|
| 4. |
Drill 8 mm (5/16 in) plug weld holes in the service part as necessary in the corresponding locations noted on the original panel.
|
|
| 5. |
Lay out and drill 2 additional rows of 8 mm (5/16 in) plug weld holes on top of the #5 bar weld flanges.
|
|
| 6. |
Prepare all mating surfaces for welding as necessary.
|
|
| 7. |
Apply GM-approved Weld-Thru Coating or equivalent to all mating surfaces.
|
|
| 8. |
Position the rear floor pan to the vehicle using 3-dimensional measuring equipment. Clamp the part in place.
|
|
| 9. |
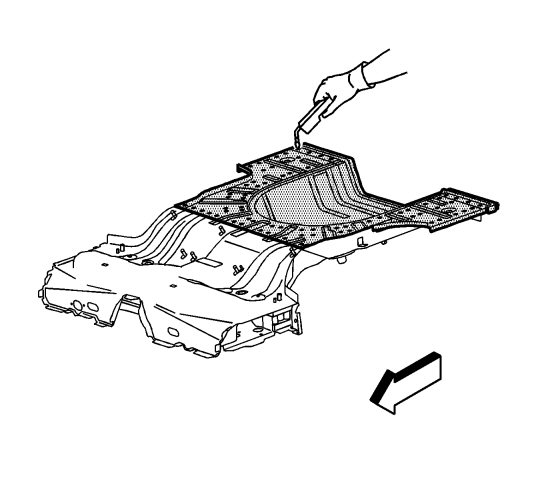
Plug weld accordingly.
|
|
| 10. |
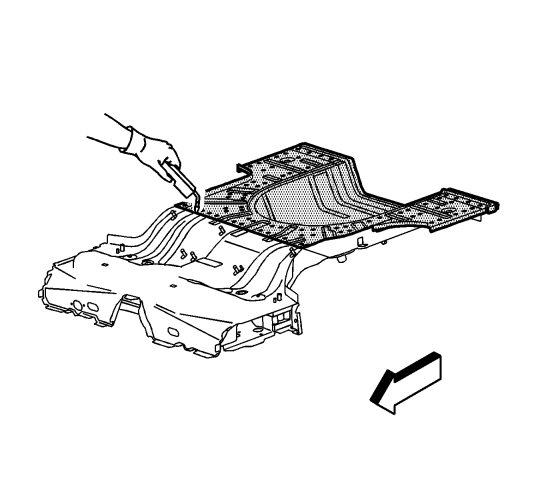
Weld the seam along the front cut edge of the floor panel service part. To create a solid weld along the front of the service part with a minimum of heat distortion , make a stitch weld along the seam with 25 mm (1 in) gaps between each weld.
|
|
| 11. |
Clean and prepare all welded surfaces.
|
|
| 12. |
Apply the sealers and anti-corrosion materials to the repair area, as necessary.
|
|
| 13. |
Paint the repair area. See
Basecoat/Clearcoat Paint Systems
.
|
|
| 14. |
Install all related panels and components.
|
|
| 15. |
Connect the negative battery cable. Refer to
Battery Negative Cable Disconnection and Connection
.
|
|
| 16. |
Activate the SIR system. See
SIR Disabling and Enabling
.
|
|

 Warning
