Air Conditioning O-Ring Seal Replacement
|
|
Air Conditioning O-Ring Seal Replacement
|
|
1.
|
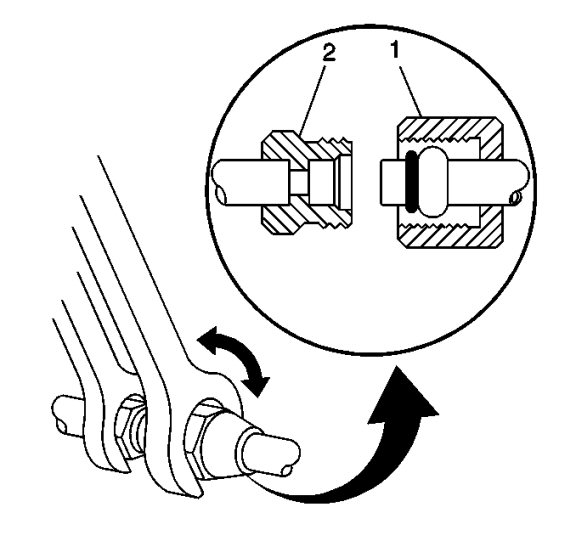
Disassemble the A/C refrigerant components. Refer to the appropriate repair procedure
|
|
|
•
|
For compression style fittings use a back up wrench on the fitting (2) and loosen the fitting nut (1).
|
|
|
•
|
For banjo style fittings remove the bolt retaining the banjo type fitting.
|
|
2.
|
Remove the O-ring seal from the A/C refrigerant component.
|
|
3.
|
Inspect the O-ring seal for signs of damage to help determine the root cause of the failure.
|
|
4.
|
Inspect the A/C refrigerant components for damage or burrs. Repair if necessary.
|
|
5.
|
|
Note
|
|
Cap or tape the open A/C refrigerant components immediately to prevent system contamination.
|
Cap or tape the A/C refrigerant components.
|
|
6.
|
Discard the O-ring seal.
|
|
1.
|
Inspect the new O-ring seal for any sign or cracks, cuts, or damage. Replace if necessary.
|
|
2.
|
Remove the cap or tape from the A/C refrigerant components.
|
|
3.
|
Using a lint-free clean, dry cloth, carefully clean the sealing surfaces of the A/C refrigerant components.
|
|
4.
|
|
Note
|
|
DO NOT allow any of the mineral base 525 viscosity refrigerant oil on the new O-ring seal to enter the refrigerant system.
|
Lightly coat the new O-ring seal with mineral base 525 viscosity refrigerant oil.
|
|
5.
|
|
Note
|
|
DO NOT reuse O-ring seals.
|
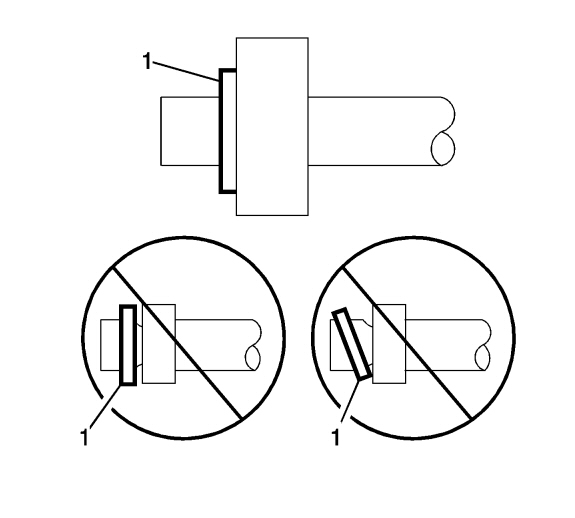
Carefully slide the new O-ring seal onto the A/C refrigerant component.
|
|
6.
|
The O-ring seal must be fully seated.
|
|
7.
|
Assemble the A/C components.
Refer to the appropriate repair procedure.
|
|
|
•
|
For compression style fittings use a back up wrench on the fitting (2) and tighten the fitting nut (1) to specification.
|
|
|
•
|
For banjo style fittings install the bolt retaining the banjo type fitting and tighten to specification.
|