To fit
| To fit |
| 1. |
Lubricate the primary shaft splines, see
 .
.
|
|
| 2. |
Insert
83 95 162 Protective sleeve, drive shafts
into the right-hand shaft seal in the gearbox to protect the seal when the gearbox is fitted.
|
||||||||||
| 3. |
Raise the car.
|
|
| 4. |
Make sure that the locating studs are in place. Lubricate with thin anti-corrosion oil.
|
|
| 5. |
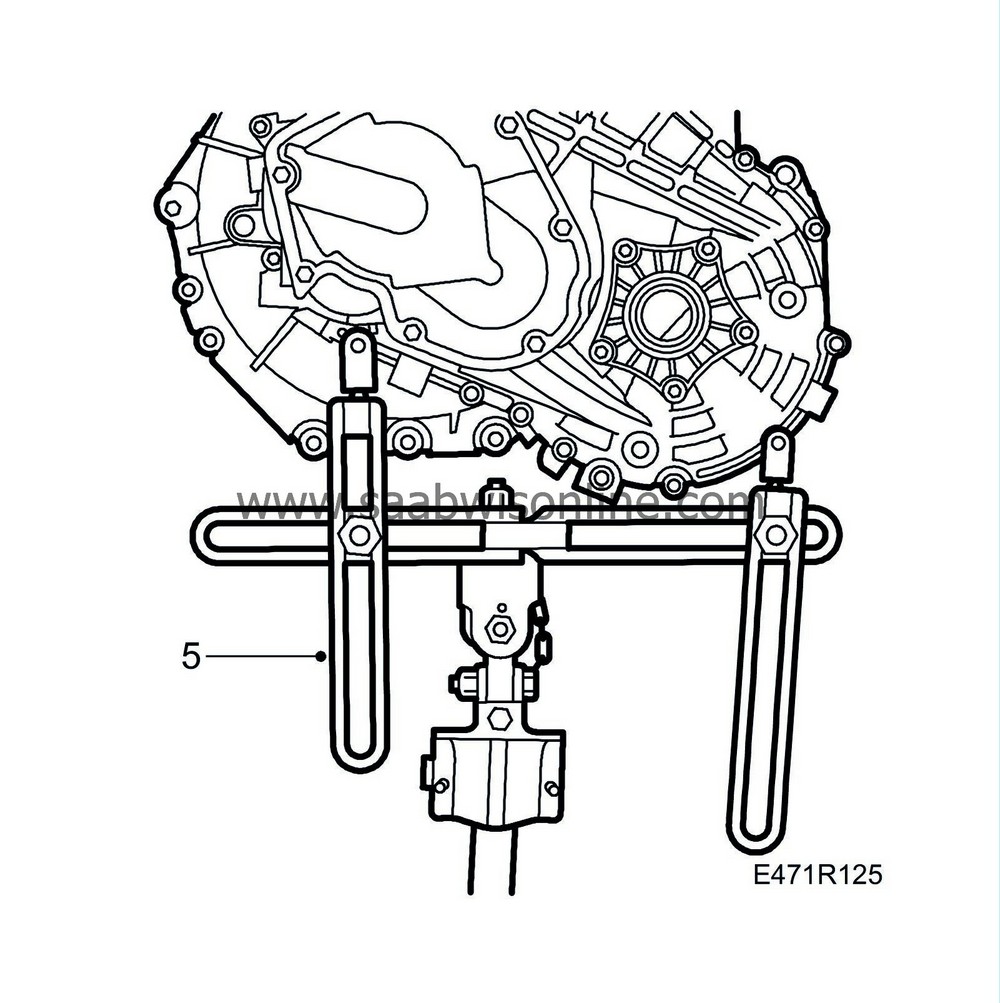
Connect
87 92 608 Holder for single-column lift
. Adjust the jack so that it is directly under the centre of the gearbox by the mating face.
|
|
| 6. |
Fit the gearbox with lifting tool onto a pillar jack.
|
||||||||||
| 7. |
Push in the rest of the gearbox. Turn the engine shaft, if needed, so that the gearbox can be fitted.
|
|
| 8. |
Tighten the lower bolts between the engine and gearbox.
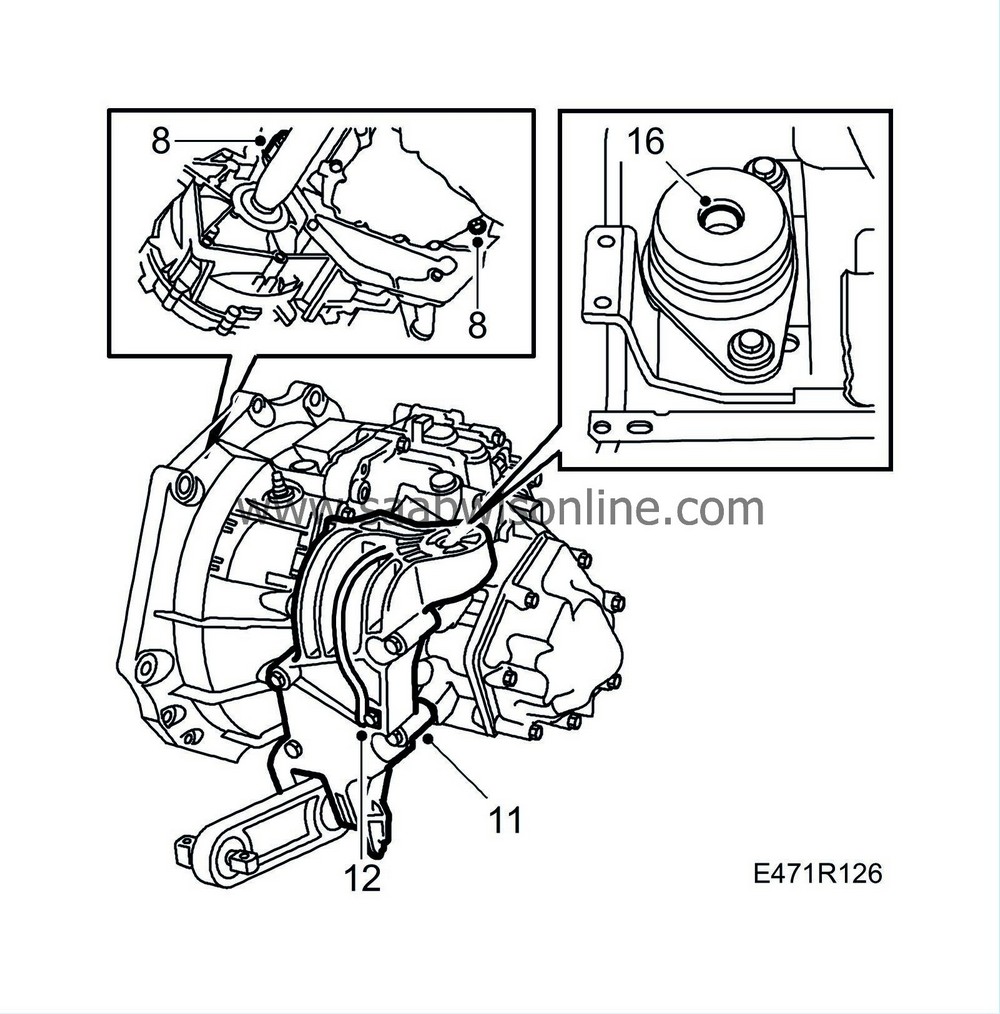
Tightening torque 70 Nm (50 lbf ft) |
|
| 9. |
Remove the lifting tool from the gearbox and remove the jack.
|
|
| 10. |
Lower the car to the floor.
|
|
| 11. |
Fit the gearbox mounting.
Tightening torque 40 Nm (30 lbf ft) |
|
| 12. |
Connect the ground lead to the mounting.
|
|
| 13. |
Fit tool 83 95 162 in the left shaft seal.
|
|
| 14. |
Make sure that the driver is clean and fit it into the tool.
|
||||||||||
| 15. |
Push in the rest of the shaft until the circlip snaps into place.
|
|
| 16. |
Raise the unit and tighten down the left engine cushion to the gearbox.
Tightening torque 84 Nm (62 lbf ft) Then fit the engine cushion bolts loosely by the body. |
|
| 17. |
Fill the gearbox with the correct amount of fluid. Use
87 92 590 Tool, oil level plug
. Tighten the level plug, train plug and filler plug.
Tightening torque 50 Nm (37 lbf ft) |
|
| 18. |
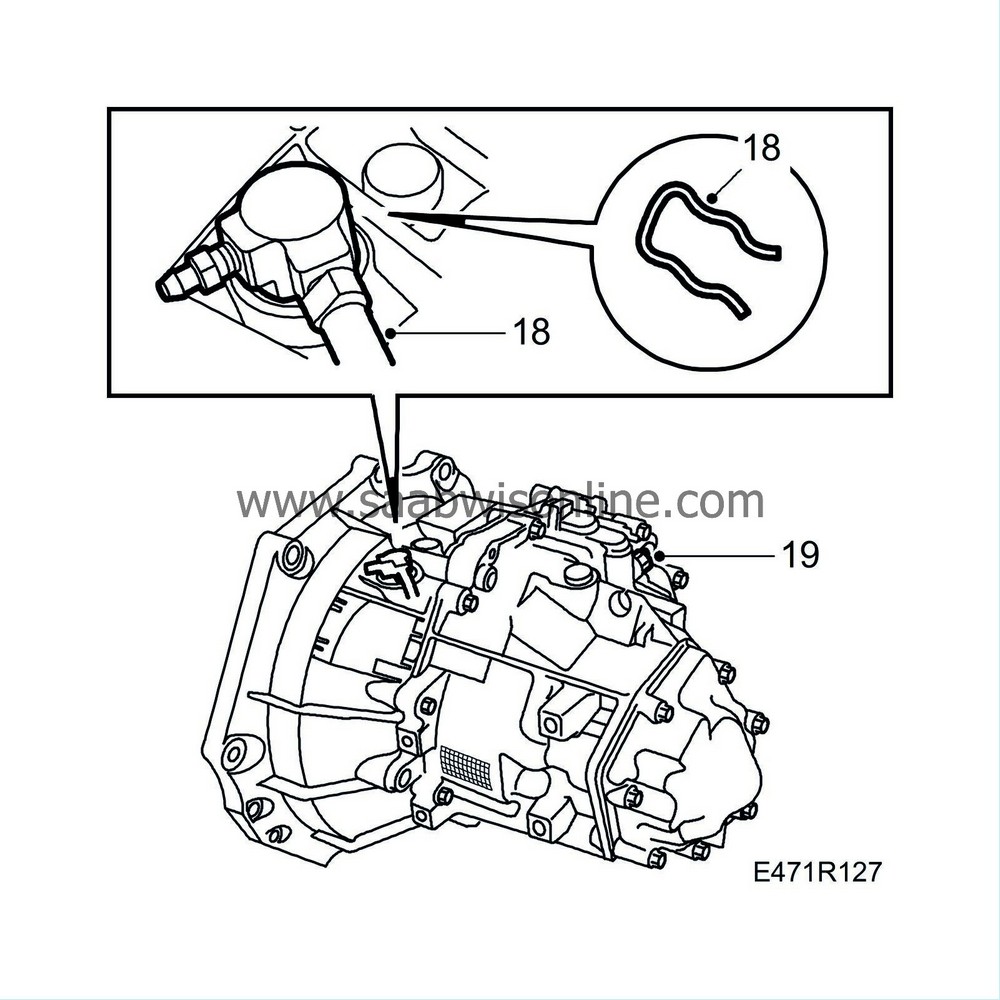
Connect the clutch delivery line to the gearbox and fit the locking clips.
|
|
| 19. |
Connect the lead to the reversing-light switch.
|
|
| 20. |
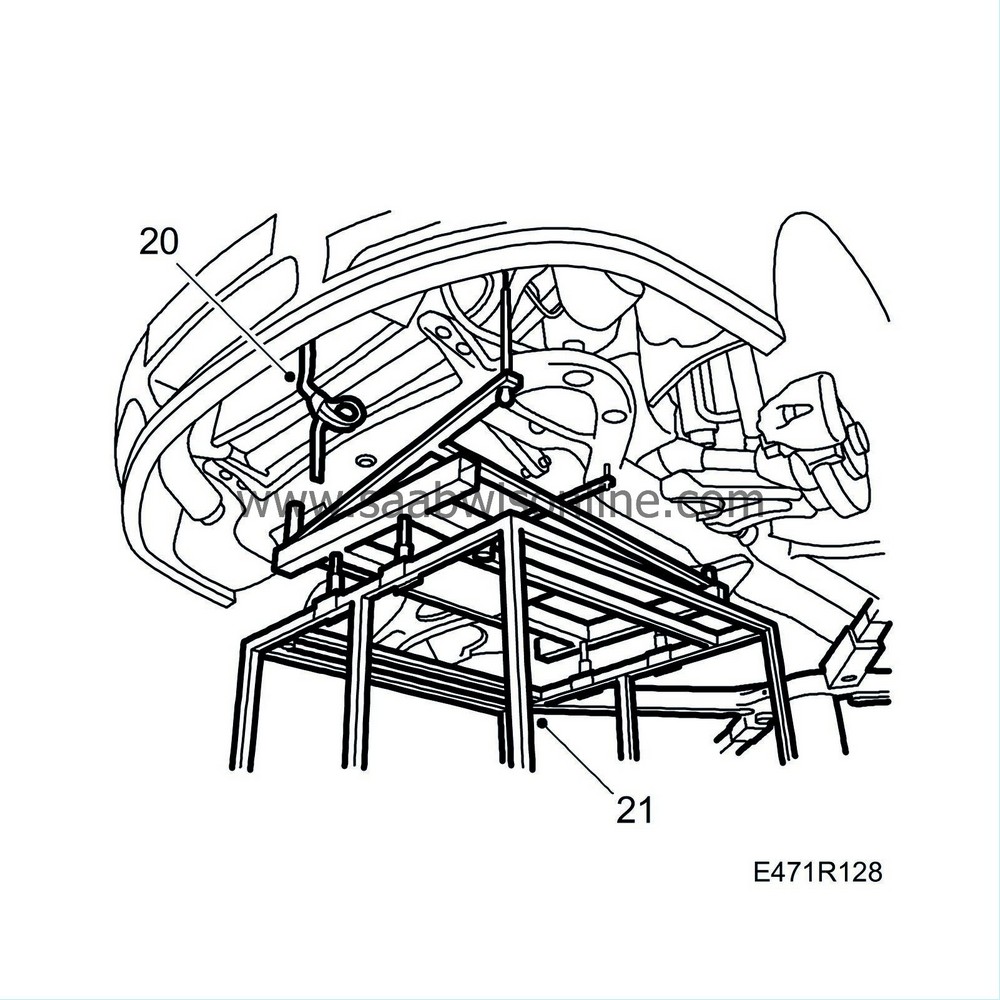
Check that the journals for the radiator assembly are correctly fixated in the radiator member.
|
|
| 21. |
Raise the car and position the lifting trolley with the subframe under the car.
|
|
| 22. |
Carefully raise the subframe.
|
||||||||||||||||
| 23. |
Tighten the front mountings (2) for the steering servo delivery line before the subframe is completely raised.
|
|
| 24. |
Guide the radiator assembly journals into the subframe.
|
|
| 25. |
Guide the AC-lines into their brackets on the subframe.
|
|
| 26. |
Adjust the subframe so that the screw holes correspond to the body. There are 2 locating studs on the lifting trolley, front left and right rear, which guide the subframe into the correct position.
|
|
| 27. |
Fit the bolts and the rear support plate that secure the subframe. Fit spacer washers if there are any. (up to and including chassis number W3050999)
|
|
| 28. |
Tighten the bolts for the subframe.
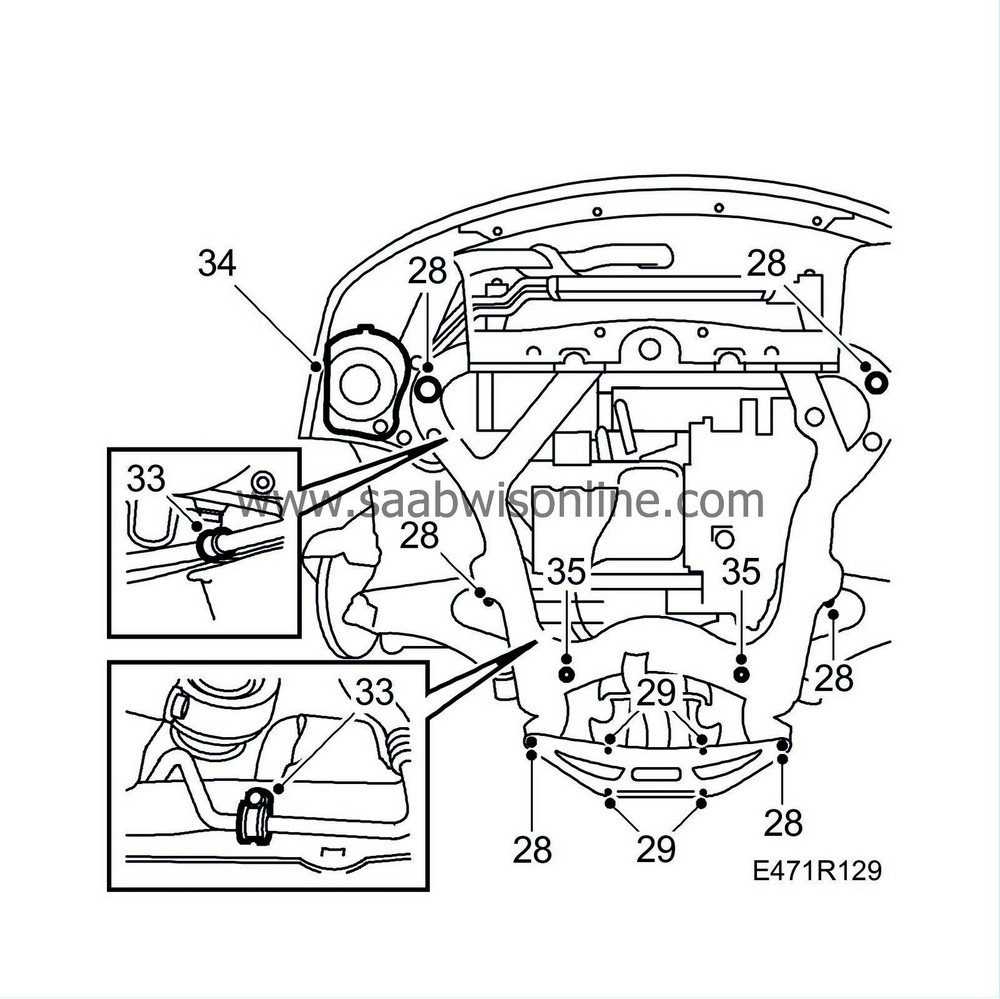
Tightening torque 100 Nm (74 lbf ft) +45 |
|
| 29. |
Tighten the bolts for the support plate.
Tightening torque 60 Nm (44 lbf ft) |
|
| 30. |
Lower the lifting trolley and move it away.
|
|
| 31. |
Remove the straps holding the radiator assembly.
|
|
| 32. |
Fit the engine oil cooler.
|
|
| 33. |
Tighten the 2 rear connecting clamps for the steering servo delivery line to the subframe.
|
|
| 34. |
Tighten down the air filter housing.
|
|
| 35. |
Tighten down the steering gear.
Tightening torque 90 Nm (66 lbf ft) |
|
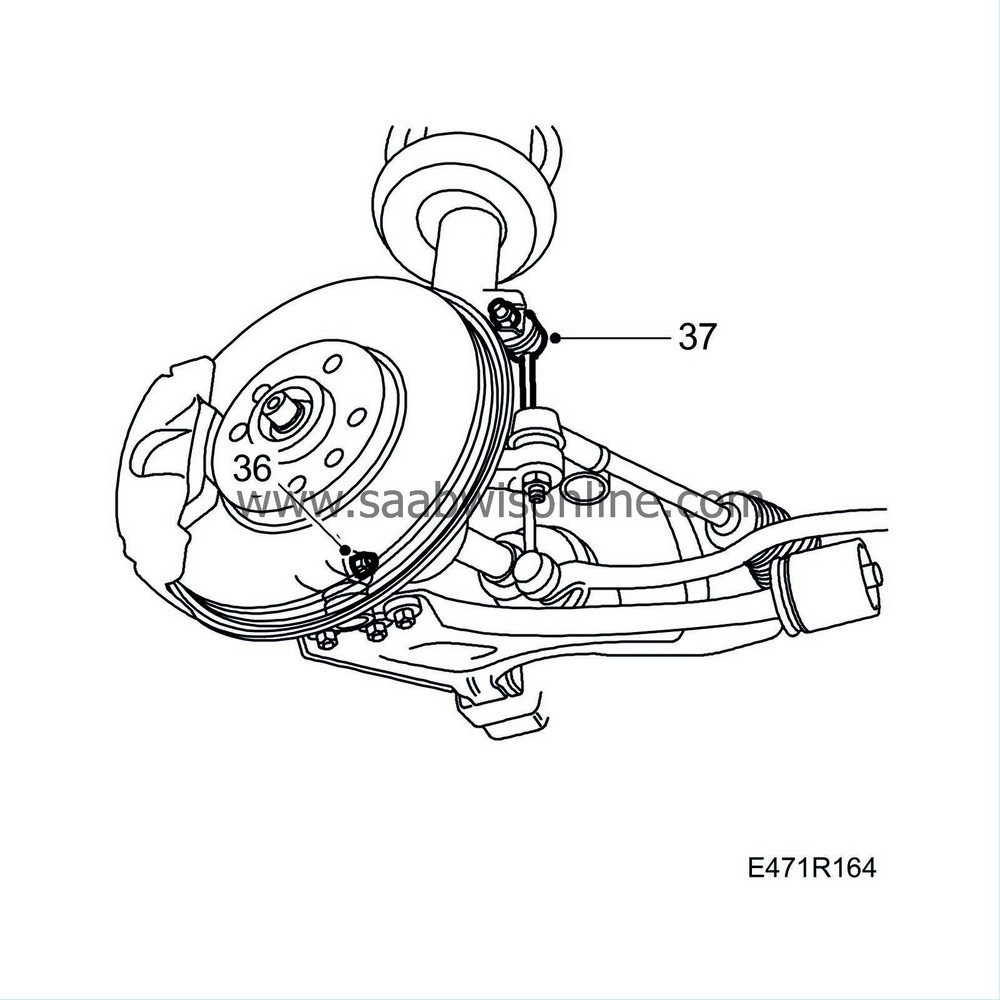
| 37. |
Fit the anti-roll bar supports. Hold with an open 17 mm wrench or hold the hexagonal pin with a socket.
Tightening torque 84 Nm (62 lbf ft) Tightening torque, nut with steel lock: 95 Nm (66 lbf ft) |
|
| 38. |
Fit the protective cover panel between the engine and gearbox.

|
|
| 39. |
Fit the rear engine cushion, with bolts, on the subframe and insert the bolts.
|
|
| 40. |
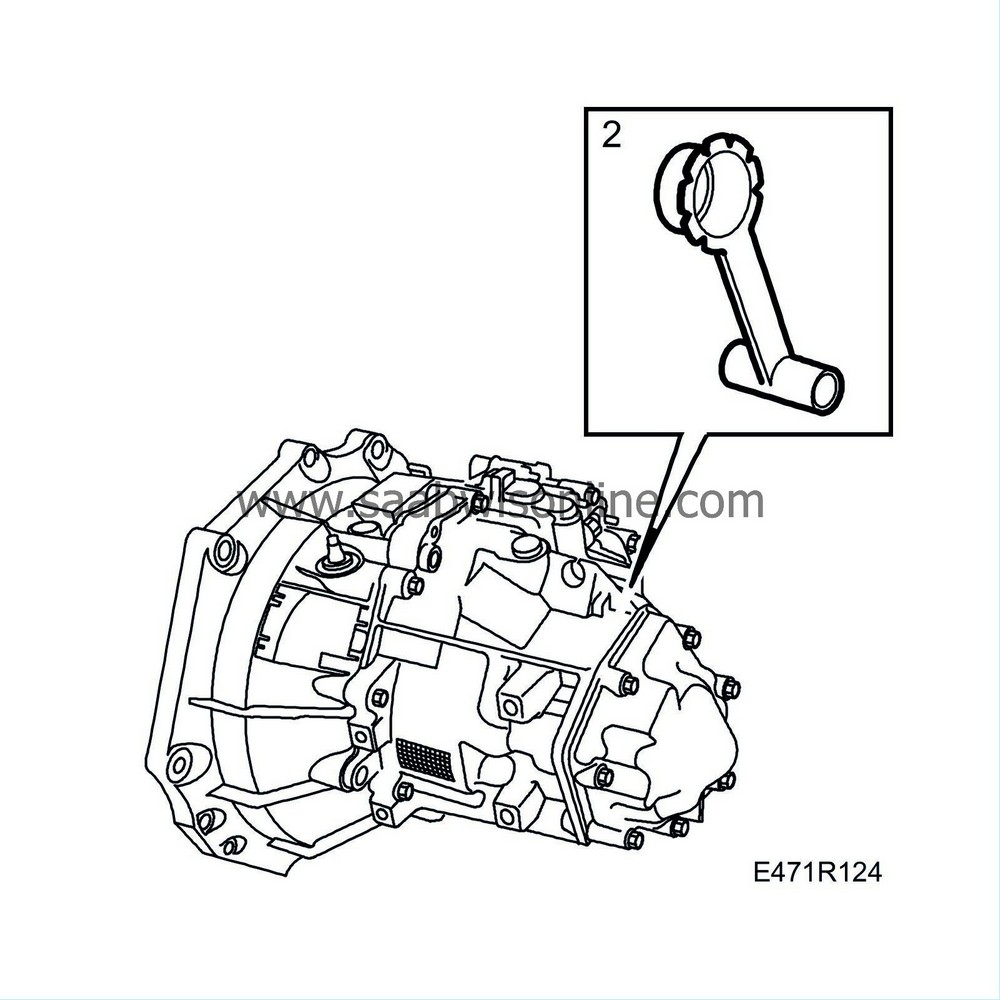
Fit the rear engine cushion, engine mounting and torque arm. The linkage for the selector mechanism will follow along.
Tightening torque 70 Nm (50 lbf ft) |
|
| 41. |
Fit the front exhaust pipe.
|
|
| 42. |
Fit the front cover.
|
|
| 43. |
Lower the car.
|
|
| 44. |
Remove the lifting beam, remove the locating studs and tighten the upper bolts between the engine and gearbox.
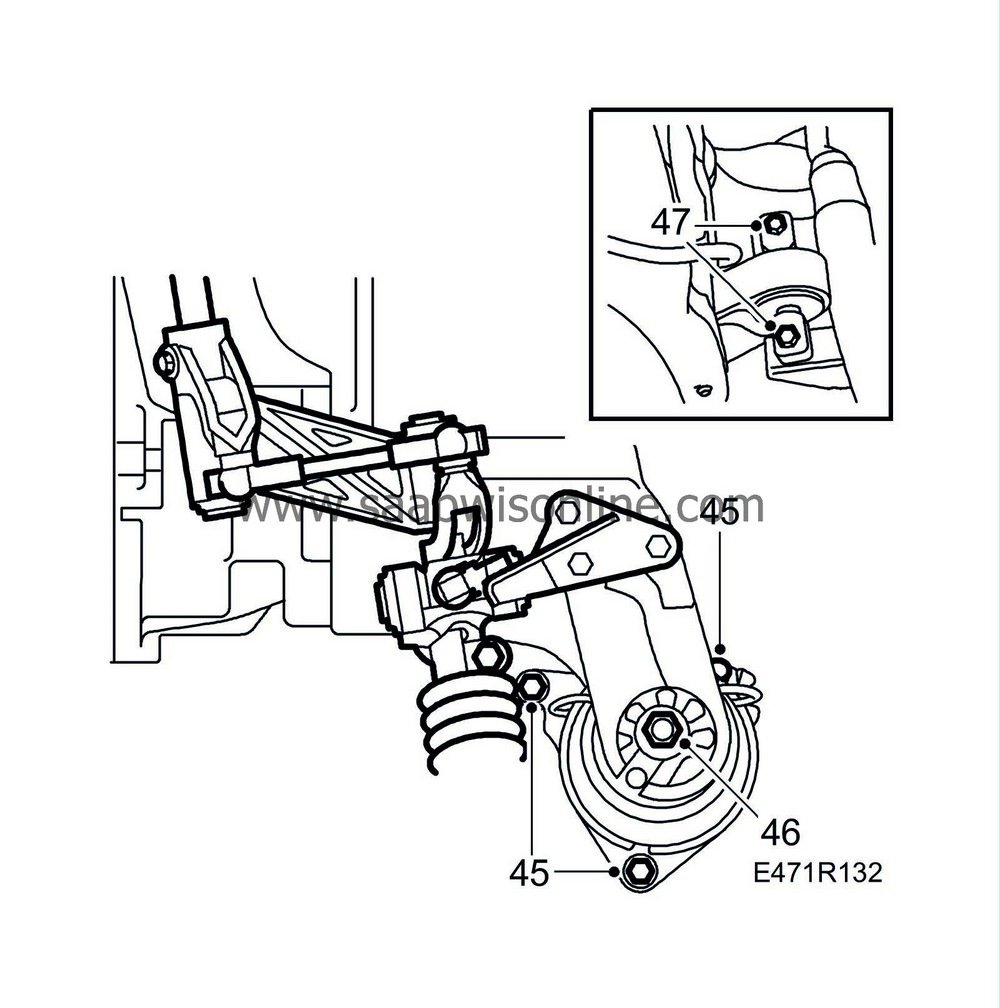
Tightening torque 70 Nm (50 lbf ft) |
|
| 45. |
Shake the power train unit to avoid stresses in the engine cushions. Tighten the bolts for the rear engine cushion from the engine compartment side.
Tightening torque 24 Nm (18 lbf ft) |
|
| 46. |
Tighten the nut for the rear engine cushion.
Tightening torque 45 Nm (33 lbf ft) |
|
| 47. |
Position a jack under the gearbox and lift the power train unit until the left engine cushion is suspended freely from the body and is in the clear. Then lower the power train unit and tighten the bolts.
Tightening torque 63 Nm (46 lbf ft) Fit and tighten the two bolts securing the torque arm to the subframe. Tightening torque 30 Nm (22 lbf ft)Raise the car. Loosen the bolt for the front torque arm and centre the rubber cushion in the arm, then tighten. Tightening torque 47 Nm (34 lbf ft)Centre and tighten the rear torque arm. Tightening torque 47 Nm (34 lbf ft)Lower the car. |
|
| 48. |
Fit the selector linkage to the gearbox and tighten.
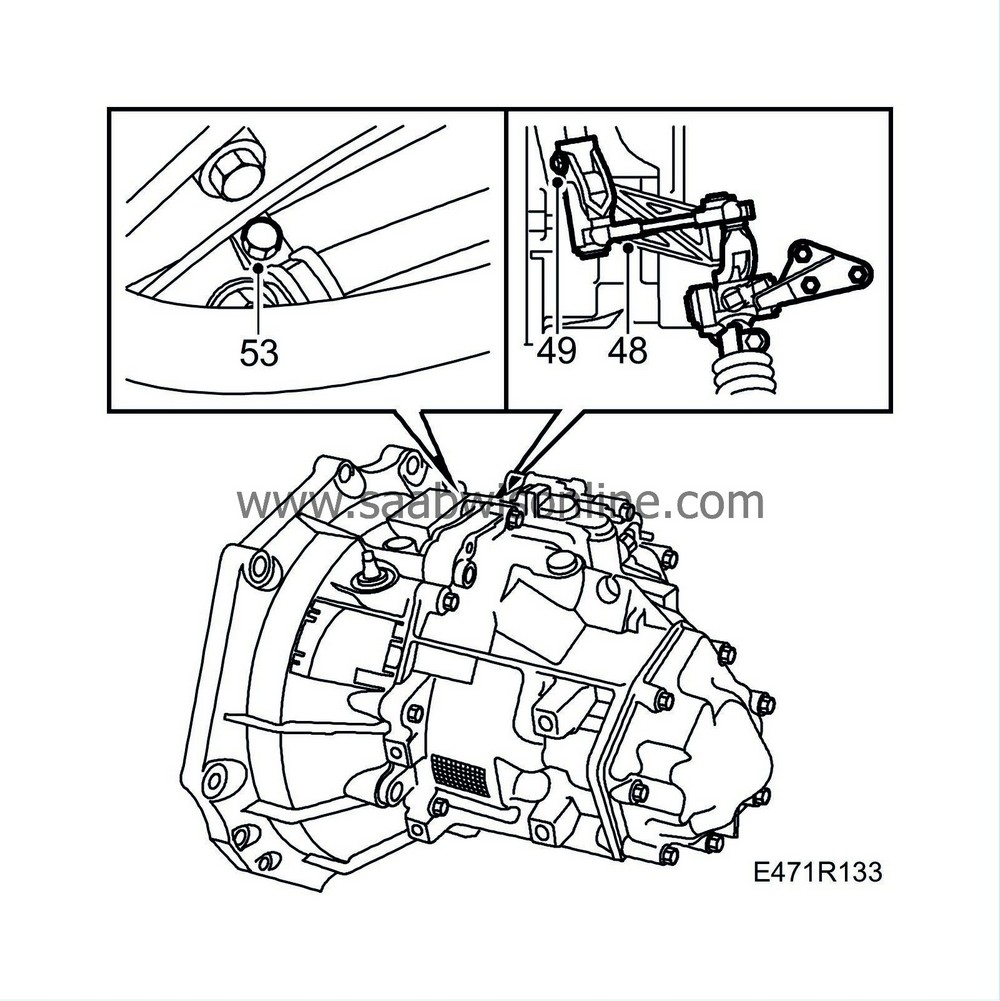
|
|
| 49. |
Connect selector linkage to the selector rod.
|
|
| 50. |
Adjust gear positions, see "Gear selector mechanism".
|
|
| 51. |
Connect the oxygen sensor(s).
|
|
| 52. |
Remove the pedal retainer from the clutch pedal and bleed the clutch according to "Clutch system, Bleeding of clutch hydraulic system in car"
 .
.
Check that there are no system leaks. |
|
| 53. |
Fit the positive lead mounting to the engine.
|
|
| 54. |
Fit the battery tray.
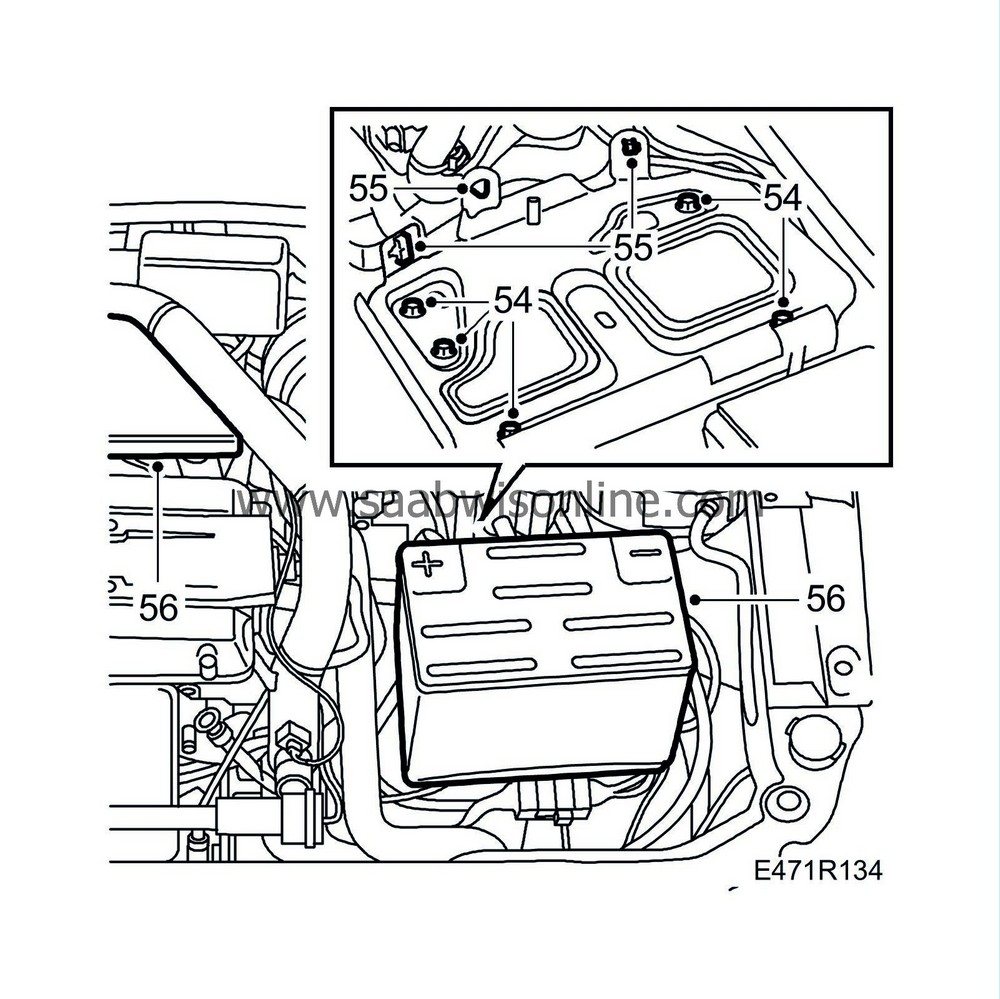
|
|
| 55. |
Fit the 2 cable ties on the wiring loom and the clip for the positive lead.
|
|
| 56. |
Fit and connect the battery, also fit the plastic cover.
|
|
| 57. |
Fit the front wheels.
Tightening torque 110 Nm (80 lbf ft) |
|
| 58. |
Fit the cover over the engine.
|
|
| 59. |
Fit the grille
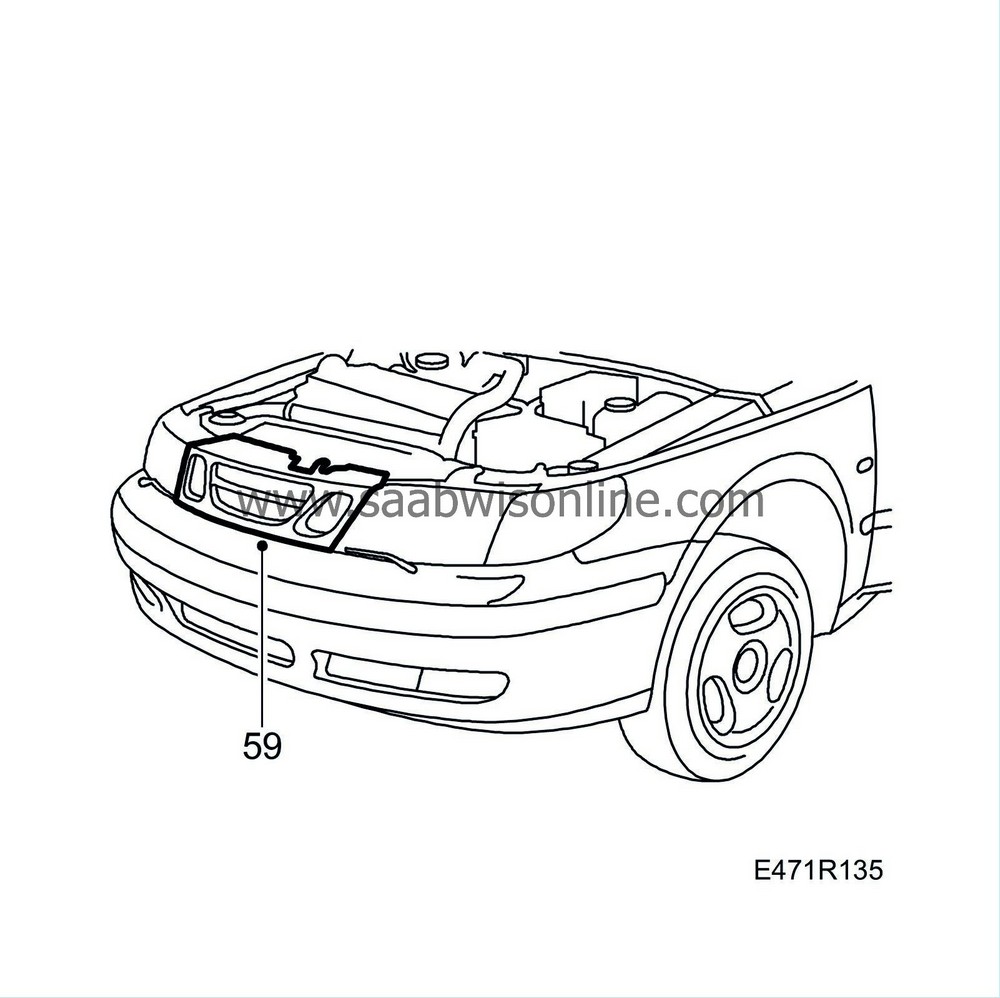
|
|
| 60. |
Test drive the car. Check the position of the steering wheel when driving straight ahead on a level road. Adjust if needed.
|
|
| 61. |
Set the correct time and radio code.
|
|

 Warning

