To remove
| To remove |
| Important | ||
|
Cables, hoses, leads etc. are secured with hard plastic cable ties. After being tightened, the ends are cut off, leaving sharp edges at the fixing points. Be aware of the risk of injury due to these sharp ends of cable tie. |
||
| 1. |
Place the car on a lift.
|
|
| 2. |
Place wing protectors over the wings to prevent soiling and damage to the paintwork.
|
|
| 3. |
Remove the front grille.
|
|
| 4. |
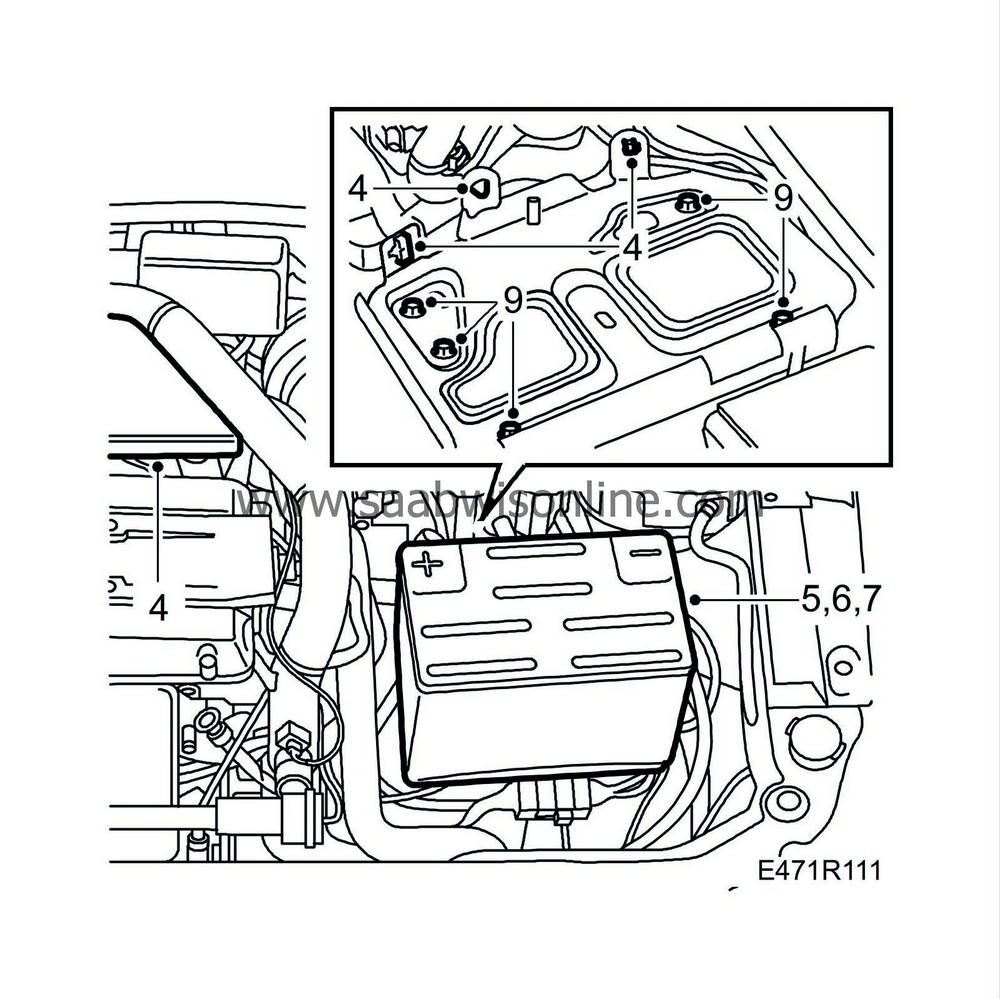
Remove the cover over the intake manifold.
|
|
| 5. |
Remove the plastic cover from the battery.
|
|
| 6. |
Detach the battery leads from the battery.
|
|
| 7. |
Remove the battery.
|
|
| 8. |
Cut the cable ties from the wiring loom. Disconnect the upper mounting for the positive lead.
|
|
| 9. |
Remove the battery tray.
|
|
| 10. |
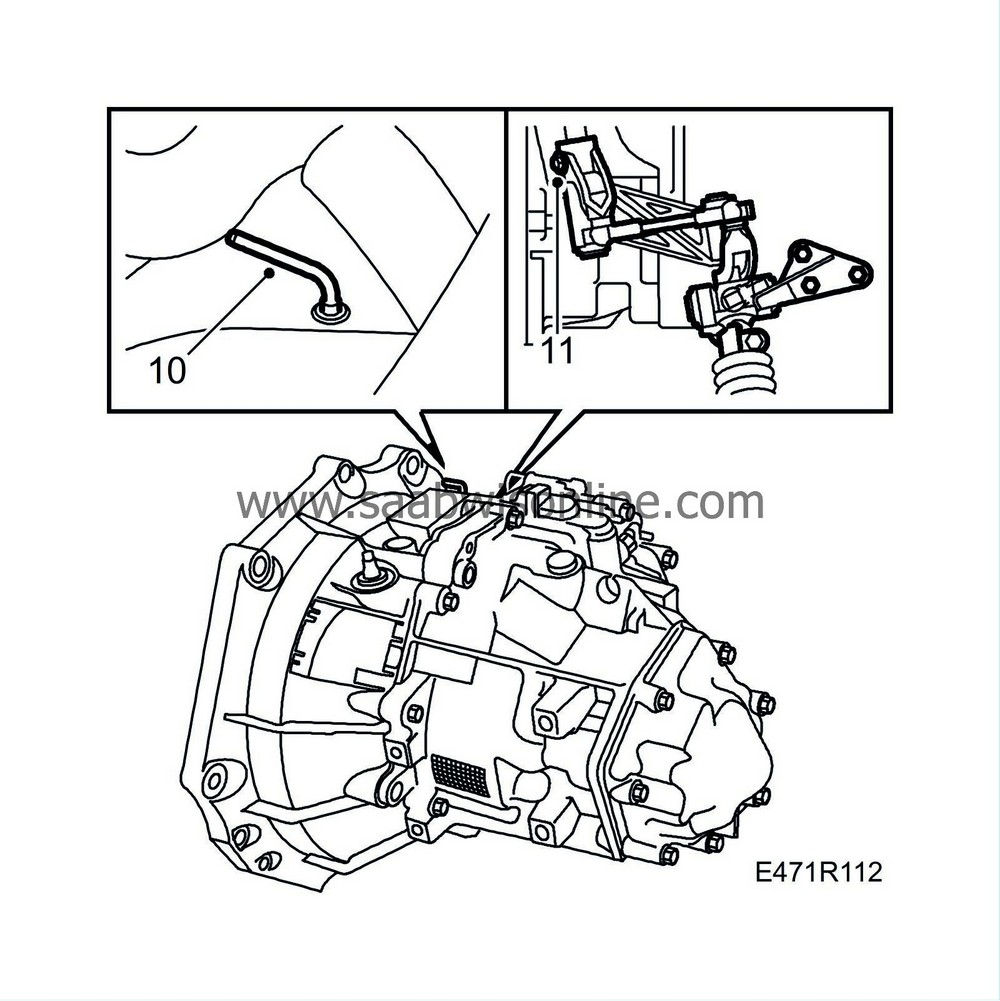
Engage 4th gear and remove the plastic plug from the gearbox. Lock 4th gear in the gearbox by inserting
87 92 335 Locking pin
.
|
|
| 11. |
Remove the clip from above that secures the selector rod in the linkage on the gearbox.
|
|
| 12. |
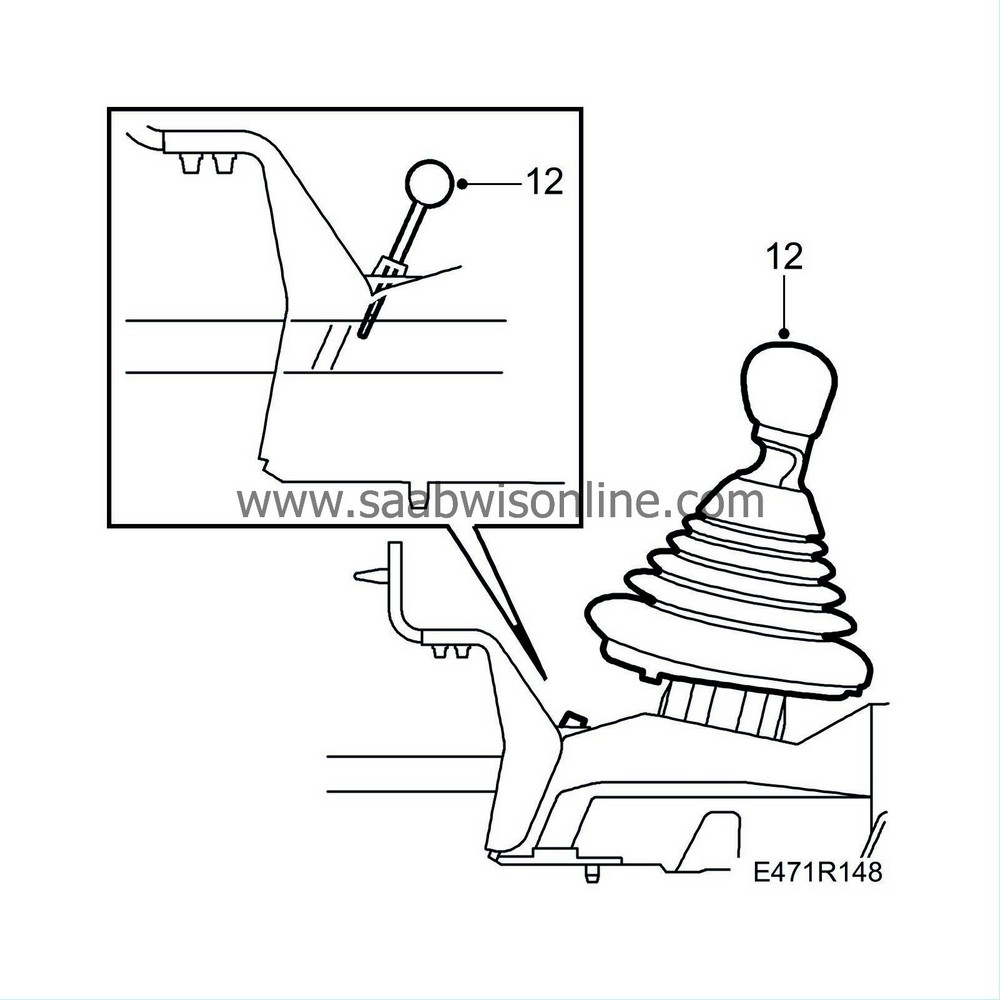
Lift up the gaiter. Engage 3rd gear so that the selector rod disengages from the linkage and fit locking pin 87 92 632 in the selector lever housing.
|
|
| 13. |
Depress the clutch pedal about 50 mm with a brake bracket. This prevents the brake fluid from flowing out of the reservoir.
|
|
| 14. |
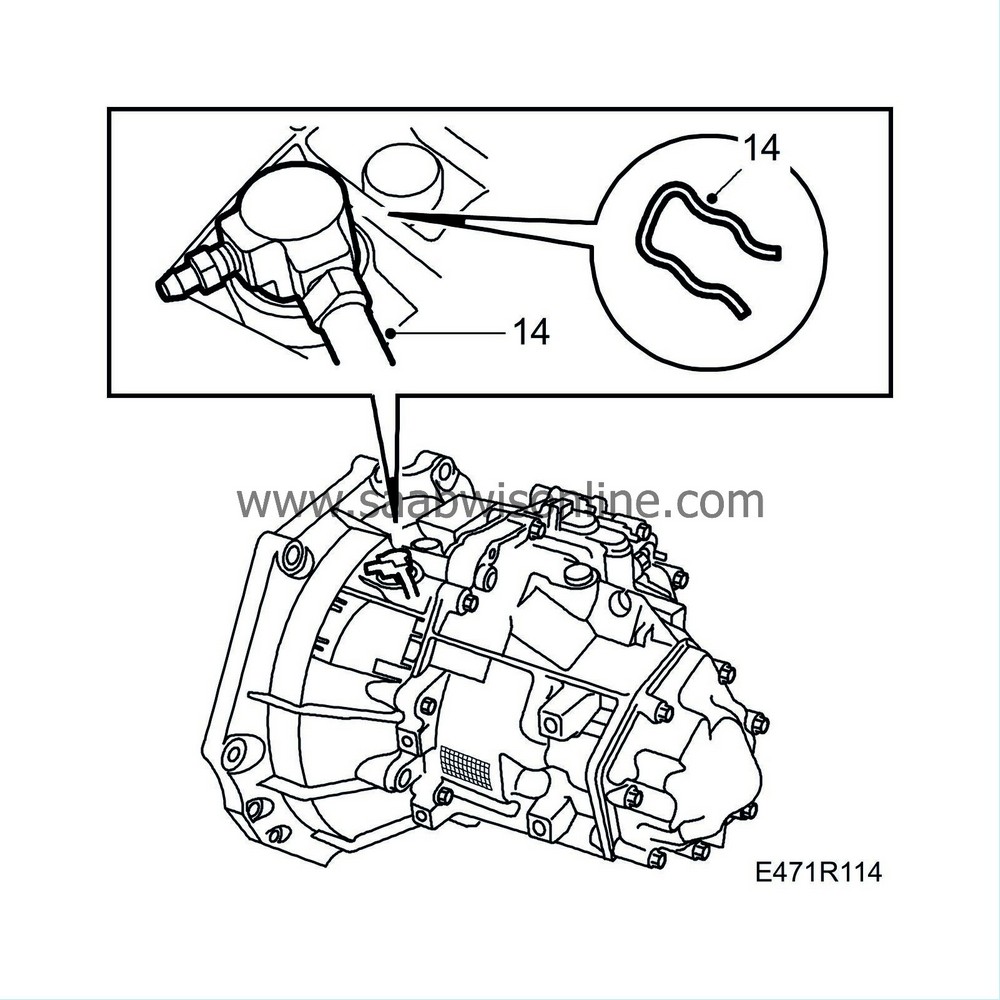
Remove the clip by the slave cylinder and disconnect the connection for the delivery line. Refit the clip.
|
|
| 15. |
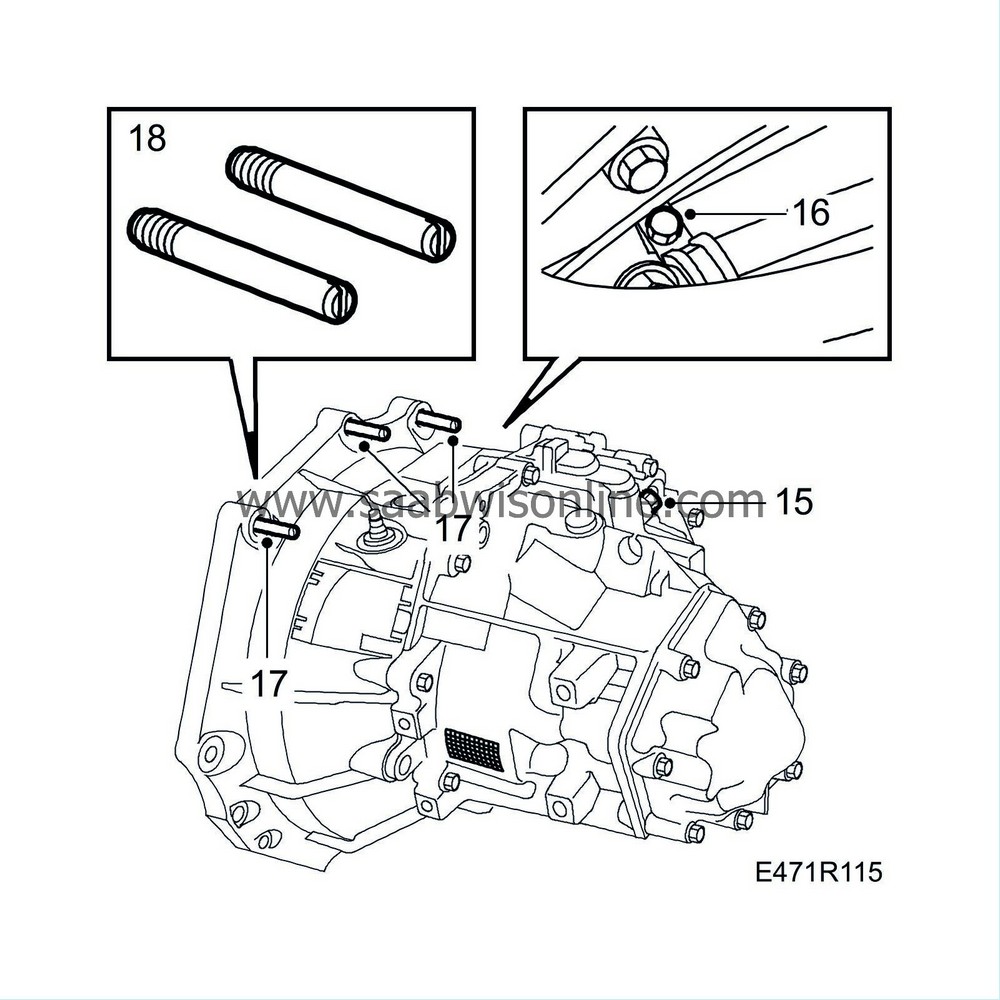
Unplug the connector for the reversing lights.
|
|
| 16. |
Disconnect the positive lead's mounting on the engine.
|
|
| 17. |
Remove the 3 upper gearbox bolts.
|
|
| 18. |
Fit locating studs 83 92 128 in the upper, outer screw holes in the engine.
|
|
| 19. |
Unplug the electric connection alt. electric connections for the oxygen sensor.
|
|
| 20. |
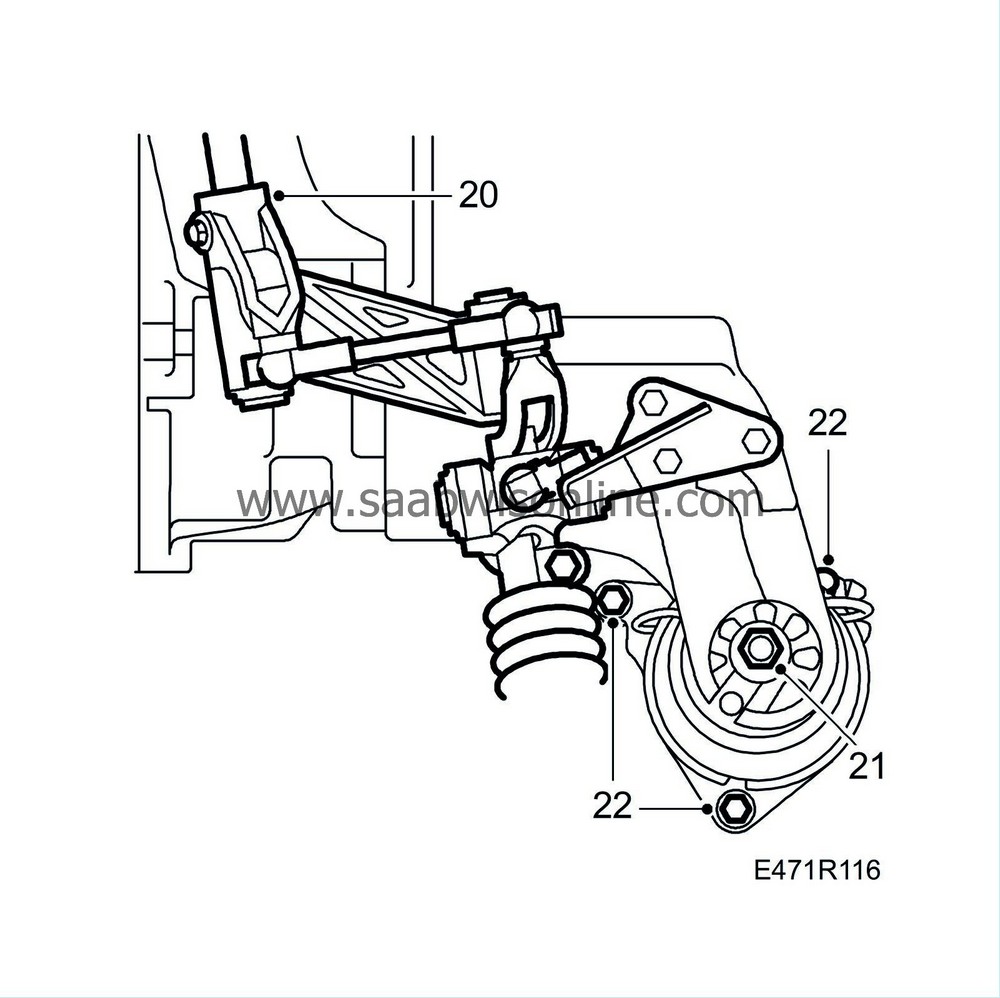
Disconnect the selector linkage by the gearbox.
|
|
| 21. |
Remove the nut from the rear engine mounting.
|
|
| 22. |
Loosen the 3 bolts that secure the rear engine cushion. Leave the bolts in place.
|
|
| 23. |
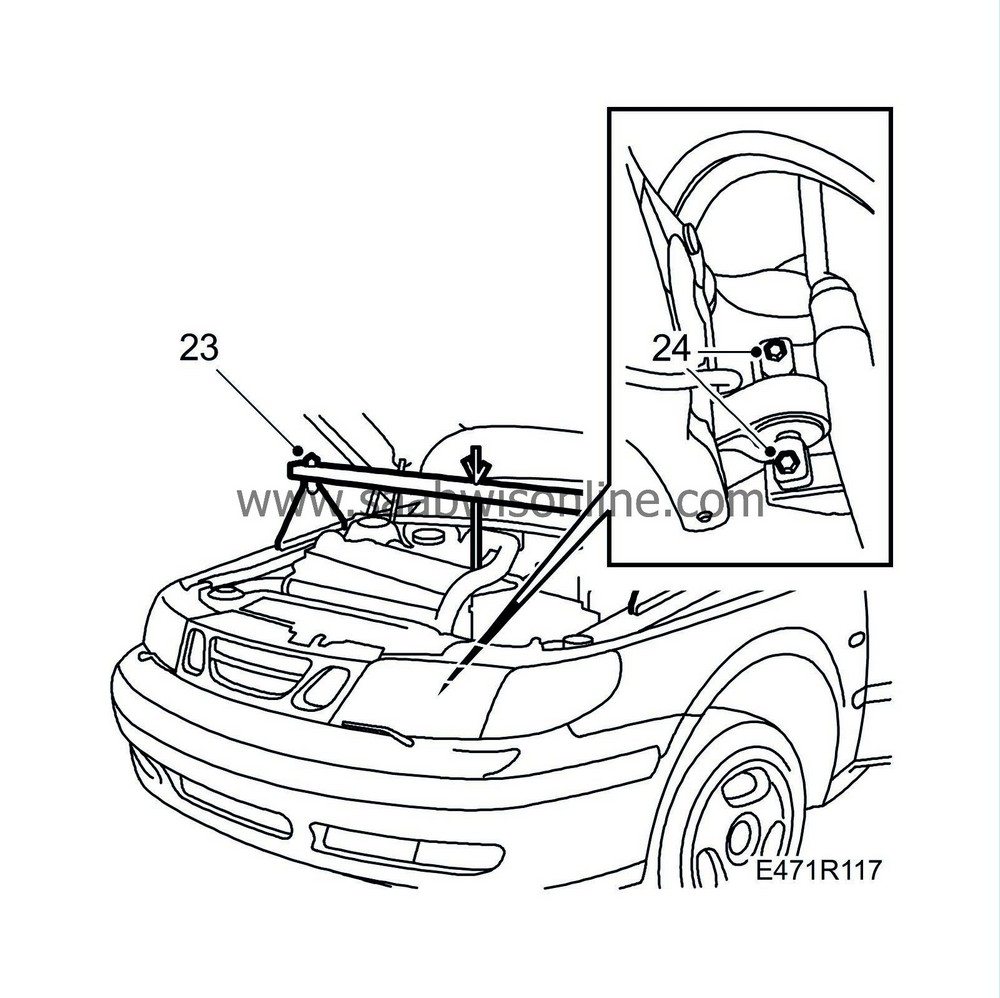
Slightly lift the engine and gearbox with
83 94 850 Lifting beam
. Position the beam so that it rests on the edges of the wings near the wing retaining bolts.
|
|
| 24. |
Remove the bolts so that the torque arm releases from the subframe.
|
|
| 25. |
Raise the car.
|
|
| 26. |
Remove the front wheels.
|
|
| 27. |
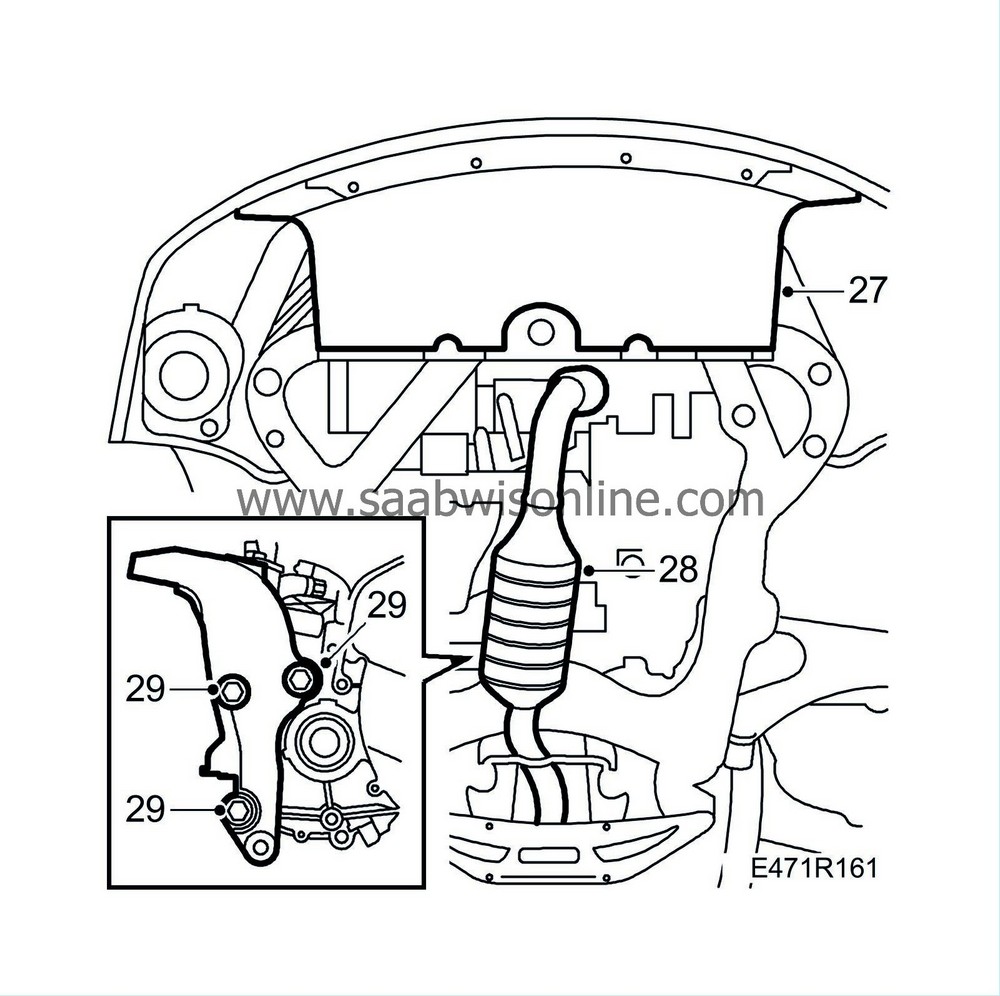
Remove the front cover, under the bumper and the cover for the belt circuit.
|
|
| 28. |
Remove the front exhaust system by first parting the flange against the turbo and then removing the rear mounting. It is important that the exhaust system is removed in this manner since the flex gaiter may otherwise be damaged. Also, be careful with the oxygen sensor(s).
|
|
| 29. |
Remove the rear engine mounting, torque arm and engine cushion. The gearbox linkage will follow along.
|
|
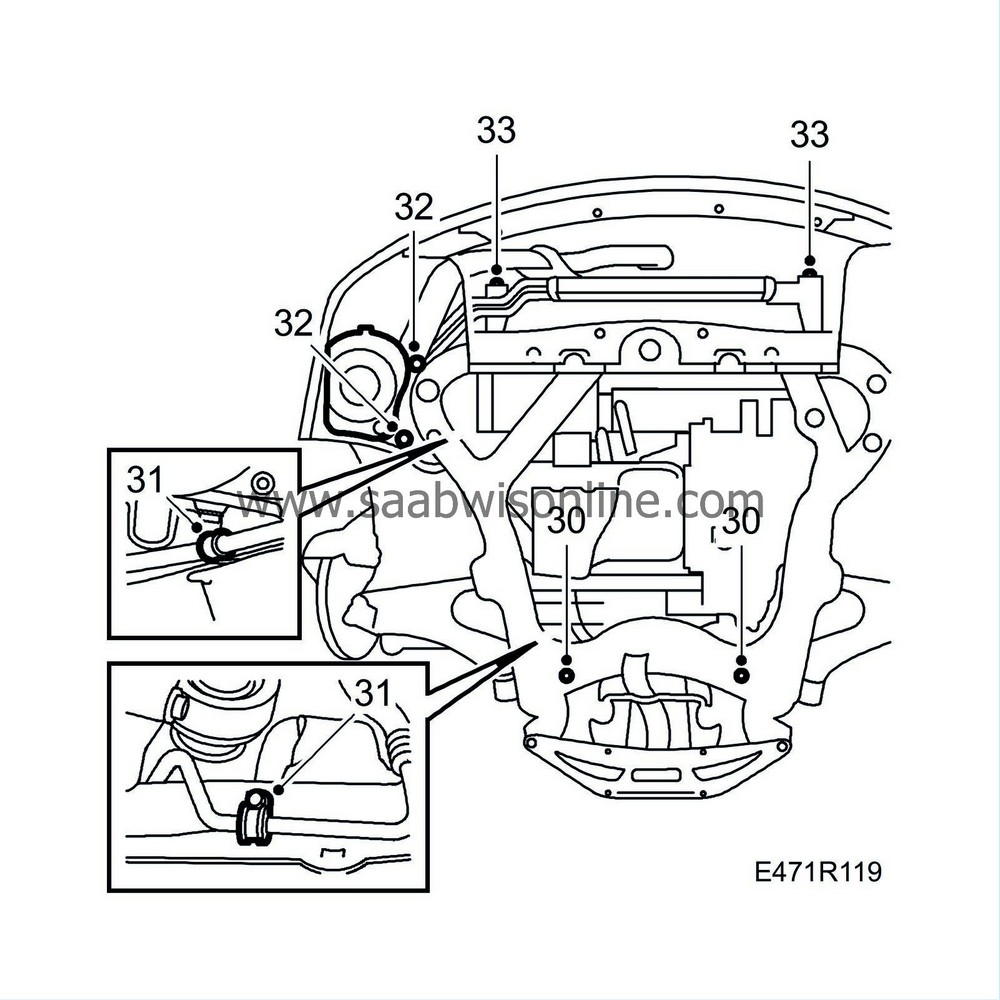
| 30. |
Remove the screws that secure the steering gear.
|
|
| 31. |
Remove the clips that secure the steering servo delivery line to the subframe.
|
|
| 32. |
Remove the air filter housing from the subframe.
|
|
| 33. |
Remove the AC-lines from the plastic clips on the subframe.
|
|
| 34. |
Remove the engine oil cooler from the charge air cooler (2 bolts).
|
|
| 35. |
Place a
83 95 212 Strap
around the radiator and radiator crossmember to suspend the radiator.
|
|
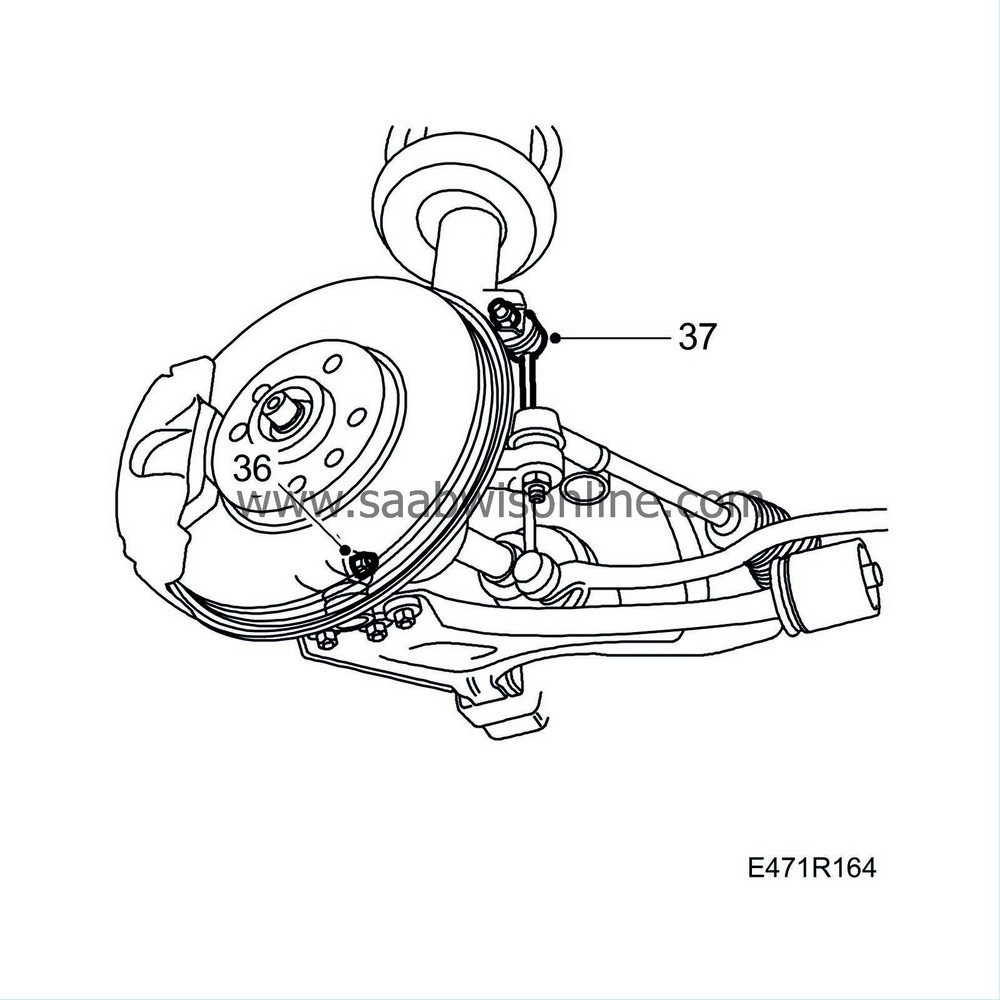
| 36. |
Remove the bolts that secure the outer ball joints to the steering swivel member on both sides.
|
|
| 37. |
Remove the upper ball joint, on both sides, from the anti-roll bar. Offer resistance with an open 17 mm wrench so that the gaiter does not twist.
|
|
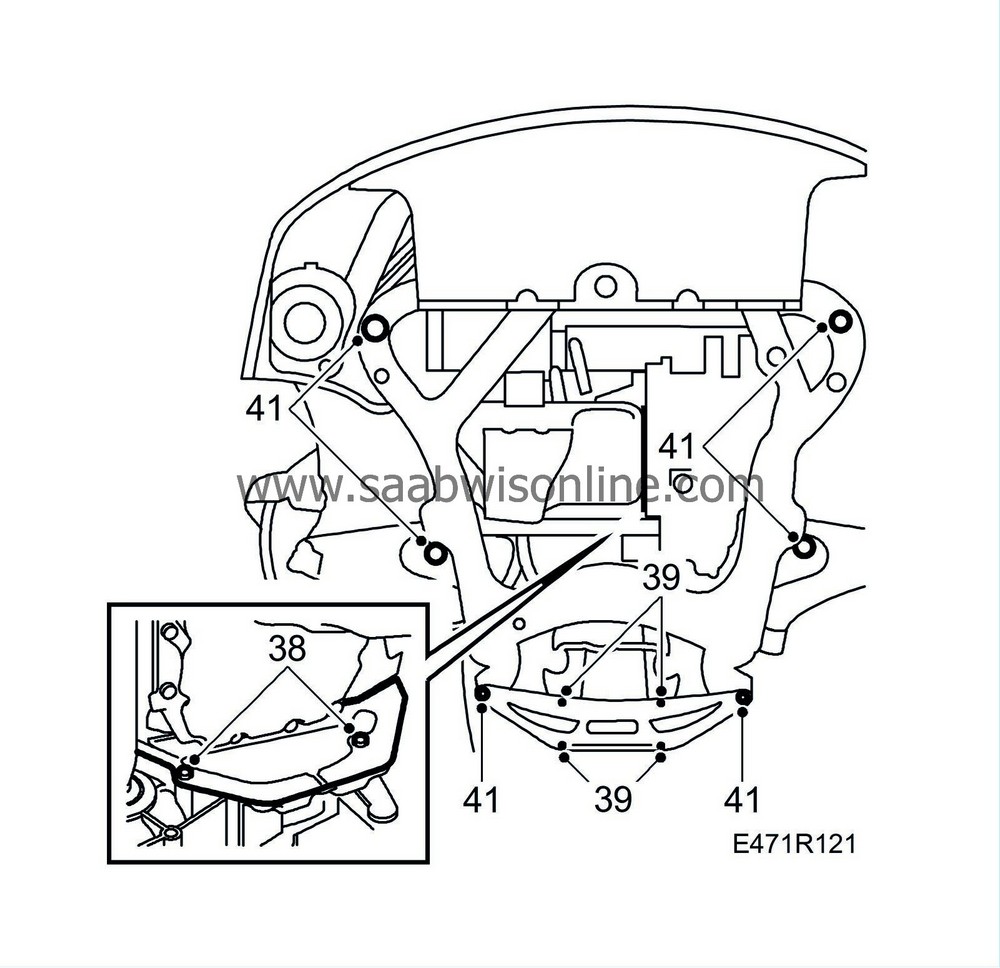
| 38. |
Remove the protective cover plate behind the flywheel.
|
|
| 39. |
Remove the 4 bolts that secure the rear support plate.
|
|
| 40. |
Place
83 95 311 Trolley lift
under the subframe.
83 94 801 Parent fixture
,
83 95 170 Spacer (x4)
,
83 95 188 Basic fixture
and
83 95 196 Holder, front
.
|
|
| 41. |
Remove the 6 bolts that secure the subframe. Retain any washers. (on chassis up to and including W3050999)
|
|
| 42. |
Lower the subframe and move it aside. At the same time, remove the front mountings (2) for the steering servo delivery line.
|
|
| 43. |
Drain the gearbox oil.
|
|
| 44. |
Disconnect the left-hand drive shaft using
87 92 616 Removal tool, drive shafts
. Suspend the shaft with cable ties.
|
|
| 45. |
Lower the car.
|
|
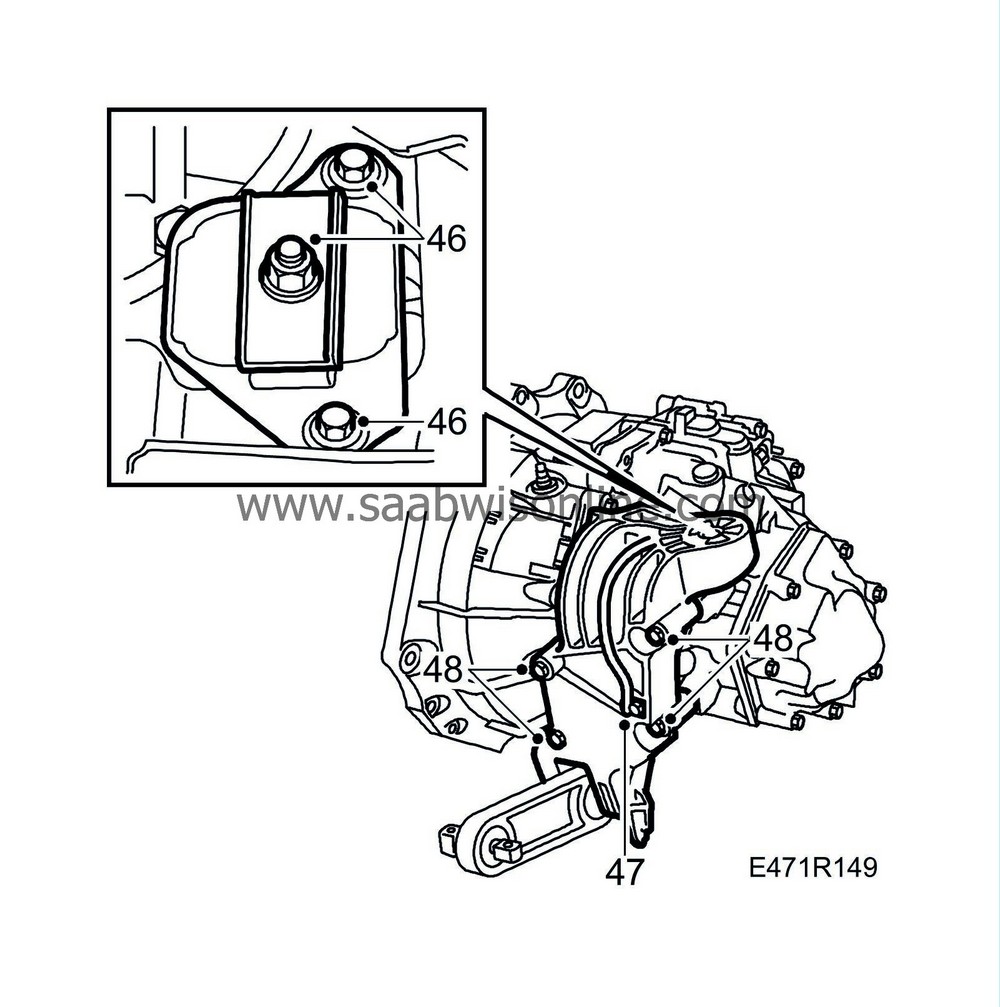
| 46. |
Mark the position and remove the bolt from the left engine cushion.
|
|
| 47. |
Disconnect the ground lead from the gearbox mounting.
|
|
| 48. |
Remove the gearbox mounting from the gearbox.
|
|
| 49. |
Lower the unit so that the gearbox goes clear from the structural member.
|
|
| 50. |
Raise the car.
|
|
| 51. |
Fit
87 92 608 Holder for single-column lift
to a single-column jack.
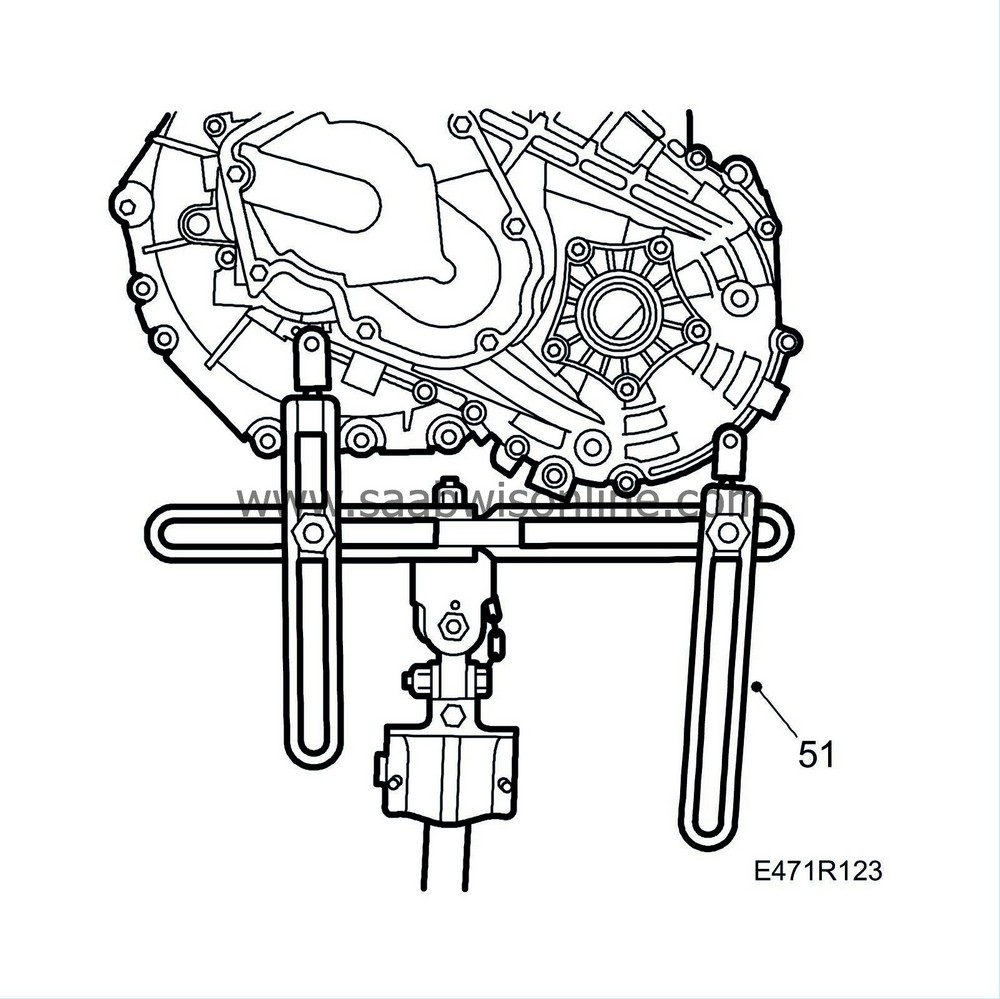
|
|
| 52. |
Adjust the lifting tool so that it is centred in line with the gearbox centre and mating face. Connect the lifting tool to the gearbox.
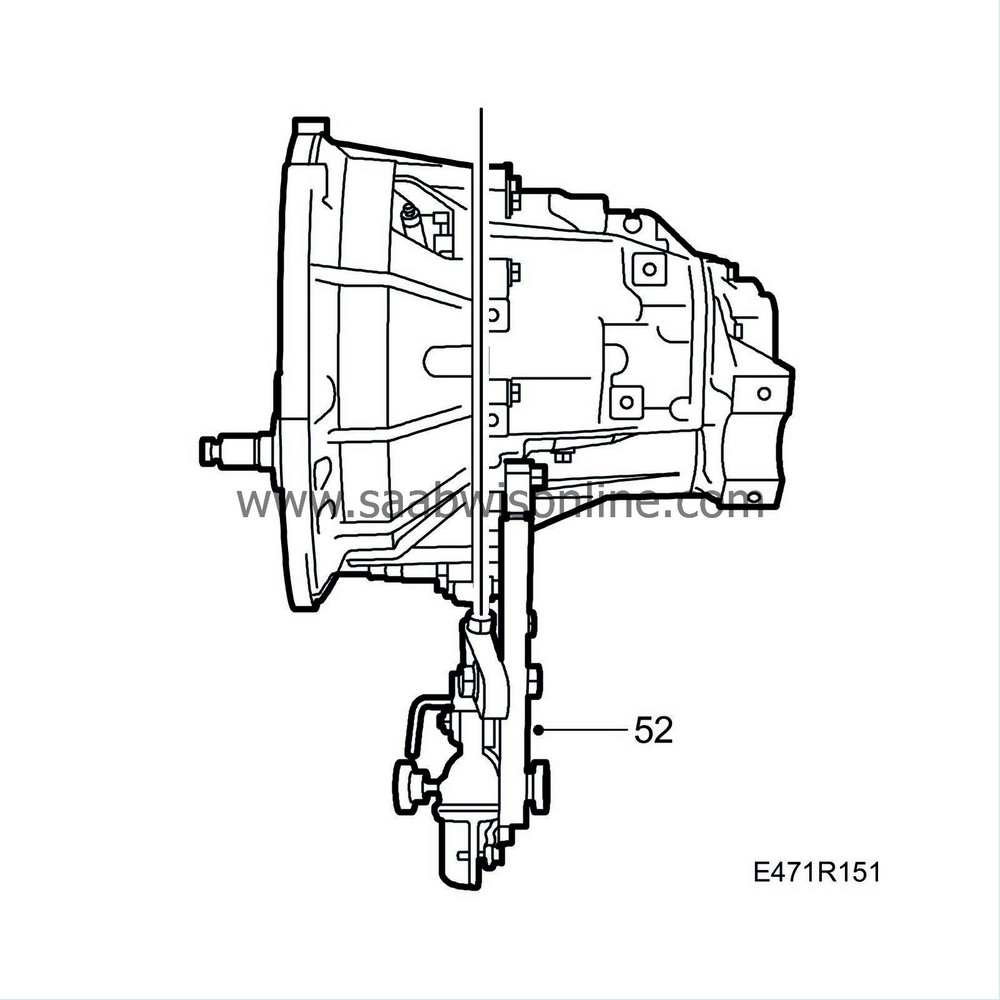
|
|
| 53. |
Remove the last 2 bolts between the engine and gearbox.
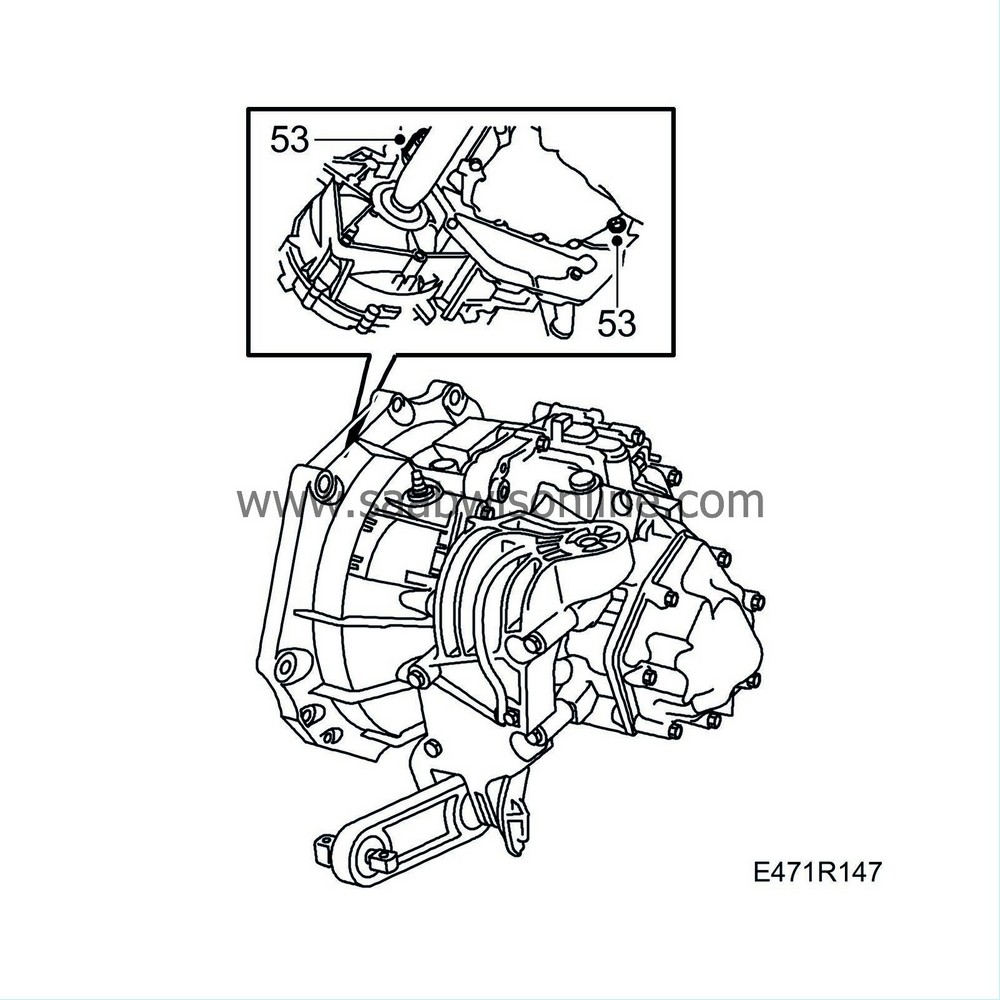
|
|
| 54. |
Pull out and lower the gearbox.
|
|||||||||
| 55. |
Lift the gearbox from the jack and remove the lifting tool from the gearbox.
|
|

 Warning

