Lower transverse link
| Lower transverse link |
| 1. |
Raise the car and remove the rear wheel.
|
|
| 2. |
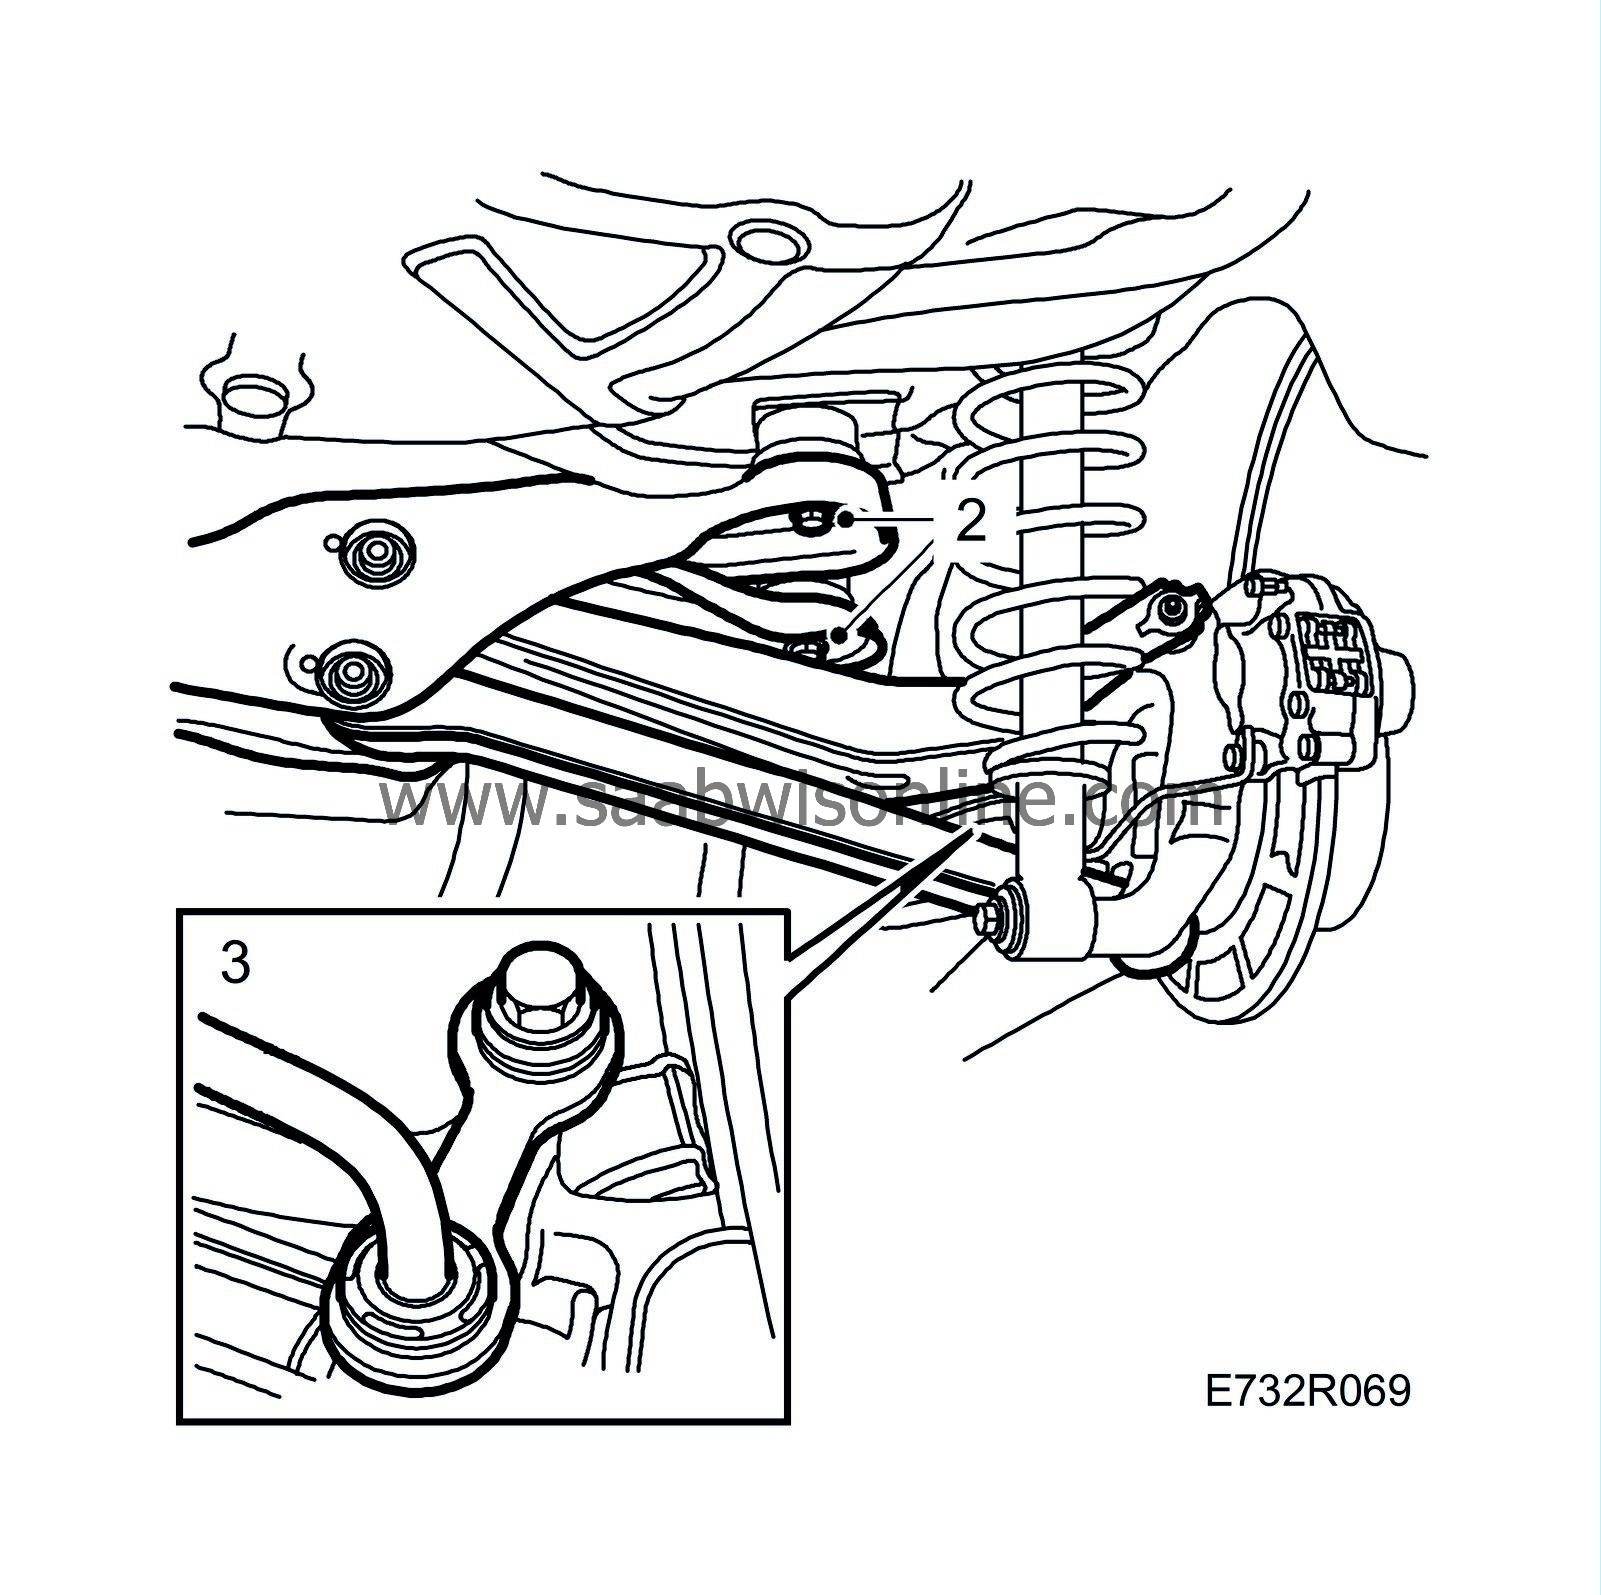
Hook off the exhaust pipe from its rear and centre rubber mounts. Support the exhaust system so that it does not excessively strain the front mounts or the bellows pipe.
|
|
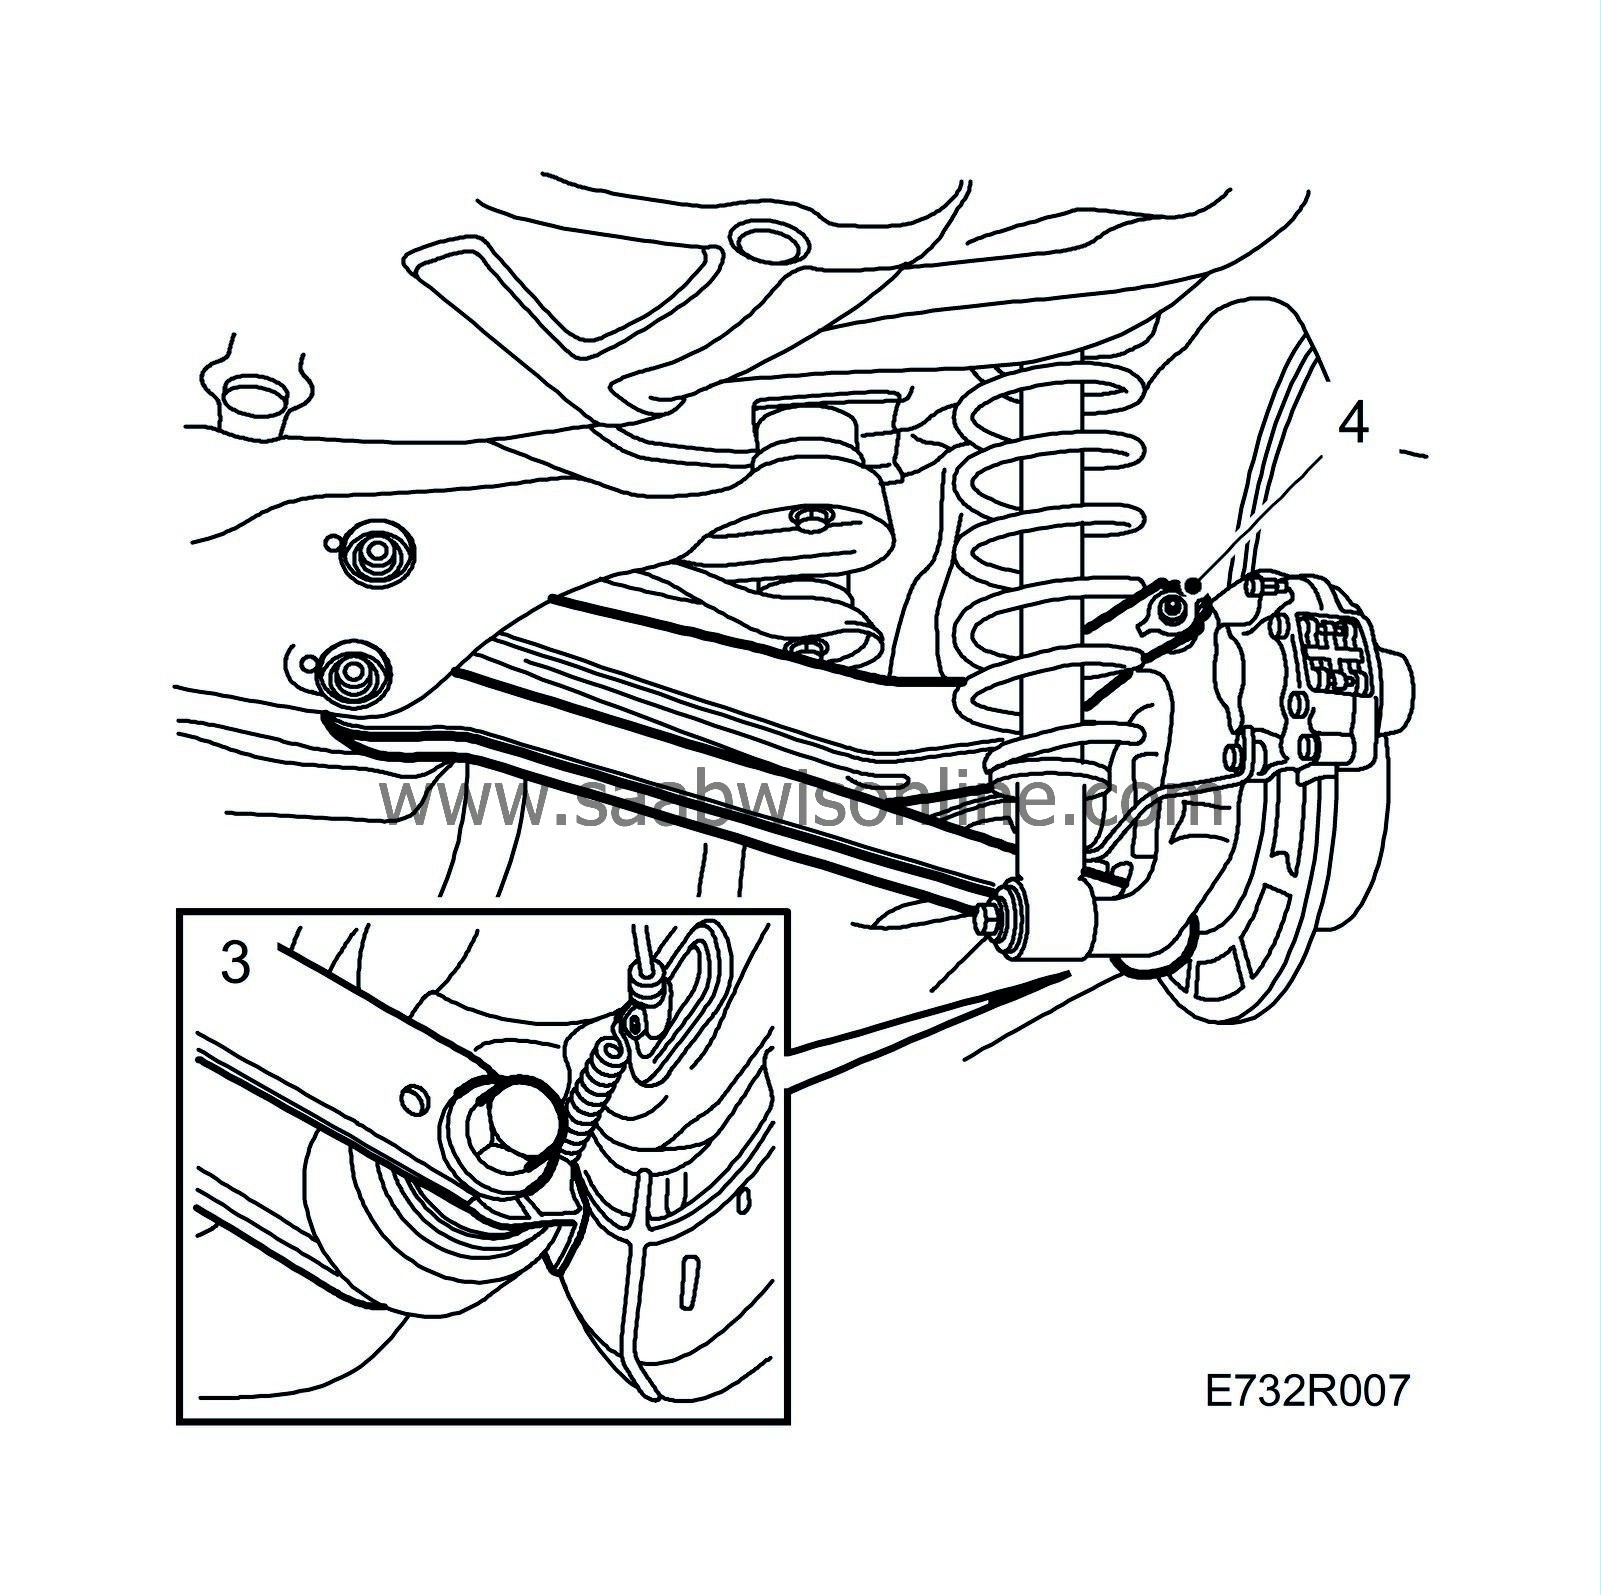
| 3. |
Detach the lower transverse link from the longitudinal link.
|
|
| 4. |
Detach the upper transverse link from the longitudinal link.
|
|
| 5. |
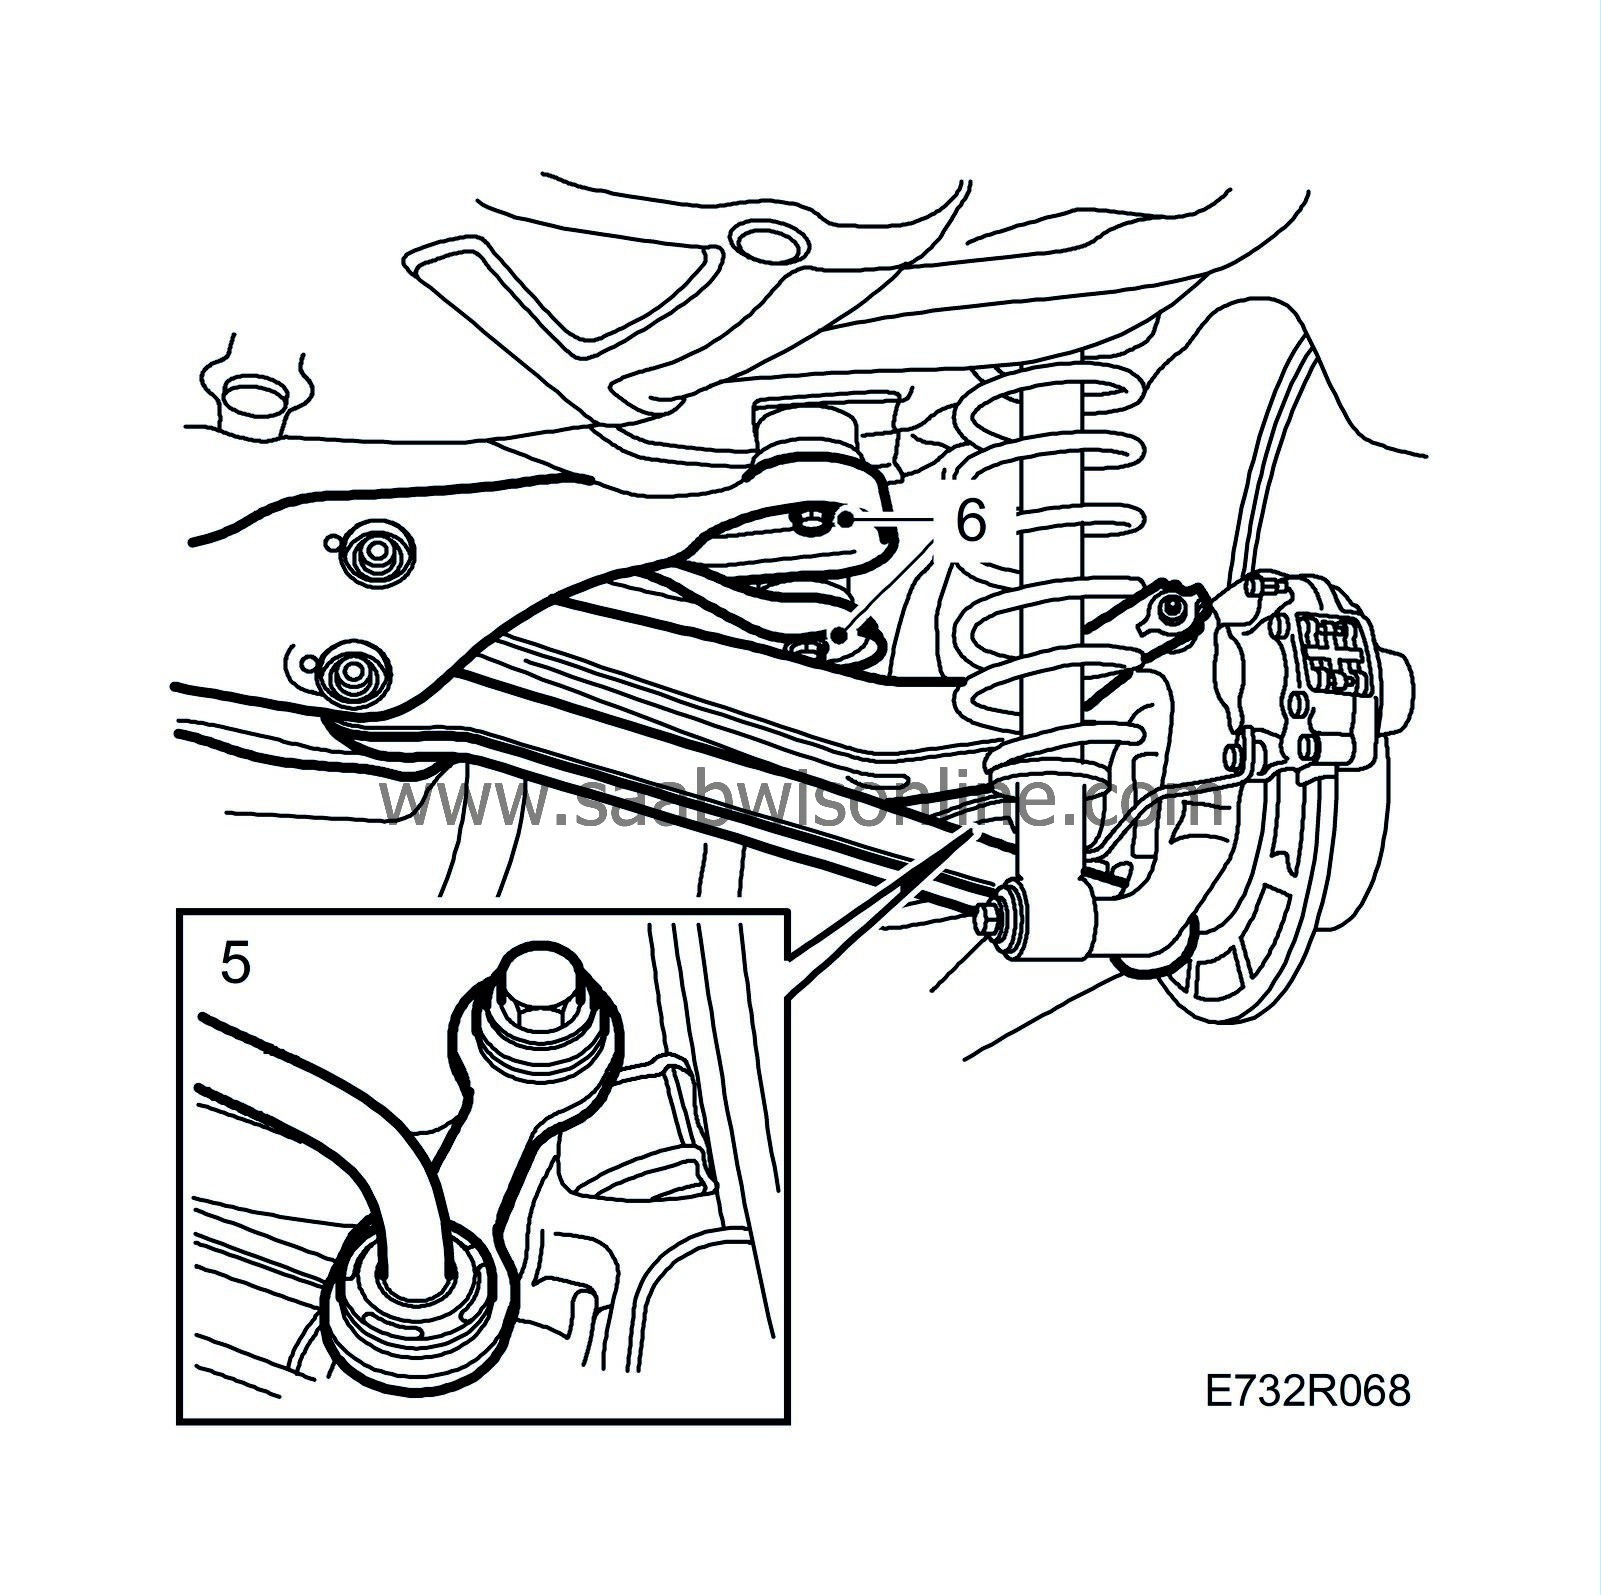
Detach the anti-roll bar from the longitudinal link.
|
|
| 6. |
Remove the subframe mounting bolts on the side where the transverse link is to be replaced and loosen the bolts on the other side.
|
|
| 7. |
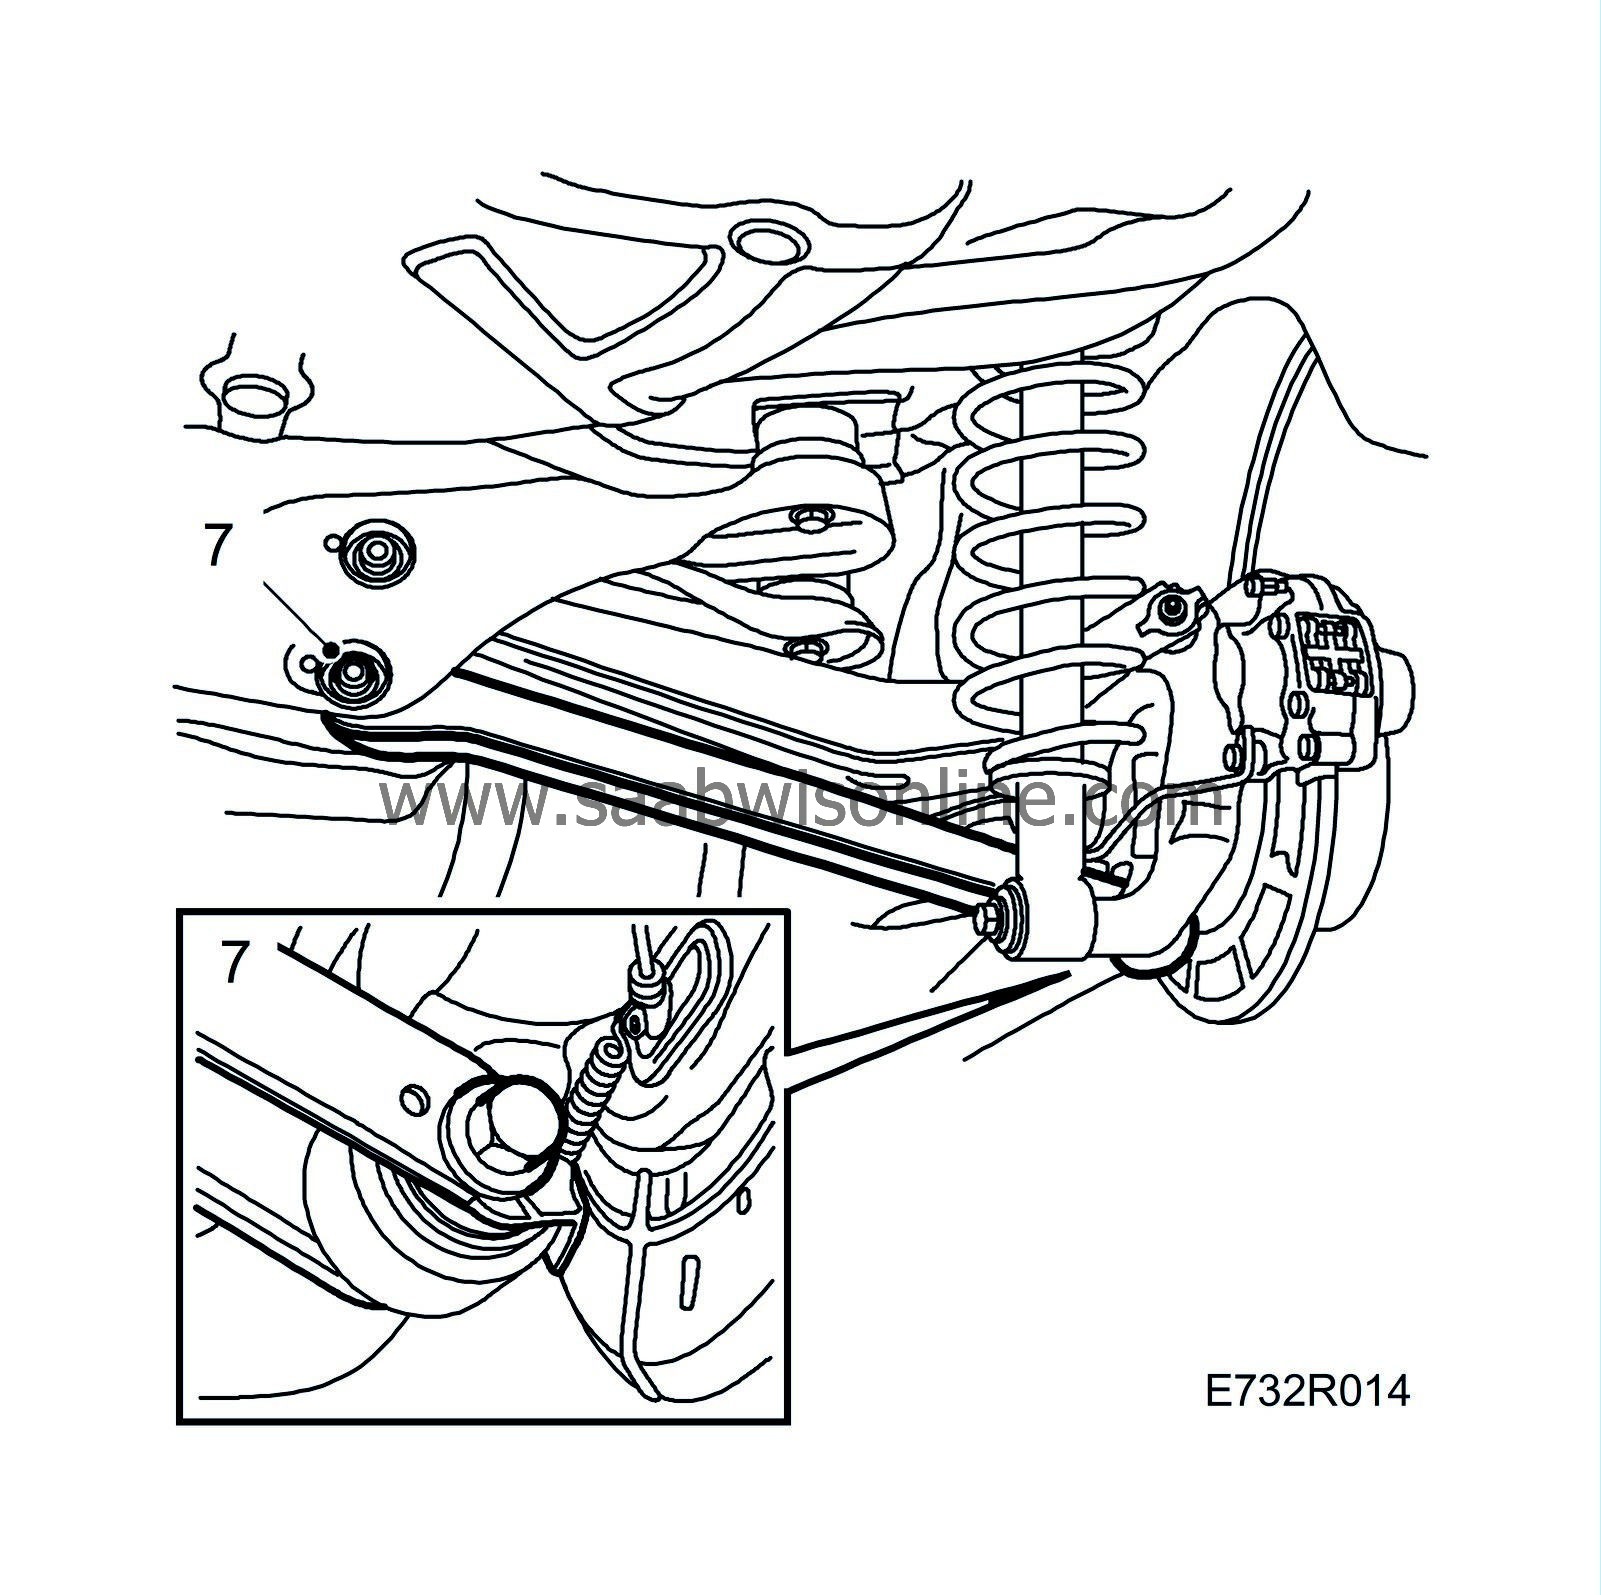
Undo the bolt attaching the transverse link to the subframe and remove the transverse link.
|
|
| Assembly |
| 1. |
Position the transverse link on the subframe and fit the bolt with a new washer but do not tighten.
|
|||||||||
| 2. |
Lift up and attach the subframe but do not tighten the subframe mounting bolts.
|
|
| 3. |
Attach and tighten the anti-roll bar to the longitudinal link.
Tightening torque 50 Nm (40 lbf ft). |
|
| 4. |
Attach and tighten the upper transverse link to the longitudinal link.
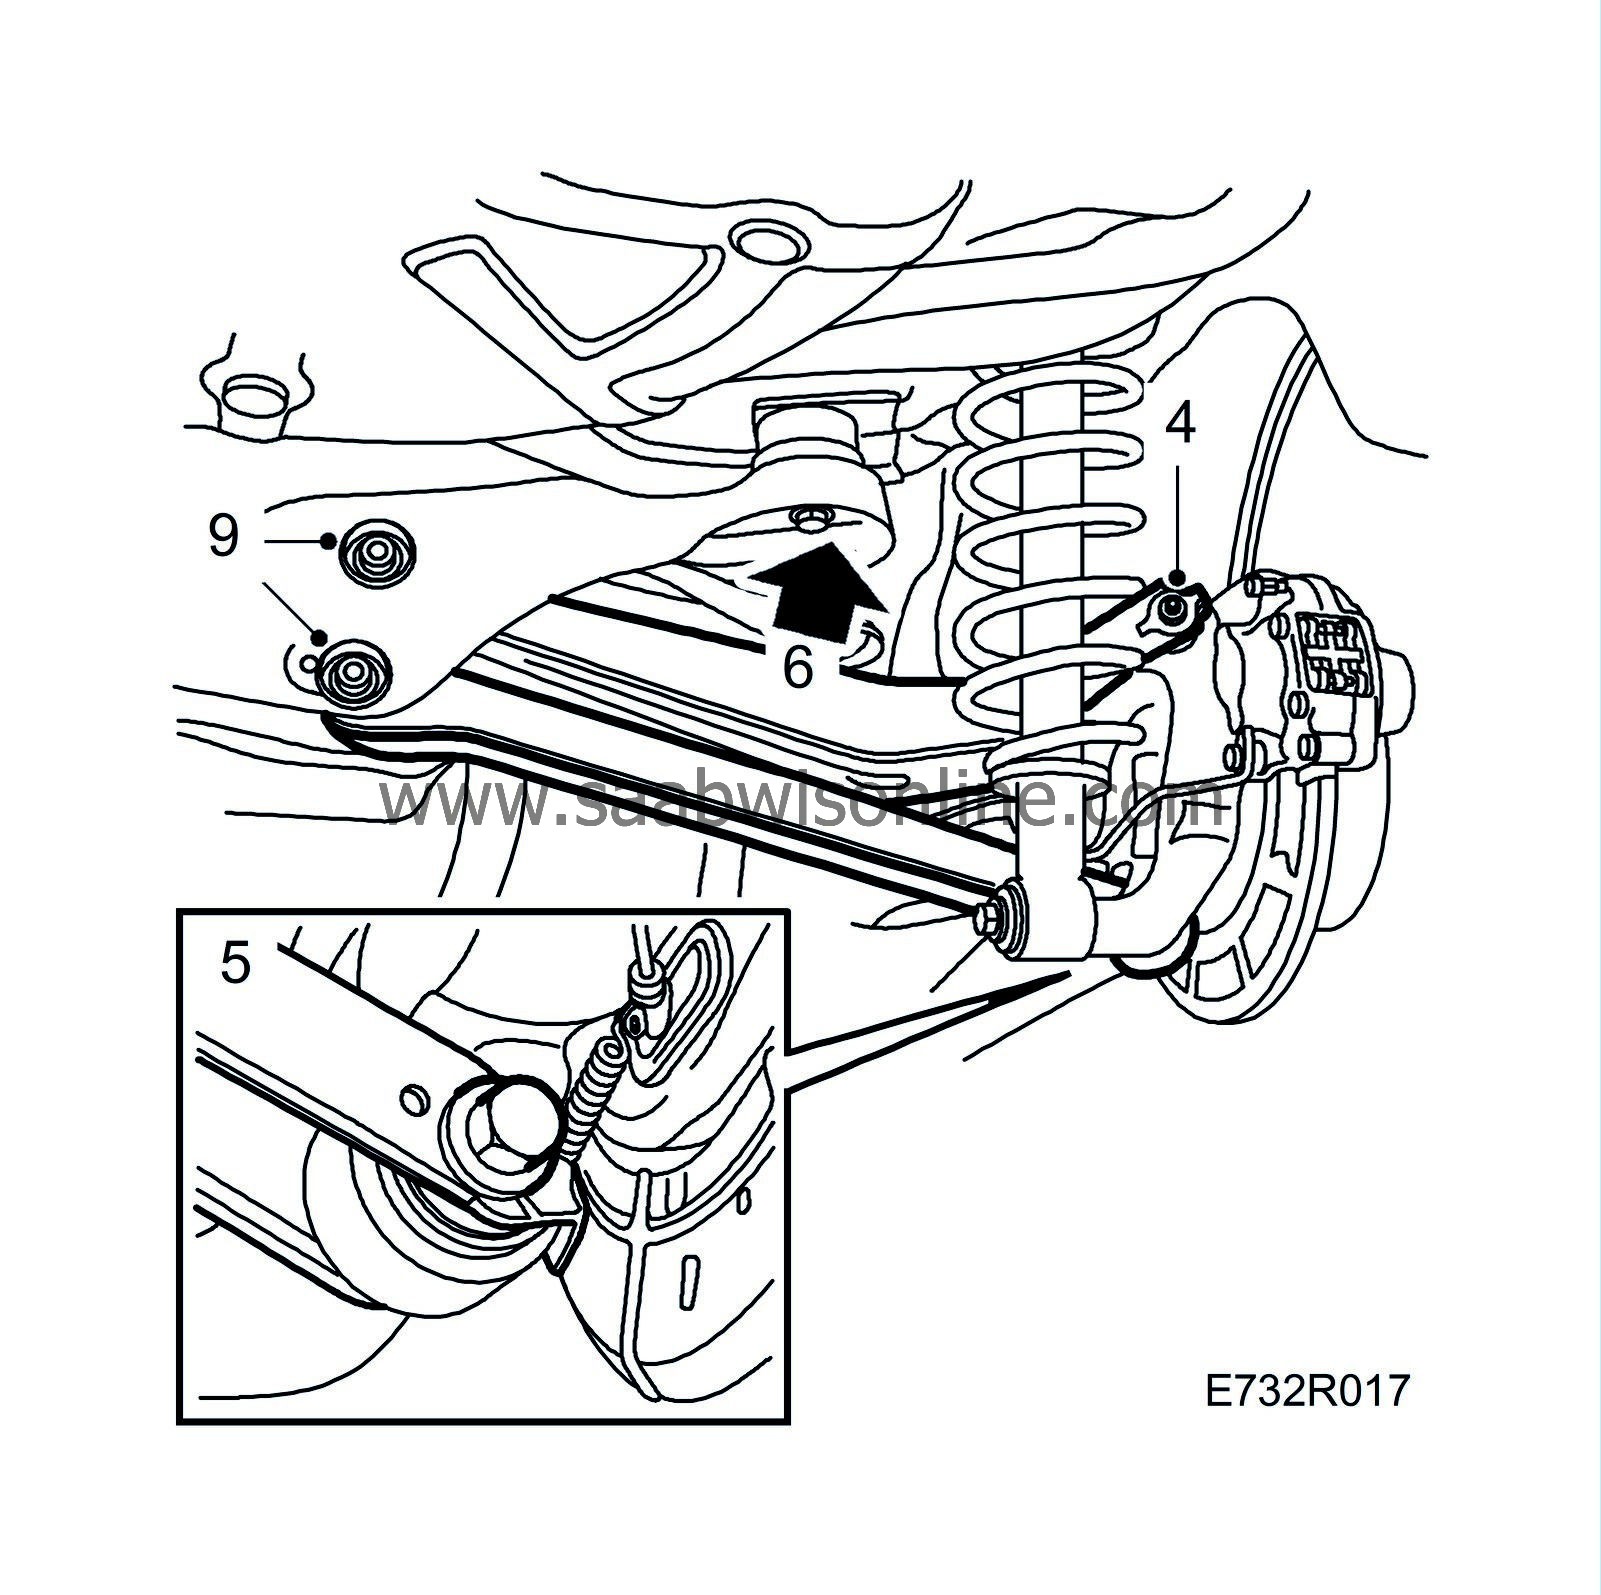
Tightening torque 90 Nm +60° (70 lbf ft +60°) |
|
| 5. |
Attach and tighten the lower transverse link to the longitudinal link.
Tightening torque 90 Nm +60° (70 lbf ft +60°) |
|
| 6. |
Tighten the subframe mounting bolts.
Tightening torque 90 Nm +60° (70 lbf ft +60°) |
|
| 7. |
Hook the exhaust pipe onto the centre and rear rubber mounts.
|
|
| 8. |
Fit the wheels, see
Wheels
.
Tightening torque aluminium rim 110 Nm (81 lbf ft). pressed steel rim 50 Nm +2x90°, max 110 Nm (37 lbf ft +2x90°, max 81 lbf ft) Lower the car. |
|
| 9. |
Tighten the bolts attaching the transverse links to the subframe.
Tightening torque 90 Nm (70 lbf ft) +60˚. |
||||||||||
| 10. |
Check the toe-in angle and adjust if necessary, see
Wheel alignment
.
|
|

 Warning

