Side air bag, from chassis number W3088397 (US X3005844)
|
|
Side air bag, from chassis number W3088397 (US X3005844)
|
|
1.
|
Ignition switch in the OFF position.
|
|
2.
|
Slide the seat forwards as far as it will go
|
|
3.
|
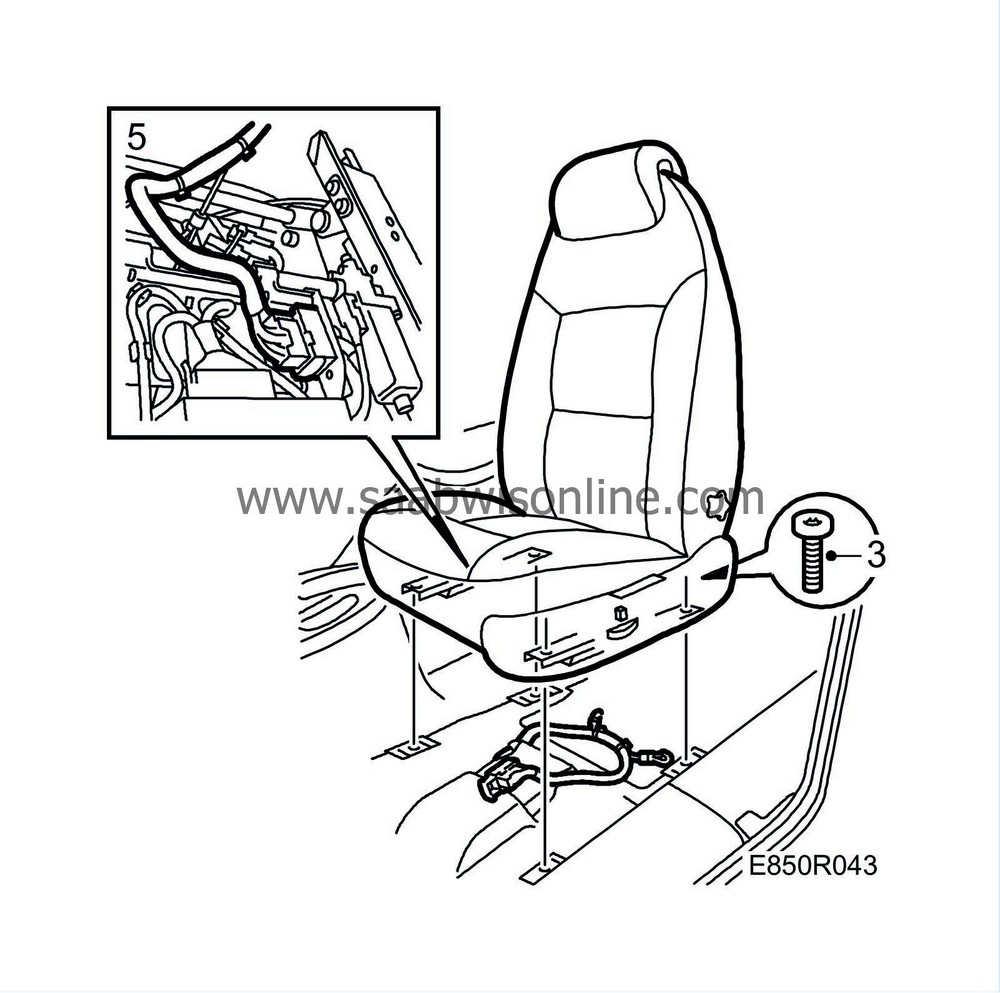
Unscrew the seat at the rear, 2 screws.
|
|
4.
|
Slide the seat backwards and undo the front 2 bolts.
|
|
5.
|
Tip the seat rearwards, snip the cable tie and unplug the 29-pin connection under the seat. Detach the straps between the cable and pullmaflex net.
|
|
6.
|
Remove the belt, if fitted, from the seat.
|
|
7.
|
Lift the seat out of the car.
|
|
8.
|
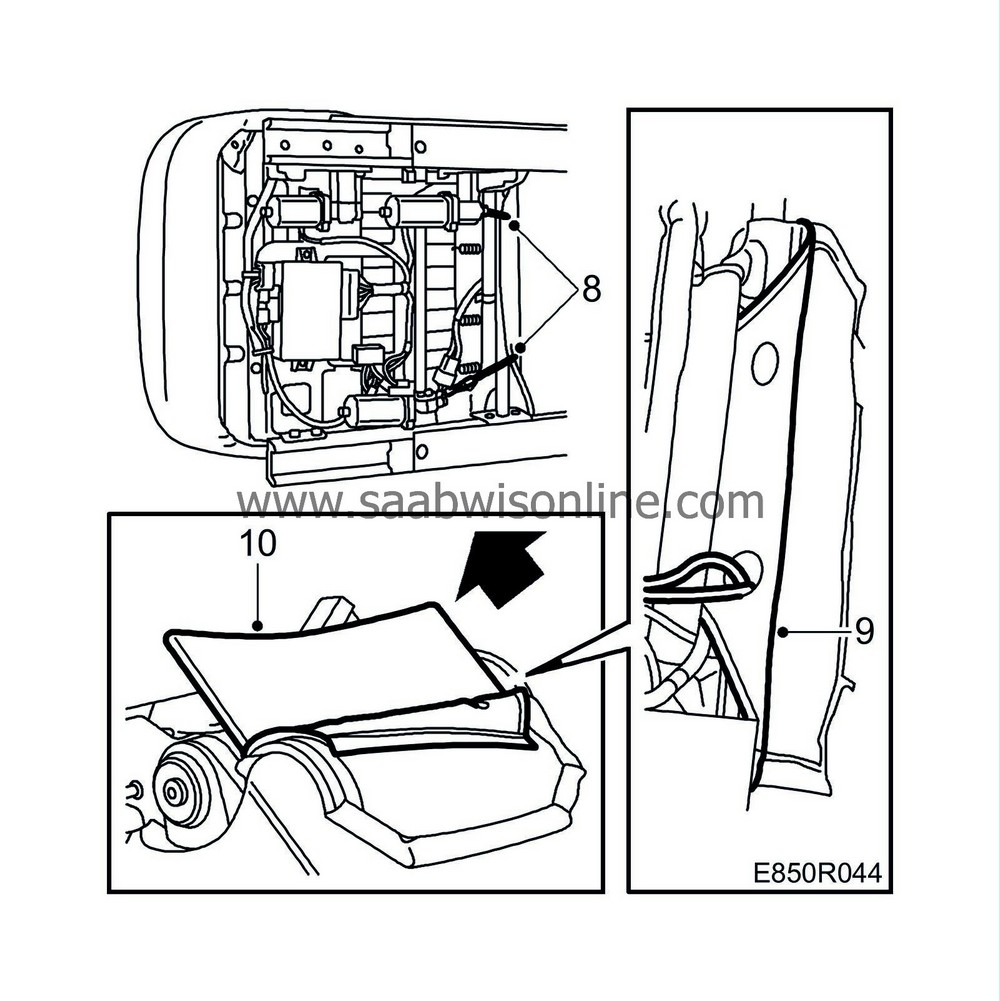
Detach the straps securing the backrest upholstery fabric at the bottom.

|
|
9.
|
Unplug the cables from the side airbag, seat-belt warning sensor and seat heating pad. Snip the cable ties round the cables. Remove the upholstery retaining strip at the bottom.
|
|
10.
|
Pull the cables out through the hole. Withdraw the board.
|
|
11.
|
Detach the rear section of the backrest upholstery fabric by removing the upholstery retaining strip along the sides and folding the fabric out of the way.

|
|
12.
|
Remove the lumbar support adjustment control.
|
|
13.
|
Remove the upholstery retaining strip along the edge at the rear of the backrest frame. Fold the fabric to one side.
|
|
14.
|
Remove the two wire rods retaining the rear edge of the front upholstery fabric at the bottom.
|
|
15.
|
Remove the felt cover on the side of the airbag at the backrest hinge by detaching the felt cover from the hook in the pullmaflex net.
|
|
16.
|
Remove the plastic-coated resistance spring for SAHR.

|
|
17.
|
Remove the side airbag, 3 nuts.
|
|
18.
|
Lift out the side airbag.
|
 Warning
|
|
Never repair and refit damaged seat upholstery. The strength of the seams is carefully calculated and must not be altered.
|
|
|
|
|
|
|
1.
|
Fit the side airbag, 3 nuts.
Tightening torque: 6.5 Nm (4.8 lbf ft)

|
|
2.
|
Fit the SAHR resistance spring as the mirror image of the spring on the other side.
|
|
3.
|
Attach the felt cover to the hook in the pullmaflex net.

|
|
4.
|
Fasten the two wire rods retaining the rear edge of the front upholstery fabric at the bottom.
|
|
5.
|
Secure the rear section of the backrest upholstery fabric by fitting the upholstery retaining strips along the edge on the rear of the backrest frame.
|
|
6.
|
Fit the rear section of the backrest upholstery fabric by securing the upholstery retaining strips along the sides. Fit the lumbar support adjustment control.
|
|
7.
|
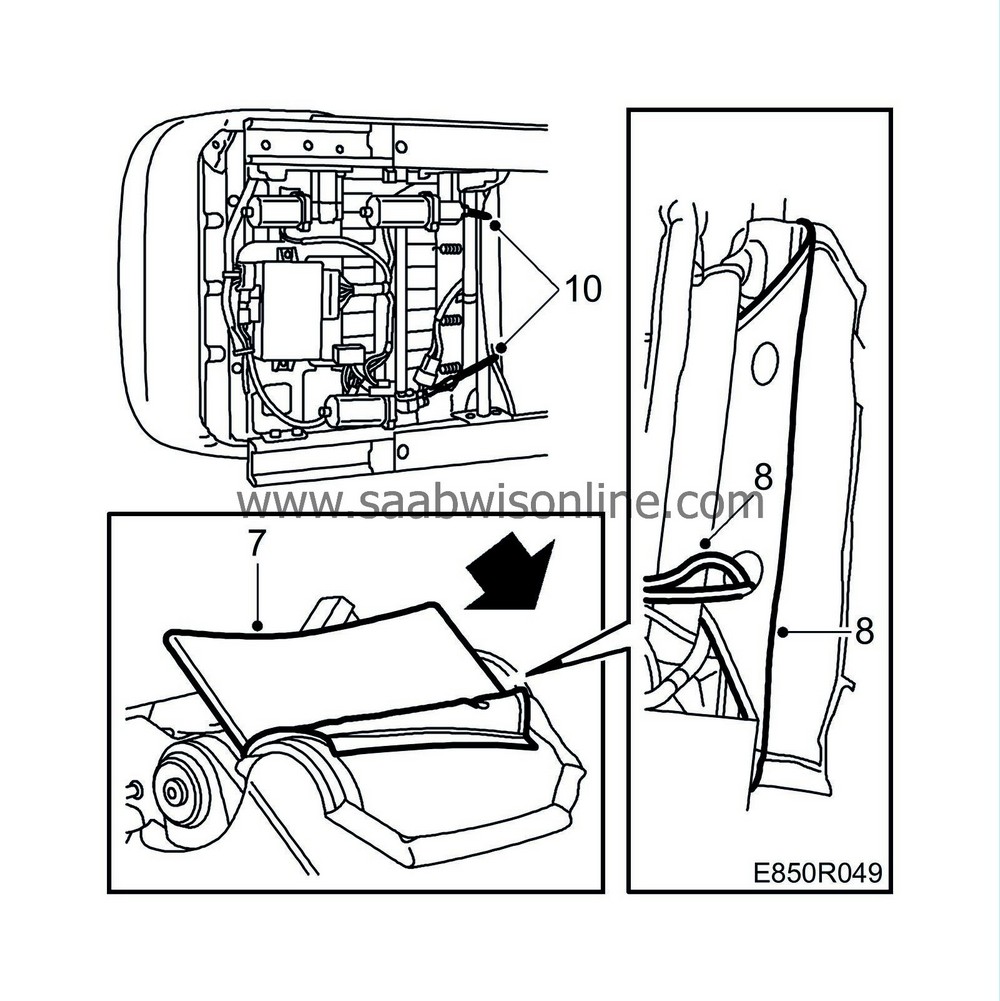
Slide the board into its proper position.

|
|
8.
|
Pull the cables through the hole in the backrest upholstery fabric and secure the upholstery retaining strips to the lower edge.
|
|
9.
|
Connect the cables and fit new cable ties.
|
|
10.
|
Secure the bottom of the backrest upholstery fabric by fitting the straps on the underside.
|
|
11.
|
Lift the seat into the car and plug in the 29-pin connector. Secure the straps under the seat to the pullmaflex net.

|
|
12.
|
Fit the belt to the seat if it has been removed.
Slide the rails into the front keys.
Position the front bolts and push forward the seat.
Insert the rear bolts.
Manually adjustable seat.
Check that the detents on right and left sides have engaged.
Tighten the rear bolts, using a torque wrench.
Slide the seat to the rear.
Manually adjustable seat.
Check that the detents on right and left sides have engaged.
Tighten the front bolts, using a torque wrench.
Tightening torque: 24 Nm (18 lbf ft)
|
Check the SRS system and control module with the diagnostics tool as follows:
With the ignition in the ON position, connect the diagnostics tool to the diagnostics socket under the dashboard. Delete any trouble codes.
Switch off the ignition and switch it on again. Wait at least 10 minutes with the ignition switched on.
Check whether a diagnostic trouble code is displayed:
If a diagnostic trouble code is displayed:
Carry out fault diagnosis according to the instructions in
 .
.
If no diagnostic trouble code is displayed:
Fitting completed correctly. Disconnect the diagnostics instrument.


 .
.

 Warning


