(801-2283) Cracks in the C-pillar roof seal
|
TECHNICAL SERVICE BULLETIN
|
|
Bulletin Nbr:
|
801-2283
|
|
Date:
...........
|
April 2001
|
|
Market:
|
all
|
|
|
Cracks in the C-pillar roof seal
|
This SI replaces SI 801-1946
All Saab 9-5 4D M98-
16-30 04 736 Standox 1K-Füllprimer (enough for 50-100 cars)
16-30 15 815 Teroson FL T875 thinner (enough for 50-100 cars)
16-82 93 748 Material kit (enough for 1 car/2 joints) containing:
|
•
|
Teroson Teromix 6700 T305
|
|
•
|
16-82 93 730 Plastic scraper
|
Tools to be used
16-82 93 193 Cutting tool
16-30 04 777 Glue gun (used with Teroson Teromix 6700 T305)
16-82 93 474 Plastic putty knife
On certain cars, cracks may form in the glue joint between the C-pillar and the roof. This could be caused by aging of the glue joint and the use of brushes or high-pressure washing.
|
Important
|
|
The procedure in this SI differs from the current issue of WIS.
|
|
|
|
Important
|
|
The procedure in this SI differs from the current issue of WIS.
|
|
|
|
1.
|
Remove the top part of the roof moulding.
|
|
2.
|
Bend of the seal lip of the rubber moulding. Place masking tape between the rubber moulding and the roof plate.
|
|
3.
|
Use masking tape to attach the seal lip of the rubber moulding to the rear window.
|
|
4.
|
Cover the rear seat upholstery to prevent it from becoming dirty.
|
|
5.
|
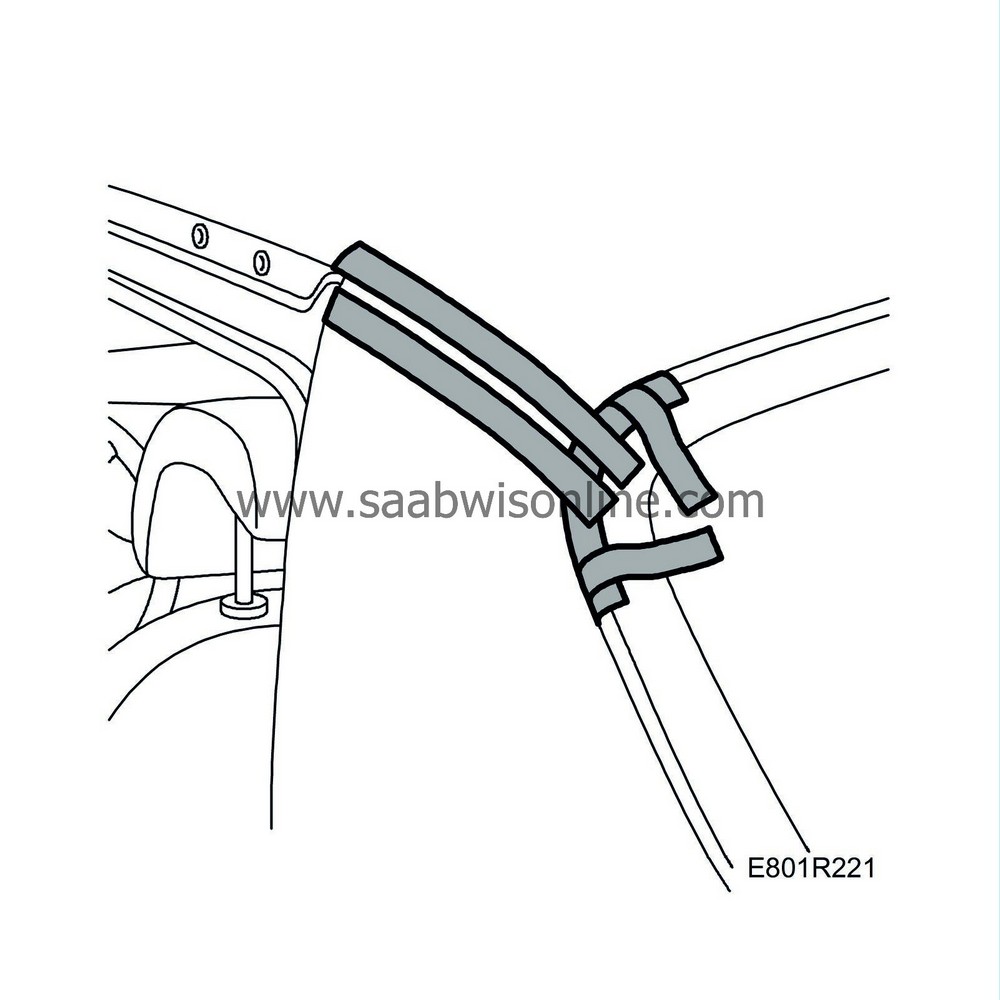
Cover the edge of the side plate and roof radii to protect the paint.
|
|
6.
|
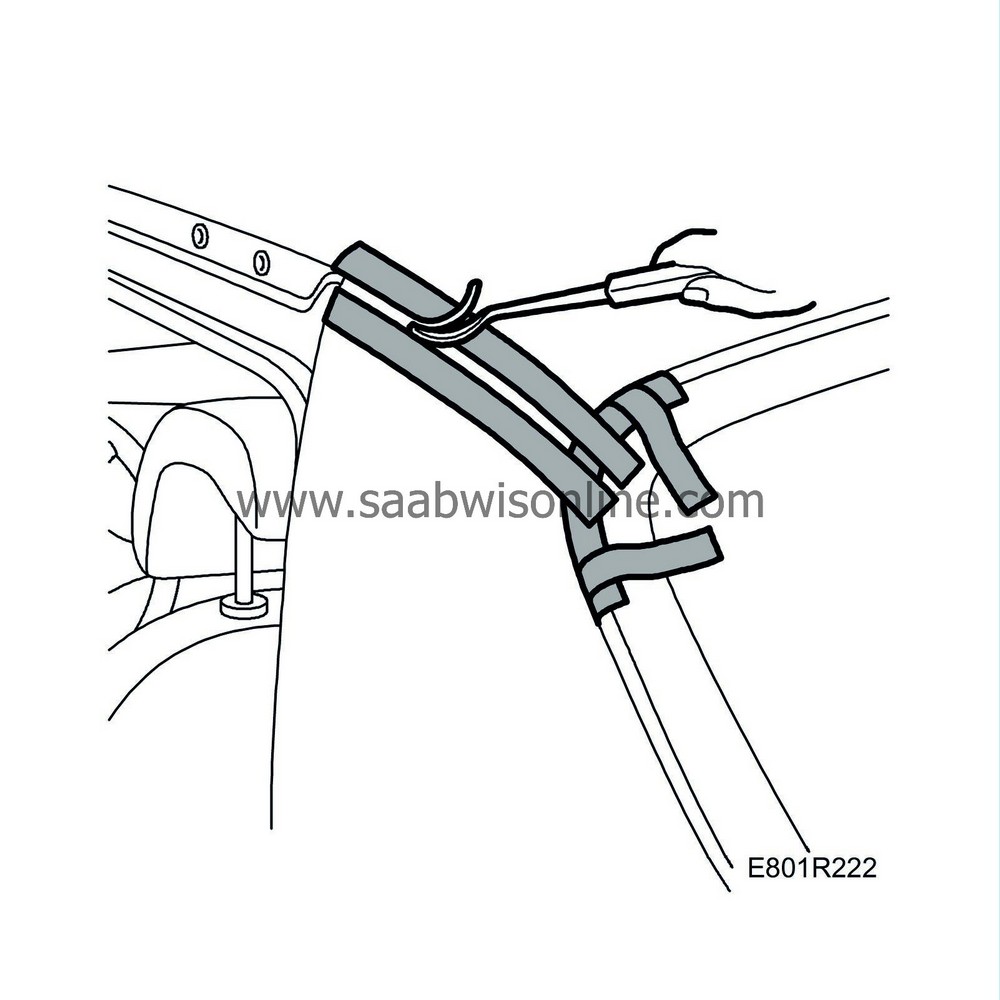
Cut away the centre of the putty string using tool 82 93 193.
|
|
7.
|
Use plastic putty knife 82 93 474 to cut away the rest of the putty. Angling the putty knife will make it easier to remove the putty. Be sure to remove all of the putty at the bottom of the joint.

|
|
8.
|
Remove the masking tape from the side plate and roof.
|
|
9.
|
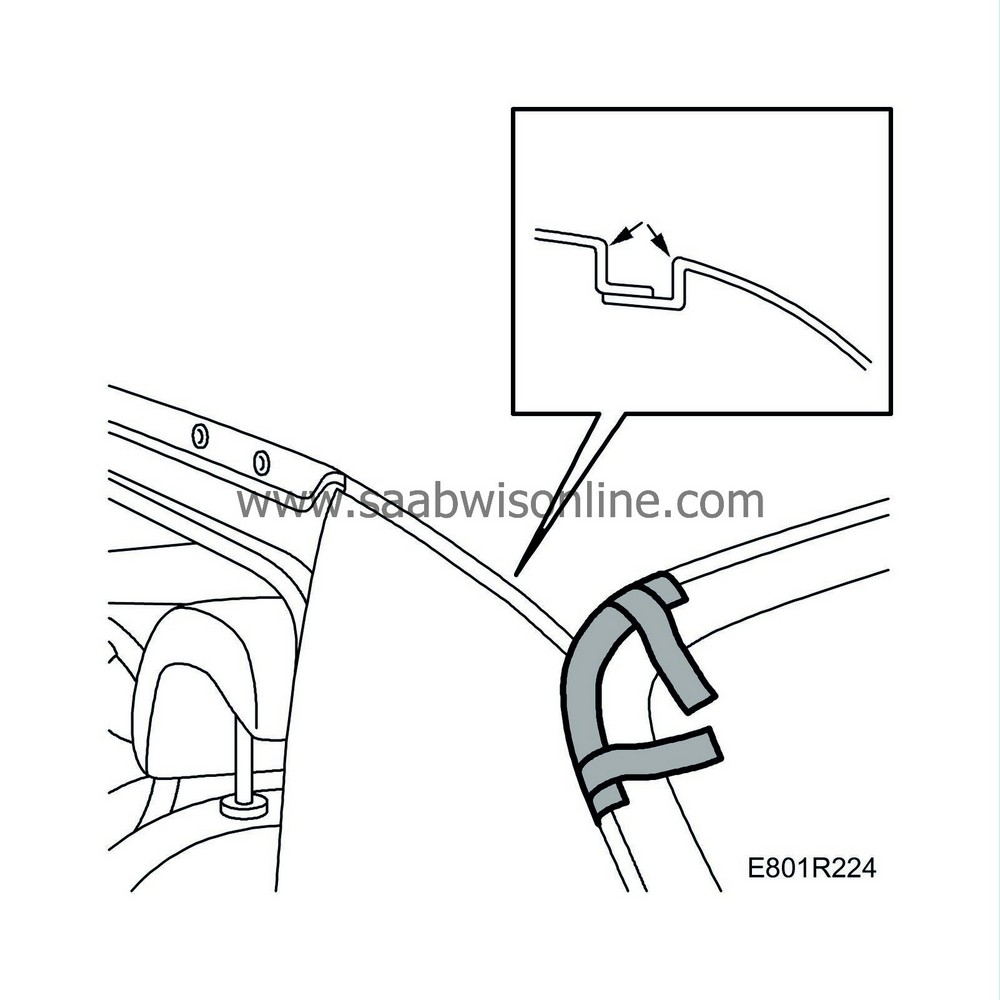
Roughen the paint in the roof joint against the side plate and the roof with fine grinding paper. Do not grind down to the primer above the radii of the roof and side plate.
|
Note
|
|
Be careful not to damage the paint on the side plate and roof radii.
|
|
|
10.
|
Wipe clean with Teroson FL T875.
Repeat points 1-10 to repair the other side.
|
|
11.
|
If the primer is damaged, apply acid-catalysed (etching) primer (Standox 1K-Füllprimer) to all ground surfaces.
|
|
12.
|
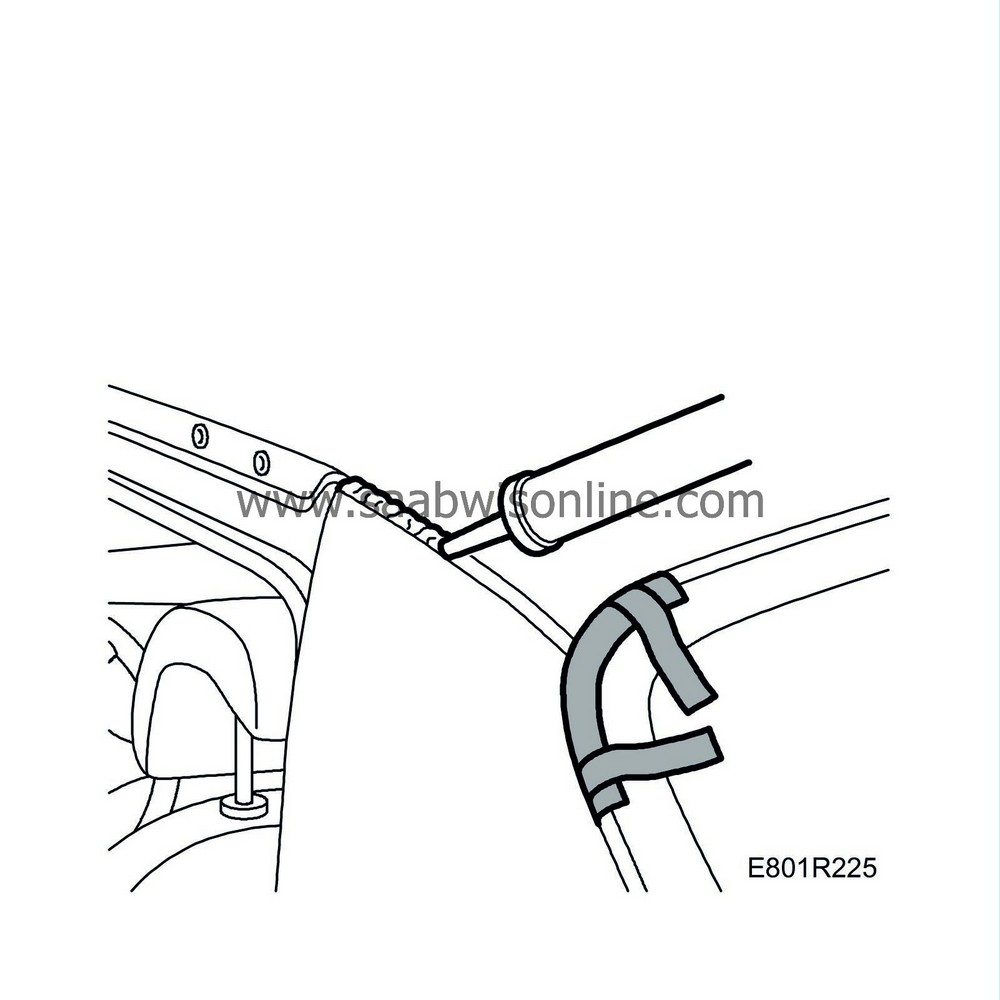
Apply new material (Teroson Teromix 6700 T305).
|
|
13.
|
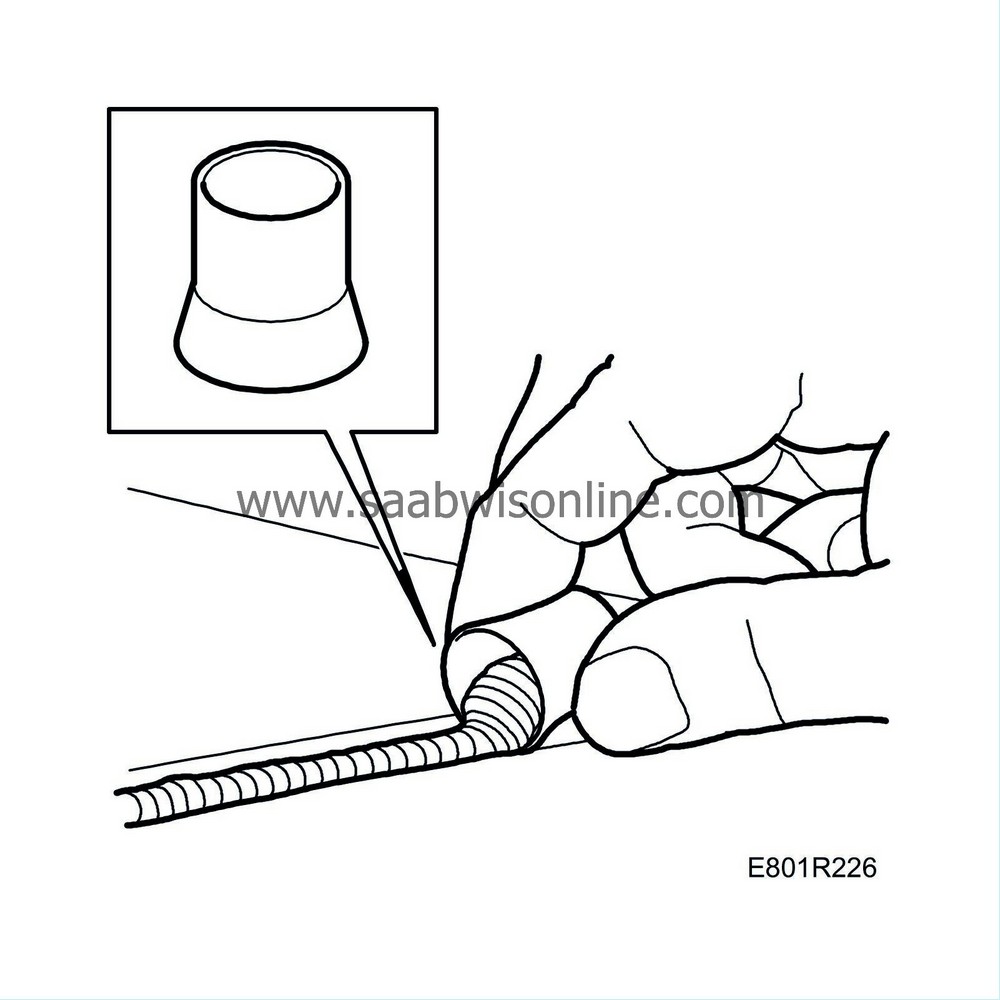
Then use the plastic scraper to remove excess material. Adjust the form against the rear window moulding and the roof moulding.
|
|
14.
|
Check the joint with respect to quality and appearance.
|
|
15.
|
Allow the material to harden 2 hours at a minimum of 20
°
C (68
°
F).
|
|
16.
|
Check the joint after hardening.
|
|
17.
|
Mask, grind and apply primer.
|
|
18.
|
Grind the primer and apply roof paint and any enamel.
|
|
19.
|
Polish the paint joint and remove the masking.
|
|
20.
|
Using a heat gun, warm the rear window rubber moulding to 80 - 100
°
C (176-212
°
F) so that the rubber moulding reassumes its normal shape.
|
|
21.
|
Fit the roof moulding and check the finish of the seal once again. Make sure there is no grinding or paint residue.
|
|
22.
|
Vacuum the car and remove the cover from the rear seat.
|
|
23.
|
Repeat points 11 - 22 to repair the other side.
|
|
Time/Warranty information
|
To resolve a customer complaint for a vehicle
in warranty
, submit a claim using the following information:
Failed Object: 81311
Fault/Reason code: 31
Location code: 09 (US=3/4)
Warranty Type (US): 01
Repair/Action code: 05
Labour Operation (US): Straight time
Labour Operation (CA): right A9200, left A9201
Time:
0.6 hours - 1 side
1.0 hour - 2 sides
This time only covers mechanical labour, not painting.


