Front doors
| Front doors |
| To remove |
| 1. |
Disconnect the wiring harness in the door.

|
|
| 2. |
Remove the door stop from the A-pillar.
|
|
| 3. |
Unscrew the nut from the lower hinge mounting first.
|
|
| 4. |
Unscrew the nut from the upper hinge mounting while supporting the door.
|
|
| 5. |
Carefully lift off the door from the hinge mountings.
|
|
| To fit |

| 1. |
Lift the door onto the hinge mountings.
|
|
| 2. |
Screw on the nuts.
|
|
| 3. |
Check the fit between the front and rear doors and tighten the nuts.
|
|||||||
| 4. |
Fit the door stop to the A-pillar.
|
|
| 5. |
Connect the wiring harness in the door.
|
|
| 6. |
Check the electrical functions in the door, window lifts, lock, etc.
|
|
| 7. |
Connect the diagnostic tool and clear any diagnostic trouble codes.
|
|
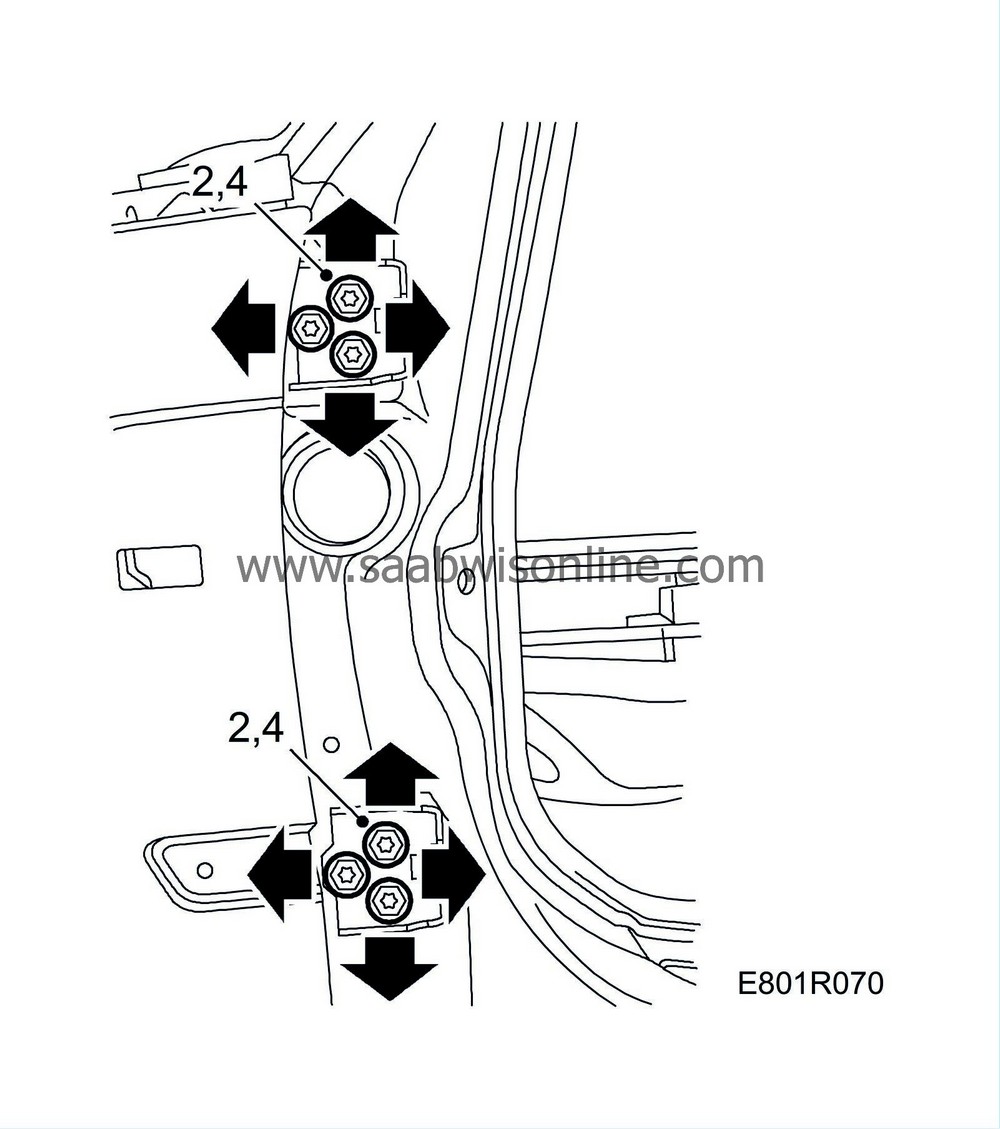
| Adjusting the front door, upwards, downwards, backwards and forwards |

| 1. |
Remove the front door.
|
|
| 2. |
Slightly loosen the screws so that the hinge mountings can just be moved.
|
|
| 3. |
Hang the door and adjust it.
|
|
| 4. |
Take off the door again and tighten the hinge mountings.
|
|
| 5. |
Refit the door.
|
|
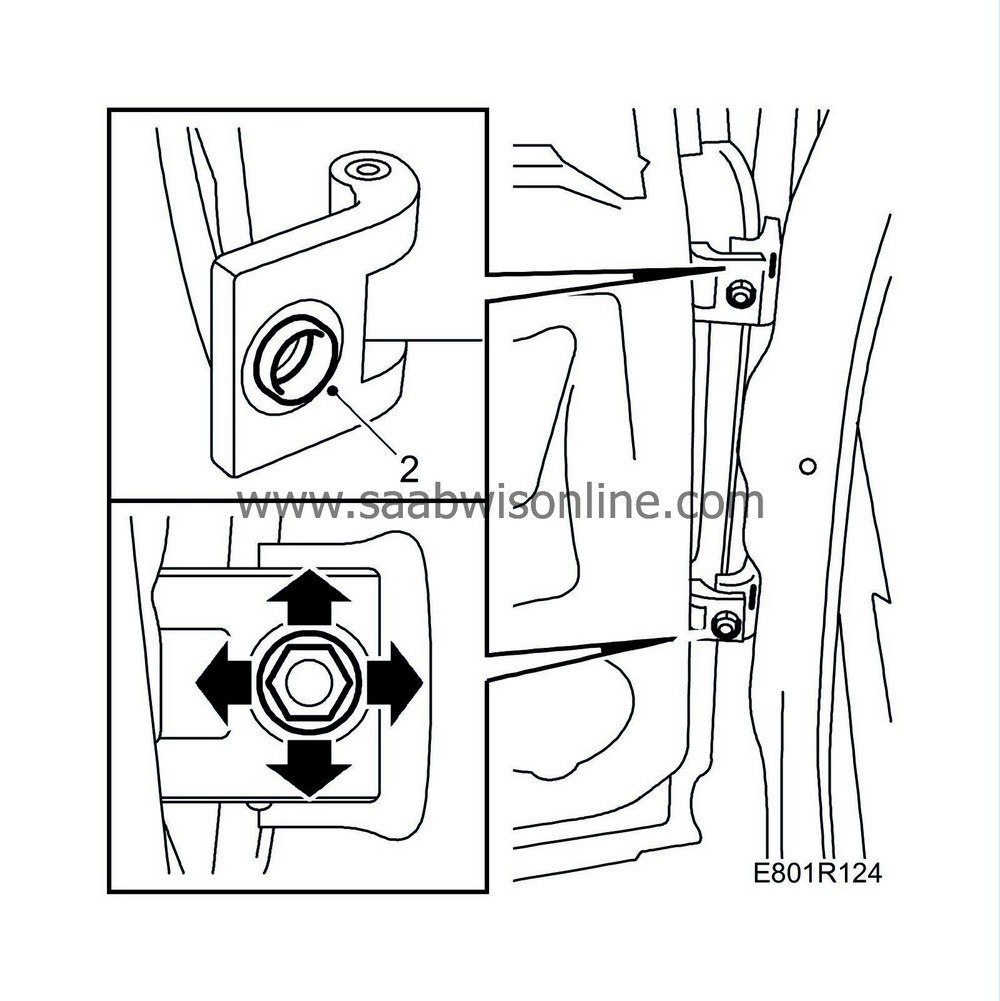
| Adjusting the front door, inwards and outwards |

| 1. |
Remove the front door. If the front wing has been removed, the door can be left on.
|
|
| 2. |
Loosen the nuts so that the screws can just be moved.
|
|
| 3. |
Hang the door and adjust it.
|
|
| 4. |
Lift off the door again and tighten the nuts.
|
|
| 5. |
Refit the door.
|
|
| Simplified adjustment of the front door, upwards, downwards, inwards and outwards |
When only a slight adjustment upwards, downwards, inwards and outwards is required, the following simplified adjustment can be implemented.
| 1. |
Open the door and unscrew the nut.

|
|
| 2. |
Knock out the sleeve.
|
|
| 3. |
Screw on the nut and adjust the door.
|
|


