Dashboard
| Dashboard |
| To remove |
|
|||||||||||||

| 1. |
Ignition switch in the OFF position.
|
|
| 2. |
Remove the speaker grille (fastened with clips).
|
|
| 3. |
Remove the speakers and unplug the connectors.
|
|
| 4. |
Remove the cover on the centre of the dashboard front.
Cars with ACC and/or alarm: Unplug the connector concerned and push the sensor down through the hole in the dashboard. |
|
| 5. |
Remove the
glove box
.
Lift out the air duct. |
|
| 6. |
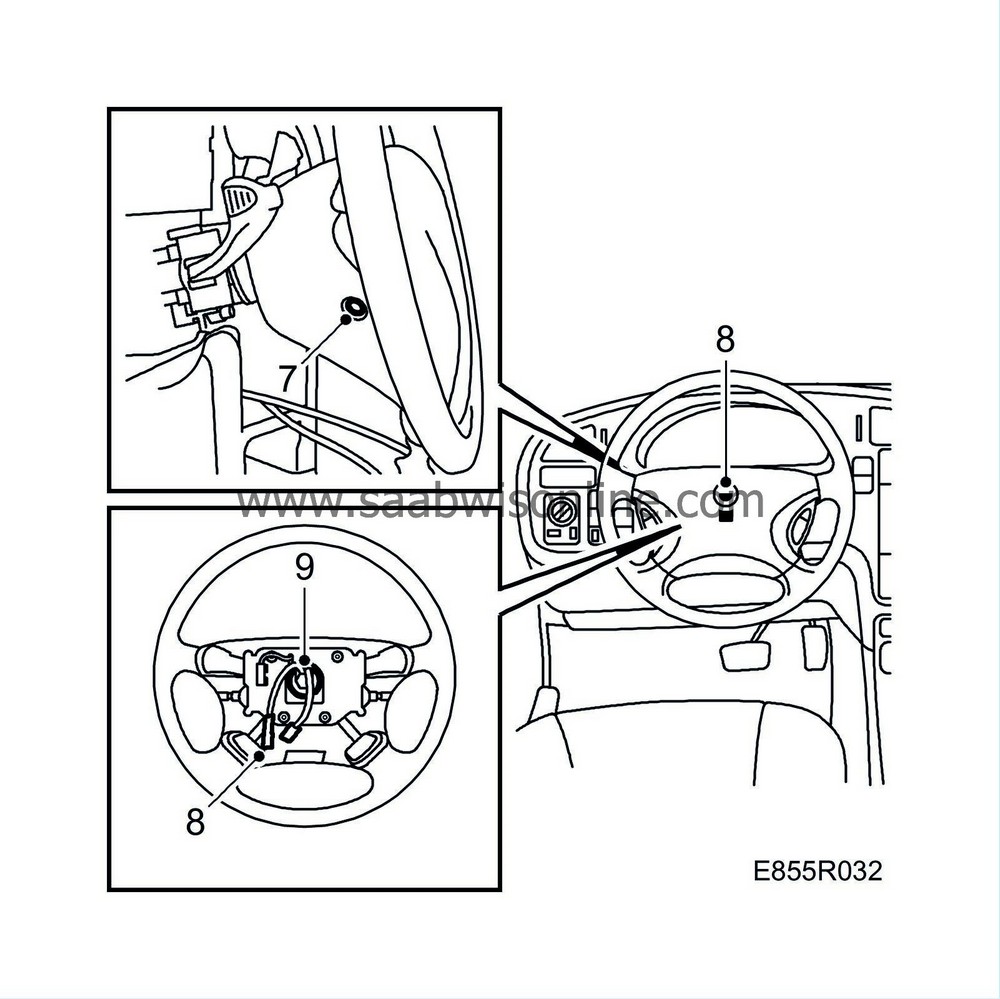
Turn the steering wheel so that the wheels are pointing straight ahead.
|
|
| 7. |
Remove the driver's airbag, 2 covers and screws.
|
|
| 8. |
Unplug the connectors to the airbag and horn, as well as to the audio system if fitted
|
||||||||||
| 9. |
Undo the steering wheel nut, leaving it fastened to the last few threads and pull off the steering wheel up to the nut. Then remove the nut and carefully lift off the steering wheel.
|
|||||||
| 10. |
Remove the data link connector, 2 screws.

|
|
| 11. |
Remove the lower dashboard panel with air duct on the driver's side, 3 screws.
|
|
| 12. |
Remove the floor light in the lower dashboard panel.
|
|
| 13. |
Manual gearbox:

Lift up the gear lever gaiter. Automatic transmission: Remove the rim with a small screwdriver. |
|
| 14. |
Remove the compartment or, alternatively, the ashtray with holder using a screwdriver.
|
|
| 15. |
Undo the screws behind the compartment, 2 pcs.
|
|
| 16. |
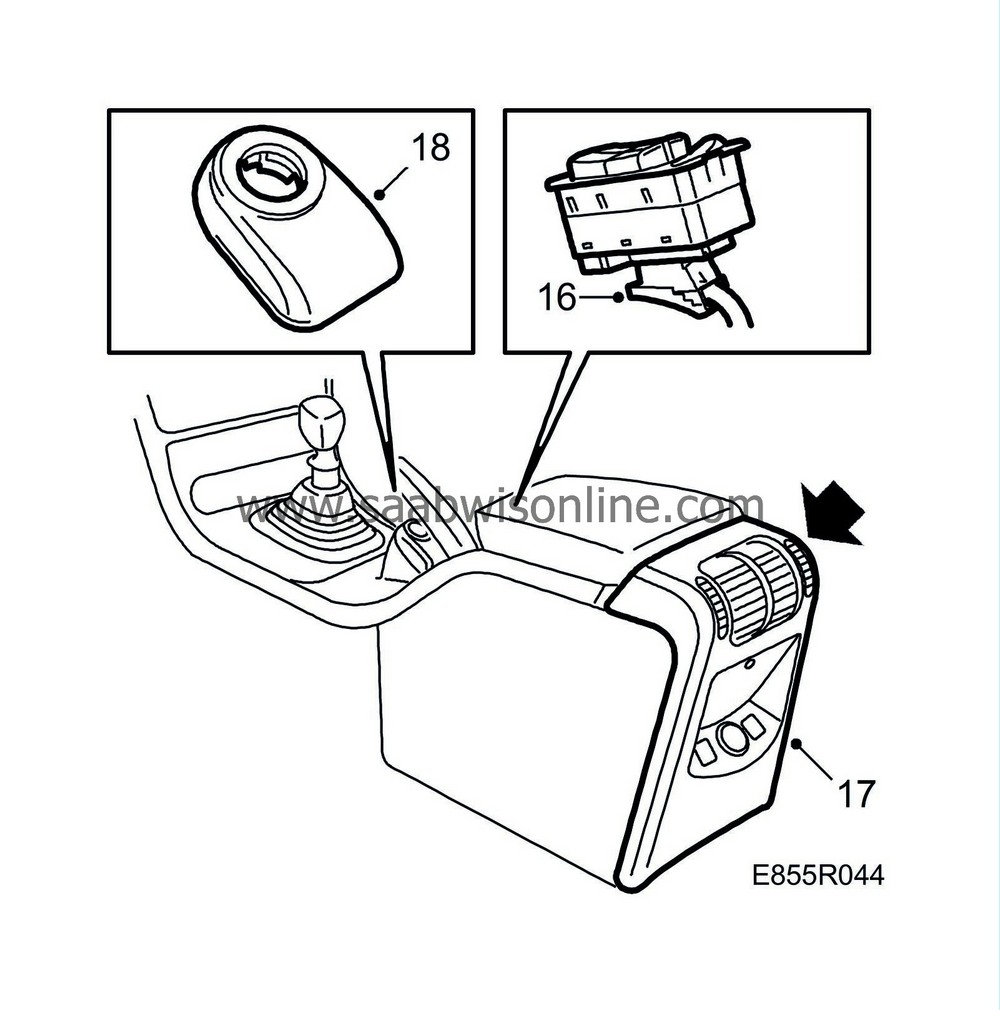
Unplug the connector to the central locking system switch.
|
|
| 17. |
Lift up the gear lever cover and unplug the connector for the seat heater and cigarette lighter.
|
|
| 18. |
Remove the switch panel, see
 .
.
|
|
| 19. |
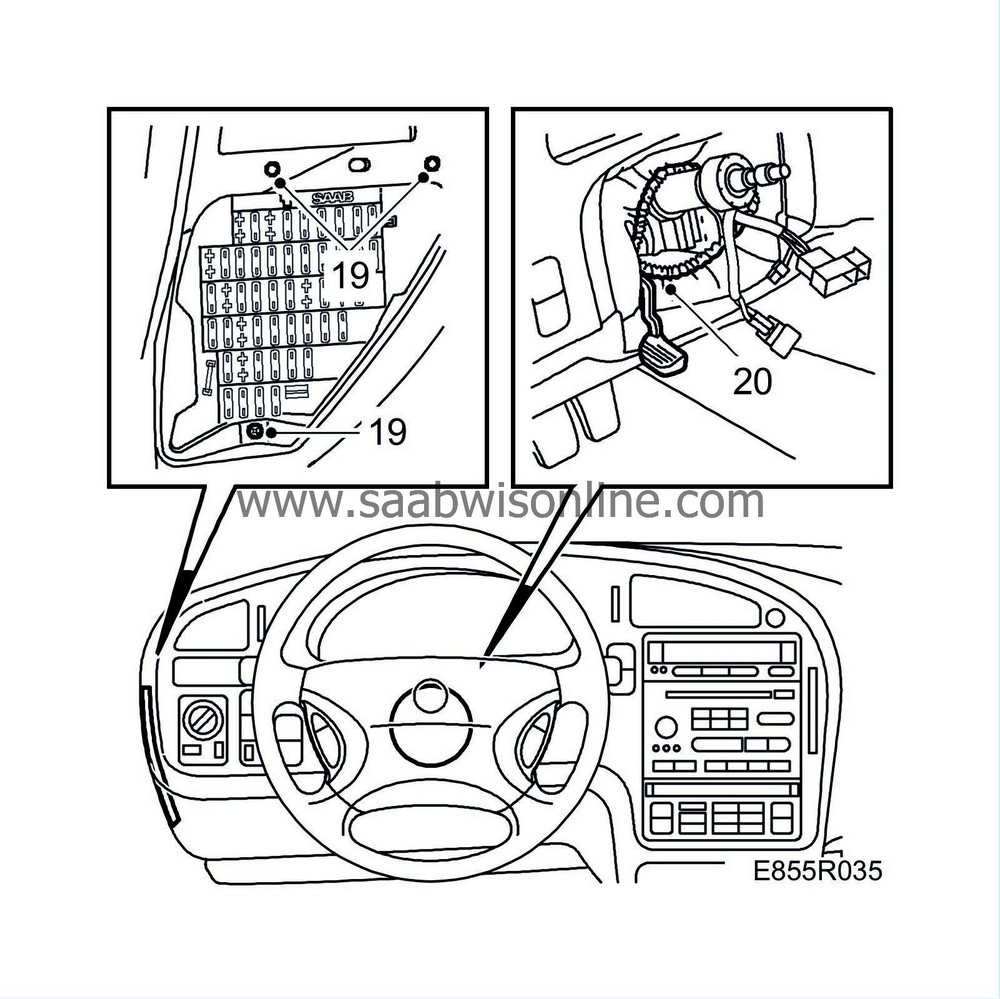
Remove the fuse box, 3 screws.
|
|
| 20. |
Remove the steering column gaiter, 4 screws.
|
|
| 21. |
Remove the main instrument unit, 4 screws.

Unplug the connectors on the back. |
|
| 22. |
Remove the air duct on the driver's side, 1 screw.
|
|
| 23. |
Cars with passenger airbag:
Unplug the airbag connector. Remove the strap holding the airbag in place, 1 screw. |
|
| 24. |
Remove the front scuff plate.

|
|
| 25. |
Fold back the carpet and remove the protective plate in front of the lower dashboard mounting, 2 nuts at each mounting point.
|
|
| 26. |
Remove the rear part of the centre console by lifting it straight up and unplugging the connector.

|
|
| 27. |
Select reverse (manual) or P (automatic) and remove the key.
|
|
| 28. |
Rotate and lift up the theft protection antenna unit (bayonet fitting) from the ignition switch and unplug the connector.
Insert the key and select neutral. |
|
| 29. |
Disconnect the switch for the electric window lifts and unplug the connectors.
|
|
| 30. |
Remove the screws holding the upper part of the centre console, 6 screws.

Lift out the upper part of the centre console.
|
|||||||
| 31. |
Undo the metal bracket with the locating pin on the floor console, 3 screws.
|
|
| 32. |
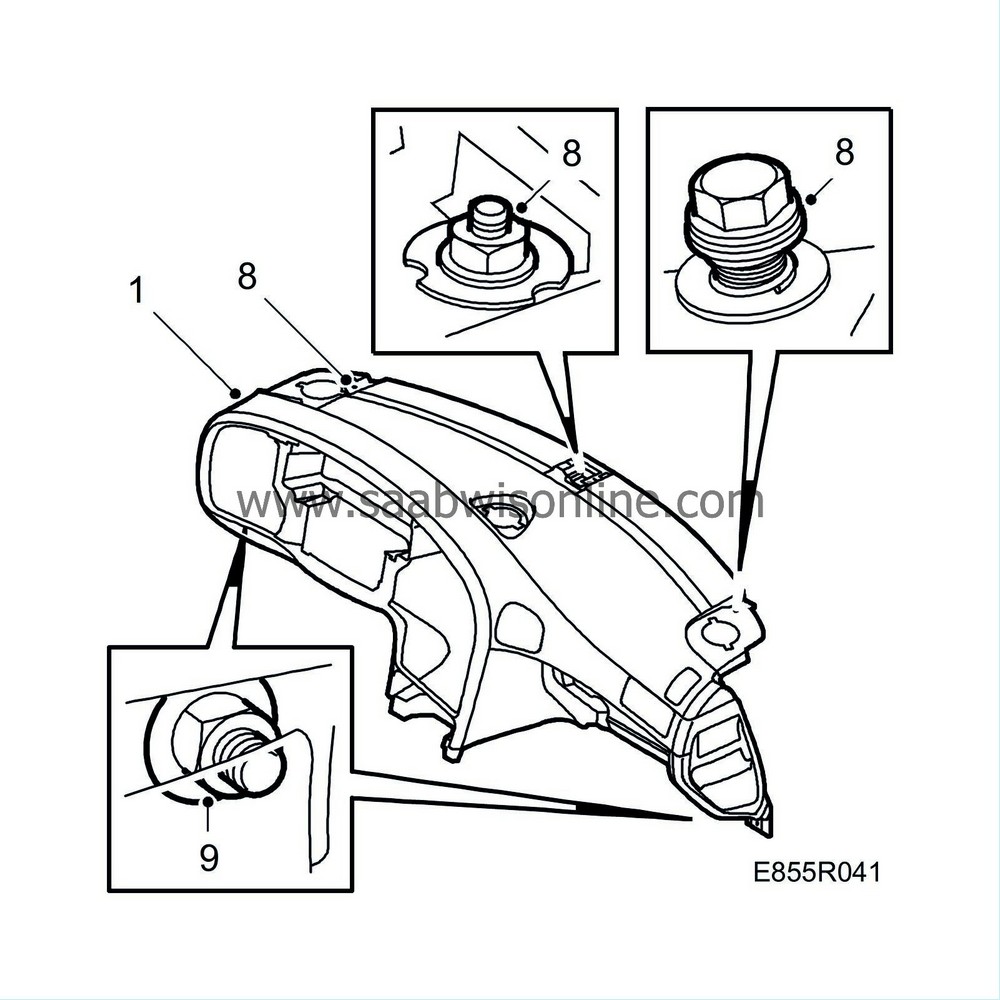
Unscrew the upper edge of the dashboard, 2 screws and 1 nut.

The middle nut need only be loosened as the hole is slotted. |
|
| 33. |
Unscrew the lower edge of the dashboard, 2 screws.
|
|
| 34. |
Lift up the dashboard and pull it outwards.
|
|
| 35. |
Lift out the dashboard.
|
|
| To fit |
|
|||||||||||||
| 1. |
Lift the dashboard into place towards the windscreen.
|
|
| 2. |
Check that no leads are trapped.
|
|
| 3. |
Lift out the wires for the instrument panel.
|
|||||||
| 4. |
Cars with ACC and/or alarm:
Pull up the wire and connector for the sensor. |
|
| 5. |
Guide the dashboard into place and fit it into the upper mountings.
|
|
| 6. |
Check that the strap for the passenger airbag runs over the front of the member.
|
|
| 7. |
Raise the lower edge of the dashboard so that it fits behind the floor console.
|
|
| 8. |
Screw the dashboard upper edge in place, 2 screws and 1 nut.
|
|
| 9. |
Screw the dashboard lower edge in place, 2 screws.
|
|
| 10. |
Refit the protective plates and carpets on each side.

|
|
| 11. |
Refit the scuff plates.
|
|
| 12. |
Screw the metal bracket firmly to the floor console with the locating pins as marked.

|
|
| 13. |
Screw the dashboard to the centre console, 2 screws.
|
||||||||||
| 14. |
Lift the upper part of the centre console backwards. At the same time, carefully guide the wires into place.
Be careful with the lead for the theft protection system. |
|
| 15. |
Screw the upper part of the centre console in place, 6 screws.
|
|
| 16. |
Connect and refit the switch for the electric window lifts and clip the handbrake gaiter back into place.
|
|
| 17. |
Reconnect the connectors on the back of the centre console and refit the rear part.
|
|
| 18. |
Plug in the connector for the theft protection antenna unit and fit the unit (bayonet fitting).
|
|
| 19. |
Cars with passenger airbag:
Screw the strap to the passenger airbag. Reconnect the airbag connector. |
|
| 20. |
Reattach the air duct on the driver's side.
|
|
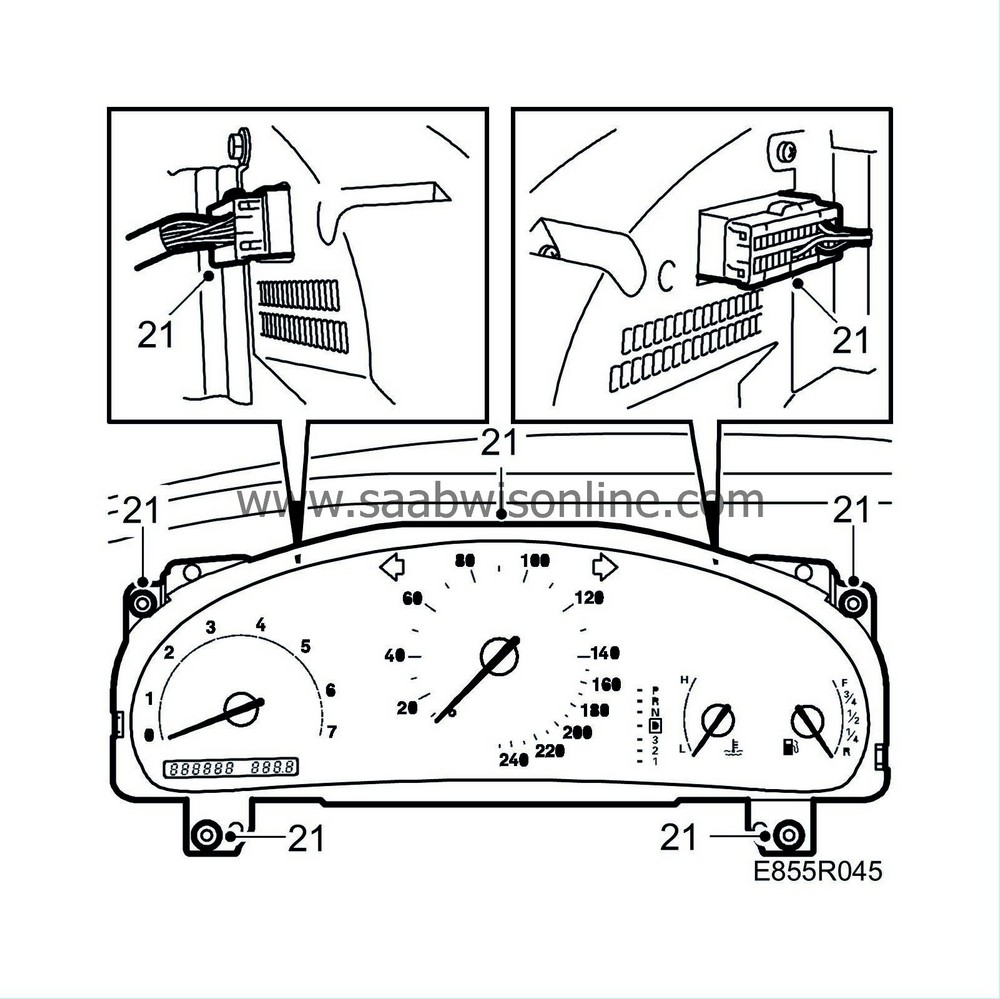
| 21. |
Reconnect the connectors for the main instrument unit and fit the unit into the dashboard, 4 screws.
|
|
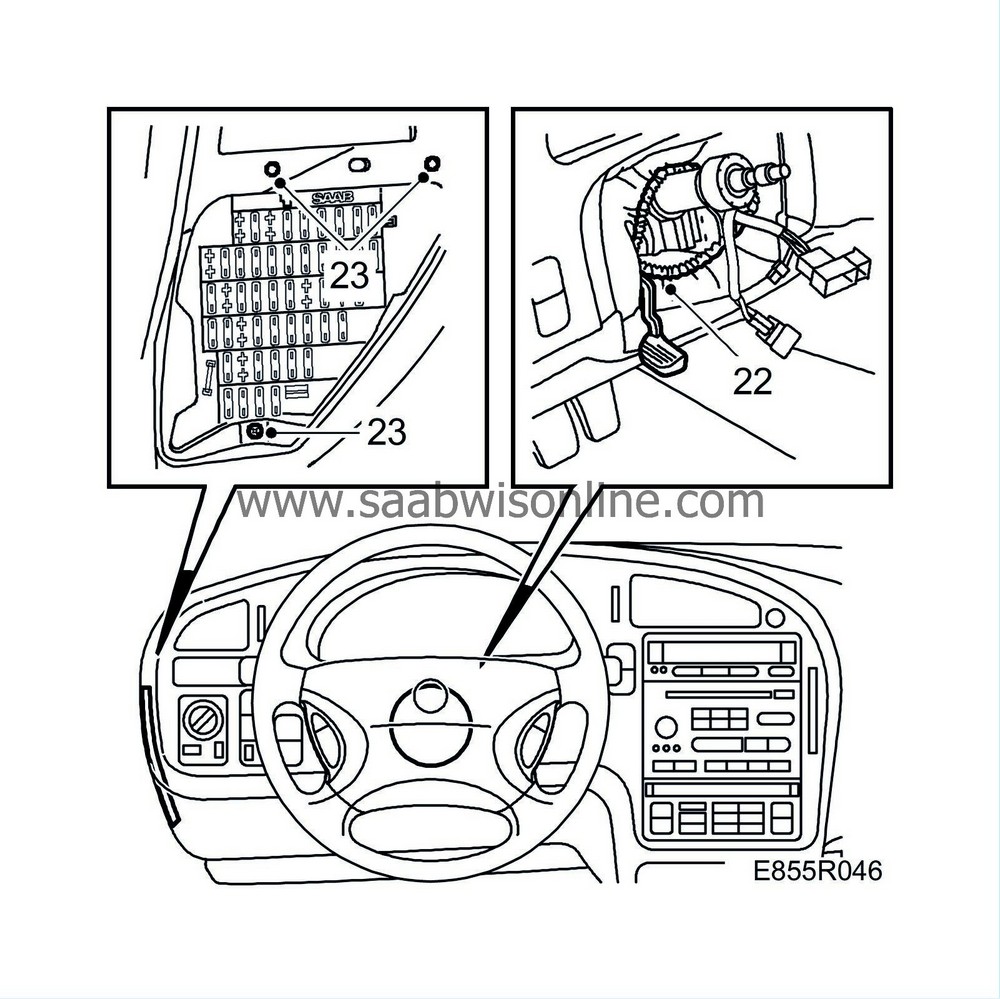
| 22. |
Refit the steering column gaiter, 4 screws.
|
|
| 23. |
Refit the fuse box, 3 screws.
|
|
| 24. |
Refit the switch panel, see
 .
.
|
|
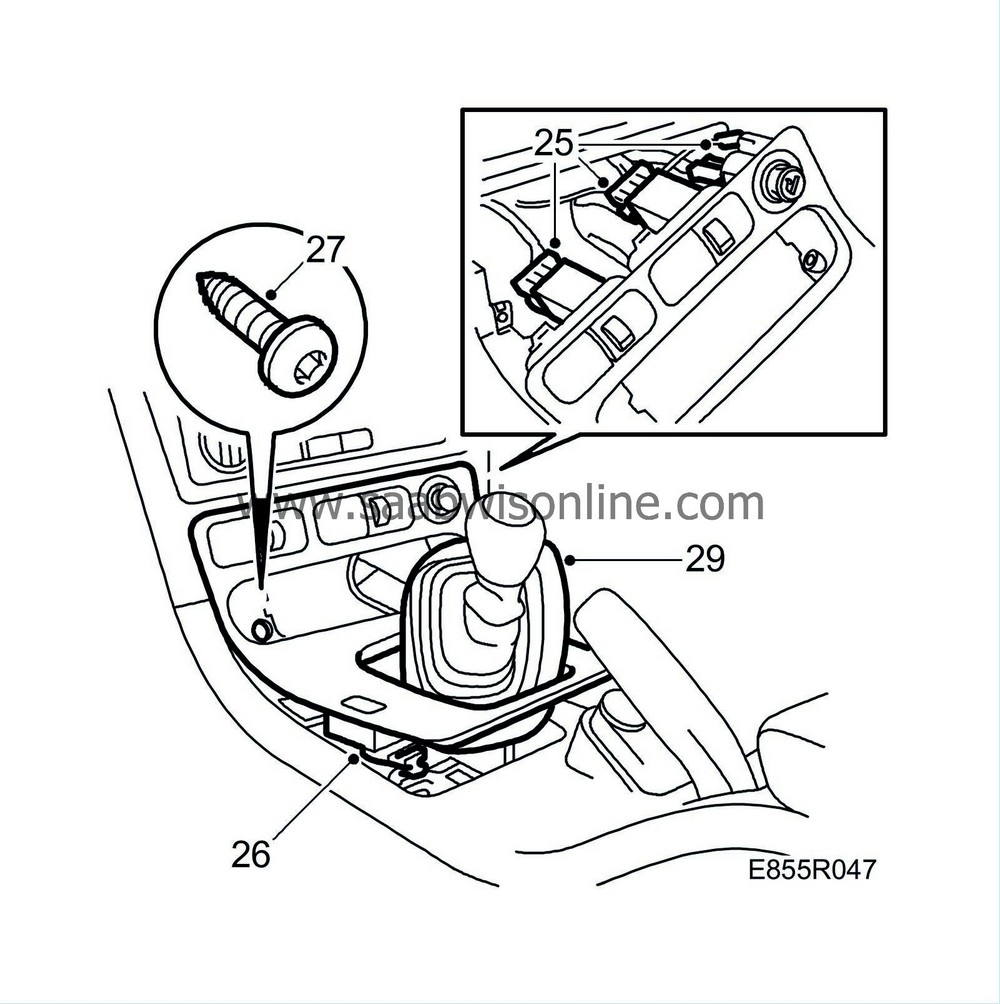
| 25. |
Replace the gear lever cover and plug in the connector for the seat heating and cigarette lighter.
|
|
| 26. |
Plug in the connector for the central locking system switch.
|
|
| 27. |
Tighten the 2 screws behind the compartment.
|
|
| 28. |
Refit the compartment or, alternatively, the ashtray with holder (fastened with clips).
|
|
| 29. |
Manual gearbox:
Refit the gear lever gaiter. Automatic transmission: Fit the rim. |
|
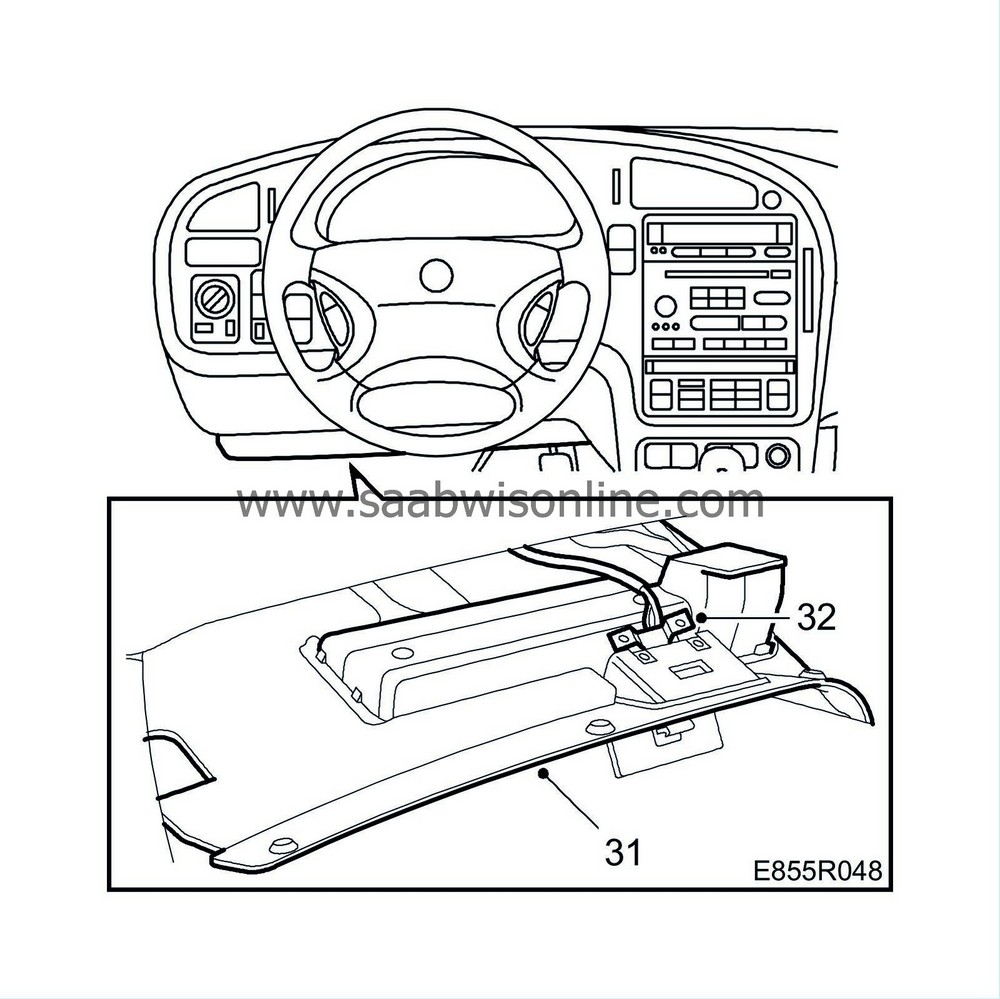
| 30. |
Refit the floor lighting in the lower dashboard panel on the driver's side.
|
|
| 31. |
Refit the lower dashboard panel with air duct on the driver's side, 3 screws.
|
|
| 32. |
Refit the data link connector, 2 screws.
|
|
| 34. |
Reconnect the horn switch and any audio system components.
|
|
| 35. |
Reconnect the connector on the back of the airbag.
|
|
| 36. |
Refit the airbag in the steering wheel, 2 screws and cover.
|
|
| 37. |
Reattach the air duct on the passenger side by guiding it in through the glove box and fitting in place.
|
|
| 38. |
Refit the
glove box
.

|
|
| 39. |
Cars with ACC and/or alarm:
Reconnect any connectors for the solar sensor and alarm. Refit the cover. |
|
| 40. |
Connect and refit the speakers.
|
|
| 41. |
Fit the speaker grilles.
|
|
| 42. |
Turn on the ignition and check the SRS system and control module with the diagnostic tool as follows:
Connect the diagnostic tool to the connector under the dashboard. Clear any diagnostic trouble codes. Turn the ignition off and on again. Wait at least 10 seconds with the ignition on. Check whether any diagnostic trouble codes are shown: If a diagnostic trouble code is shown: Carry out a fault diagnosis as instructed in Group 8, Airbag (SRS), ”Fault diagnosis by diagnostic trouble codes”. If no diagnostic trouble code is shown: Installation is complete. Disconnect the diagnostic tool. |
|

 Warning


