Fuel tank
| Fuel tank |
|
||||||||||||||||||||||
| To remove |
Drain the tank if the fuel level is above 1/4 full tank.
| 1. |
Raise the rear seat cushion and fold back the carpet.

|
|
| 2. |
Remove the fuel pump cover.
|
|
| 3. |
Undo the upper connector and the connector for the tank pressure sensor.
|
||||||||||
| 4. |
Carefully loosen the check valves and fuel lines from the pump. The check valves are fastened to the pump with quick-release couplings.
|
|
| 5. |
Undo the quick-release couplings for the vent hose, use special tool 83 95 261.
|
|
| 6. |
Release the handbrake to make it easier to disconnect the handbrake cable later.
|
|
| 7. |
Raise the car.
|
|
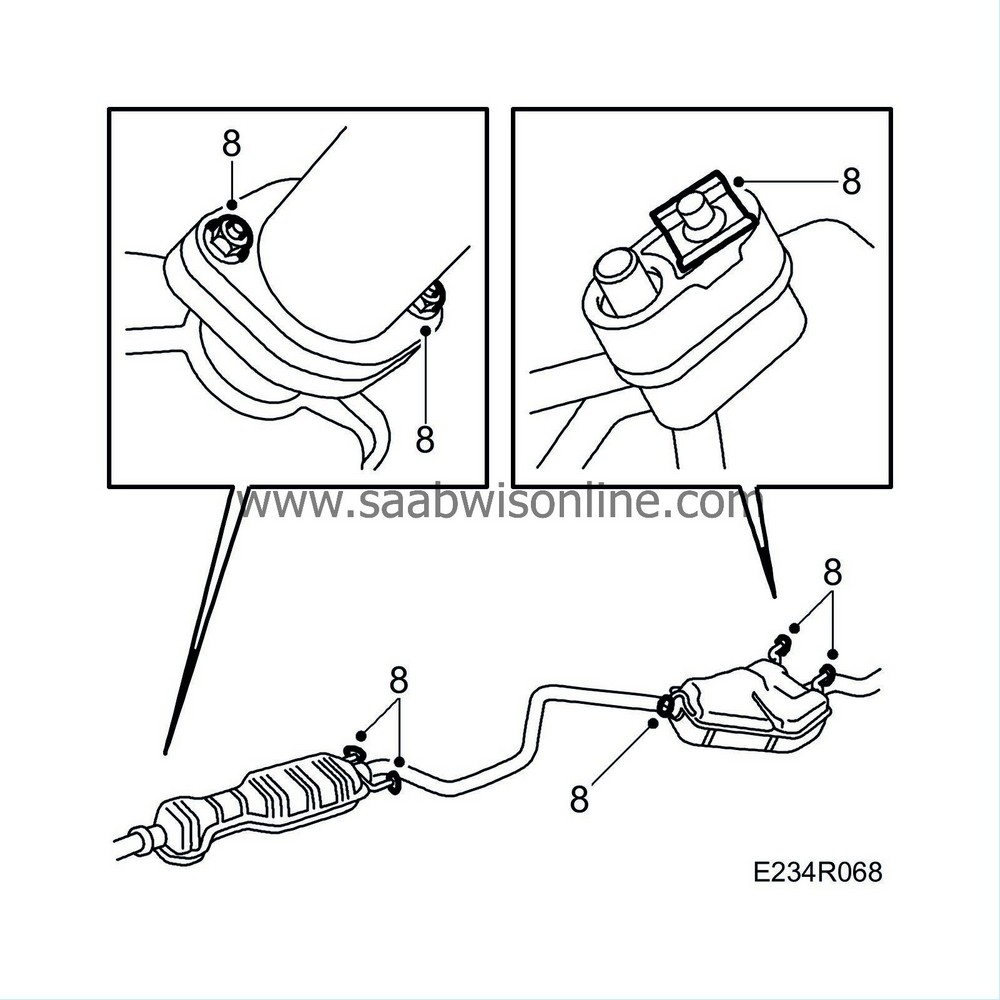
| 8. |
Dismantle the rear exhaust pipe section.
|
|
| 9. |
Cut the cable tie securing the cables.

|
|
| 10. |
Unplug and detach the connector to the shut-off valve.
|
|
| 11. |
Loosen the vent device from its holder with a screwdriver.
|
|
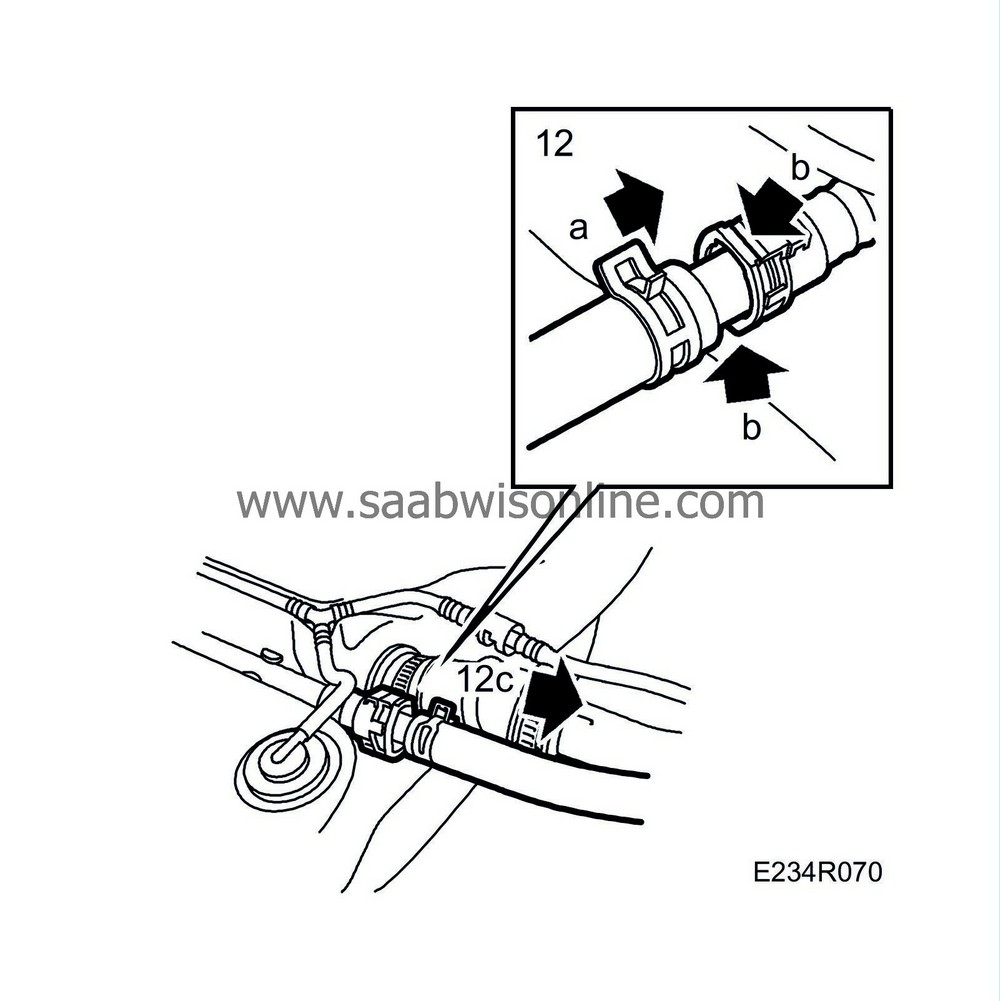
| 12. |
Disconnect the vent device quick-release coupling from the tank in the following way.
|
|
| 12.a. |
Press in the connector towards the tank in the direction of the connection.
|
| 12.b. |
Pinch the ring so that the catches go up.
|
| 12.c. |
Detach the connection by pulling it away from the tank.
|
| 13. |
Cut the cable tie securing the cables to the filler pipe.

|
|
| 14. |
Disconnect the vent pipe quick-release coupling with special tool 83 95 261.
|
|
| 15. |
Undo the plastic screw.
|
|
| 16. |
Loosen the hose clip and carefully detach the filler hose.
|
|
| 17. |
Detach both handbrake cables at the handbrake lever.

|
|
| 18. |
Remove the rubber straps securing the handbrake cables
|
|
| 19. |
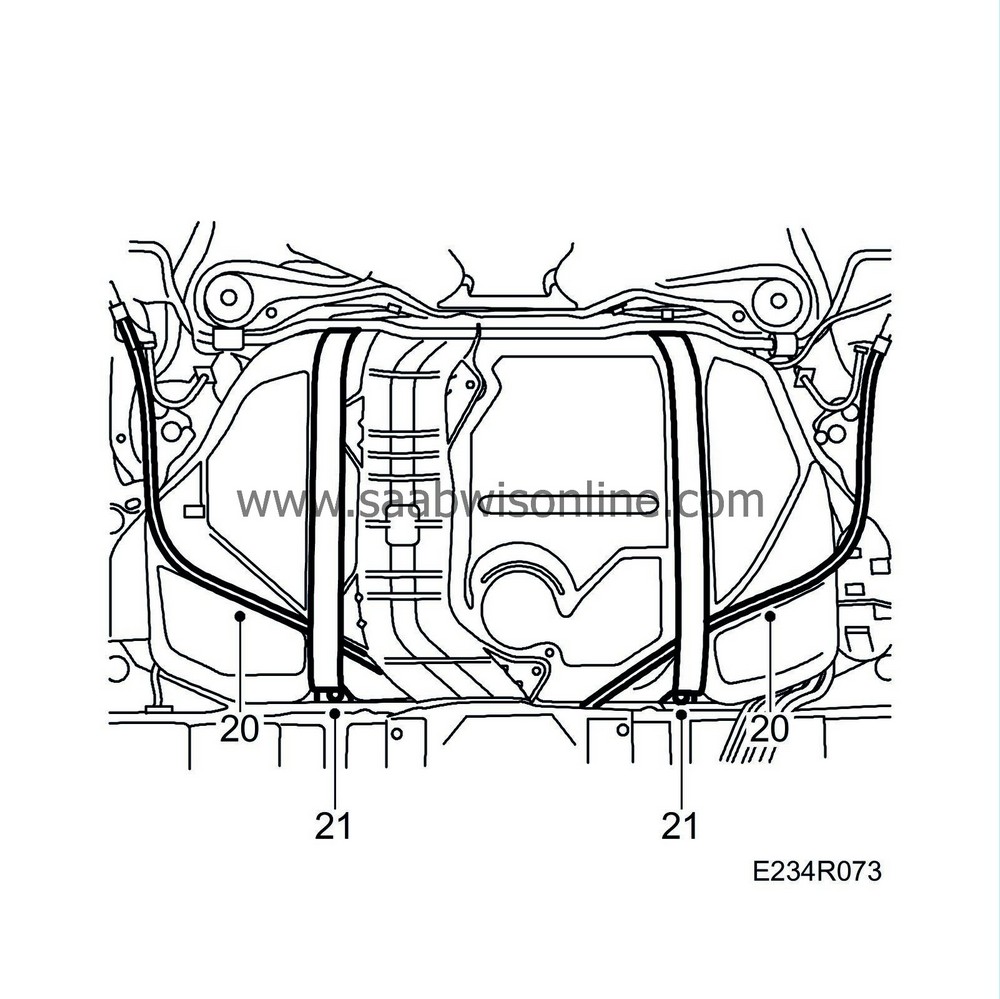
Place a pillar jack under the tank.
|
|
| 20. |
Bend away the handbrake cables.
|
|
| 21. |
Undo the front bolts on the straps securing the tank and carefully lower the tank.
|
|
| 21.A. |
Carry out steps 22-25 when changing the tank. |
| 22. |
Remove the evaporative emission canister.

|
|
| 23. |
Remove the pressure sensor.
|
|
| 24. |
Remove the fuel pump, see “Fuel system, Adjustment/replacement, Fuel pump”
 .
.
|
|
| 25. |
Remove the heat shield.
|
|
| To fit |

| 1. |
Fit the heat shield.
|
|
| 2. |
Fit the fuel pump, see “Fuel system, Adjustment/replacement, Fuel pump”
 .
.
|
|
| 3. |
Fit the pressure sensor.
|
|
| 4. |
Fit the evaporative emission canister.
|
|
| 5. |
Place the tank on a pillar jack.
|
|
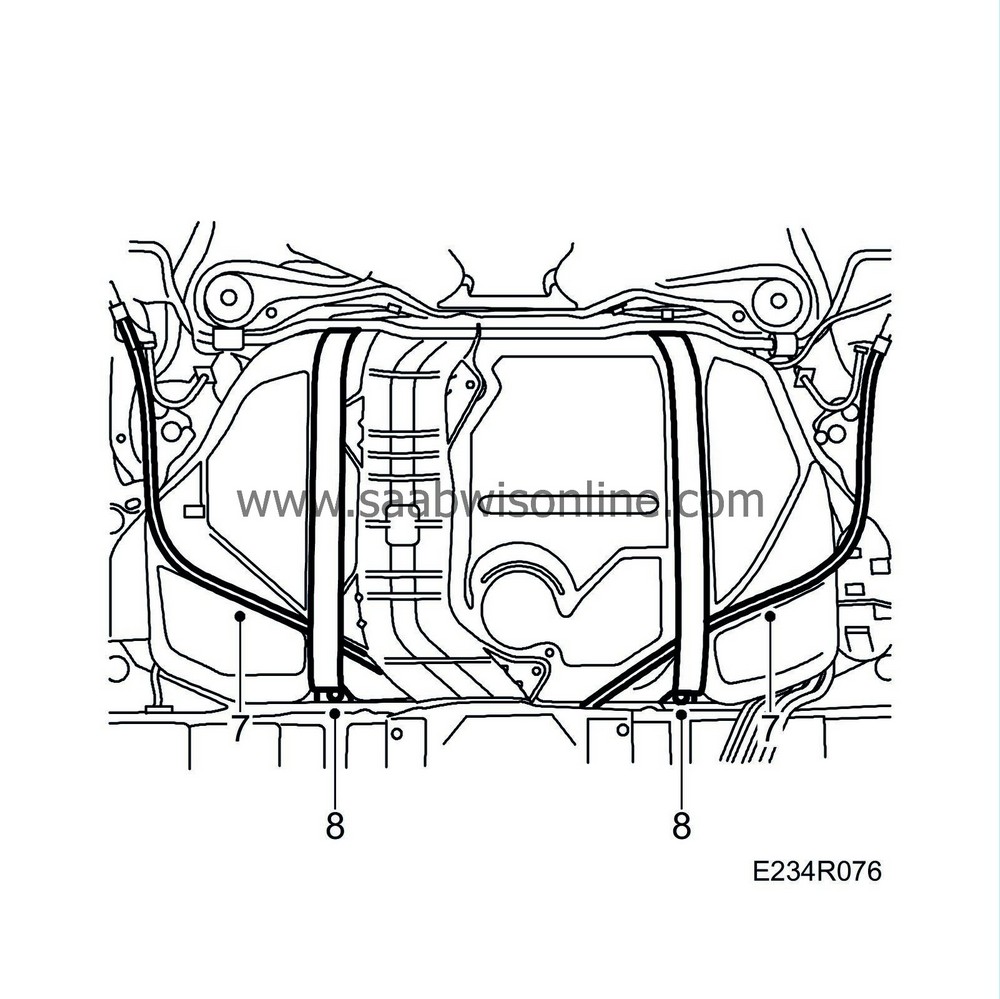
| 6. |
Carefully jack up the tank.
|
|
| 7. |
Place the handbrake cables in the tank recesses.
|
|
| 8. |
Lift up the tank completely and fasten the straps.
|
|
| 9. |
Attach the handbrake cables.

|
|
| 10. |
Fasten the rubber straps that keep the handbrake cables in place.
|
|
| 11. |
Fit the filler pipe vent hose.

|
|||||||
| 12. |
Secure the cable to the filler pipe with a cable tie.
|
|
| 13. |
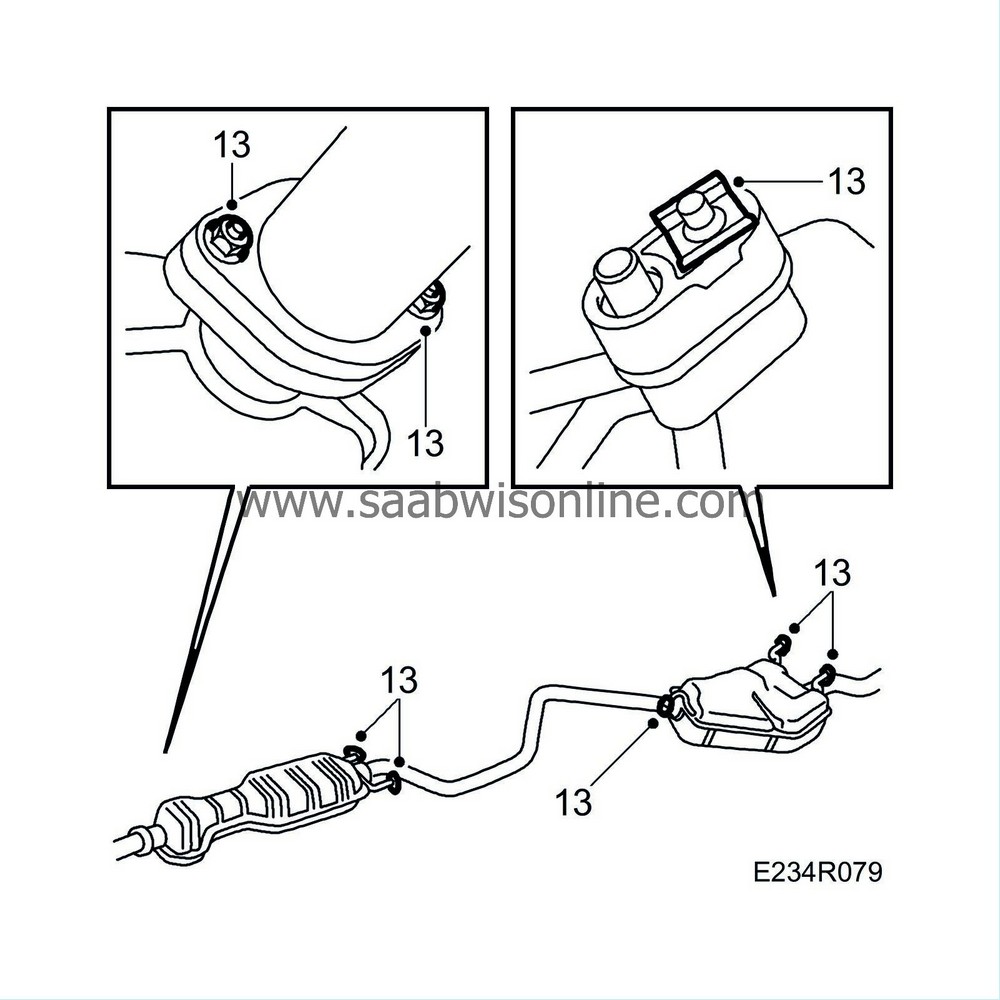
Fit the rear section of the exhaust pipe
|
|
| 15. |
Fit the vent device and secure the cable with a cable tie.
|
|
| 16. |
Lower the car to the floor.
|
|
| 17. |
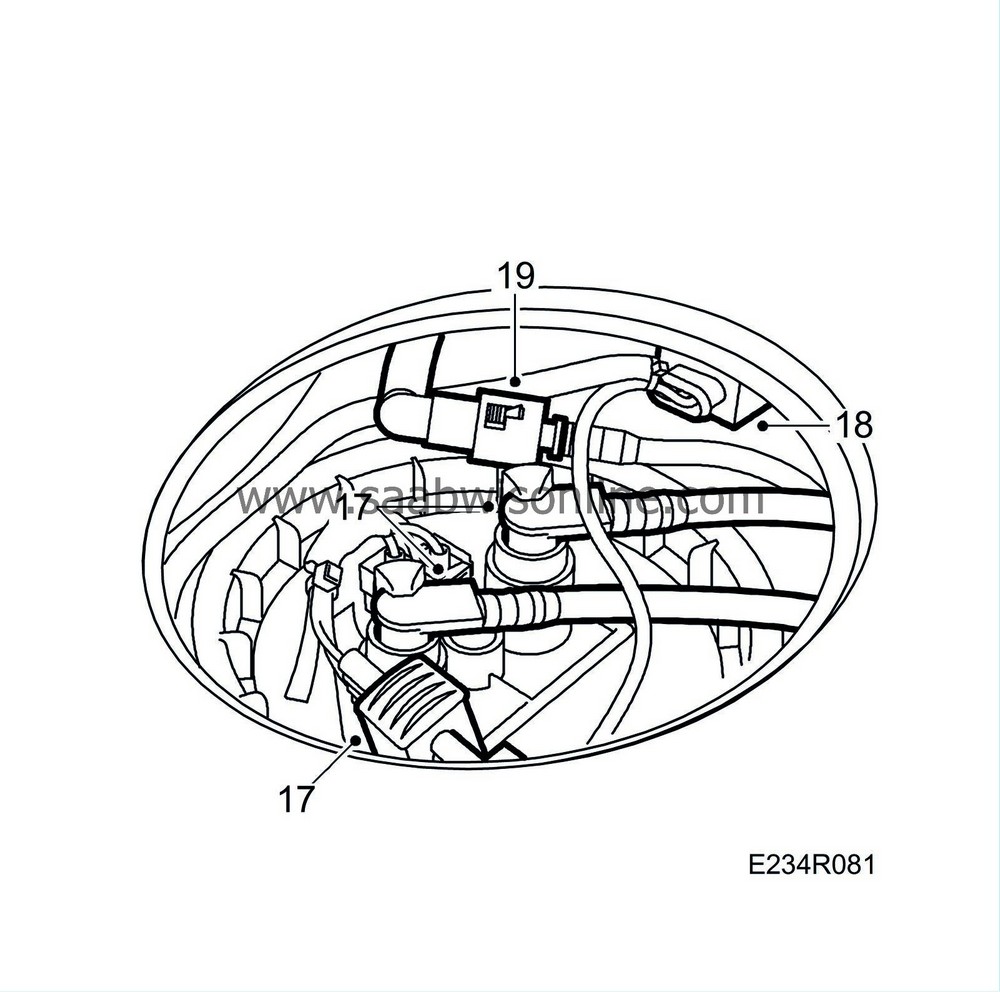
Apply acid-free Vaseline to the O-rings. Spray with Kontakt 61 and plug in the connector and connect the fuel lines.
|
|
| 18. |
Plug in the pressure sensor connector.
|
|
| 19. |
Plug in the purge connector.
|
|
| 20. |
Fit the cover and replace the carpet.
|
|
| 21. |
Lower the seat cushion.
|
|

 Warning


