Fuel pump
| Fuel pump |
|
||||||||||||||||||||||
| To remove |
| Important | ||
|
The car should be parked on a level surface. If the tank is full and the car is jacked up at the rear when the pump is removed, it is very likely that fuel will run out. |
||
|
Place protective paper over the carpeting when the pump is removed as there is a risk of fuel spilling out. |
||
| 1. |
Raise the rear seat cushions and fold the carpeting out of the way.
|
|
| 2. |
Remove the fuel pump cover.
|
|
| 3. |
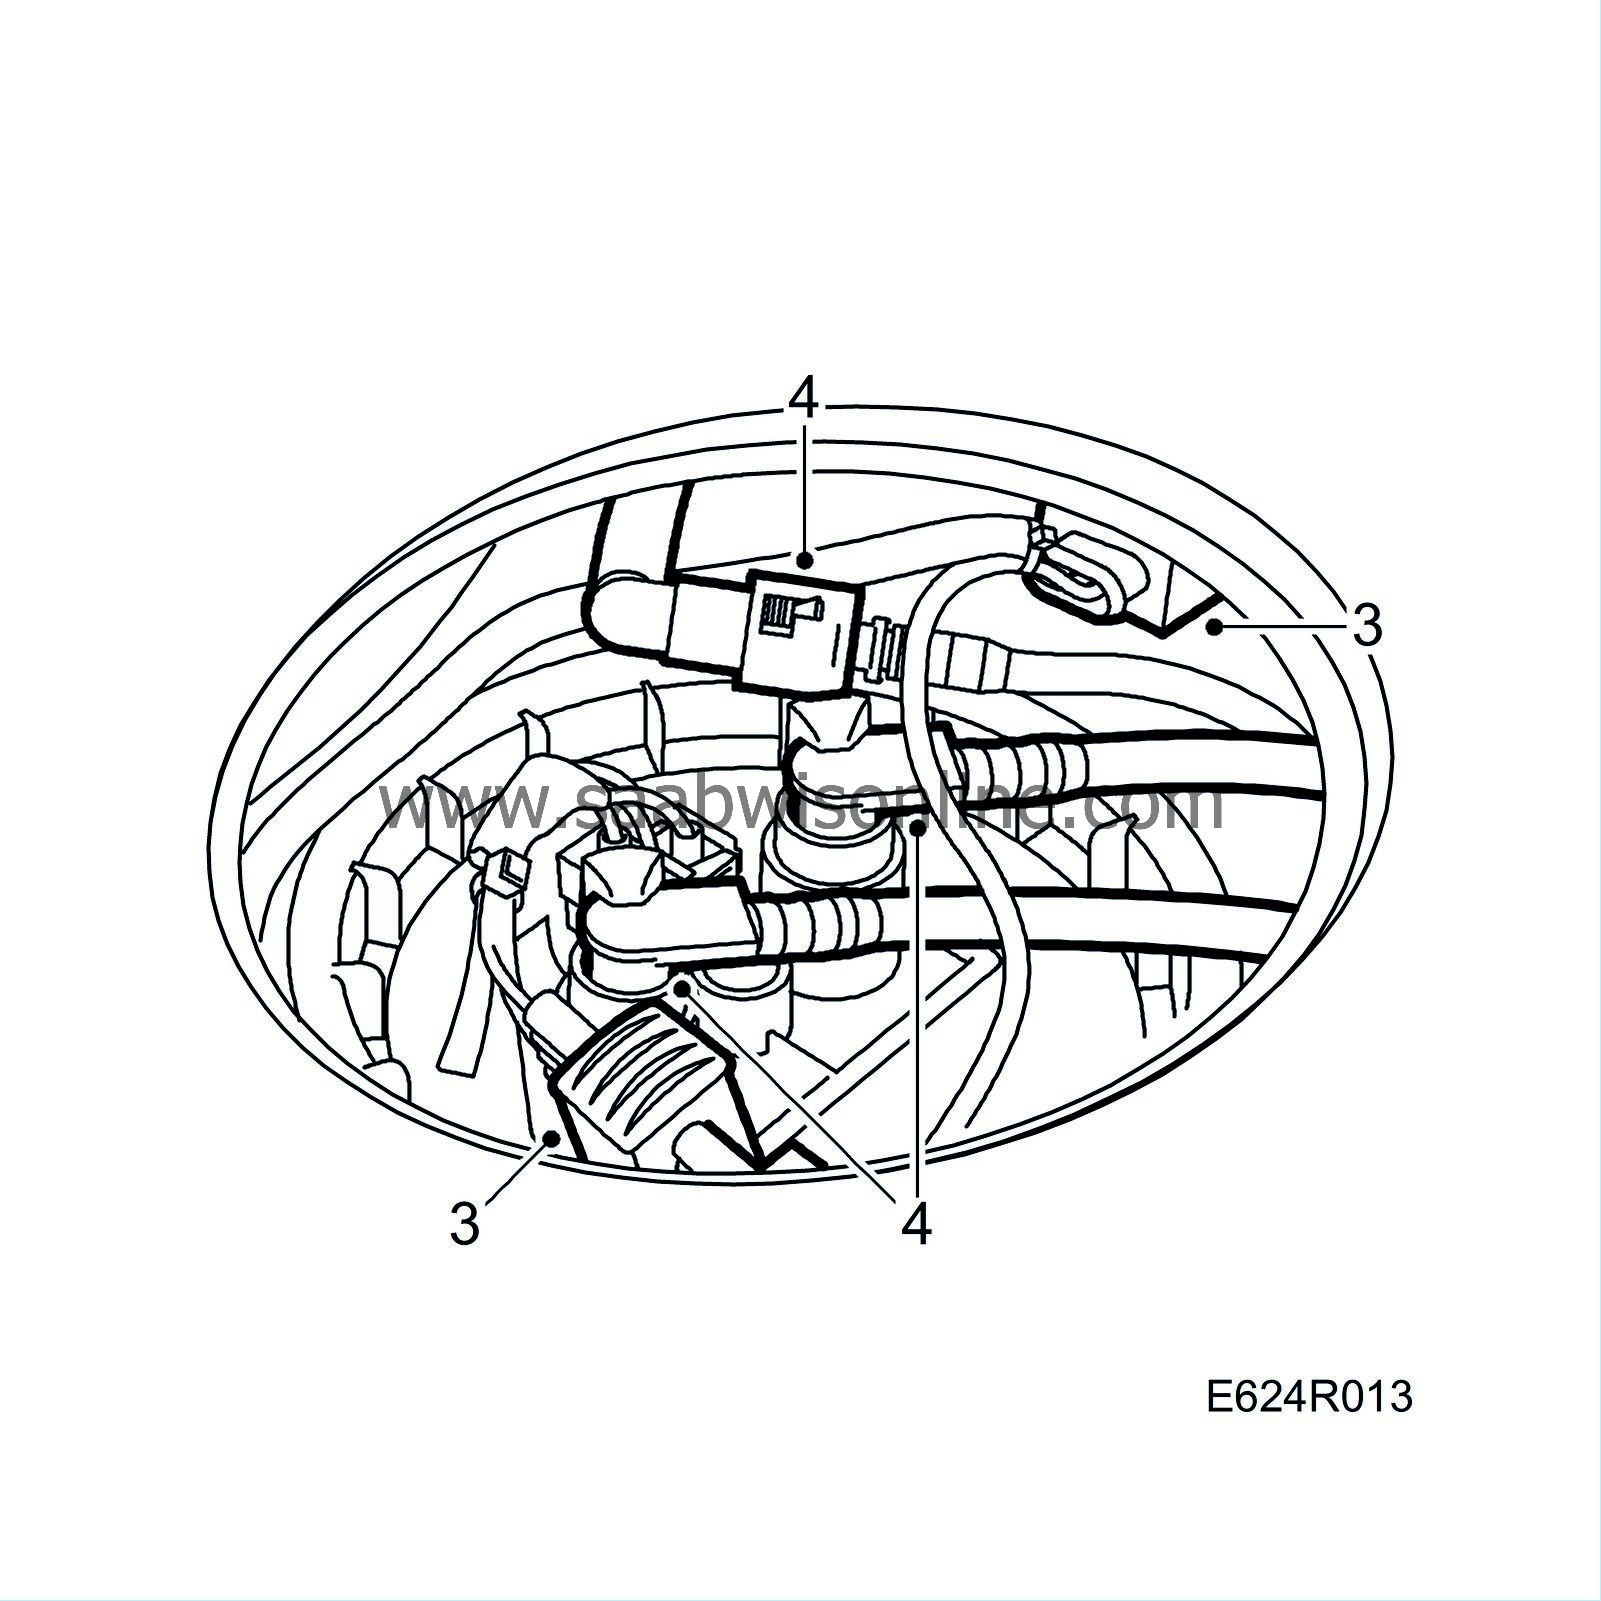
Undo the upper connector and the connector to the tank pressure sensor.
|
||||||||||
| 4. |
Carefully detach the nonreturn valve with fuel lines from the pump. The nonreturn valves are fastened to the pump with quick-release couplings.
Carefully move the purge hose out of the way. |
|
| 5. |
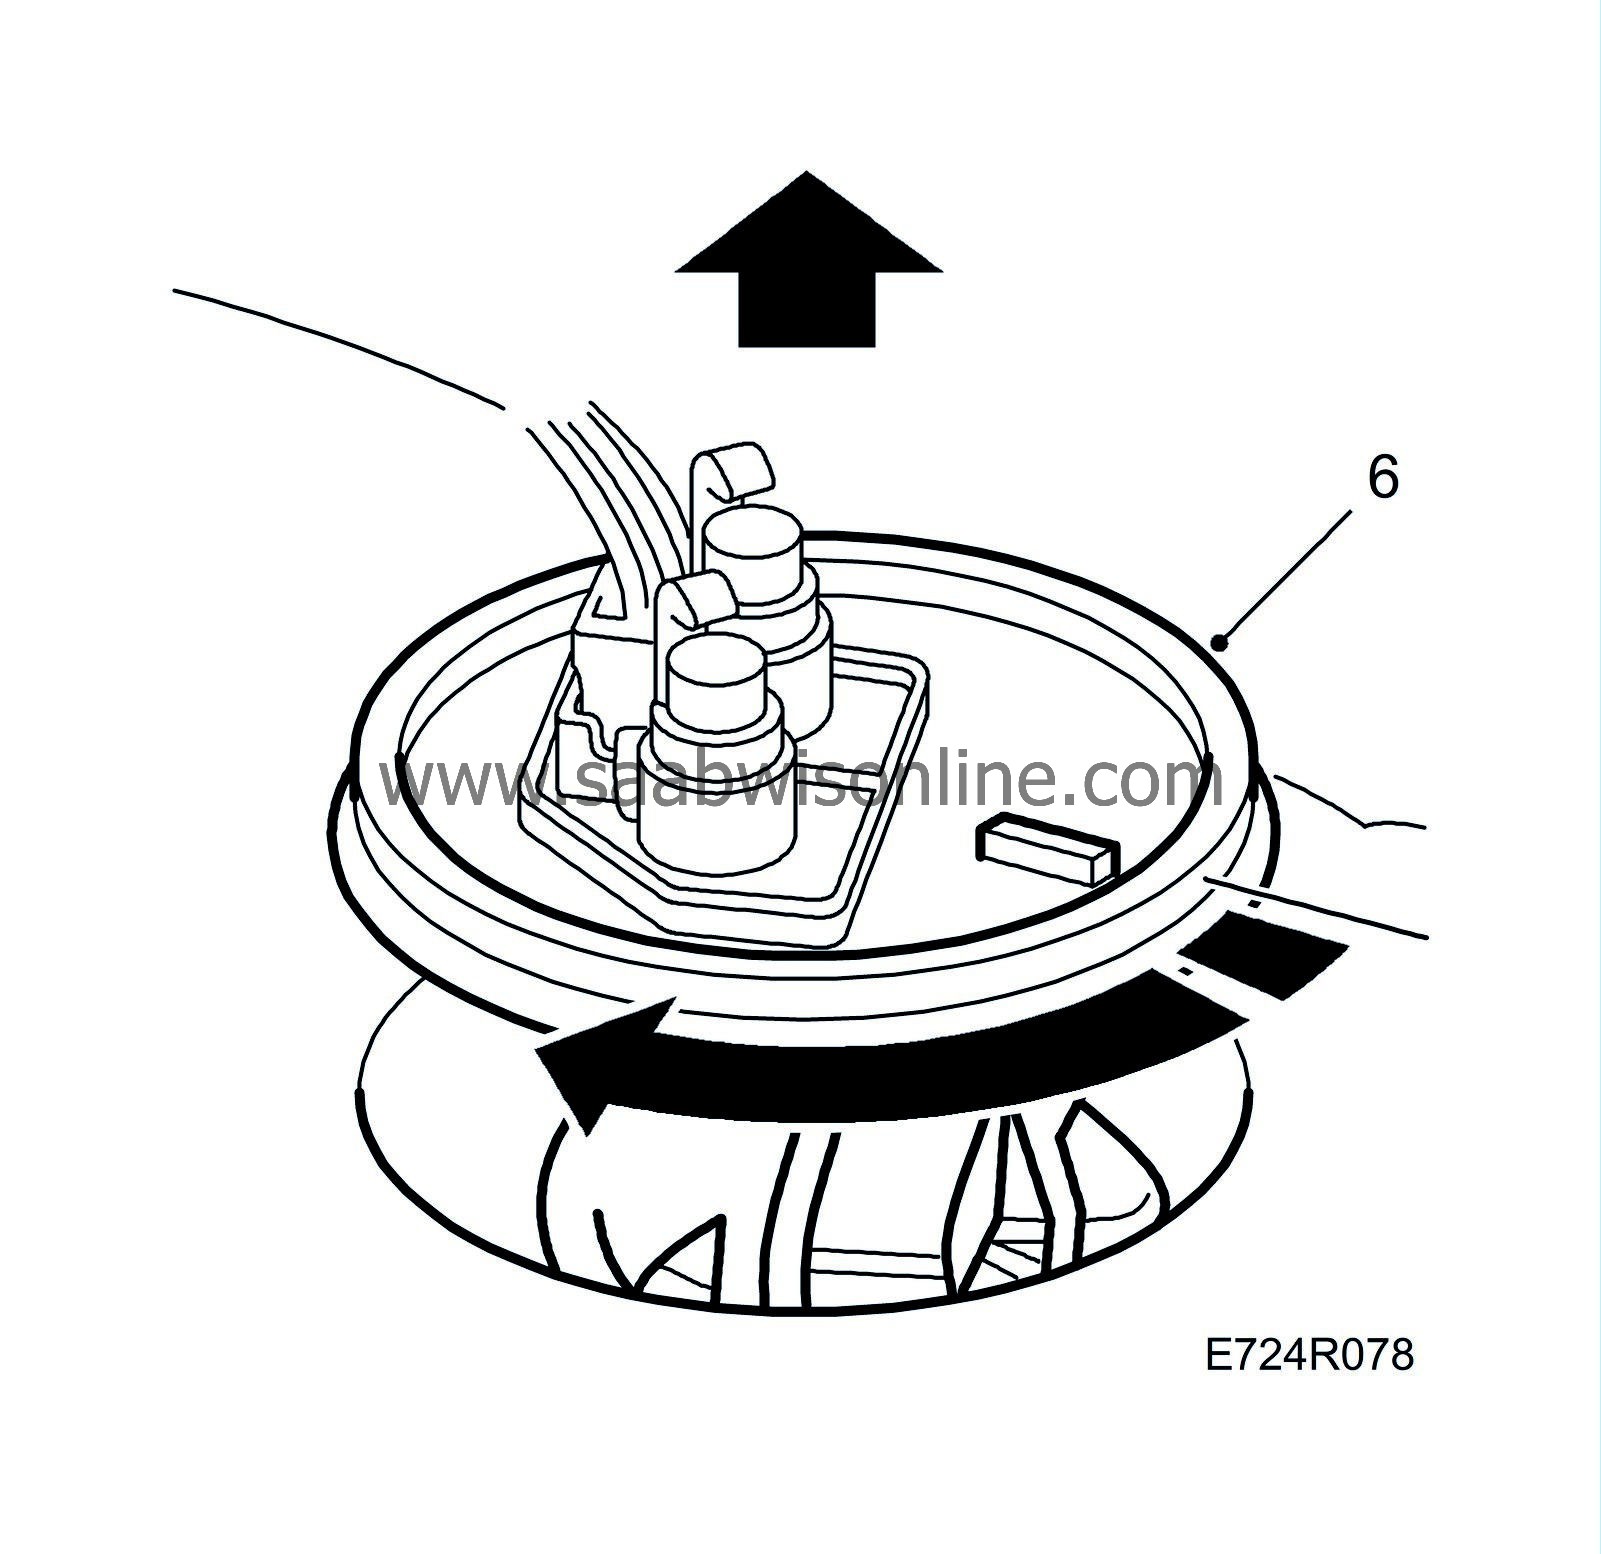
Remove the screw ring, using special tool 83 94 462.

|
|
| 7. |
Transfer the pump to a suitable receptacle and pour out the fuel.
|
|
| To fit |
| 1. |
Clean sealing surfaces.
|
|
| 2. |
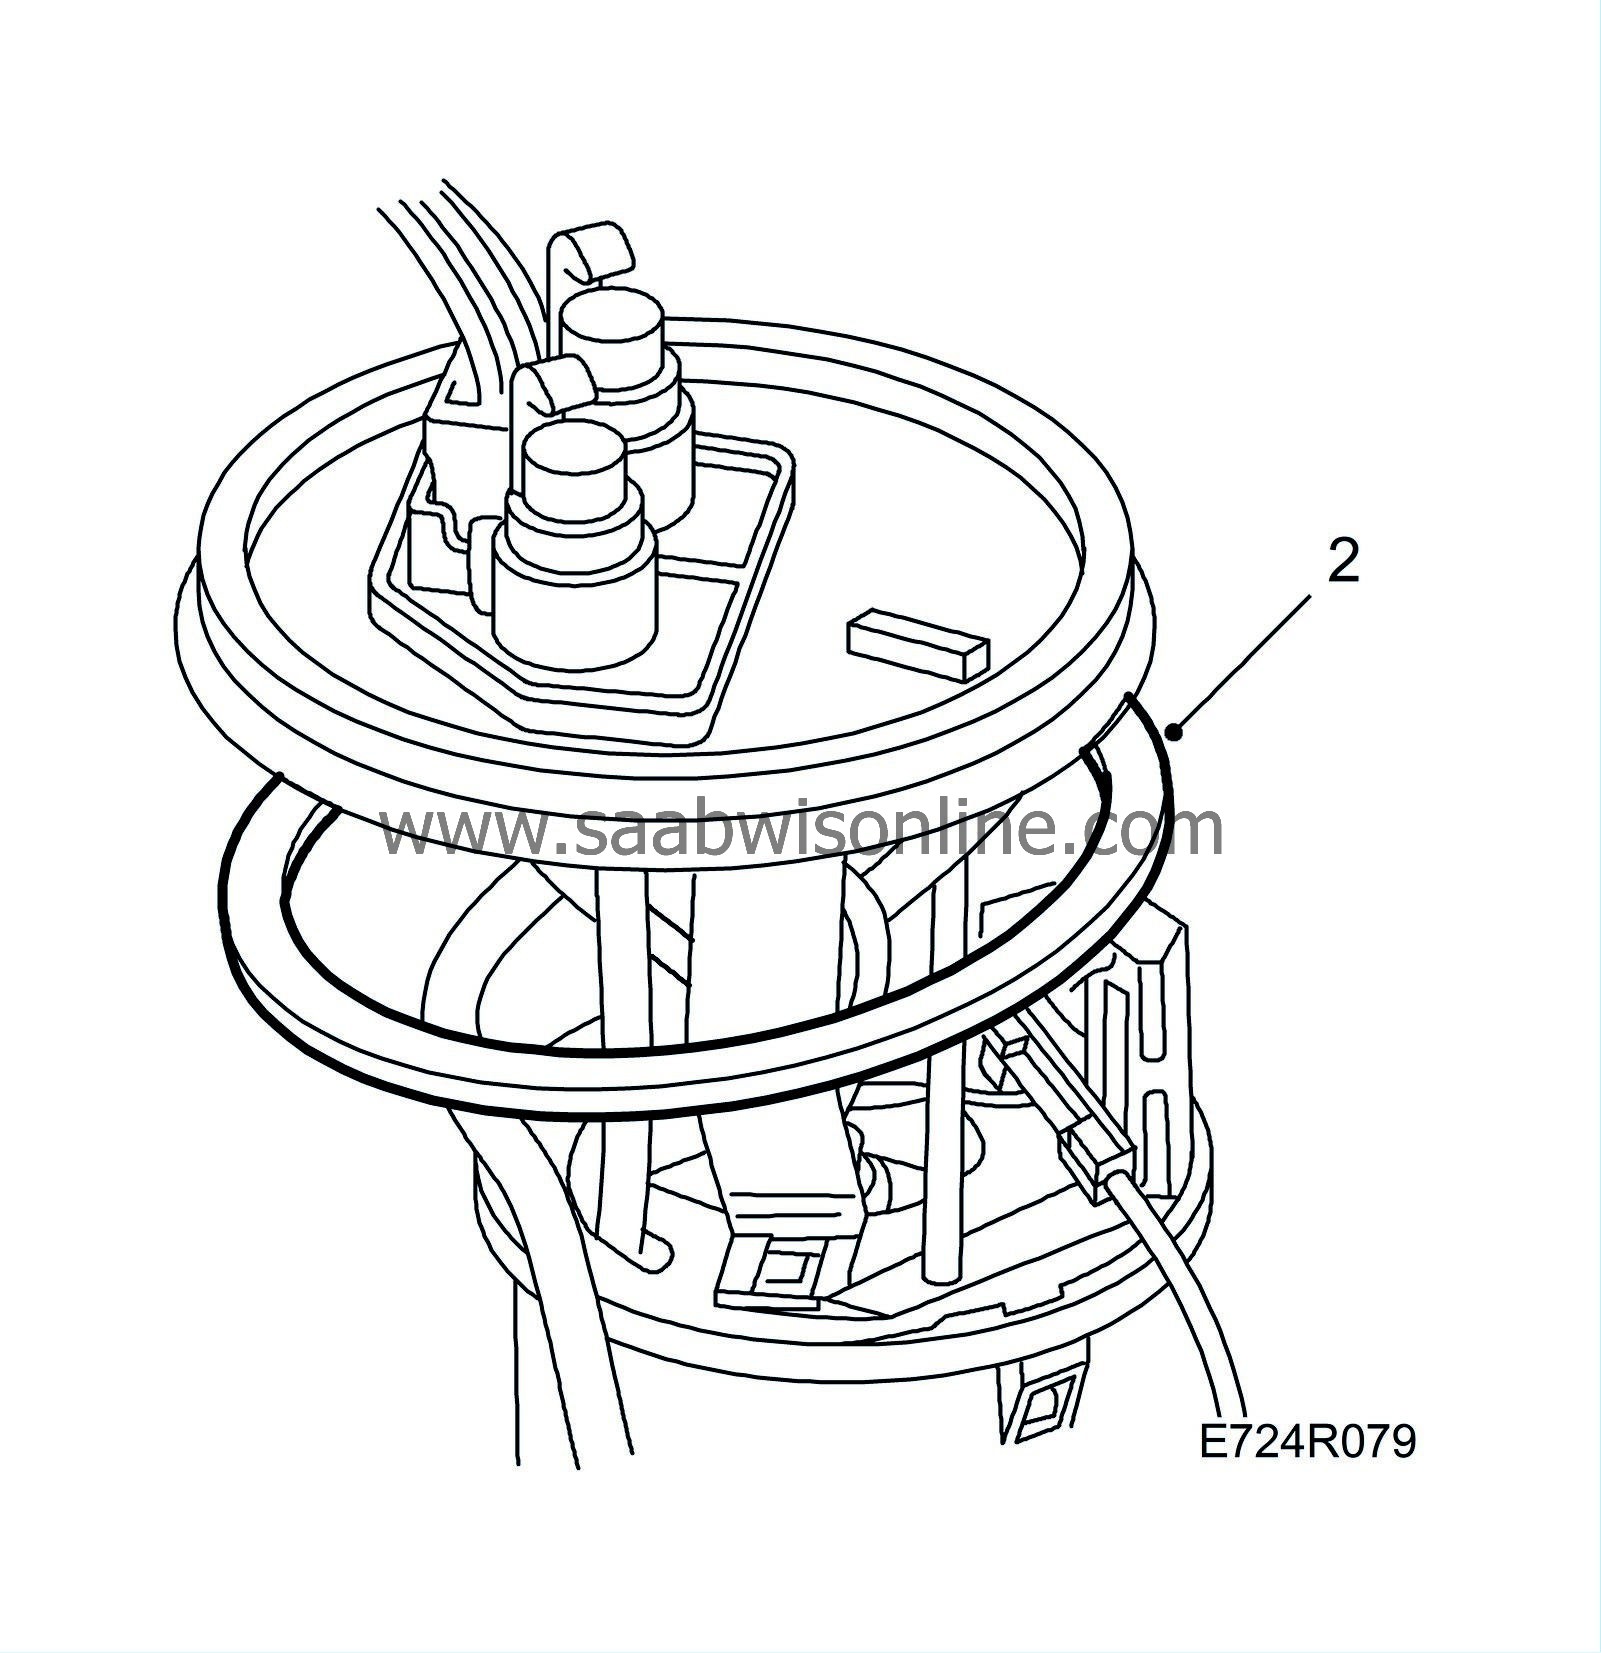
Fit a new O-ring in the groove in the tank mounting.
|
|
| 4. |
Lubricate the threads on the pump lid and the top of the pump with non-acidic vaseline to prevent the pump from turning when the screw ring is tightened.
|
|
| 5. |
Fit the screw ring and tighten it, using tool 83 94 462.
Tightening torque: 75 Nm (55 lbf ft) |
|
| 6. |
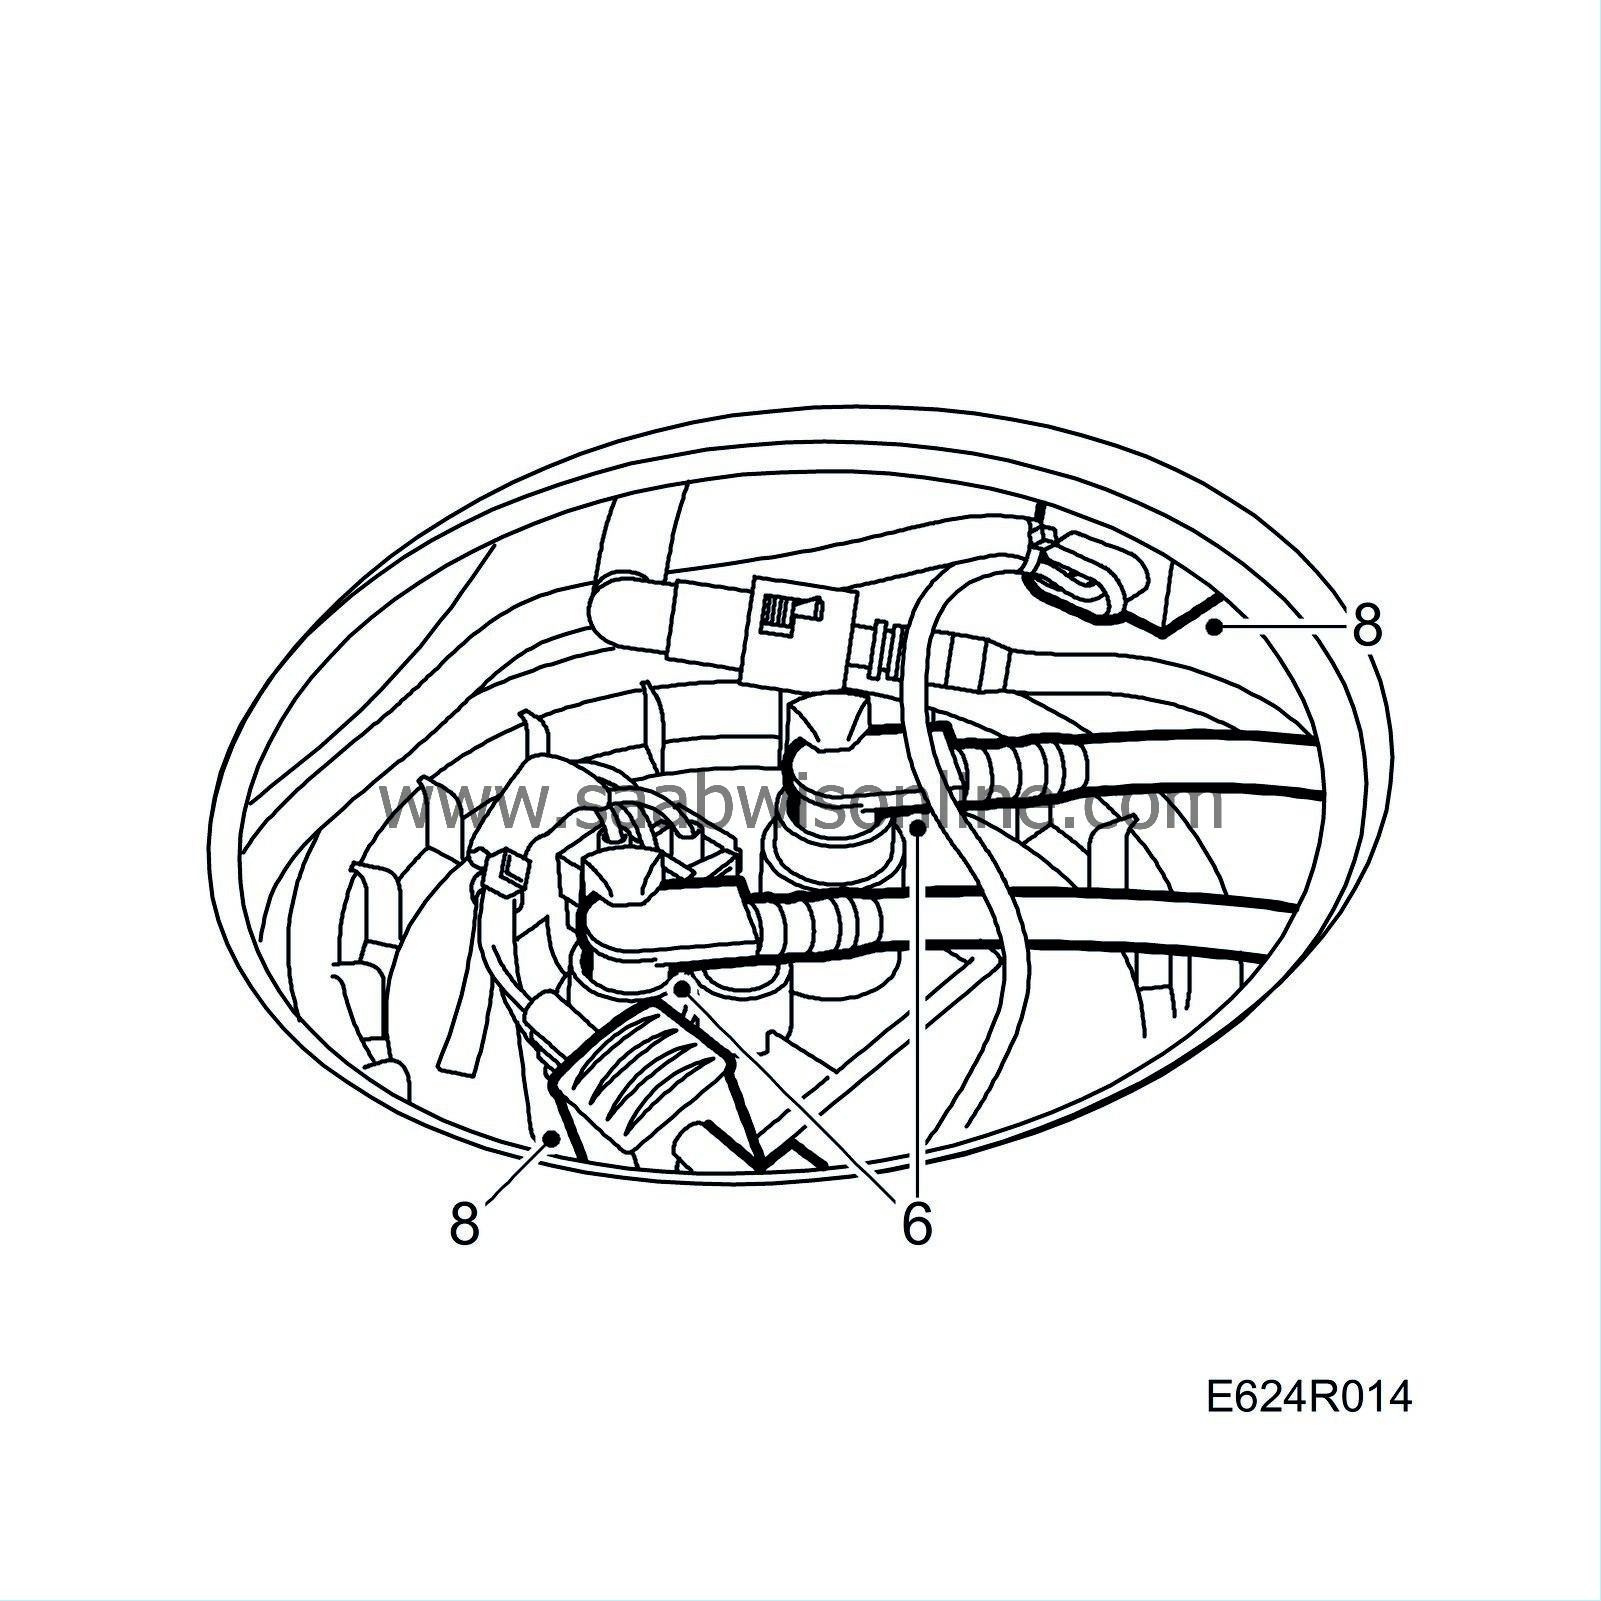
Inspect and lubricate the O-rings on the fuel line connections with non-acidic vaseline and connect them to the pump.
|
|
| 7. |
Make sure that the yellow hooks have snapped in place over the connections.
|
|
| 8. |
Spray the connectors with Kontakt 61, part no. 30 04 520 and plug in them.
|
|
| 9. |
Check that the pump works properly and that it does not leak.
|
|
| 10. |
Fit the fuel pump cover, fold back the carpeting and return the rear seat cushions to their places.
|
|
| Checking the nonreturn valve |
| 1. |
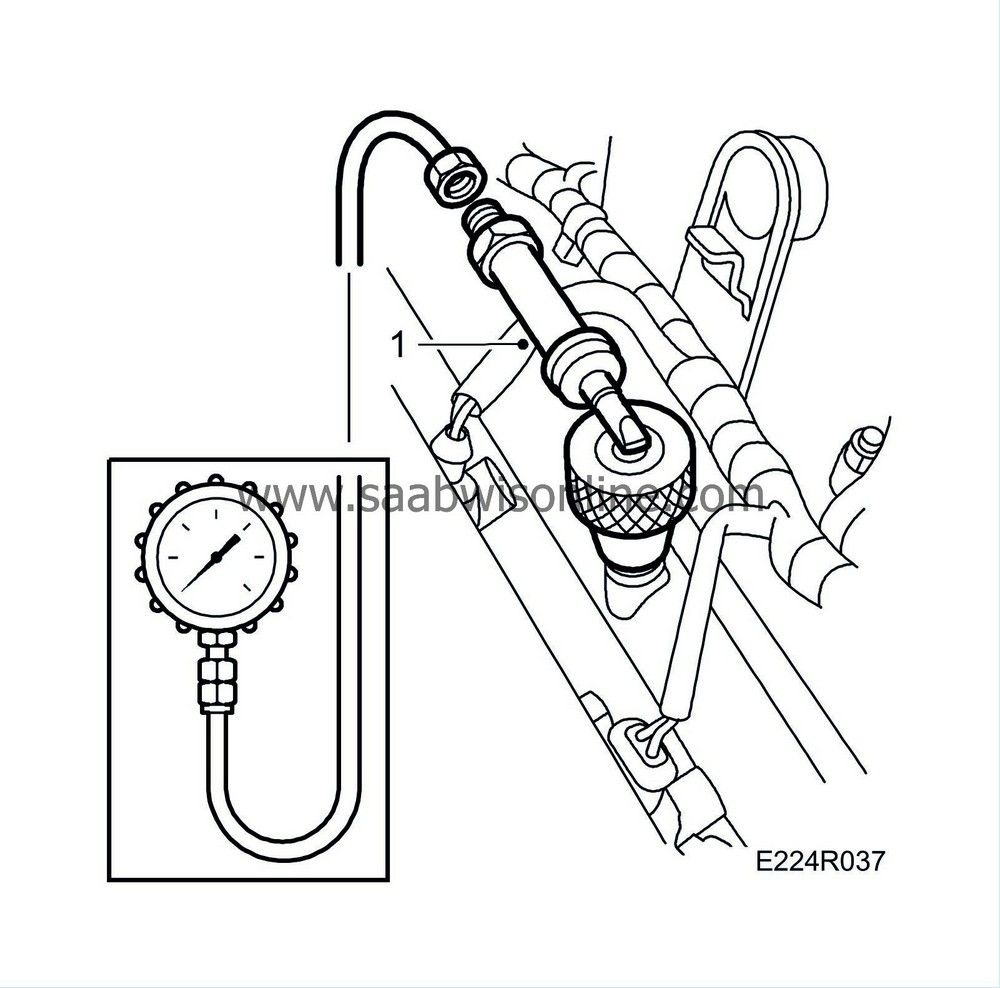
Remove the valve cap. Connect pressure gauge equipment (part no. 83 93 852), and special tool (part no. 83 94 744) with pressure gauge, special tool (part no. 83 93 852) with “safety on” to the fuel-injection rail. Put “safety off” on the tool.
|
|
| 2. |
Activate the fuel pump with the diagnostic tool.

|
|
| 3. |
Run the pump manually until the pressure gauge stops rising.
|
|
| 4. |
Read the pressure gauge. Turn off the pump. The residual pressure after 20 min. should be at least 2.3 bar (33 psi).
|
|
| 5. |
If the residual pressure is too low then check the nonreturn valve by detaching it from the pump outlet to see if it is leaking.
|
|
| 6. |
Remove the special tool (part no. 83 93 886).
|
|
| Changing the nonreturn valve |
| Important | ||
|
If the nonreturn valves on both the delivery line and the return line are changed then it is important to make sure they are fitted on the correct line. |
||
| 1. |
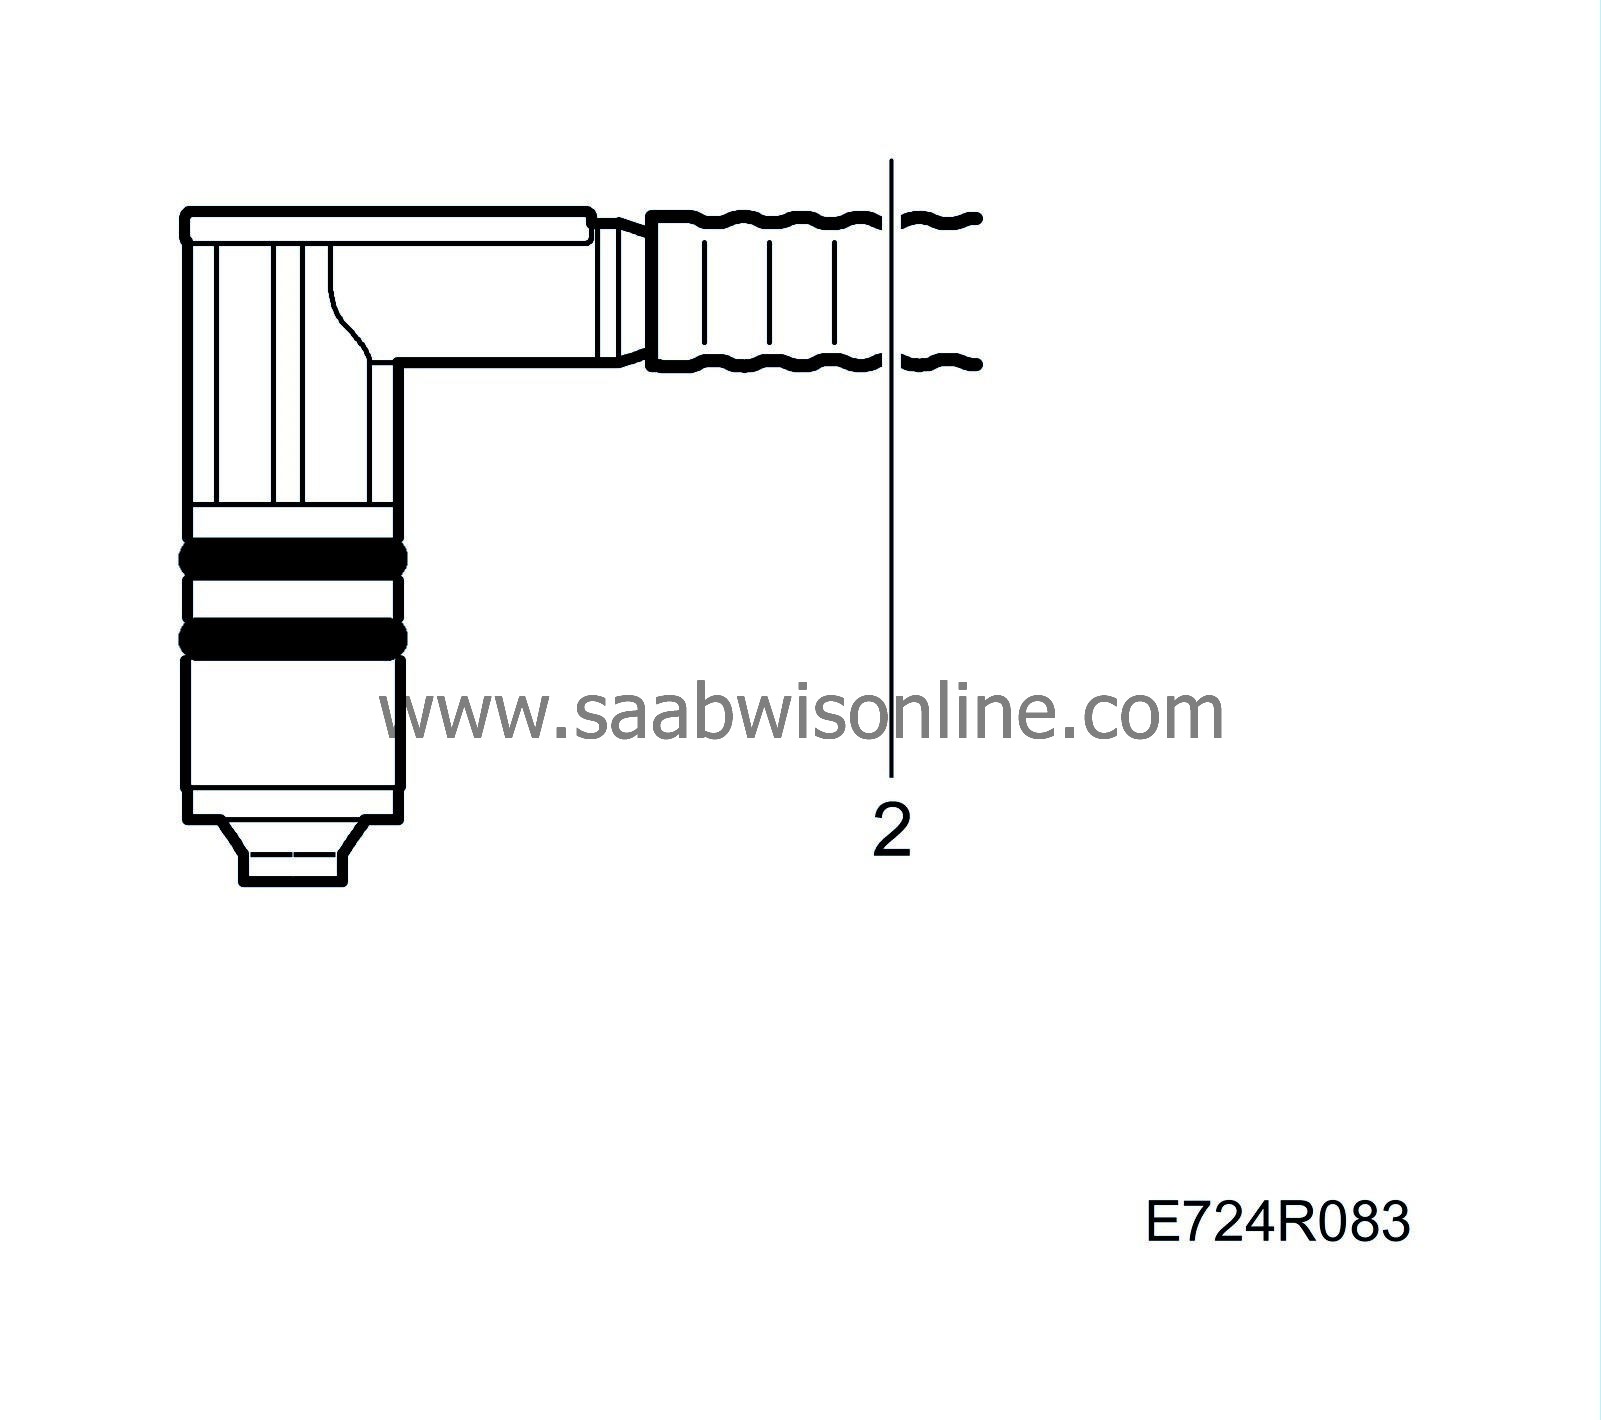
Expose the nonreturn valve.
|
|
| 2. |
Cut the fuel delivery line at the nipple as illustrated using a razor blade or sharp knife, etc.
|
|
| 3. |
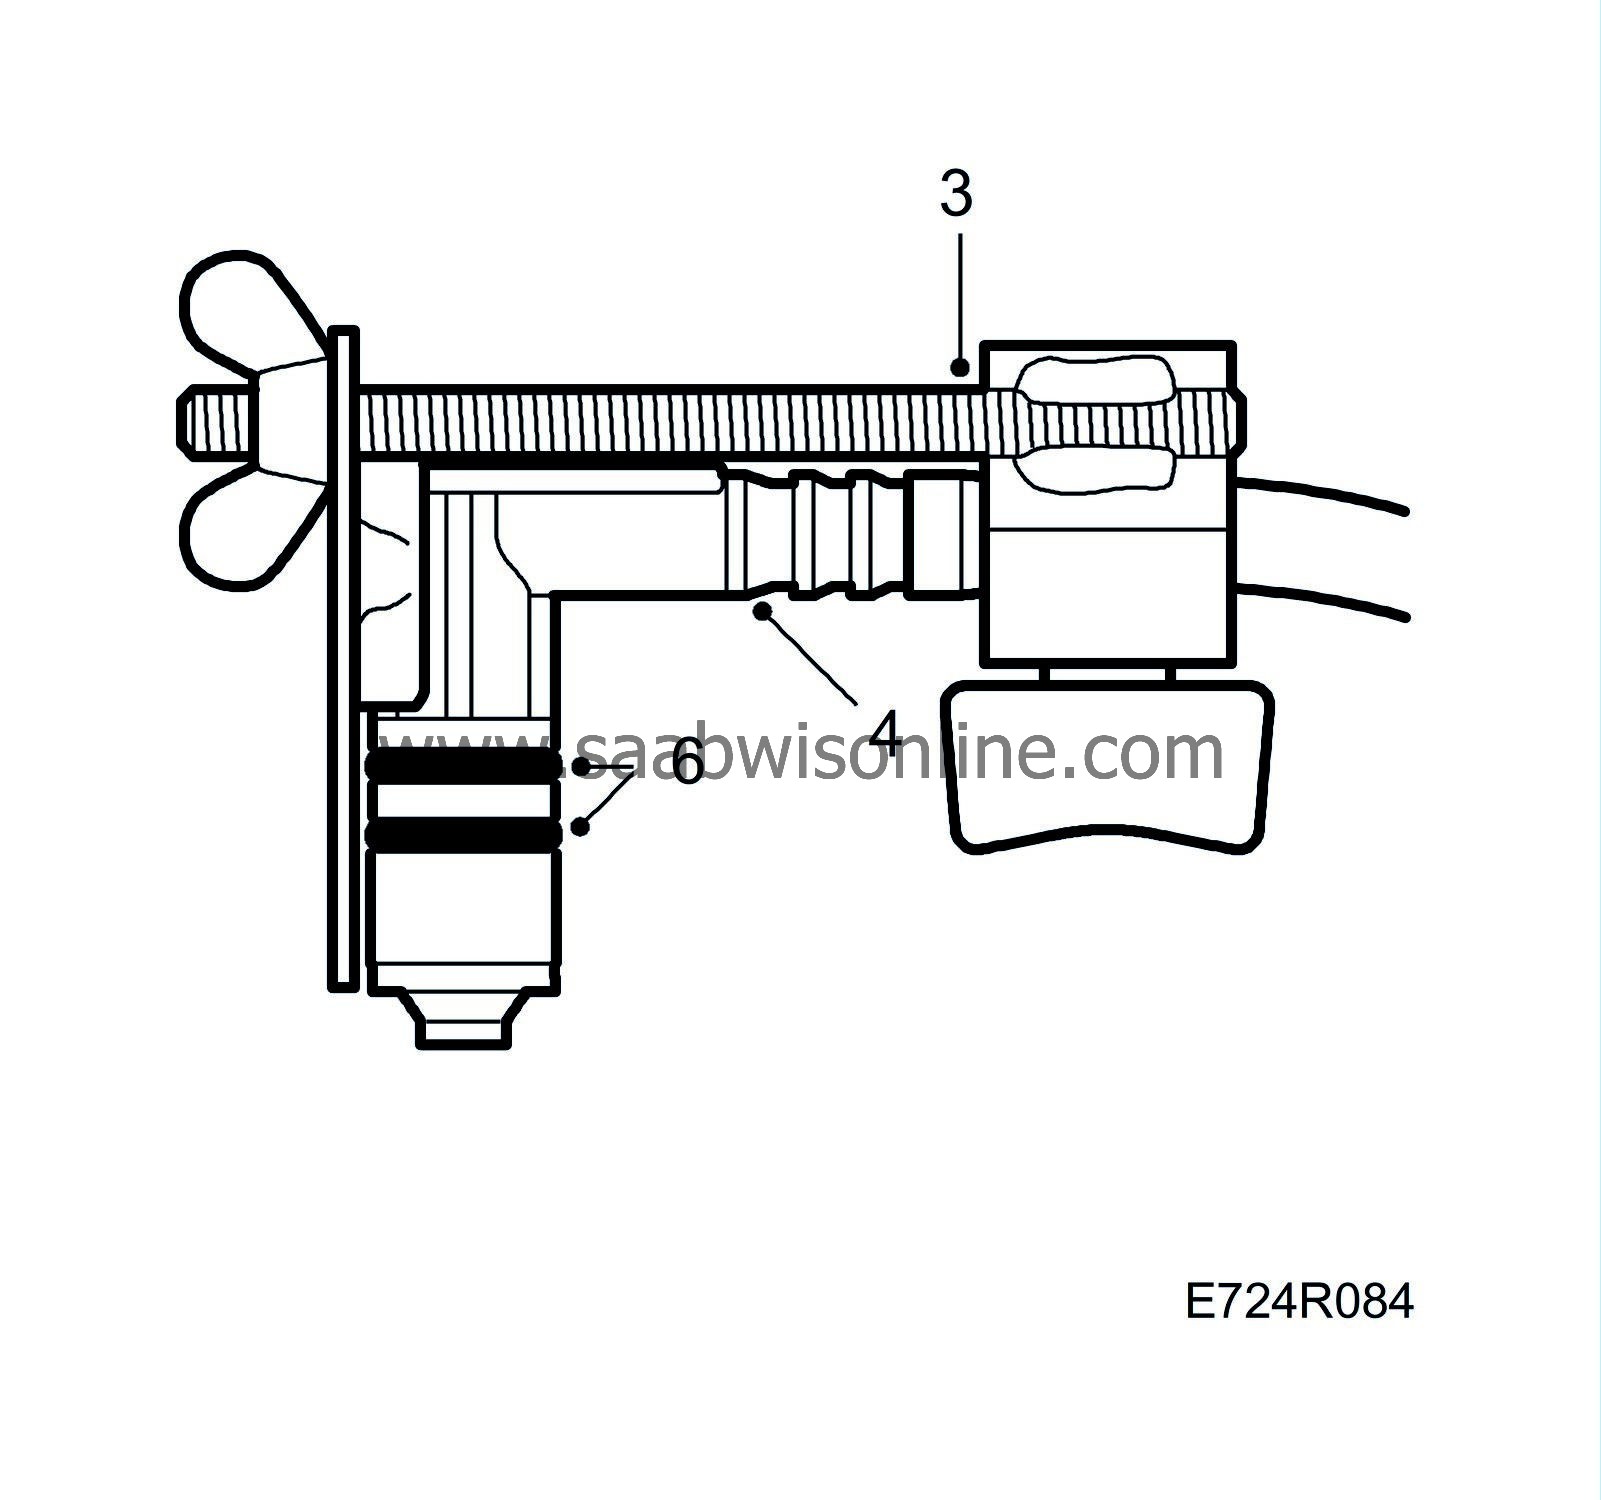
Fit tool 83 95 329 to the fuel line. The end of the fuel line must protrude a short way.
|
|
| 4. |
Fit O-rings to the new nonreturn valve, lubricate the valve with acid-free vaseline and position it to the fuel line. Make sure the valve is turned the right way as it cannot be rotated once fitted and the hose is too stiff to twist.
|
|
| 5. |
Press in the nonreturn valve using the tool. Gradually move the special tool so that there is always only a small distance between the tool and the nonreturn valve connecting nipple.
|
|
| 6. |
Plug in the connector and spray with Kontakt 61 (30 04 520). Apply acid-free vaseline to the nonreturn valve O-rings. Connect the fuel lines. Make sure the catch secures the delivery line properly.
|
|
| 7. |
Start the engine and check for fuel leaks.
|
|
| Checking the fuel gauge float arm position |
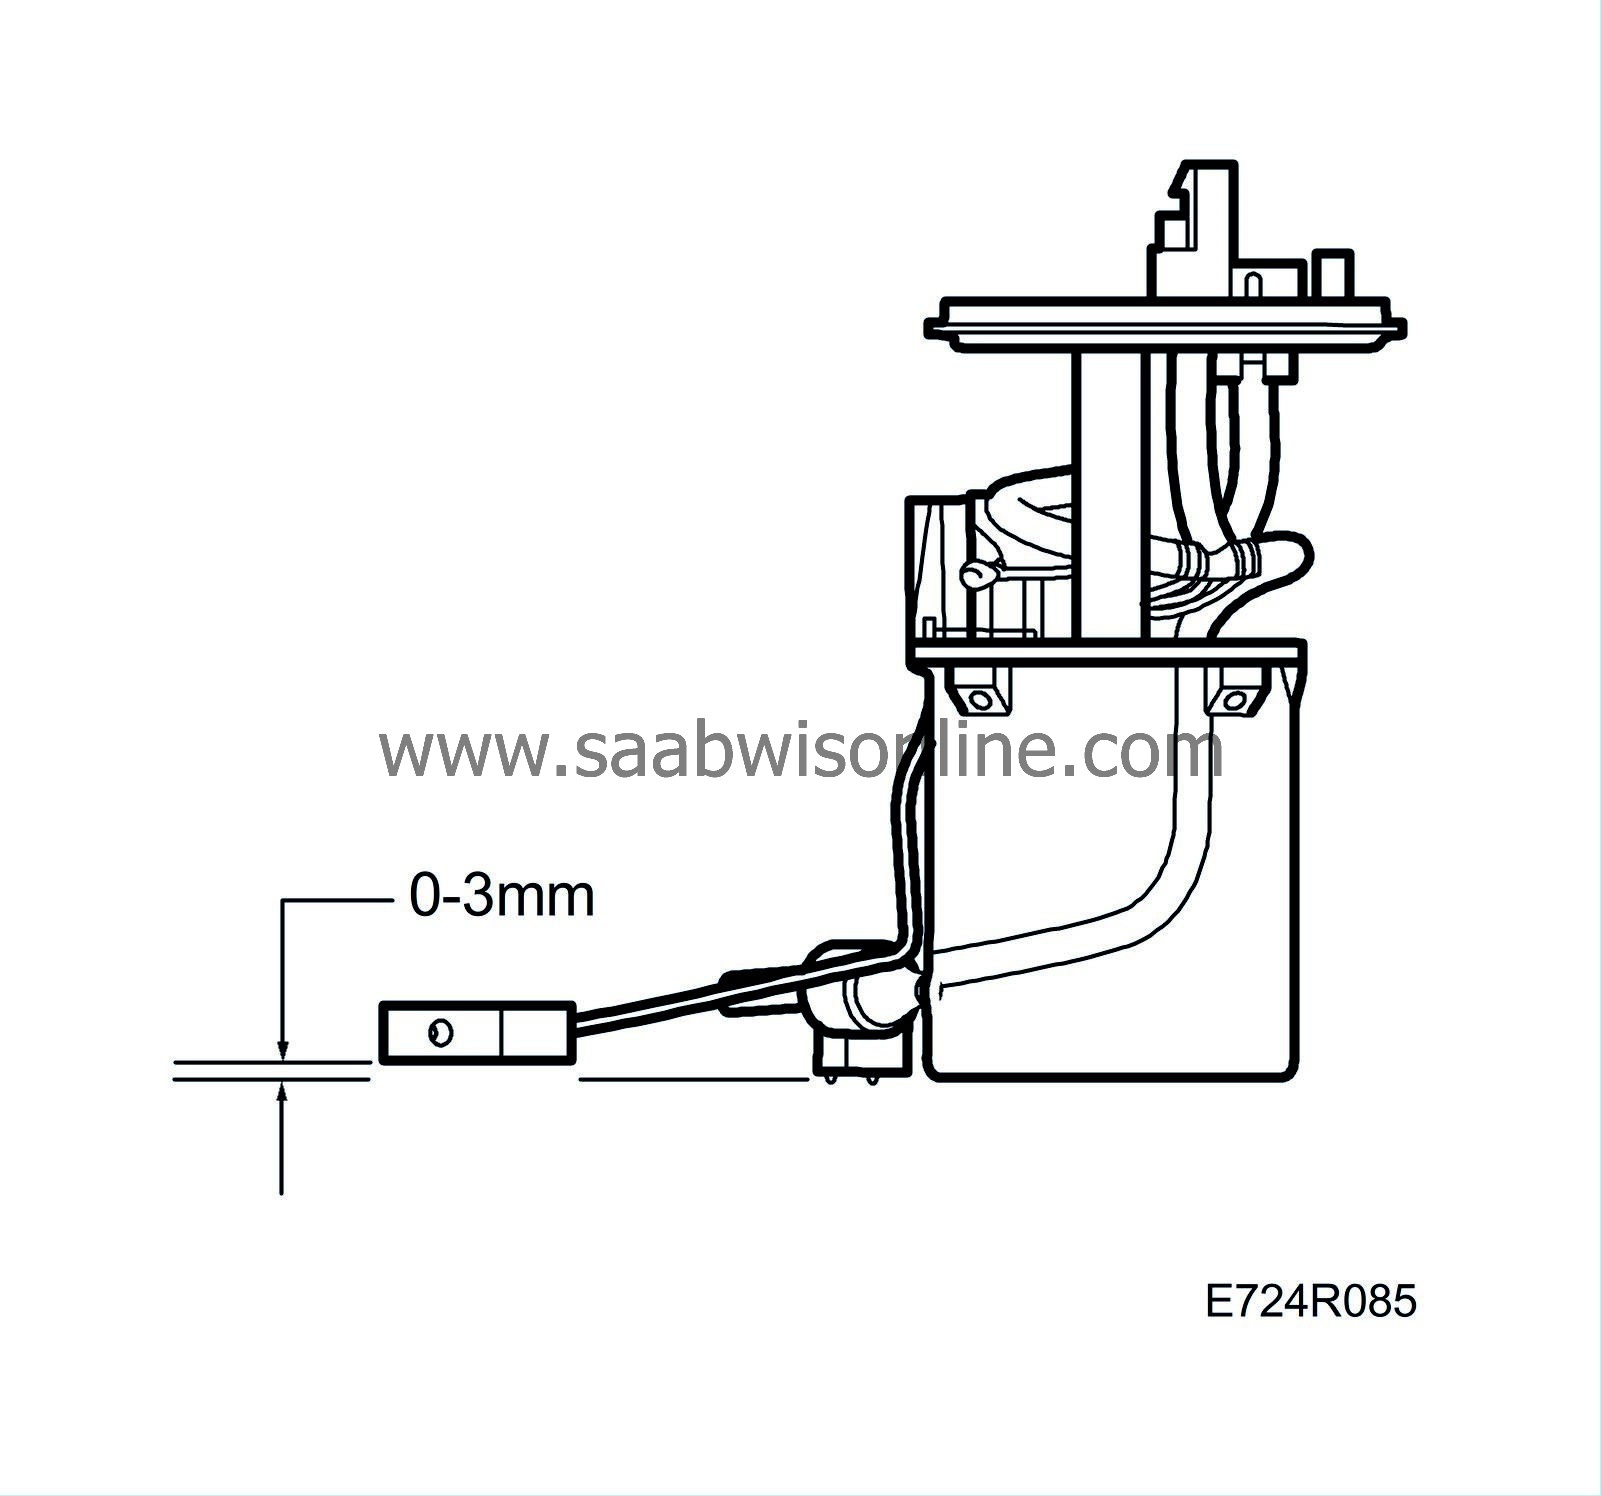
With the pump placed on a level surface, the distance between the surface and the bottom of the float should be 0-3 mm.
The sensor resistance should be:
| • |
Empty tank, float in bottom position: 50±1.5 ohms.
|
|
| • |
Full tank, float in top position: 425±6.5 ohms.
|
|

 Warning
