(367-2248) Disturbances due to wiring harness provisions for CD changer
Symptom: Disturbances to bus communication.
|
MODIFICATION INSTRUCTION
|
|
Bulletin Nbr:
|
367-2248
|
|
Date:
...........
|
Juni 2000
|
|
Market:
|
Ej US, CA, JP
|
|
|
Disturbances due to wiring harness provisions for CD changer
|
Cars in stock must be remedied before delivery.
Cars already delivered must be rectified in connection with a scheduled visit to the garage for service or repairs.
Saab 9-5 M98-M00 within VIN interval W3050001-Y3046149 and which have no CD changer
Certain cars have a wiring harness for a CD changer. The 12-pin connector of this wiring harness may be located where it is subjected to moisture. This in turn can affect bus communication.
Symptom description
Disturbances to bus communication.
79 71 864 Cable tie
16 - 30 04 520 Anti-corrosion protection (Kontakt 61) (sufficient for several cars)
Check box C1 of the modification identity plate before preceding. Continue as follows if the box has not been marked.
|
1.
|
Open the bootlid and lift up the floor panel in the luggage compartment.
|
|
2.
|
Undo the scuff plate (secured with clips) by carefully prising it up using a screwdriver.
|
|
3.
|
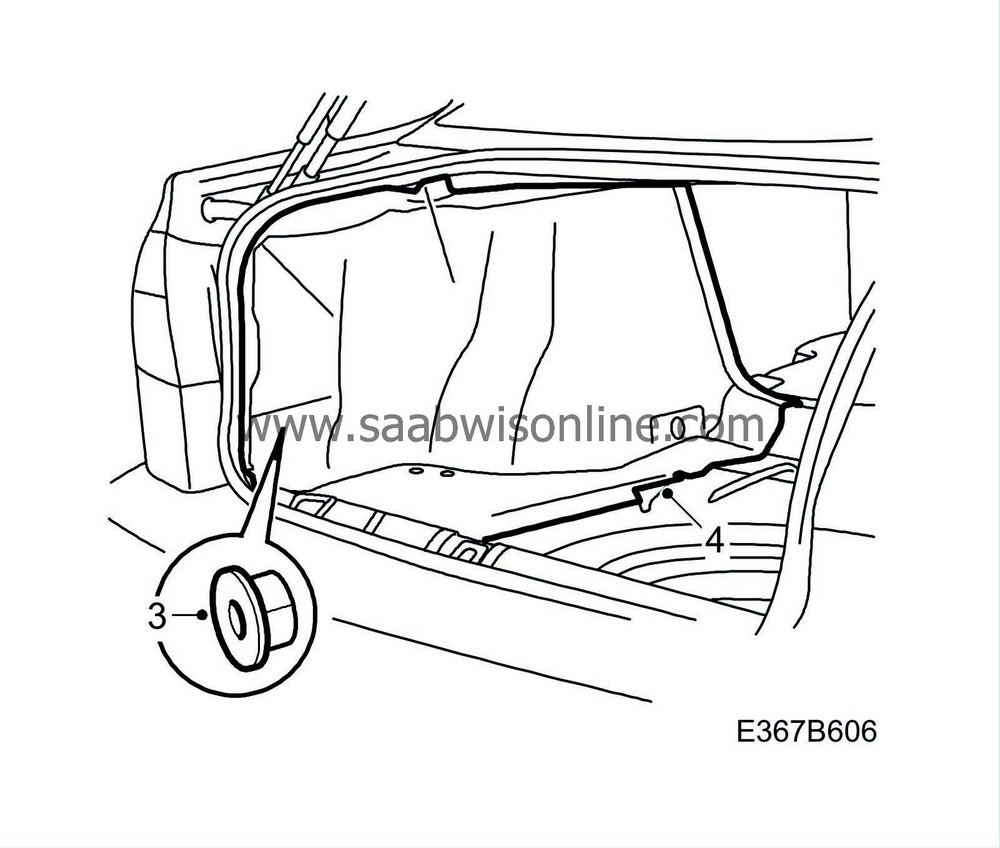
Remove the 3 plastic nuts securing the side trim.
|
|
4.
|
Carefully bend aside the side trim.
|
|
5.
|
Cut the cable tie closest to the connector.
|
|
6.
|
Check the connector for the CD changer and apply anti-corrosion protection (Kontakt 61). If the sleeves are green and oxidized, proceed as follows:
|
|
|
6.a.
|
Check that the radio code is available (applies only to cars not fitted with a Saab audio system).
|
|
|
6.b.
|
Remove the negative battery cable.
|
|
|
6.c.
|
Unplug the connector and press out the sleeves.
|
|
|
6.d.
|
Wipe out the connector and apply anti-corrosion protection (Kontakt 61).
|
|
|
6.e.
|
Press in the sleeves as illustrated and plug the connector together.

|
|
7.
|
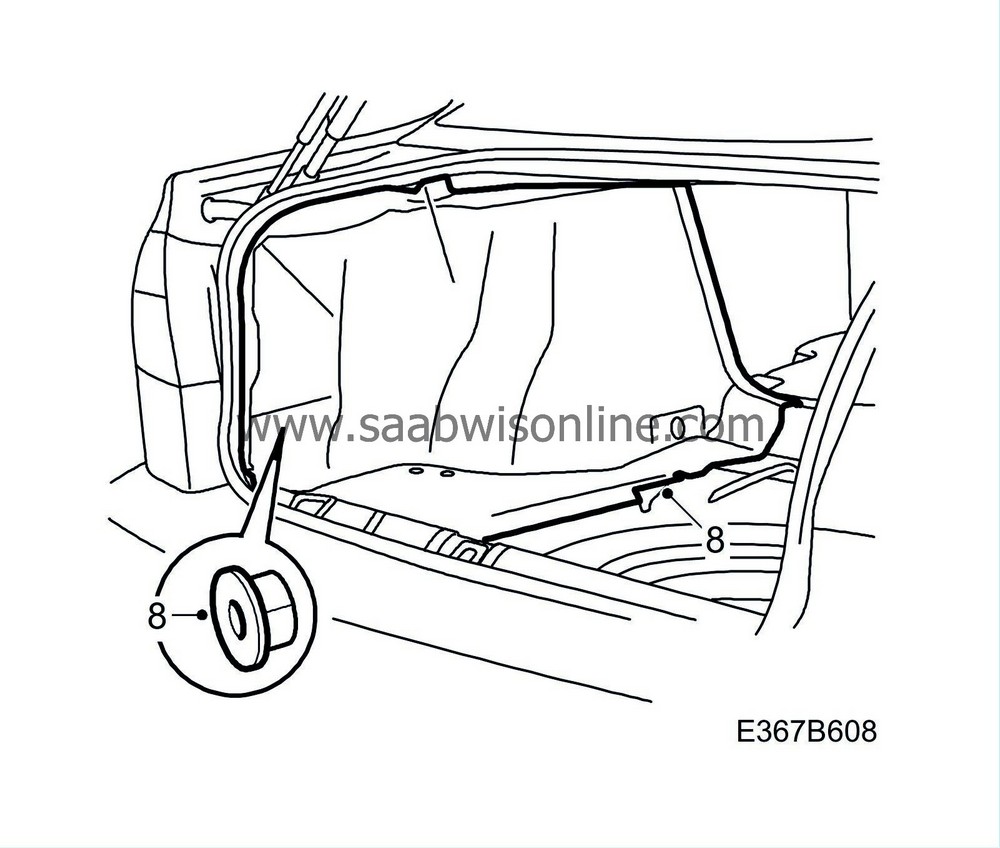
Bend the connector upwards as high as possible against the side panel of the wheel housing, and secure it to the regular wiring harness with a cable tie.
|
|
8.
|
Fit the side trim with the 3 plastic nuts.
|
|
9.
|
Fit the scuff plate (secured with clips) and lower the floor panel. Close the bootlid.
|
|
10.
|
If the battery has been disconnected: Connect the negative battery cable, adjust the time and date on the SID and enter the radio code (if applicable).
|
Check box C1 of the modification identity plate before preceding. Continue as follows if the box has not been marked.
|
1.
|
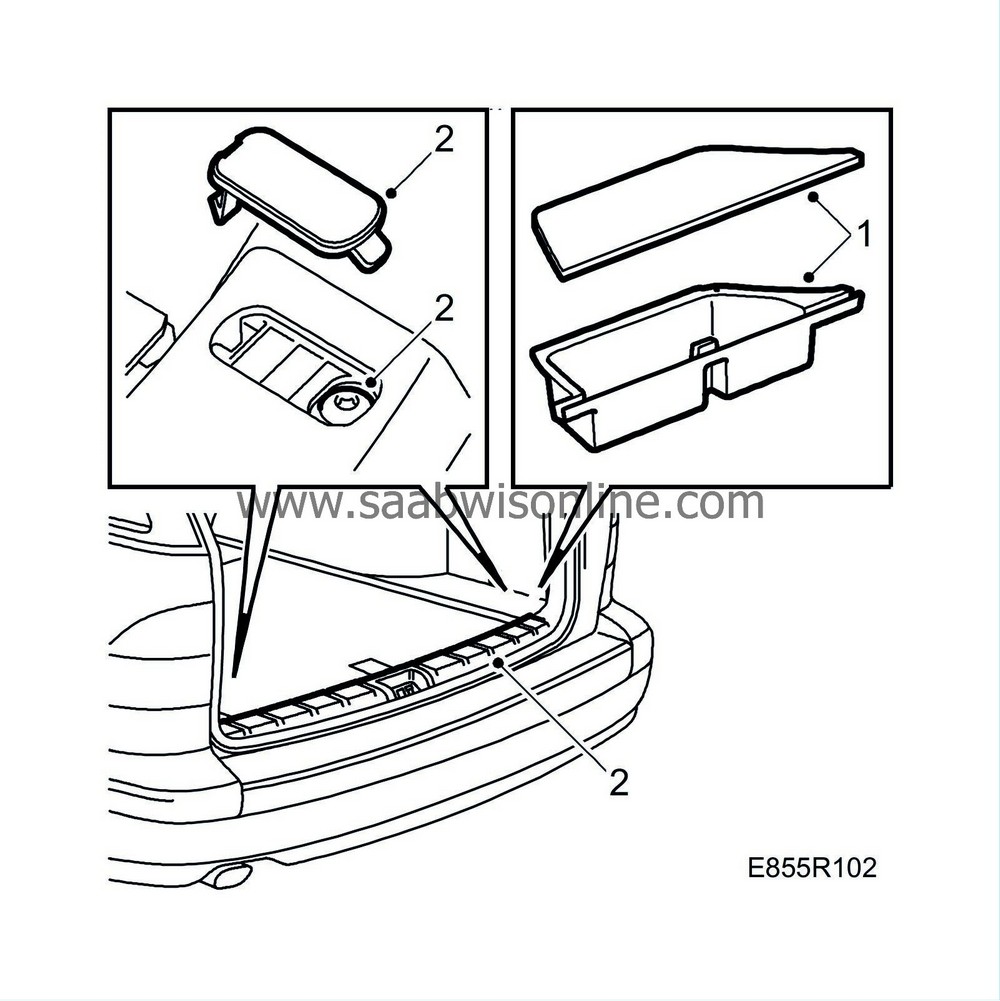
Open the tailgate, remove the cover from the storage compartment and remove the storage box.
|
|
2.
|
Remove the scuff plate (2 covers, screws and clips).
|
|
3.
|
Detach the rear roof moulding at the edges so that clearance for the D-pillar trim is obtained.

|
|
4.
|
Remove the D-pillar trim (secured with clips).
|
|
5.
|
Remove the parcel shelf support (1 cover and 3 screws).
|
|
6.
|
Remove the side bolster by pulling the upper edge of the bolster to release the lug. Then unhook the lower edge.

|
|
7.
|
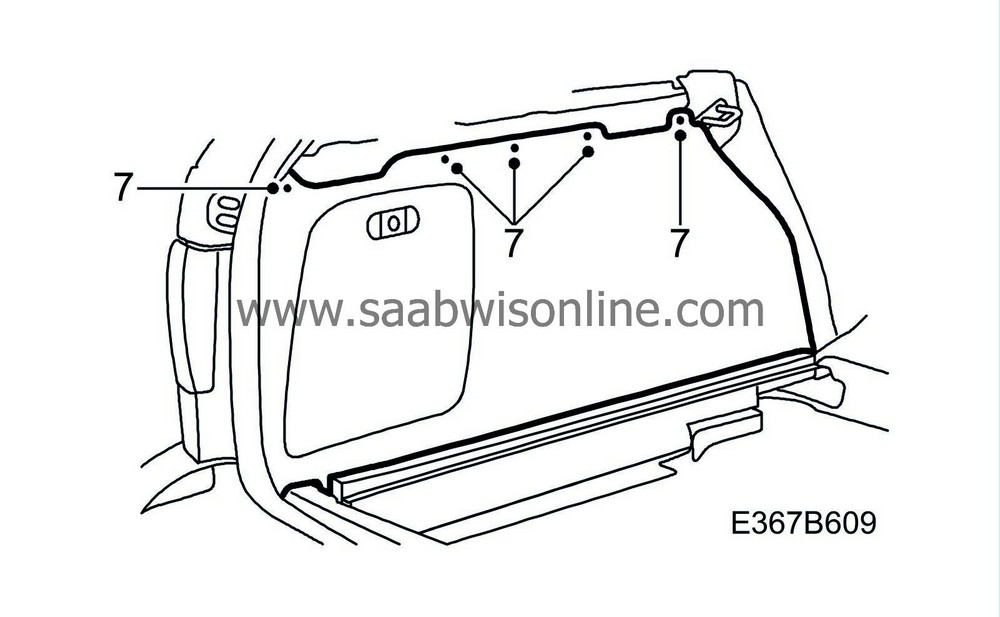
Remove the 5 screws securing the top edge of the side trim.
|
|
8.
|
Lift out the side trim.
|
|
9.
|
Cut the cable tie closest to the connector.
|
|
10.
|
Check the connector for the CD changer and apply anti-corrosion protection (Kontakt 61). If the sleeves are green and oxidized, proceed as follows:
|
|
|
10.a.
|
Check that the radio code is available (applies only to cars not fitted with a Saab audio system).
|
|
|
10.b.
|
Remove the negative battery cable.
|
|
|
10.c.
|
Unplug the connector and press out the sleeves.
|
|
|
10.d.
|
Wipe out the connector and apply anti-corrosion protection (Kontakt 61).
|
|
|
10.e.
|
Press in the sleeves as illustrated and plug the connector together.

|
|
11.
|
Bend the connector upwards as high as possible against the side panel of the wheel housing, and secure it to the regular wiring harness with a cable tie.
|
|
12.
|
Lift in the side trim.
|
|
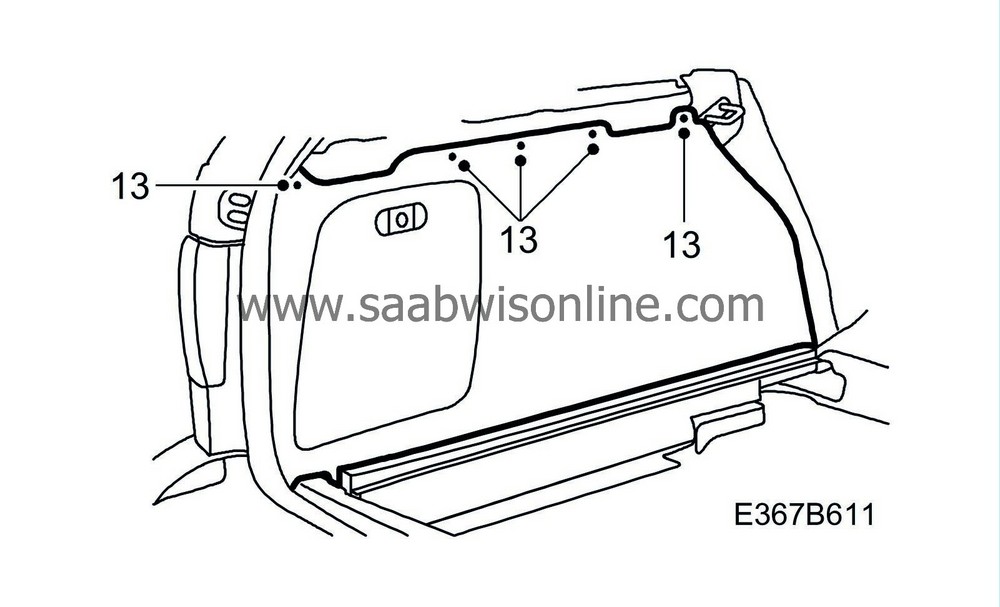
13.
|
Fit the screws securing the top edge of the side trim. Start with the rearmost screw so that the trim is properly aligned.
|
|
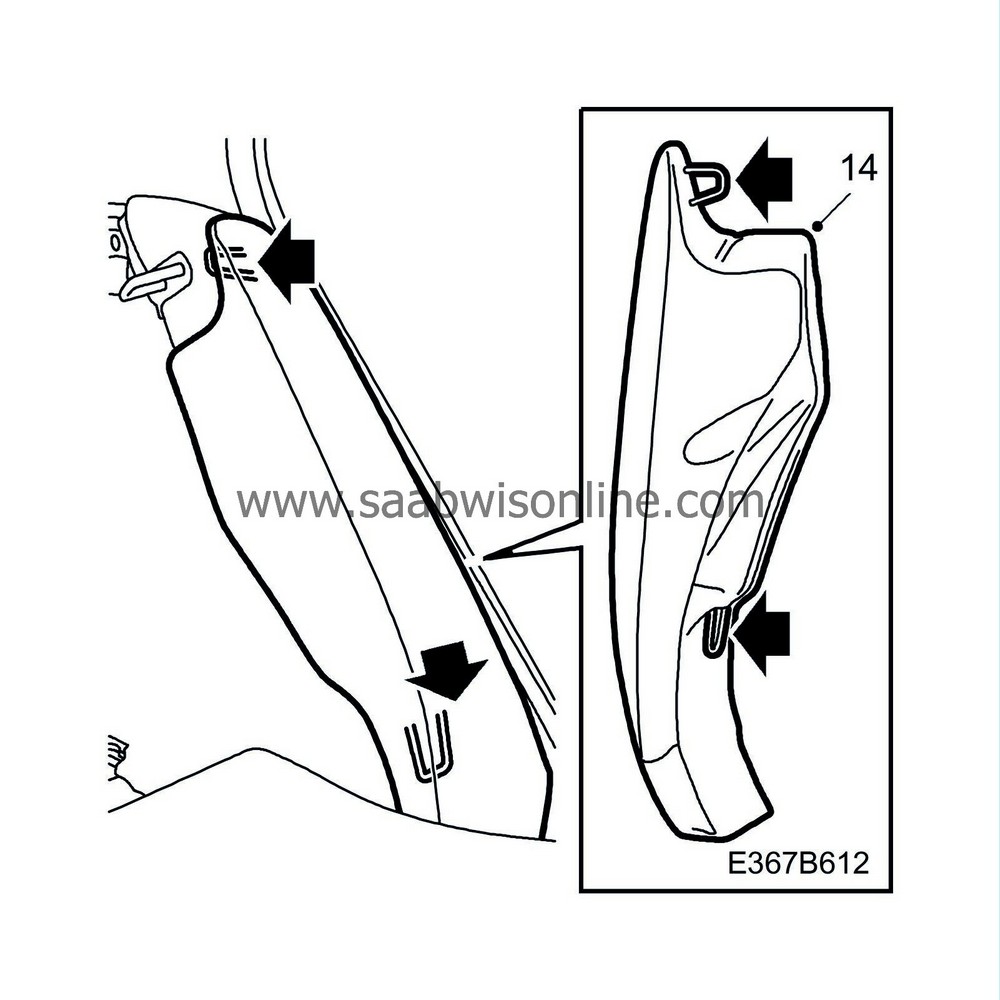
14.
|
Fit the side bolster by first hooking in the lower edge and then securing the lug.
|
|
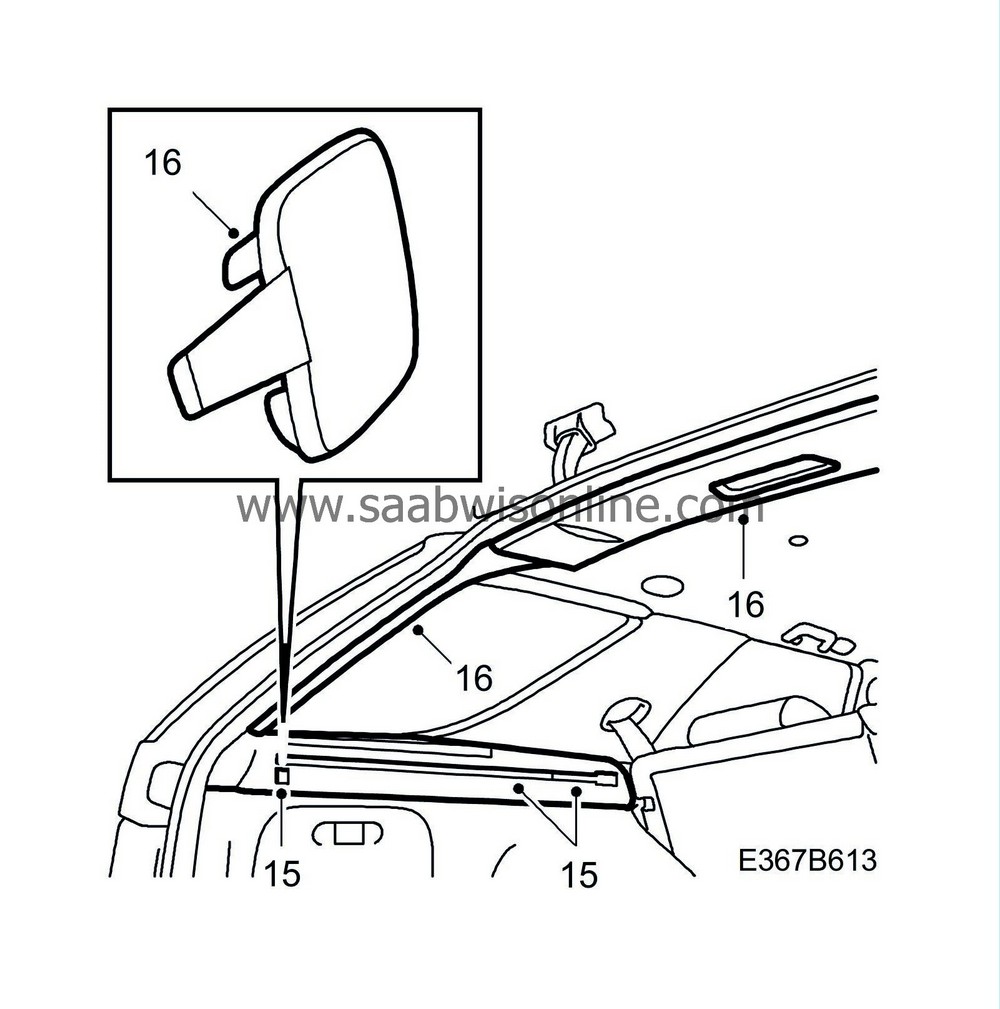
15.
|
Fit the parcel shelf support (3 screws and 1 cover).
|
|
16.
|
Fit the D-pillar trim, secured with clips. Press the rear roof moulding into place.
Adjust the seal above the D-pillar trim and edges of the roof moulding.
|
|
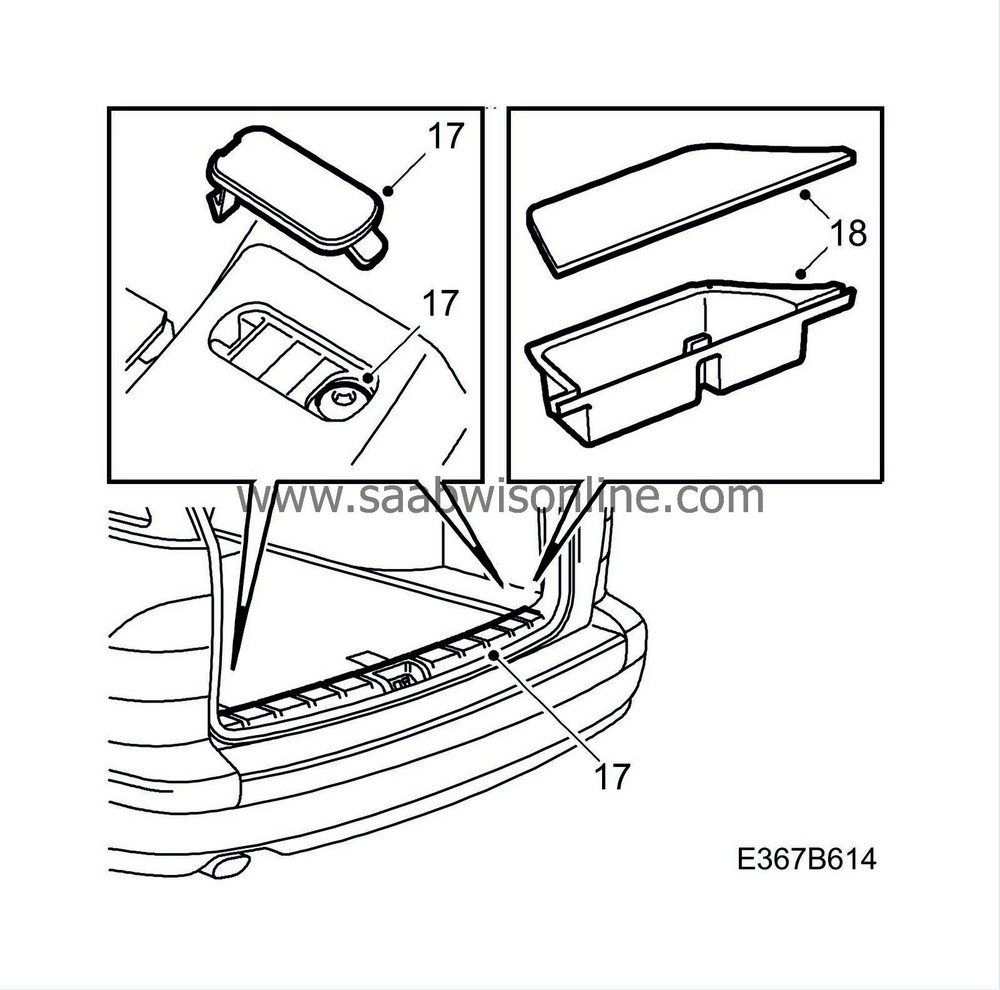
17.
|
Fit the scuff plate (clips, 2 covers and screws). Adjust the position of the seal over the scuff plate.
|
|
18.
|
Put back the storage box and fit the cover. Close the tailgate.
|
|
19.
|
If the battery has been disconnected: Connect the negative battery cable, adjust the time and date on the SID and enter the radio code (if applicable).
|
|
Marking the modification identity plate
|
On completion of the necessary measures, box C1 on the modification identity plate must be marked. If the work was carried out by the importer, mark the box with a "7". If done by a dealer, mark it with an "8".
|
Warranty/Time Information
|
See separate information.


