Front wheel housing and complete front frame member
|
|
Front wheel housing and complete front frame member
|
|
1.
|
Position the car in an aligning bench.
|
|
2.
|
Remove the front wing.
|
|
3.
|
Remove the bumper member.
|
|
4.
|
Remove the radiator crossmember.
|
|
5.
|
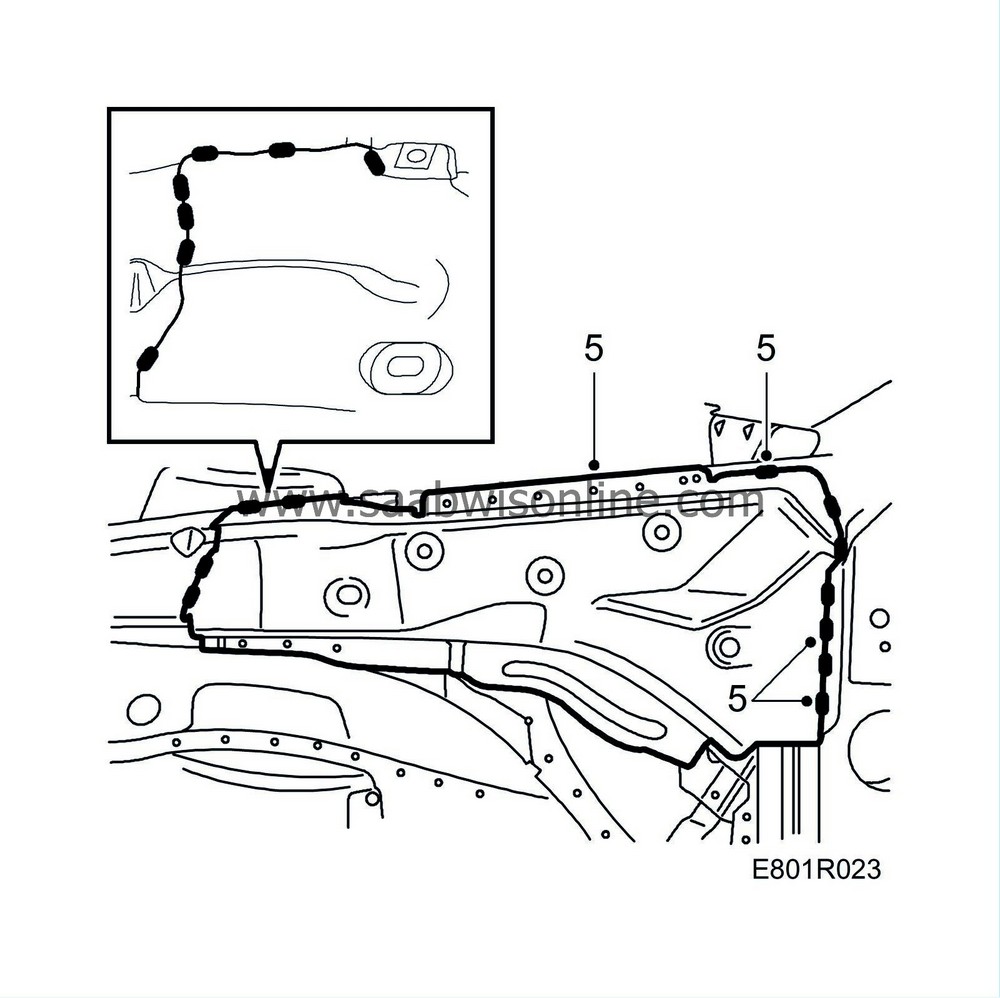
Grind away the welds and drill out the spot-welds. Remove the reinforcing plate on the outside of the wheel housing.
|
|
6.
|
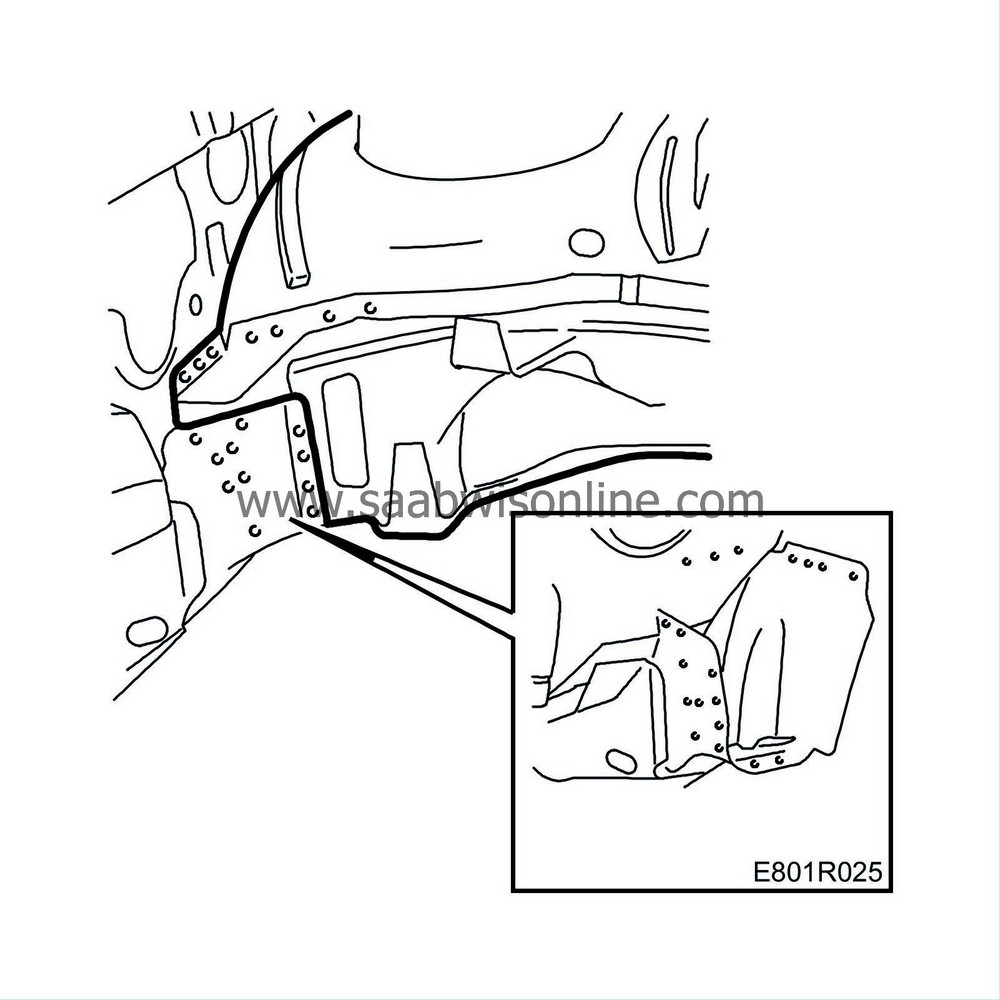
Drill out the spot-welds securing the wheel housing and frame member to the bulkhead as illustrated.

|
|
7.
|
Drill out the rest of the spot-welds and tap loose the wheel housing and frame member.

|
|
8.
|
Accurately align and grind down all surfaces that have been spot welded.
|
|
9.
|
Grind away the primer from the surfaces on the spare parts that are to be welded.
|
|
10.
|
Apply welding primer to the spare parts and the body.
|

|
1.
|
Fix the frame member in place by means of a few welding tongs. Position the frame member precisely using the aligning bench measuring system
|
|
2.
|
Weld the rear edge of the frame member.
|
|
3.
|
Put the wheel housing in position and fix it with a few welding clamps. Adjust its position exactly with the alignment bench measuring system.
|
|
4.
|
Drill holes for plug-welding the wheel housing.
|
|
5.
|
Apply welding primer to the surfaces that are to be spot-welded and plug-welded.
|
|
6.
|
Weld on the wheel housing.

|
|
7.
|
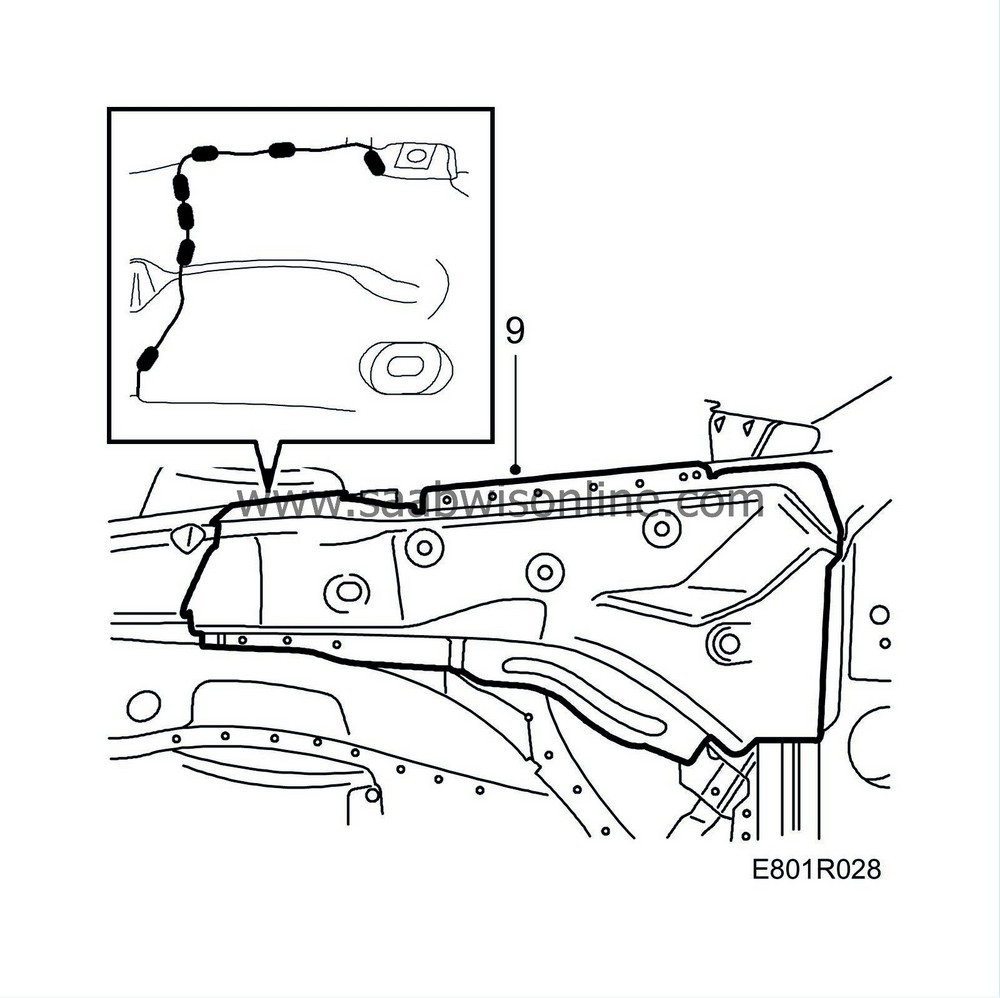
Position the outer reinforcing member.
|
|
8.
|
Weld on the outer reinforcing member.
|
|
9.
|
Weld on the reinforcing plate to the outside of the wheel housing.

|
|
10.
|
Fit the bumper member.
|
|
11.
|
Fit the radiator crossmember.
|
|
13.
|
Remove any remaining welding primer. Welding primer reduces adhesion of paint, filler and sealant.
|
|
14.
|
Apply primer to all bare metal surfaces.
|
|
15.
|
Seal joints and seams with sealant.
|
|
16.
|
Apply underseal to the underbody and in the wheel housing after painting. Use Terostat 9320.
|
|
17.
|
Apply anti-corrosion agent to the interior of the frame member after painting. Use Terotex HV 400 or Mercasol 1.
|


