(855-2199) C-pillar trim
| MODIFICATION INSTRUCTION | |
| Bulletin Nbr: | 855-2199 |
| Date: ........... | December 1999 |
| Market: | US |
| C-pillar trim |
| Customer satisfaction campaign 118 27 |
Cars in stock must be rectified before delivery.
A personal communication must be sent to the owners of cars already delivered requesting them to get in touch with the nearest Saab garage as soon as possible to have the fault rectified.
| Cars affected |
Saab 9-5 5D, M1999, VIN up to and including X3090057.
| Background |
A bad choice of material was made for the C-pillar trim. The material is degraded by heat and moisture.
| Parts required |
47 07 196 Pillar trim, left-hand
47 07 204 Pillar trim, right-hand
| Procedure |
To remove

| 1. |
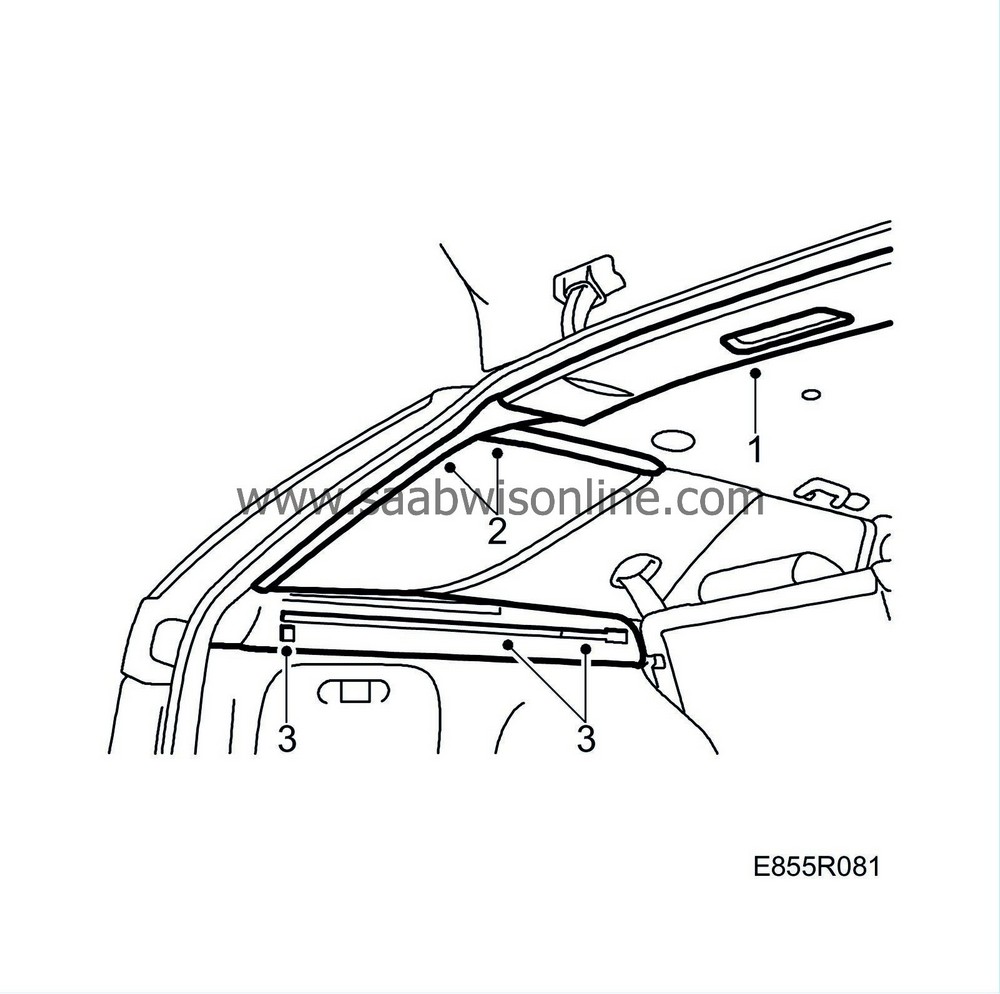
Detach the rear roof covering so that clearance for the D pillar trim is obtained.
|
|
| 2. |
Remove the roof moulding between the C-pillar and D-pillar.
Remove the D-pillar trim by pulling it forwards (towards the front of the car). The trim is secured with clips. |
|
| 3. |
Remove the parcel shelf support, 3 screws, 1 with cover.
|
|
| 4. |
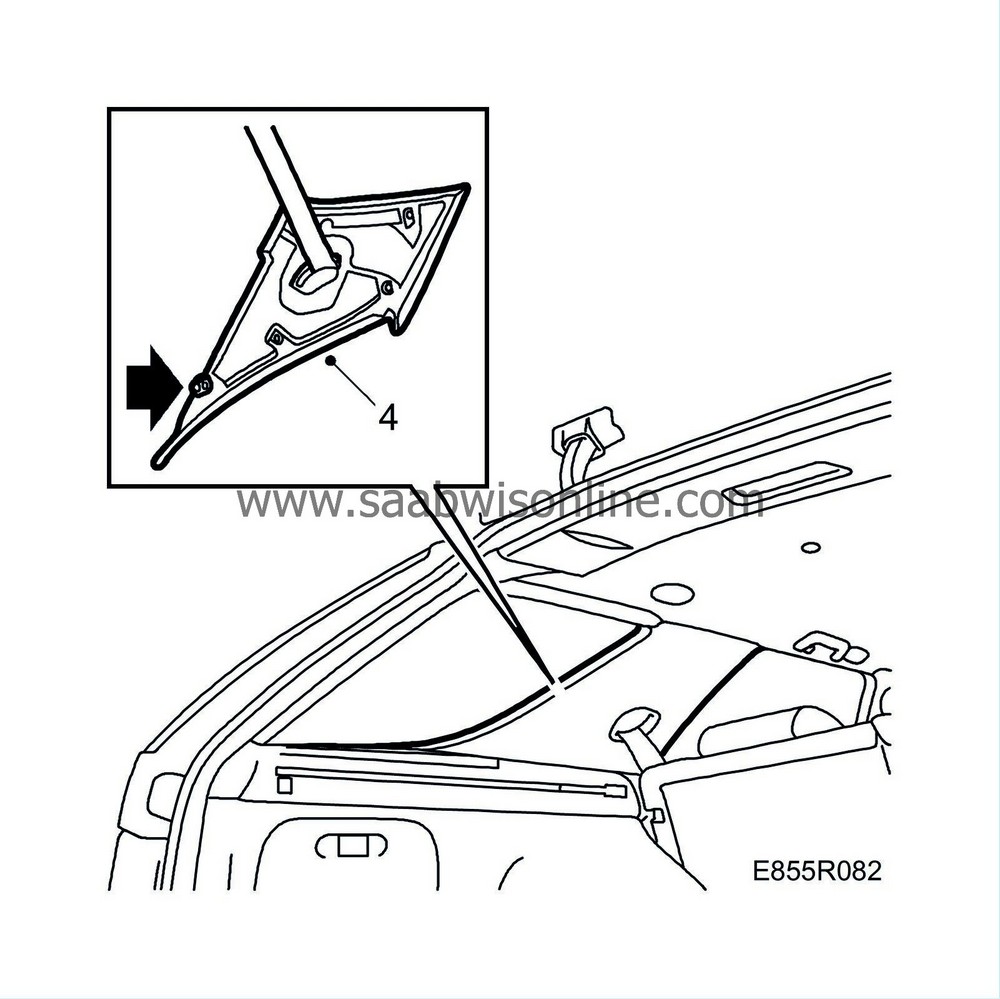
Remove the C-pillar trim starting at the top edge. Lift out the trim guide pin at the lower rear edge.

|
|
| 5. |
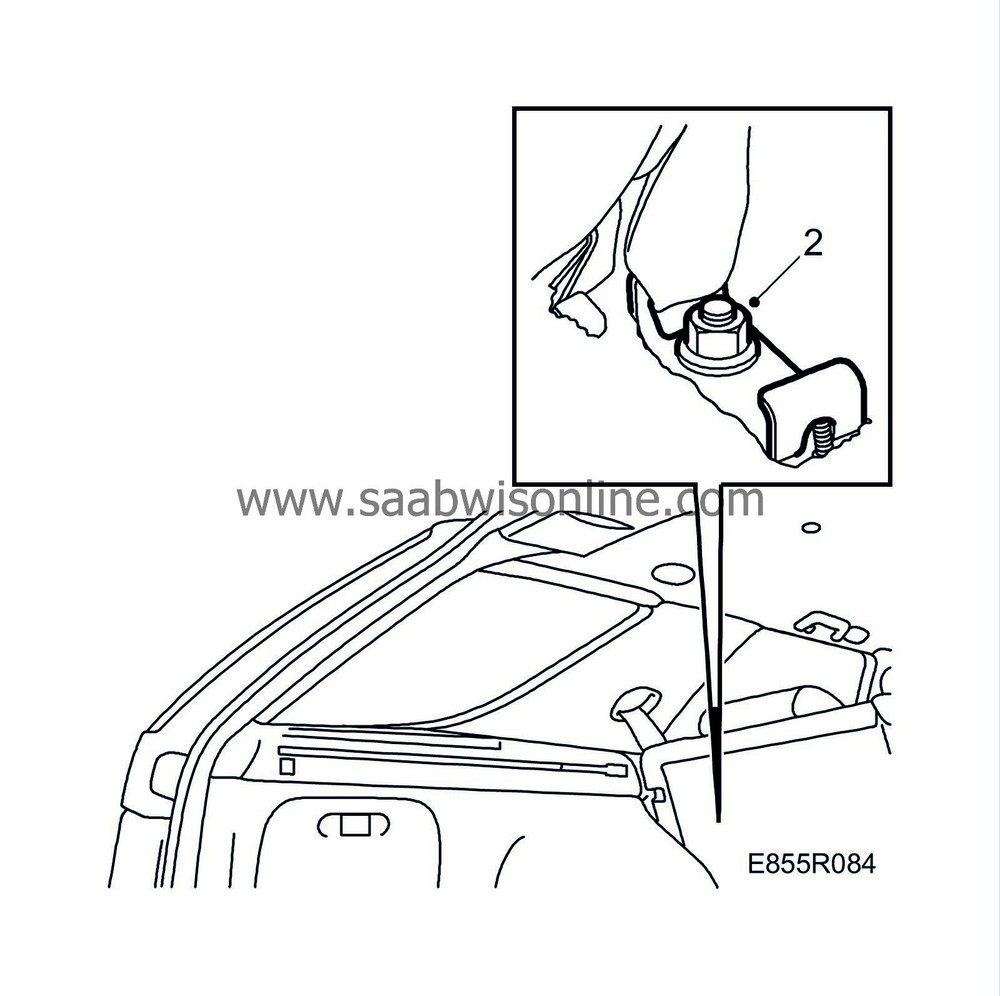
Tip the rear seat cushion forward and unscrew the lower seat-belt anchorage.

|
|
| 6. |
Remove the strap guide from the C pillar trim.
|
|
| 7. |
Pull the belt out through the C-pillar trim.
|
|
To fit

| Note | ||
|
The belt must be fitted so that it will run properly when assembly is completed. |
| 1. |
Feed the seat belt through the C-pillar trim.
|
|
| 2. |
Secure the seat belt to the lower anchor. Make sure that the guide is in the right position, so that the seat cushion hook assumes the correct position.
Tightening torque 45 Nm (33 lbf ft) Press the strap guide into place in the C pillar trim. |
|
| 3. |
Tip the rear seat cushion back.
|
|
| 4. |
Position the C pillar trim by means of the locating pin and press the trim into place.

|
|
| 5. |
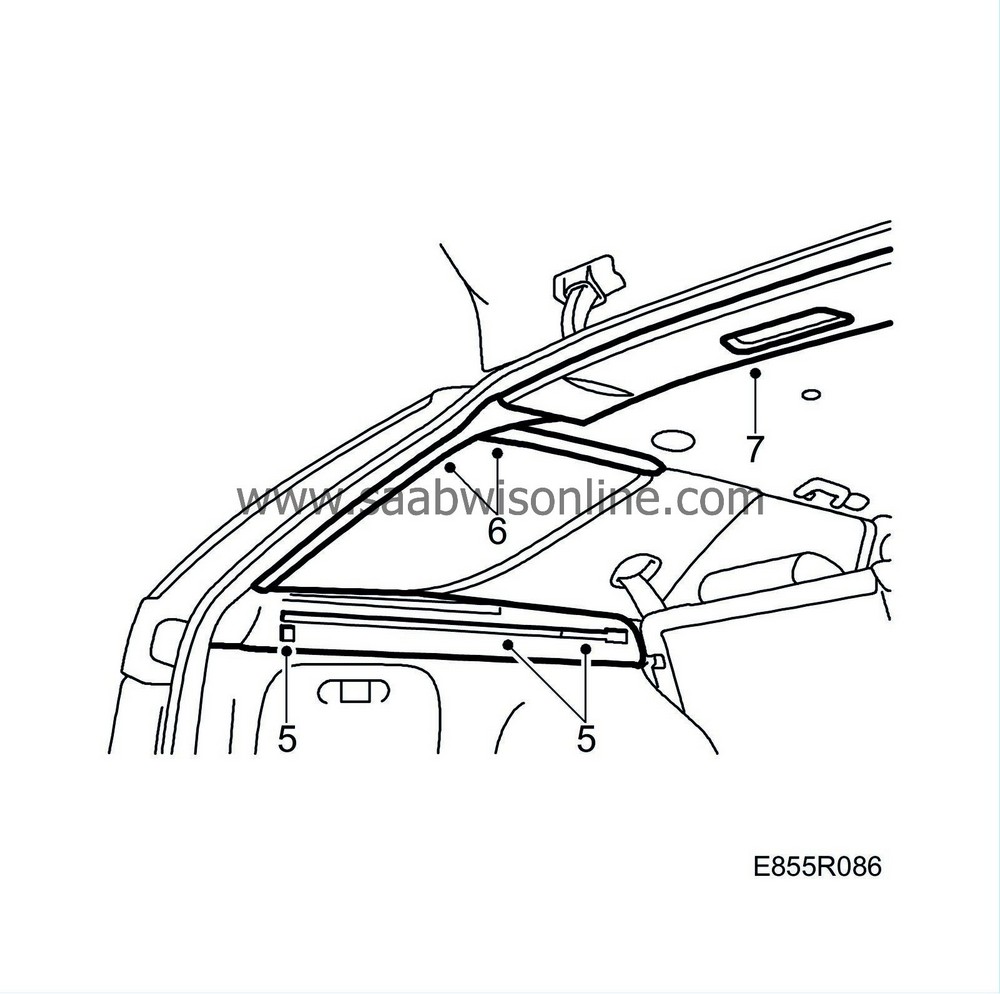
Fit the parcel shelf support, 3 screws, 1 with cover.

|
|
| 6. |
Fit the D pillar trim, secured with clips. Adjust the weatherstrip over the edge of the D pillar trim.
Fit the roof moulding between the C-pillar and D-pillar. |
|
| 7. |
Press the rear roof covering into place.
|
|
| Warranty/Time Information |
See separate information.


